Intermediate 4-6 hours Worsted yarn

Worked on the glider, counted out loud —

Yellow Bear Amigurumi in Soft Plush Velvet Yarn

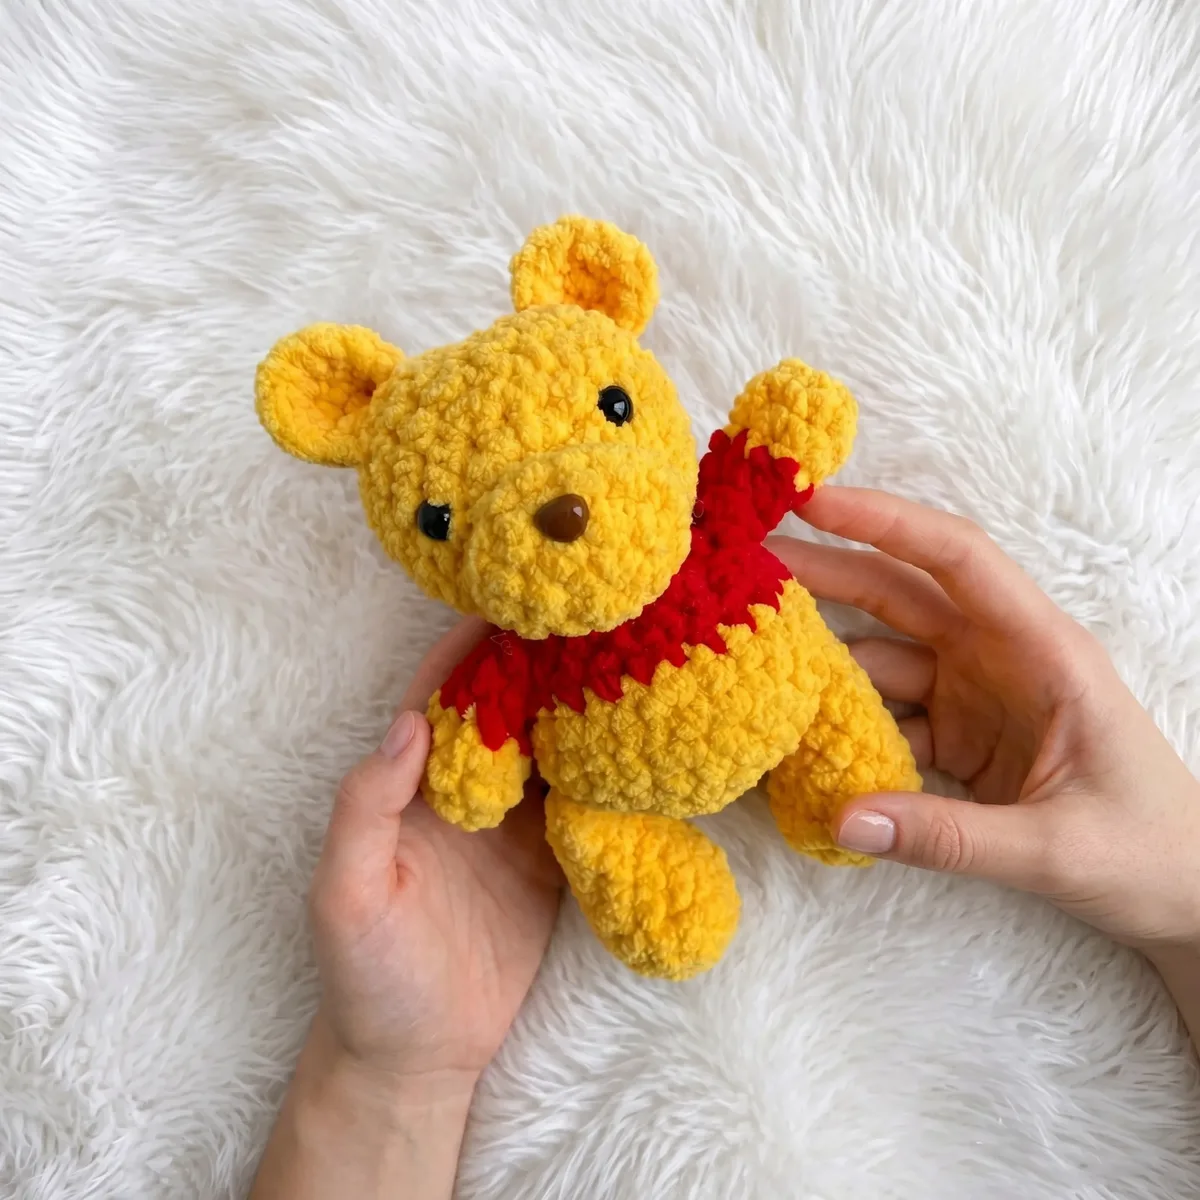
A plush velvet bear amigurumi with a red shirt detail, worked in easy spiral rounds. About 4-6 hours for a confident beginner.

Jump to the rounds

What this one is

This is the kind of project you pull out on a quiet evening when you want something to hold in your lap and watch grow. It suits anyone who loves a soft, huggable finished piece more than a fussy one — a beginner who's ready to move past a basic ball, or an experienced maker who wants an easy, repetitive make between bigger projects. The yellow-and-red color pairing gives it a cheerful, familiar look without asking for anything complicated from your stitch vocabulary.

Your hands mostly do one thing here: single crochet in a continuous spiral, with increases and decreases doing the shaping instead of any special stitches. Between the legs, arms, body, head, ears and muzzle, you're looking at a handful of short sittings rather than one long haul — most people finish the whole bear across a few evenings, working one or two pieces at a time before assembling everything at the end.

Try it another way

Once you've made the bear as written, there's plenty of room to play. Swap the red for a different shirt color — navy, forest green, or a soft gray all sit nicely against the yellow main color, and the color-change technique on the arms works the same way regardless of which shade you pick. If you want a smaller keepsake version, try the same pattern in a lighter-weight yarn with a smaller hook; the stitch counts (6, 12, 18, 24 and so on through the increases) will still shape correctly, just at a smaller scale. Going up to a bulkier plush yarn with a larger hook gives you an oversized cuddle-sized bear instead. You could also rework the shirt idea across the whole body instead of just the arms, carrying the red up through more rounds for a fuller sweater look. For gifting, consider working the ears and muzzle in a third contrast color, or leave off the safety eyes and embroider a softer expression instead if the toy is meant for a very young child. Each of these changes uses the same shaping already in the pattern — you're just choosing where the color, yarn weight, or scale shifts.
The rounds, in full

Written out, round by round

Intermediate4-6 hours5 mmWorsted

Bring to the porch

Everything this one takes, in the order you will reach for it.

Yarn

  • Plush/velvet weight yarn (such as Alize Velluto or equivalent velvet-style yarn) in two colors — yellow (main color) and red (for the shirt detail)

Hook

  • US H-8 / 5 mm

Safety eyes

  • 10 mm, 2 pieces

Stuffing

  • Polyfill / fiberfill
  • Yarn needle / tapestry needle
  • Scissors
  • Stitch marker (recommended for tracking rounds in continuous spiral)

Legs (Make 2)

  1. Round 16 sc in MR. (6)
  2. Round 2inc in each st around. (12)
  3. Round 3-4sc in each st around. (12)
  4. Round 51 sc, dec repeat 4 times. (8)
  5. Round 6-9sc in each st around. (8) (4 rounds total)At the end of Round 9, sl st to close and fasten off. Leave a yarn tail for assembly. Stuff lightly.

Arms (Make 2)

  1. Round 16 sc in MR. (6)
  2. Round 21 sc, inc repeat 3 times. (9)
  3. Round 3-4sc in each st around. (9)Change to red yarn at the start of the next round.
  4. Round 51 sc, dec repeat 3 times. (6)
  5. Round 6-7sc in each st around. (6)At the end of Round 7, sl st to close and fasten off. Leave a yarn tail for assembly. Stuff lightly.

Body

Begin with yellow yarn.

  1. Round 16 sc in MR. (6)
  2. Round 2inc in each st around. (12)
  3. Round 31 sc, inc repeat 6 times. (18)
  4. Round 42 sc, inc repeat 6 times. (24)Round 5 joins the Legs into the Body. Position both Legs ready to work into.
  5. Round 58 sc, work 4 sc together with first Leg (crocheting through both the Body sts and the Leg sts simultaneously), 8 sc, work 4 sc together with second Leg. (24)
  6. Round 63 sc, inc repeat 6 times. (30)
  7. Round 7sc in each st around. (30)Change to red yarn at the start of the next round.
  8. Round 83 sc, dec repeat 6 times. (24)
  9. Round 92 sc, dec repeat 6 times. (18)
  10. Round 10sc in each st around. (18)Round 11 joins the Arms into the Body. Position both Arms ready to work into.
  11. Round 116 sc, work 3 sc together with first Arm, 8 sc, work 3 sc together with second Arm. (18) (stitch count remains 18 as arm sts replace body sts)
  12. Round 121 sc, dec repeat 6 times. (18)Stuff the Body firmly before closing. Sl st to close and fasten off.

Head

Begin with yellow yarn.

  1. Round 16 sc in MR. (6)
  2. Round 2inc in each st around. (12)
  3. Round 31 sc, inc repeat 6 times. (18)
  4. Round 42 sc, inc repeat 6 times. (24)Attach safety eyes between Rounds 2 and 3, spaced evenly apart, before continuing.
  5. Round 53 sc, inc repeat 6 times. (30)
  6. Round 6-8sc in each st around. (30)
  7. Round 93 sc, dec repeat 6 times. (24)
  8. Round 102 sc, dec repeat 6 times. (18)
  9. Round 111 sc, dec repeat 6 times. (12)
  10. Round 12dec 6 times. (6)Stuff the Head firmly. Pull yarn tail through remaining stitches and pull tight to close. Weave in end.

Ears (Make 2)

  1. Round 16 sc in MR. (6)
  2. Round 2inc in each st around. (12)Fasten off and leave a yarn tail for sewing. Do not stuff. Sew onto the Head between Rounds 5 and 6.

Muzzle

  1. Round 16 sc in MR. (6)
  2. Round 22 sc, inc repeat 2 times. (8)Fasten off and leave a yarn tail for sewing. Do not stuff. Sew onto the center front of the Head.

Putting it together

Step 1

Attach the Head to the Body: With the opening of the Body facing up, position the Head on top and sew it in place using the yarn tail and a whipstitch around the full opening. Make sure it sits centered and upright.

Step 2

Attach the Ears: Flatten each Ear slightly and sew onto the Head between Rounds 5 and 6, one on each side. Use the yarn tail and whipstitch through the base of the Ear and into the Head stitches.

Step 3

Attach the Muzzle: Center the Muzzle on the front of the Head, below the safety eyes. Sew it on with the yarn tail, stitching around the entire perimeter so it sits flat and secure.

Step 4

Embroider the nose and mouth (optional) using a small amount of dark yarn — a simple satin stitch nose and a curved smile line complete the face beautifully.

Step 5

Weave in all remaining yarn tails securely. Trim any excess.

Marlene's notes

Note 01

Gauge is not critical for this project, but your fabric should be tight enough that stuffing does not show through. Stick with the US H-8 / 5mm hook and go down half a size if your plush yarn feels loose.

Note 02

This pattern is worked entirely in continuous spiral rounds — do not join at the end of each round unless specifically instructed. Keep your stitch marker moving with you every round rather than relying on counting stitches from memory.

Note 03

When you change to red for the shirt detail on the arms, carry or cut the yellow depending on your preference, and give the new color a gentle tug on the first stitch so the join round doesn't show a gap.

Note 04

Plush yarn can make it harder to see individual stitches. Work slowly and use your fingertip to feel each stitch before inserting the hook.

Before you sit down

  • Check you have enough yarn in both colors — plush and velvet-style yarns are usually sold in smaller skeins than standard worsted, so it's worth confirming yardage against the full piece list before you start the legs.
  • Have your stitch marker ready and decide now how you'll track the start of each round — in a continuous spiral it's easy to lose your place, especially on the twelve-round body.
  • Work a small test swatch with your yarn and the US H-8 / 5mm hook first, since plush yarns vary in thickness between brands and you want a fabric tight enough that stuffing won't peek through.
  • Read through Round 1 of the Legs and Arms before casting on — both start with 6 sc in a magic ring, and since you're making two of each, it helps to know the shape you're aiming for before you commit yarn to hook.

How the hours go

Legs and Arms (2 each, 5 rounds per piece)
about 1-1.5 hours total, because there are four small pieces to work even though each one is short
Body (12 rounds)
about 1-1.5 hours, because it's the longest single piece and the shaping rounds need close counting
Head, Ears, Muzzle and assembly
about 1.5-2 hours, because the smaller pieces are fiddly to whipstitch on evenly and you're placing the ears precisely between Rounds 5 and 6

Looking after it

  • Hand wash the finished bear in cool water with a gentle detergent, since plush and velvet-style yarns can mat or lose their nap in a machine wash, then press out excess water in a towel rather than wringing it.
  • Lay it flat to dry away from direct heat, reshaping the ears and limbs gently with your fingers while damp, and store the finished piece somewhere dry and out of direct sunlight to keep the color from fading.
FAQs

Asked on the glider

the ones that come up on the glider

Can I use regular worsted weight yarn instead of plush yarn?

Yes, you can substitute a standard worsted weight yarn using a US G-6 or H-8 hook. Keep in mind the finished bear will look different — the velvety texture that gives this bear its soft, plush appearance is specific to velvet-style yarn. With regular yarn, stitches will be more visible and the surface will have a traditional amigurumi look rather than a plush toy feel.

When exactly should I insert the safety eyes?

Insert the safety eyes after completing Round 4 of the Head, positioning them between Rounds 2 and 3. Do this before continuing to Round 5, because once the Head is further along and stuffed, you cannot push the safety eye posts through the fabric cleanly. Getting them in early also lets you adjust the spacing while the opening is still wide enough to see inside.

How do I crochet the legs and arms into the body?

the designated rounds, hold the finished Leg or Arm against the Body opening with the stitches aligned. Insert your hook through the next Body stitch and the corresponding stitch on the Leg or Arm at the same time, then work a single crochet through both layers. This joins the limb directly into the Body as you go, creating a secure, built-in attachment without any sewing required for those pieces.

How big does the finished bear turn out?

Alize Velluto or a comparable plush yarn on a US H-8 / 5 mm hook, the finished bear measures approximately 15–18 cm (6–7 inches) tall. Plush yarns tend to work up slightly larger than their weight suggests because of the pile. If your tension is tighter than average, your bear may be slightly smaller — and that's perfectly fine.