Confident Beginner 2-4 hours Worsted yarn

Worked on the glider, counted out loud —

A little crochet potted plant to grow on your shelf

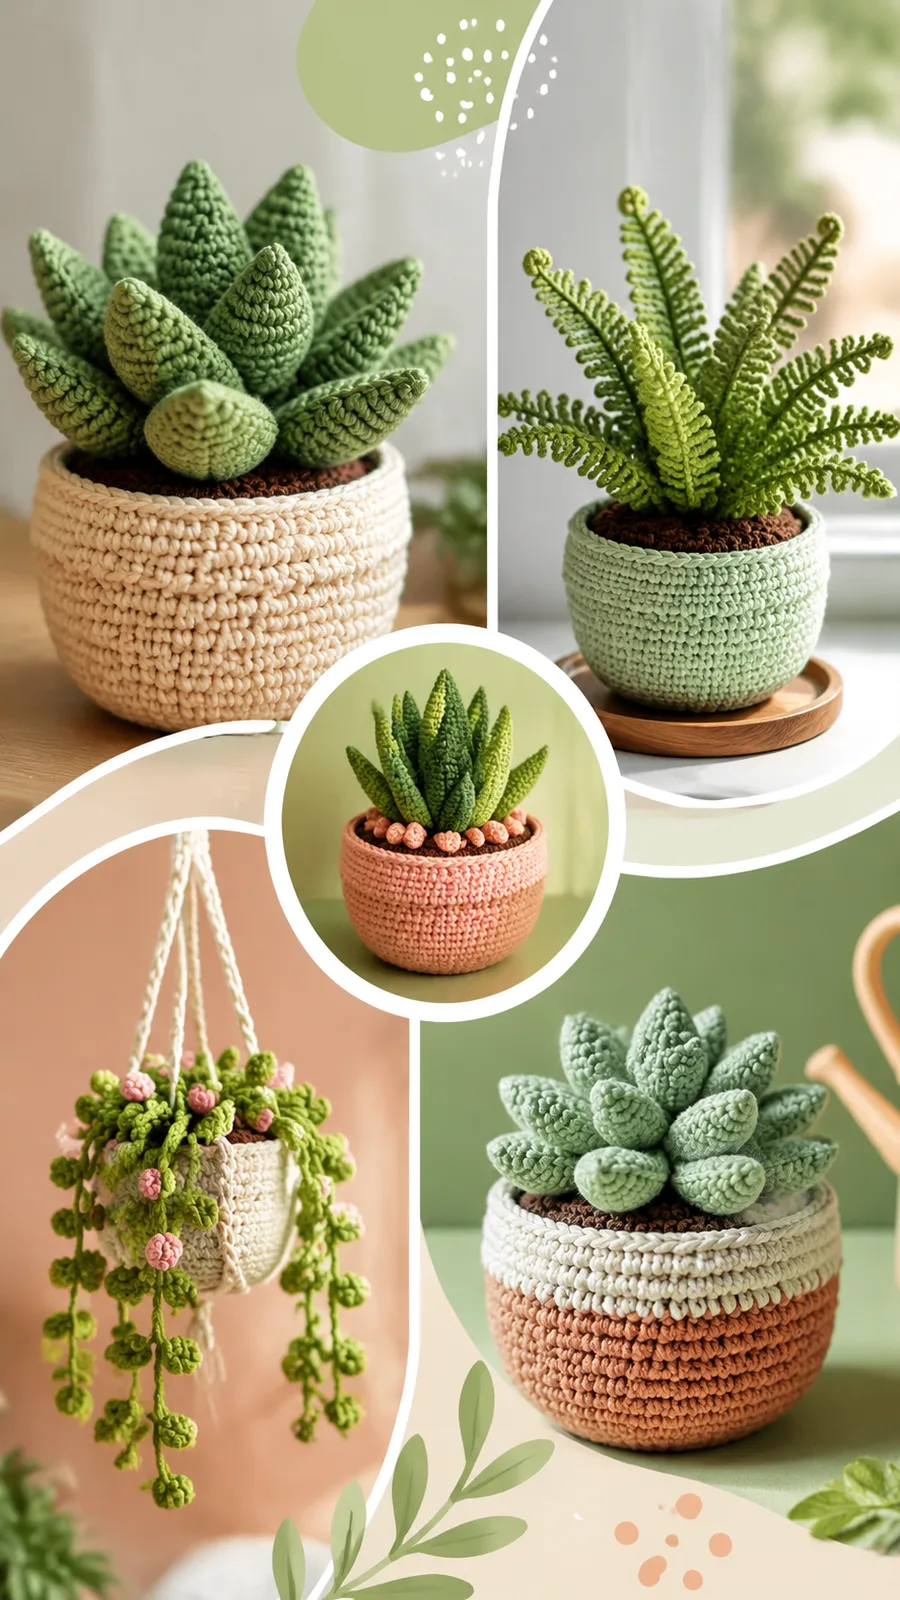
A confident-beginner crochet potted plant with layered leaves and a textured pot, ready in a few hours.

Jump to the rounds

What this one is

This little potted plant is for the evening you want to make something small and finished before bed, the kind of project that fits in your lap without taking over the coffee table. It is for the friend who kills real plants but loves greenery anyway, for the shelf that feels a little bare, and for you if you like amigurumi-style builds that come together in distinct, satisfying pieces rather than one long slog.

Your hands spend most of the time in single crochet, working the brown pot up from a magic ring, then shaping the green main piece into its rounded leaf layers through simple increases and decreases. Expect somewhere around two to four hours total, split naturally across the pot, the base, and the leaves you stitch separately and arrange by feel once everything is ready to assemble.

Try it another way

The easiest change is color: swap the green for a few different shades across your leaves so the plant reads like a mixed arrangement rather than one uniform variety, or work the pot in a soft neutral using the optional cream or beige instead of brown. If you want a fuller plant, make extra Main Pattern pieces beyond what the base calls for and layer them in at different heights once you reach the 6-stitch rounds at the tip, since smaller leaves naturally tuck behind taller ones. You can also stop the pot's shaping early, right around the 12 or 18-stitch rounds, if you want a shallower dish-style container instead of the full 8-round pot, which suits a trailing or low plant look. For gifting, keep the whole piece to embroidered details only and skip any added decorations, since this design is not recommended with small attached parts for young children. And if you are using up scrap cotton, this project is small enough that leftover worsted weight from another make will usually cover both the pot and a full set of leaves.

What makes this one satisfying is how much shape comes from so few techniques. You are working single crochet throughout, which keeps every piece firm enough to hold its form without wires or cardboard, and the increases and decreases do all the real design work, turning a flat magic ring into a rounded pot bottom or a tapering leaf tip. Building the plant base separately from the pot means you get to see each component finished on its own before it becomes part of the whole, which is its own small reward. Because the leaves are individual pieces rather than one fused shape, you get to arrange them like you would arrange real foliage, turning and angling until the plant looks like it grew that way instead of being stitched.
The rounds, in full

Written out, round by round

Confident Beginner2-4 hours3.25 mmWorsted

Bring to the porch

Everything this one takes, in the order you will reach for it.

  • Worsted weight cotton yarn in green, brown, and optional cream or beige
  • Small amount of polyester stuffing

Crochet hook

  • 3.25 mm (US D-3)

Tools

  • Yarn needle for sewing pieces together
  • Stitch marker for continuous rounds
  • Scissors

Crochet Pot

Use brown yarn.

Step by step: Use green yarn.

  1. Round 1Make a magic ring, work 6 sc into ring. (6 sts)
  2. Round 2Inc in each stitch around. (12 sts)
  3. Round 3(Sc in next st, inc) repeat 6 times. (18 sts)Sc in each stitch around. (18 sts) Fasten off, leaving a long yarn tail for sewing. Place the base inside the pot opening and stitch securely.
  4. Round 4(Sc in next 2 sts, inc) repeat 6 times. (24 sts)
  5. Round 5(Sc in next 3 sts, inc) repeat 6 times. (30 sts)
  6. Round 6Work sc in each stitch around through the back loops only. (30 sts)
  7. Rounds 7–12Sc in each stitch around. (30 sts)
  8. Round 13(Sc in next 4 sts, dec) repeat 6 times. (30 sts) Stuff the pot lightly with fiberfill. Keep the base flat and firm.

Main Pattern

  1. Round 1Make a magic ring, work 5 sc into ring. (5 sts)
  2. Round 2Inc in each stitch around. (10 sts)
  3. Round 3Sc around. (10 sts)
  4. Round 4(Sc in next 3 sts, dec) repeat 2 times. (8 sts)
  5. Round 5(Sc in next 2 sts, dec) repeat 2 times. (6 sts)
  6. Round 6Sc around. (6 sts)
  7. Round 7Dec 3 times. (3 sts)
  8. Round 8Sc 3 together. (1 st) Fasten off and leave a sewing tail. Lightly shape each leaf with your fingers before attaching.

Putting it together

Step 1

Because this crochet plant is decorative, gentle care will help maintain its shape. Dust the surface with a soft brush or cloth. If washing becomes necessary, hand wash carefully with mild soap and reshape while damp.

Step 2

Important: Plastic safety eyes, buttons, beads, or small decorative pieces are not recommended for babies or children under three. For child-safe versions, use embroidered details and keep all parts securely attached.

Marlene's notes

Note 01

The 3.25 mm hook paired with worsted cotton is what keeps this fabric tight enough to stay structured once stuffed, so avoid sizing up even if your gauge runs loose.

Note 02

Keep your stitch marker moving up with every round on both the pot and the main pattern pieces, since nothing here is joined and it is easy to lose your place.

Note 03

Stuff the pot lightly and evenly rather than packing it tight, so the rounded shape stays smooth instead of lumpy where the increases happen.

Before you sit down

  • Wind off enough worsted weight cotton in green and brown before you start, plus your optional cream or beige, so you are not interrupting a round to hunt for yarn.
  • Set a stitch marker ready to place in the first stitch of round 1 of the pot, since every round after is worked continuously without joining.
  • Work a quick single crochet swatch with your 3.25 mm hook to check your fabric is firm, not loose, since the pot needs to hold its stuffed shape.
  • Read through all 8 rounds of the Main Pattern before casting on, so the shaping sequence from increases to decreases makes sense as one shape rather than isolated rows.

How the hours go

Crochet Pot
about 30-40 minutes, because its 8 rounds include several increase rounds that need steady counting to stay even
Main Pattern (plant base and leaves)
about 45-60 minutes, because the 8 rounds move through both increases and decreases, and the leaves are worked and finished individually
Assembly and finishing
about 15-20 minutes, because attaching the stuffed base inside the pot and arranging the leaves by hand takes a bit of patience rather than stitch count

Looking after it

  • Since this is worked in worsted weight cotton, dust it regularly with a soft brush or cloth rather than reaching for water as a first option.
  • If it does need a wash, hand wash gently with mild soap, then reshape the pot and leaves while still damp and let everything air dry flat before setting it back on the shelf.
FAQs

Asked on the glider

the ones that come up on the glider

Do I need to join each round of the pot and main pattern?

No, everything here is worked in continuous rounds without joining or turning. Keep a stitch marker in the first stitch of each round and move it up as you go so you always know where a round starts.

What hook and yarn weight does this pattern use?

You'll work with a 3.25 mm (US D-3) hook and worsted weight cotton yarn in green, brown, and an optional cream or beige. The firm cotton combined with this hook size is what keeps the pot structured once it's stuffed.

How much yarn do I actually need?

The pattern calls for small amounts in each color since both the pot and the main pattern are only 8 rounds each. A single skein in each shade is typically more than enough, with leftovers for a second plant.

Can I make the leaves different sizes?

Yes, that's really the point of working them as separate pieces. Stop a leaf at an earlier round if you want it smaller, or work extras so you can layer varying heights for a fuller, more natural-looking plant.

Is this project suitable for a confident beginner?

Yes, it relies entirely on single crochet with straightforward increases and decreases, no complex stitches involved. The main skill to practice is keeping tension even in continuous rounds, which this project is a good size to learn on.

Is this safe to give to a young child?

As written with yarn and stuffing only, it's fine, but skip any plastic safety eyes, buttons, or beads if a child under three might handle it. Use embroidered details instead and make sure every piece is sewn on securely.