Intermediate 4-6 hours Super Bulky yarn

Worked on the glider, counted out loud —

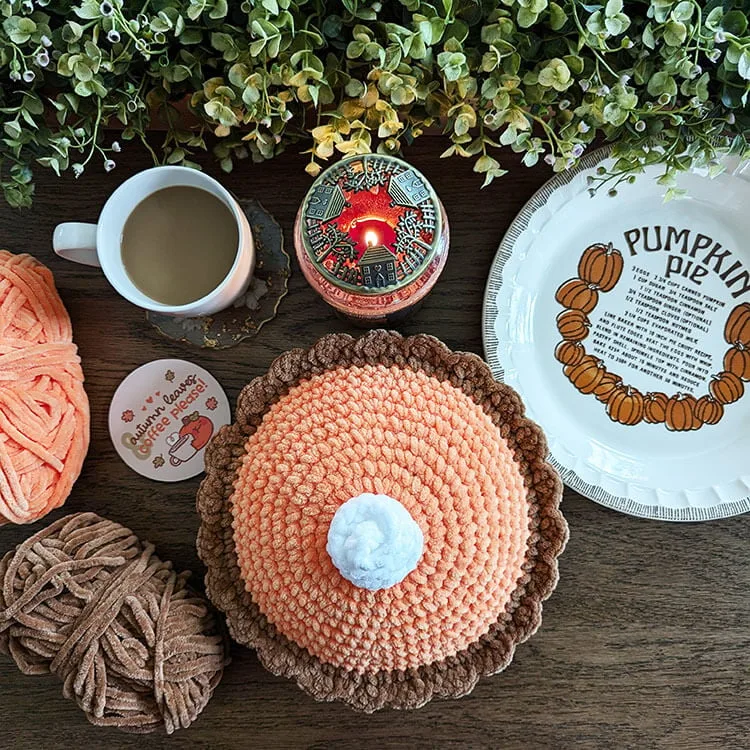
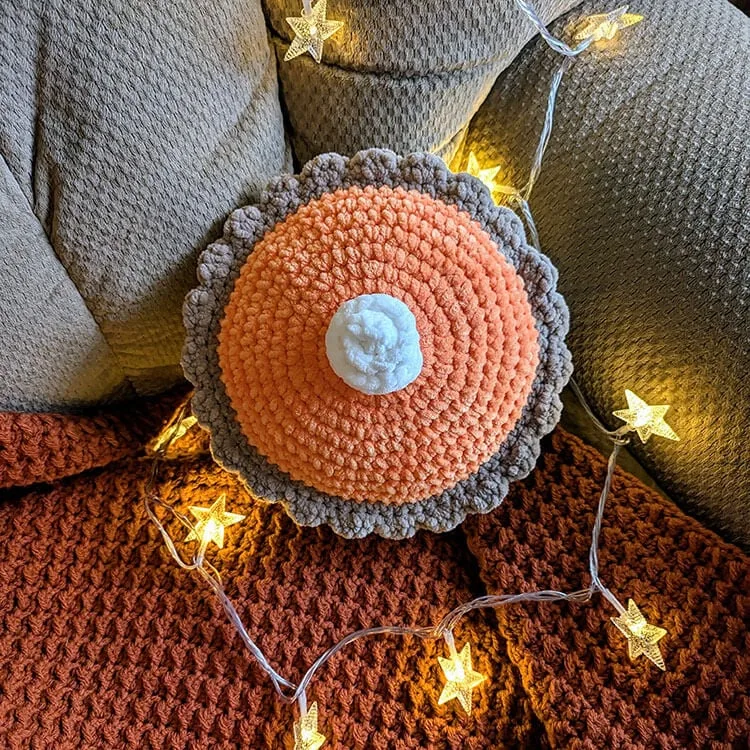
Crochet pumpkin pie amigurumi with crust and whipped topping

A stuffed crochet pumpkin pie with crust and topping, worked in super bulky yarn. Suits intermediate makers, about 4-6 hours.

Jump to the rounds

What this one is

This one's for the night you want something on the hook that feels like it's already baked, something soft and orange and a little bit silly sitting on your coffee table. It's a good one to make for someone who collects kitchen things, or for the friend who always claims the last slice at every gathering. There's no wrong time to stitch up a pie that never needs a crust shield.

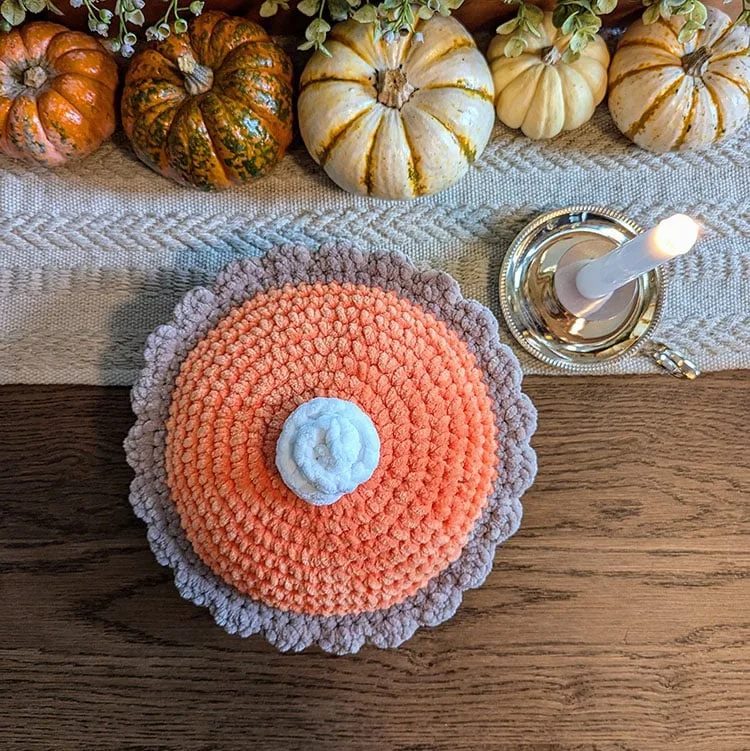
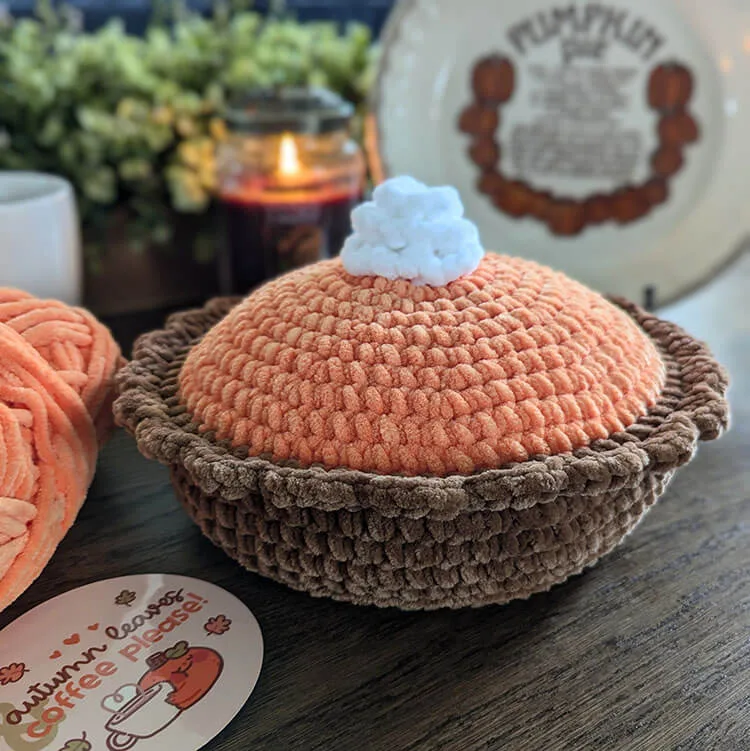
Your hands will spend most of the time building two separate domes, one in Tangerine for the filling and one in Toffee for the crust, each worked in tidy increase rounds until they're wide enough to meet. Then you'll join them, stuff the middle, and finish the edge with little scalloped puffs before adding a small flourish of White on top. Set aside a solid afternoon, maybe two sittings if you like to pace yourself.

Try it another way

Once you've made one, it's easy to play with this pattern. Swap Tangerine for a deep red or purple to turn the filling into a different kind of pie altogether, or work the crust in a heathered cream instead of Toffee for a lighter, flakier look. You could also skip the White topping entirely and leave the filling exposed for a simpler, rustic slice, or pile on extra White stitches for a more generous dollop. If you want a set, make a few in a row with slightly different filling colors so they read like a dessert table rather than a single pie. Because both the filling and crust are built from the same basic increase sequence up through 18 stitches and beyond, you can comfortably substitute a different worsted or bulky yarn you already have, just expect the finished size to shift slightly with gauge. The 72-stitch attaching round is forgiving enough that minor tension differences between crust and filling won't stop the two halves from matching up. This also makes a fun teaching project if you're showing someone their first amigurumi joinery, since the two-piece construction is so visual and the payoff is immediate.

There's something deeply satisfying about watching two flat-ish circles grow into matching domes that are clearly meant to fit together, filling nestled right into crust like it was always going to happen. The crust edge round is the real treat here: that repeating cluster of three half double crochets skipped and slip-stitched gives you a scalloped lip that actually looks like a hand-pressed pie crust, not just a plain border. Joining the two pieces while stuffing as you go keeps the shape honest and round instead of lumpy. And because every part uses the same simple increase logic, you get to watch your skills compound round by round instead of learning something new for each piece. It's a quick, cheerful way to practice clean single crochet increases and finish with a result that photographs like it took far longer than it did.
The rounds, in full

Written out, round by round

Intermediate4-6 hours6.0 mmSuper Bulky

Bring to the porch

Everything this one takes, in the order you will reach for it.

  • Premier Parfait Chunky yarn (#6 Super Bulky, 131yds) in the following colors: Tangerine (for the orange filling), Toffee (for the crust), and a small amount of White (for the whipped topping).
  • A US size J 6.0 mm crochet hook
  • Poly-fil or other stuffing material
  • A stitch marker
  • Scissors for cutting yarn
  • A tapestry needle for sewing ends

Making the Pie Filling (using orange yarn)

To start, chain 2

  1. Round 1In the second chain from the hook, place 6 single crochets. This will be the base of your filling. (You should have 6 stitches at the end of this round.)As you work, don't forget to place your stitch marker in the first stitch of each round. This will serve as a helpful guide to track when a new round begins.
  2. Round 2In this round, you will increase in each stitch all the way around. After this round, you should have 12 stitches total.
  3. Round 3Here, you will repeat the pattern of *increasing one stitch, followed by a single crochet in the next stitch*. Continue this pattern around until you complete the round, resulting in 18 stitches.
  4. Round 4For this round, continue the same pattern: *increase in one stitch, then single crochet in the next two stitches*. Repeat around until you total 24 stitches.
  5. Round 5This time you will increase, then single crochet in the next three stitches. Continue until you finish the round with 30 stitches.
  6. Round 6Continue with the pattern of *increasing, then single crocheting in the next four stitches* until you round off at 36 stitches.
  7. Round 7Following the same logic, your stitches will now count as *increase, followed by five single crochets* for a total of 42 stitches by the end.
  8. Round 8Repeat the pattern of *increase and six single crochets* for a new total of 48 stitches.
  9. Round 9Now, let's modify slightly to *increase, followed by seven single crochets*. You should have 54 stitches after completing this round.
  10. Round 10Follow along with the pattern of *increase, plus eight single crochets* to round it off with 60 stitches.
  11. Round 11This time you will do an increase followed by nine single crochets, reaching a total of 66 stitches.
  12. Round 12For the final increase round, use the pattern of *increase and ten single crochets* to finish with 72 stitches.
  13. Round 13In this round, make one single crochet in every stitch around to retain the count at 72 stitches.After completing this round, slip stitch to the first stitch, fasten off, and weave in the loose ends securely.

Making the Crust (using tan yarn)

To start, chain 2

  1. Round 1In the second chain from the hook, work 6 single crochets to establish the base of your crust. (You should have 6 stitches by the end of this round.)Keep in mind to indicate the first stitch of each round with your stitch marker. This will help you stay organized as you crochet.
  2. Round 2Increase in each stitch around to grow your total to 12 stitches.
  3. Round 3Now, work the pattern of *increase followed by a single crochet in the next stitch* around until you reach a total of 18 stitches.
  4. Round 4Continue increasing and single crocheting in the next two stitches, repeating until you end up with 24 stitches.
  5. Round 5Increase, then single crochet in the next three stitches, concluding this round with 30 stitches.
  6. Round 6For this round, follow the same pattern of *increase and four single crochets*, rounding up to 36 stitches.
  7. Round 7Now your pattern should be *increase and five single crochets*, finishing with 42 stitches.
  8. Round 8Repeat the pattern of *increase followed by six single crochets* to total 48 stitches.
  9. Round 9In this round, you will work on the pattern *increase, then single crochet in seven stitches*, giving you a total of 54 stitches.
  10. Round 10Continue with your pattern of *increase, followed by eight single crochets* for a total of 60 stitches.
  11. Round 11Once again, you will be performing the pattern of *increase and nine single crochets*, resulting in 66 stitches.
  12. Round 12In this round, keep to the pattern of *increase followed by ten single crochets* for a final count of 72 stitches.
  13. Round 13Make one single crochet in the back loop of each stitch around for a total of 72 stitches.
  14. Rounds 14–17During these rounds, you will make one single crochet in each stitch around for a consistent 72 stitches.After completing round 17, slip stitch to the first stitch, fasten off, and weave in the yarn ends carefully.

Attaching the Crust and Filling, Stuffing, and Making the Crust Edge

To bring your project together, place the orange filling directly on top of the tan crust. We will now crochet the pieces together using the tan yarn.

  1. Round 1Attach the yarn to any stitch of your choice, chain 1, and single crochet in the same stitch. Proceed to single crochet around the circumference, attaching the filling to the crust as you go. Once finished, make sure to stuff the pie to your desired fullness. After you close the pie, this round should maintain a total of 72 stitches.Slip stitch to the first stitch but do not fasten off just yet. Move on to round 2, where we will create the crust edge.
  2. Round 2Start with a chain 1 and single crochet in the same stitch. Then, for the rest of the round, work *3 half double crochets in the next stitch, skip the next stitch, and slip stitch in the following stitch*. Repeat this pattern until you reach the end of the round. If you have one stitch left, skip it, then slip stitch to the starting chain. Fasten off securely and weave in your ends neatly.

Creating the Whipped Topping (using white yarn)

To begin, chain 14

Next, crochet 3 double crochets into the second chain from the hook and continue doing this in each chain across. Once finished, fasten off while leaving a long tail for sewing.

To create the whipped topping effect, wrap the string around itself until it forms a spiral, adjusting to your liking. Finally, securely attach the whipped topping to the pie filling using a yarn needle.

Marlene's notes

Note 01

A US size J 6.0 mm hook paired with super bulky yarn moves fast, so check your tension stays snug enough that stuffing doesn't peek through the stitches.

Note 02

Move your stitch marker up every single round on both the filling and the crust pieces; with 12 and 13 rounds respectively, it's easy to lose your place without it.

Note 03

Stuff the pie to the fullness you like before the attaching round closes at 72 stitches, since you won't have easy access once that round is finished and slip-stitched.

Note 04

Finished size: the pumpkin pie measures approximately 10.5 inches wide and 5 inches tall, not including any whipped topping you add. Using a different super bulky yarn or hook size than the Premier Parfait Chunky and US J 6.0 mm hook will change these finished dimensions.

Note 05

This project is worked in continuous rounds; unless a step tells you otherwise, do not join or slip stitch at the end of each round.

Porch photos

Before you sit down

  • Check you have enough Tangerine, Toffee, and White Premier Parfait Chunky on hand before you start the filling, since all three colors are worked as solid sections rather than small stripes.
  • Keep your stitch marker within reach from round 1 on both the filling and the crust, since both parts ask you to mark the first stitch of every round to stay oriented.
  • Read through Round 2 of the crust-edge section before you begin it, since the repeating pattern of three half double crochets, a skip, and a slip stitch is easier to follow once you've seen the whole sequence.
  • Have your stuffing ready before you start joining the crust and filling in the attaching round, since you'll be stuffing mid-round rather than at the very end.

How the hours go

Making the Pie Filling
about 45-60 minutes because of the 12 rounds of steady increases to get the dome shaped
Making the Crust
about 50-70 minutes because it runs 13 rounds, one more than the filling, to build a slightly wider base
Attaching, Stuffing, and Crust Edge
about 30-45 minutes because the scalloped edge pattern in Round 2 takes a bit of care to keep even

Looking after it

  • Since this pie is worked entirely in acrylic Premier Parfait Chunky, spot clean with a damp cloth and mild soap rather than tossing the whole piece in the wash, so the stuffing inside stays dry and doesn't clump.
  • Let it air dry fully before setting it back on display, and store it somewhere it won't get squashed flat, since acrylic yarn holds its shape well but can still crease if pressed under something heavy for too long.
FAQs

Asked on the glider

the ones that come up on the glider

Can I make the pie slices instead of a whole pie?

This pattern as written builds one complete round pie from two domed pieces, so there's no slice version included here. You could stop stuffing partway and leave a wedge open, but that would mean departing from the given round counts.

Why does the crust have 13 rounds when the filling only has 12?

The extra round gives the crust a touch more height and a slightly wider base to cradle the filling before you join the two pieces. It also helps the crust edge sit at the right spot once you reach the attaching round.

What happens if I lose count partway through a round?

Your stitch marker in the first stitch of each round is there exactly for this, so you can count back to it and recheck your total against the stitch count given for that round. Both the filling and crust note their expected totals at each stage so you can confirm before moving on.

Do I need to stuff it very firmly?

Stuff it to whatever fullness feels right to you before the attaching round closes, since the pattern leaves the amount up to your preference. Firmer stuffing will give you a rounder, sturdier pie, while lighter stuffing makes a softer one.

What is the crust edge round actually doing?

Round 2 of the attaching section repeats three half double crochets into a stitch, skips the next stitch, and slip stitches into the following one, all the way around. That repeating cluster is what creates the scalloped, pressed-crust look along the rim.