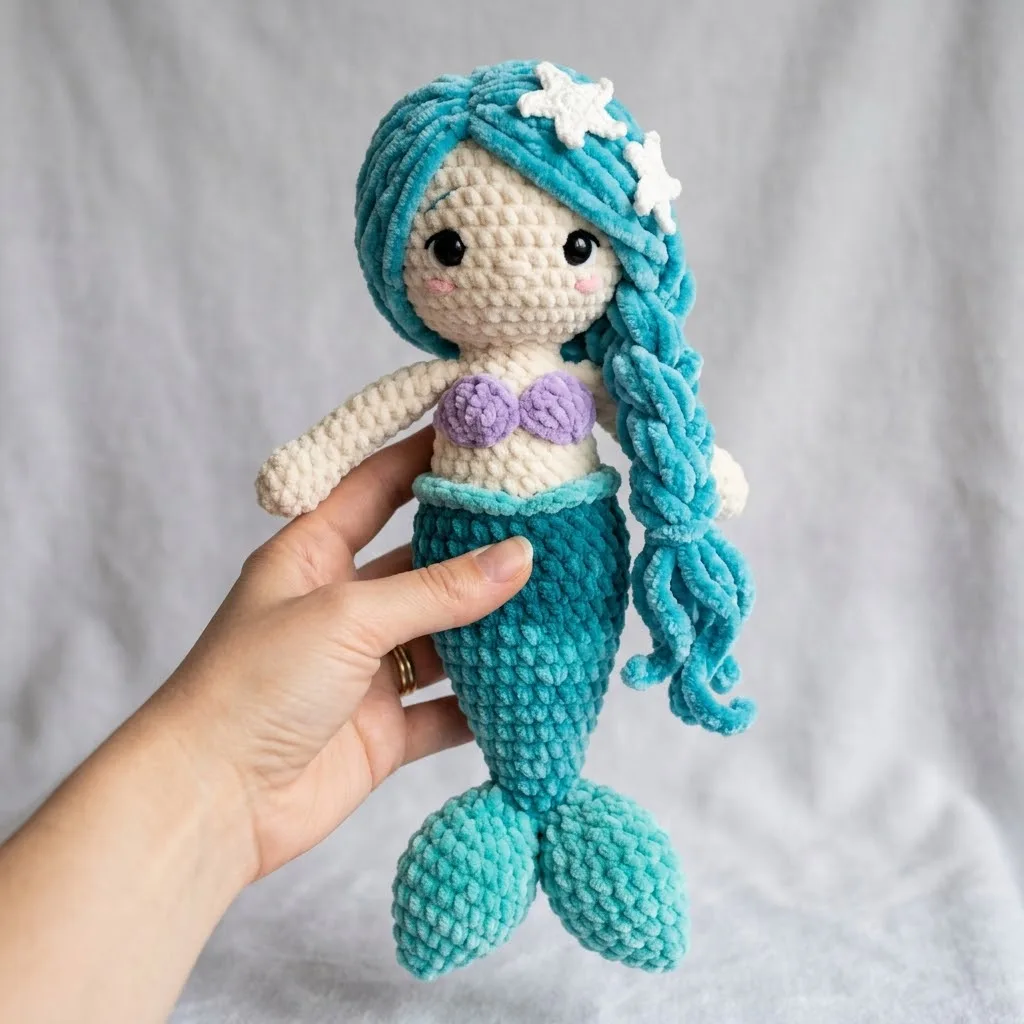
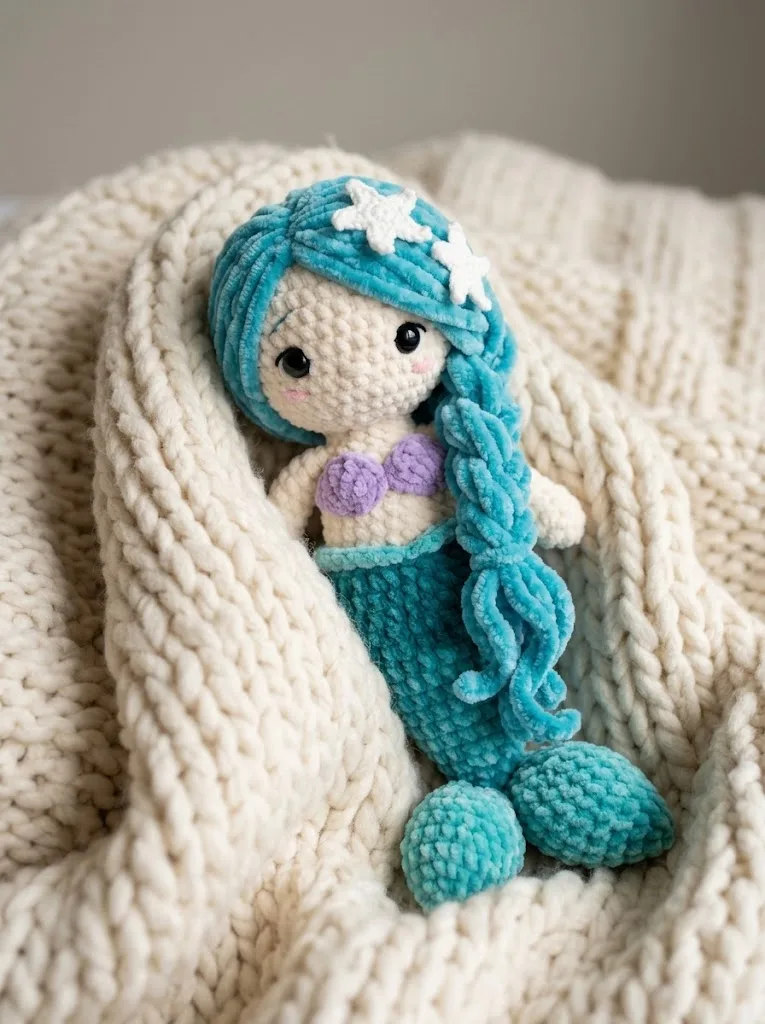
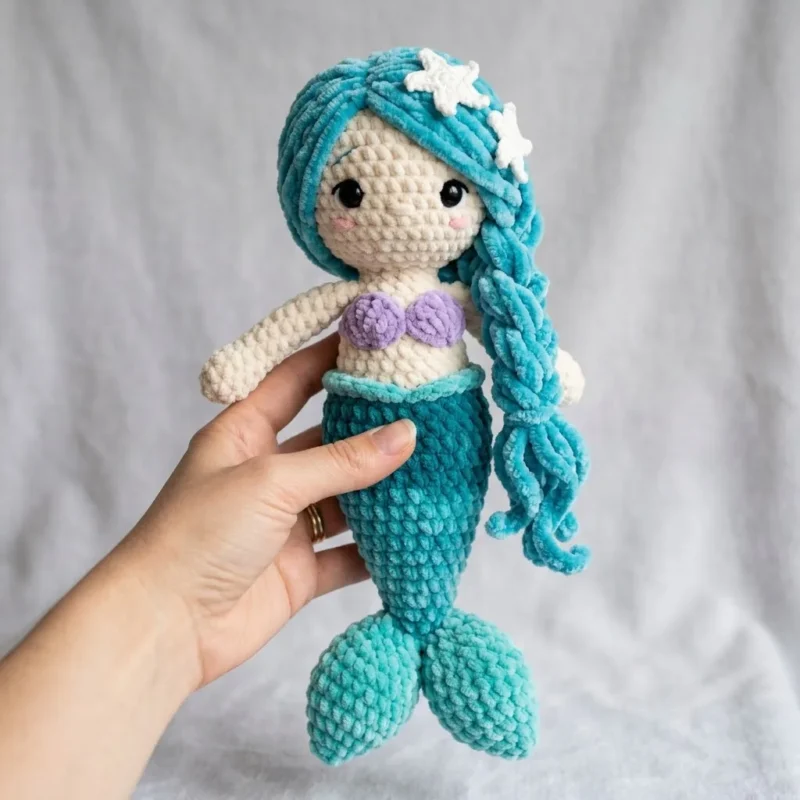
You know the kind of project that makes you want to clear the coffee table and pull up a chair. This mermaid is exactly that. She's built for anyone who loves a toy with a bit of texture to it, for the gift-giver who wants something a child will actually want to hold, and for you if you've been curious about what chenille yarn feels like under your hook.
02
Try it another way
Once you've made her as written, there's plenty of room to play. Swap the teal chenille for a different shade, purple or coral would both look lovely, and your doll takes on a whole new personality without changing a single stitch. If you only have worsted cotton on hand and no chenille, you can work the tail and hair in that instead; you'll lose some of the plush squish, but the shaping stays identical since the stitch counts (6, 12, 18, 24 and beyond) don't change with the fiber. For the seashell top, try using scrap yarn in a contrasting bright color so it pops against the cream body rather than blending with the lavender. You could also skip the starfish hair accessories for a simpler finish, or make a few extra ones to scatter elsewhere, since each one uses only a small amount of white yarn. If you're making her as a gift for a specific room, consider swapping the lavender shell for a color that matches the space. And if you want a slightly larger doll, working the same pattern in a chunkier yarn with a bigger hook will scale her up while keeping every round count the same.
The rounds, in full
Progress tracker
0 of 0 rounds
Tap a round as you finish it. This device remembers where you stopped.
Written out, round by round
Intermediate4-6 hours3.5 mmWorsted
Bring to the porch
Everything this one takes, in the order you will reach for it.
Yarn
01Worsted weight cotton yarn in cream or beige for the head, body, and arms (approximately 80 yards)
02Chenille or velvet yarn in teal or turquoise for the hair and mermaid tail (approximately 120 yards)
03Worsted weight yarn in light purple or lavender for the seashell top (approximately 10 yards)
04Worsted weight yarn in white for the starfish hair accessories (approximately 5 yards)
05Small amount of pink yarn or embroidery floss for the cheeks
Tools
063.5mm crochet hook (US E/4) for worsted weight sections
074.0mm crochet hook (US G/6) for chenille yarn sections
08Tapestry needle with a blunt tip for sewing pieces together
09Stitch marker to track the beginning of rounds
10Polyester fiberfill stuffing
1112mm black safety eyes (one pair)
12Scissors
13Pins for positioning pieces before sewing
14A note about the yarn: Chenille yarn is tricky to work with. It splits easily and can be hard to see your stitches. Use a slightly larger hook than you normally would. Take your time. Good lighting helps enormously.
The Head
Use cream worsted weight yarn and 3.5mm hook.
Step by step: Use cream worsted weight yarn and 3.5mm hook.
Step by step: Use cream worsted weight yarn and 3.5mm hook.
Step by step: Continue with teal chenille yarn and 4.0mm hook.
Step by step: Use light purple yarn and 3.5mm hook; Shell piece (Make 2):.
Step by step: This is where the magic happens. Use teal chenille yarn throughout; Hair cap: Work the hair cap directly onto the head or create it separately and sew on.
Round 1MR, 6 sc into ring (6 sts)
Round 2Inc in each st around (12 sts)Step by step: Working in BLO only, sc in each st around (12 sts).*Sc 1, dec* repeat around (8 sts) Fasten off, leaving a long tail. Flatten slightly to create a shell shape. The back loop round creates a ridged texture that resembles seashell lines.through 14: Sc in each st around (12 sts) — 12 rounds total Do not stuff the arms, or stuff very lightly at the hand area only. This allows them to hang naturally.Step by step: Flatten the opening and sc across to close (6 sc through both layers); Fasten off, leaving a long tail for sewing.
Round 3*Sc 1, inc* repeat around (18 sts)Step by step: through 6: Sc in each st around (18 sts) — 3 rounds total; *Sc 1, dec* repeat around (12 sts) Stuff lightly.Dec around (6 sts) Fasten off. Close the hole. Leave a tail for sewing to the bottom of the main tail piece.
Round 4*Sc 2, inc* repeat around (24 sts)Step by step: through 12: Sc in each st around (24 sts) — 8 rounds total; *Sc 2, dec* repeat around (18 sts) Stuff the body firmly; Sc in each st around (18 sts) Fasten off, leaving a long tail for sewing to the head.
Round 5*Sc 3, inc* repeat around (30 sts)
Round 6*Sc 4, inc* repeat around (36 sts)
Round 7*Sc 5, inc* repeat around (42 sts)through 12: Sc in each st around (42 sts) — 5 rounds total Fasten off. Position on the head covering the back and top, leaving the face exposed.
Step by step: Hair strands:.
Cut approximately 40 to 50 strands of chenille yarn, each about 16 inches long. Fold each strand in half and use your hook to pull the folded loop through a stitch on the hair cap. Pull the ends through the loop and tighten. This creates a lark’s head knot.
Attach strands densely across the back of the hair cap. Concentrate more strands on one side to create the side-swept look visible in the design.
Step by step: Braid:.
Gather a large section of strands and create a simple three-strand braid. Secure the end with a small piece of matching yarn tied tightly. Trim any uneven ends.
Round 8through 16: Sc in each st around (42 sts) — 9 rounds total Insert safety eyes between rounds 11 and 12, approximately 8 stitches apart. Make sure they are secure before continuing.
Round 17*Sc 5, dec* repeat around (36 sts)
Round 18*Sc 4, dec* repeat around (30 sts)
Round 19*Sc 3, dec* repeat around (24 sts) Begin stuffing the head firmly. Add more stuffing as you continue decreasing.
Round 20*Sc 2, dec* repeat around (18 sts)
Round 21*Sc 1, dec* repeat around (12 sts)
Round 22Dec around (6 sts) Fasten off. Use your tapestry needle to weave through the remaining 6 stitches. Pull tight to close. Weave in the end.
The Mermaid Tail
Switch to teal chenille yarn and 4.0mm hook. The larger hook accommodates the bulkier yarn.
Round 1MR, 6 sc into ring (6 sts)
Round 2Inc in each st around (12 sts)
Round 3*Sc 1, inc* repeat around (18 sts)
Round 4*Sc 2, inc* repeat around (24 sts)
Round 5through 8: Sc in each st around (24 sts) — 4 rounds total
Round 9*Sc 3, inc* repeat around (30 sts)
Round 10through 20: Sc in each st around (30 sts) — 11 rounds total
Round 21*Sc 3, dec* repeat around (24 sts)
Round 22Sc in each st around (24 sts)
Round 23*Sc 2, dec* repeat around (18 sts) Stuff the tail firmly as you work.
Round 24Sc in each st around (18 sts) Fasten off, leaving a long tail for sewing to the body.
The Starfish (Make 2)
Use white worsted weight yarn and 3.5mm hook.
Round 1Ch 2, 5 sc in second ch from hook (5 sts) For each point of the star, pick up in one of the 5 stitches: *Ch 3, sl st in second ch from hook, sc in next ch, sl st in the original sc.* Repeat for all 5 points.Fasten off. Leave a tail for sewing into the hair.
Putting it together
Step 1
Take your time with assembly. This is where your mermaid truly comes to life.
Step 2
Step 1: Sew the head to the body. Position them so the face looks forward and the body is centered. Use a whip stitch and matching cream yarn. Sew completely around for security.
Step 3
Step 2: Sew the tail to the bottom of the body. Overlap slightly where the cream body meets the teal tail. This creates a seamless transition.
Step 4
Step 3: Sew both tail fins to the bottom of the main tail, angled outward.
Step 5
Step 4: Sew the arms to either side of the body, just below where the head attaches. Position them so they hang naturally at her sides.
Step 6
Step 5: Attach the hair cap to the head. Sew around the edge where it meets the face, leaving the hairline looking natural.
Step 7
Step 6: Sew the seashell top pieces to the chest area of the body.
Step 8
Step 7: Tuck the starfish accessories into the hair near the top. Sew them in place with white yarn.
Step 9
Step 8: Embroider rosy cheeks using pink yarn or embroidery floss. Create small circles with satin stitch below and slightly outside each eye.
Marlene's notes
💡Note 01
Chenille splits easily and the stitches can be hard to spot, so work under good light and go slowly rather than trying to match your usual cotton speed.
💡Note 02
Keep that stitch marker moving every single round across all three pieces; these are worked continuously with no joining, and it's easy to lose your place otherwise.
💡Note 03
Stuff firmly but evenly as you close each piece, especially the head, since a lumpy fill will show more under the smooth cotton than it would under the fluffier chenille.
Porch photos
Before you sit down
Check you have enough chenille yarn on hand (120 yards) since the tail and hair are both worked from it and running short mid-piece is frustrating.
Set out both hooks, the 3.5mm for cotton sections and the 4.0mm for chenille, so you're not hunting for the right size mid-round.
Place a stitch marker before Round 1 of the head or tail and get in the habit of moving it up each round, since everything here works in continuous rounds with no joining.
Read through the head's first few rounds before casting on, since it shifts yarn and hook partway through and it helps to know that change is coming.
How the hours go
The Mermaid Tail
about 60 minutes because the 11 rounds of chenille are slower going, between the thicker yarn and the trickier stitch visibility
The Starfish (make 2)
about 20 minutes total because each one is a single quick round with five little picot-style points to work
Looking after it
Hand wash gently in cool water if she needs it, since the chenille tail can mat or shed if machine washed or tumbled dry; lay everything flat to air dry instead.
Once dry, fluff the chenille sections with your fingers to restore the plush texture, and store her lying down or loosely seated rather than squeezed into a tight space, so the cotton body and chenille tail keep their shape.
Can I use regular worsted yarn instead of chenille for the tail and hair?
Yes, the stitch counts stay exactly the same either way. You'll just lose the squishy, velvety texture that chenille gives, so the tail will feel firmer rather than plush.
Why does my chenille yarn keep splitting?
Chenille is simply a trickier fiber to work with than cotton, and it happens to most people at first. Using the slightly larger 4.0mm hook as directed and working in good light makes a real difference.
Do I need to join each round?
No, every part of this doll, the head, tail, and starfish, is worked in continuous rounds with no joining. Keep a stitch marker on the first stitch of each round so you don't lose track.
How much yarn do I actually need for the whole doll?
You'll want about 80 yards of cream cotton for the head, body, and arms, about 120 yards of chenille for the tail and hair, and smaller amounts of lavender and white, around 10 and 5 yards, for the shell top and starfish.
What size safety eyes does this pattern use?
The pattern calls for one pair of 12mm black safety eyes, which go into the head before it's stuffed and closed.
Can I skip the starfish hair accessories?
Absolutely, they're a sweet detail but not structural to the doll. Each one only takes a single quick round, so they're easy to add later too if you change your mind.
🧵
Sunday evening, from the glider —
The porch letter
A pattern and a note from the glider, most weeks.
🧵
Every round ticked off.
That was the last round. Would you like the letter when the next one goes up?