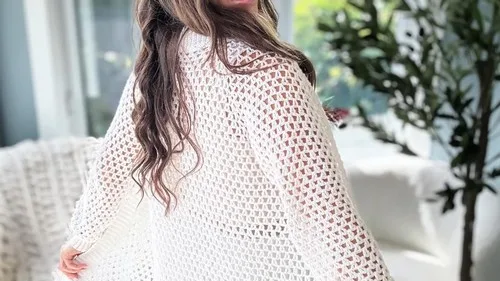
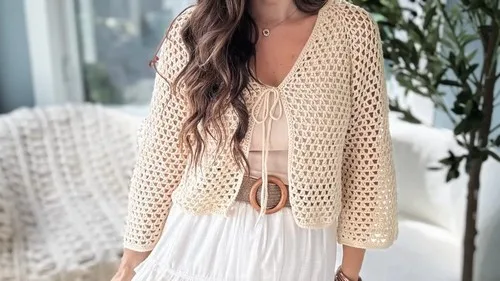
Intermediate 4-6 hours Fingering yarn

Worked on the glider, counted out loud —

V-Stitch Summer Cardigan For Warm Day Layering

An open, breezy V-stitch cardigan in fingering weight for warm evenings. Intermediate, about 4-6 hours once the rhythm sets in.

Jump to the rounds

What this one is

This is the cardigan for the kind of evening when the air finally loosens up but you still want something over your shoulders. You know the feeling: too warm for a sweater, too cool for bare arms. It suits anyone who reaches for the same soft throw-on piece all summer, the one that goes over a sundress or a tank top without adding real weight.

Your hands spend most of this project in a steady back-and-forth, building rows of open V stitches once the first two setup rows are behind you. There are 41 rows of that V stitch to work through, so it settles into a rhythm fast. Between the single crochet foundation, the long repeat, and finishing touches like the ties and blocking, plan on a handful of unhurried sittings rather than one long stretch.

Try it another way

The V stitch pattern itself gives you room to play without touching the stitch count. Swap the ivory for a soft pastel or a deeper solid if you want the open stitch texture to read differently against your skin. For sizing, you can lengthen or shorten the piece by adding or removing rows from the Rows 3 to 41 repeat, since each one simply stacks another V onto the row below. If you want a different drape, try the pattern in a different fingering weight fiber blend; a silk or linen blend fingering yarn will hang cooler and drape more than a pure wool. The ties are an easy place to experiment too: instead of plain strands, try a contrasting color for the ties so they stand out against the ivory body, or braid them before attaching for a bit more texture. You could also skip the ties altogether and add a single button instead, though you'll want to account for that in your finishing steps. However you adjust it, the Row 1 foundation and the V-stitch Row 2 setup stay the backbone of the whole piece.

There's real satisfaction in watching Row 1's plain single crochet transform, row by row, into something lacy. The V stitch itself is the star here: two double crochets and a chain, worked into the same stitch, opening up little diamond windows across the whole body. Once you've worked Row 2 and set those first V's in place, Rows 3 through 41 ask you to keep landing your double crochets into the V below, which trains your eye to read the fabric rather than count stitches. By the time you reach the ties and blocking, you've built a textured, drapey piece almost meditatively, one repeat at a time, and the open stitch pattern means it breathes exactly the way a warm-weather layer should.
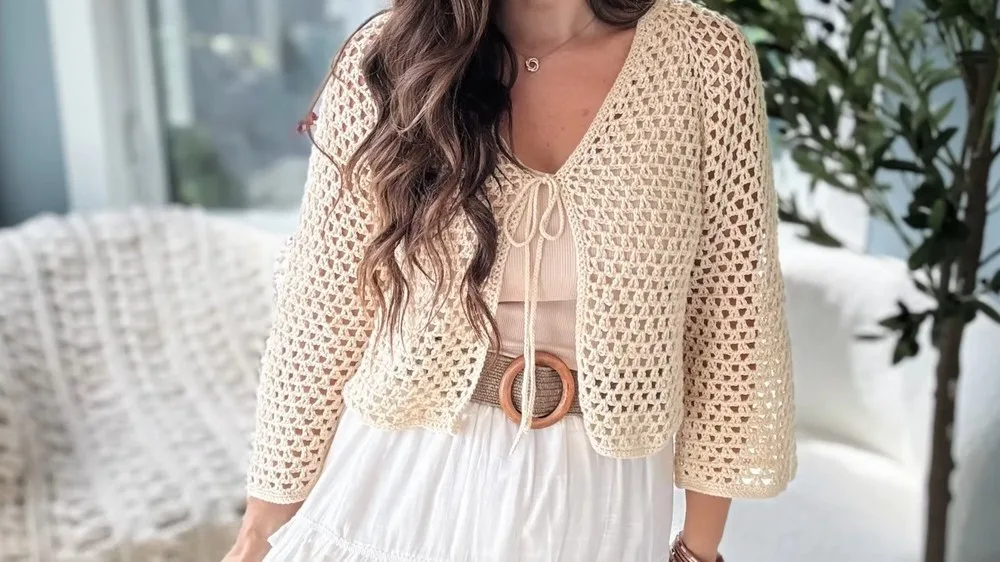
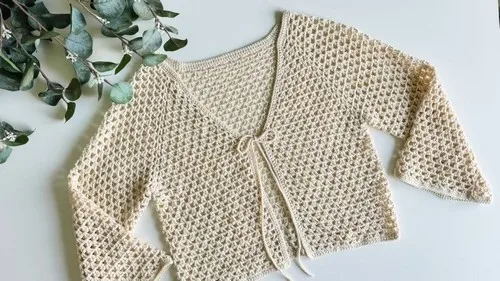
The rounds, in full

Written out, round by round

Intermediate4-6 hours4.5 mmFingering

Bring to the porch

Everything this one takes, in the order you will reach for it.

  • Comfy fingering weight yarn from Wii Crochet in the color ivory (or your preferred color)

Two crochet hooks

  • a 4.5 mm and a 3.5 mm
  • Stitch marker
  • Tapestry needle
  • Scissors
  • Measuring tape

Main Pattern

  1. Foundation ChainChain (CH) 94. This foundational step is crucial as it determines the width of your project. Ensure that your chains are not too tight; this can affect the flexibility and the final appearance of your work. If you find your chain stitches tend to be tight, consider using a hook one size larger for this step before switching back to your intended hook size for the remainder of the project.(94)
  2. Row 1Setting the Stage Start by creating a single crochet (SC) in the second chain from your hook. This process begins to establish the pattern's texture and forms the base for the subsequent pattern rows. Once you've made the SC, chain one (CH 1), skip the next chain stitch then SC into the next. The act of skipping chains and alternating with SCs creates little windows or spaces which will be utilized in the next row for creating more complex stitches. Repeat this pattern across the entire row, ensuring consistent tension for a uniform look.
  3. Row 2Introducing the V Stitch Begin Row 2 with a chain 3 (CH 3), which counts as your first double crochet (DC). This elevation is necessary as DCs are taller than SCs. Then, directly DC into the first SC you come across. Following this, you create a chain space of one (CH 1), skip three single crochets from the previous row, then execute what is known as a V stitch in the next SC. This V stitch, integral to the design, typically consists of a DC, CH 1, and another DC into the same stitch, creating a V-like shape. This formation introduces a lovely, open texture that will be prevalent throughout your piece. Repeat this sequence to the end of the row, finishing with a DC in the last SC to mirror the row's beginning.
  4. Rows 3–41Expanding the Pattern Rows 3 to 41 - Expanding the Pattern. Each of these rows builds on the texture established in row 2. Start every row with a CH 3, which continues to count as the first DC. Your first actual DC of each row goes into the V stitch from the row below, enhancing the texture and adding to the fabric's drape. Remember the CH 1 before you skip to the next V stitch to maintain the pattern's openness and ensure the 'V' shapes align vertically, creating a beautiful, consistent pattern. The repetition of these steps not only solidifies the pattern in your muscle memory but also allows for a kind of meditative rhythm often found in crochet.

Finishing

Weave in any loose ends.

Attach your ties. To attach your ties, fold them in half and attach them to the back of the cardigan, one on each side. You can attach them with a safety pin or by sewing them in place.

Block your cardigan. Blocking will help your cardigan to lay flat and even. To block your cardigan, wet it and lay it flat on a blocking board or mat. Pin it out to its desired shape and size. Allow it to dry completely before removing the pins.

Optional Add a ribbed edging. To add a ribbed edging, work a row of single crochets around the entire edge of the cardigan. Then, work a row of double crochets around the entire edge of the cardigan. Repeat these two rows until you have reached your desired length.

Optional Add buttonholes. To add buttonholes, chain 4, skip the next 2 stitches, single crochet in the next stitch, chain 4, skip the next 2 stitches, single crochet in the next stitch. Repeat this pattern across the entire front of the cardigan.

Optional Add buttons. To add buttons, sew them onto the opposite side of the cardigan from the buttonholes.

Marlene's notes

Note 01

Keep your tension even through the chain-1 spaces in Row 1; those little windows set the spacing for every V stitch that follows.

Note 02

Place a stitch marker in your first V stitch of Row 2 so you can find your place quickly across all 41 repeat rows.

Note 03

The CH 3 at the start of each row counts as your first double crochet, so don't add an extra stitch into that same space.

Porch photos

Before you sit down

  • Check you have enough of the ivory fingering weight yarn from Wii Crochet, or your chosen substitute, to carry you through the foundation chain of 94, all 41 rows of the V-stitch body, plus two ties.
  • Set out both hooks, the 4.5 mm and the 3.5 mm, before you begin so you're not hunting mid-row for the right one.
  • Work a small swatch in the V stitch pattern first to see how the ivory yarn opens up and to get a feel for the CH 1, skip, V-stitch rhythm before committing to Row 1.
  • Read through Row 2 closely before you start it, since it introduces the V stitch that every following row depends on, and have your stitch marker ready to flag your first V for easier counting.

How the hours go

Foundation Chain & Rows 1-2
about 20-30 minutes because you're chaining 94, establishing the single crochet base, and placing your first V stitches
Main Pattern, Rows 3-41
about 3-5 hours because this is the long repeat section, 39 rows of matching V stitches to the row below
Finishing
about 30-45 minutes because weaving in ends, attaching ties, and blocking all take a little patience even with no rounds left to work

Looking after it

  • Hand wash your cardigan gently in cool water with a mild detergent made for fine fibers, then roll it in a towel to press out excess water rather than wringing it.
  • Lay it flat to dry and re-block if it loses its shape over time; since you already pinned it out once, you know roughly the dimensions to coax it back to, and store it folded rather than hung so the open V stitches don't stretch out.
FAQs

Asked on the glider

the ones that come up on the glider

Why does Row 2 use a different stitch height than Row 1?

Row 1 builds a single crochet foundation with small chain-1 gaps, while Row 2 introduces the taller double crochet V stitch that needs the CH 3 to reach the right height. That shift in height is what opens up the lacy texture you see across the rest of the rows.

How do I know if I'm placing my V stitches correctly through the long repeat?

Each V stitch in Rows 3 to 41 should land directly into the V stitch from the row below it, which keeps the V shapes stacking in neat vertical columns. A stitch marker in your first V of each row makes this much easier to track.

Do I need both hook sizes for the whole project?

The materials list calls for a 4.5 mm and a 3.5 mm hook, so you'll likely use the smaller one for a firmer section, such as the single crochet foundation row, and the larger for the open V stitch body. Check your swatch to see which size gives you the drape you want for each section.

How are the ties attached?

Fold each tie in half and attach one to the back of the cardigan on each side, either with a safety pin for a temporary hold or by sewing them in place for something permanent. Weave in any loose ends from the ties at the same time as the rest of your finishing work.

Why does blocking matter for this piece?

Blocking is what helps the open V stitch pattern lay flat and even rather than curling at the edges. Wetting the piece, pinning it to size on a blocking board, and letting it dry fully makes a real difference in how the finished cardigan drapes.

Can I add buttons instead of ties?

Yes, the pattern notes a few optional finishing touches: you can work a ribbed edging by alternating rows of single and double crochet around the whole edge, add buttonholes by chaining 4, skipping 2 stitches, and single crocheting in the next stitch across the front, then sew buttons onto the opposite side from the buttonholes.