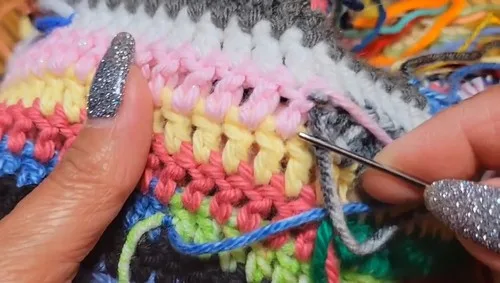
Intermediate 4-6 hours Worsted yarn

Worked on the glider, counted out loud —

Two-Panel Crochet Shorts Pattern With Color-Block Stripes

A confident-beginner crochet shorts pattern in two panels with color-block rows, ready in about a weekend.

Jump to the rounds

What this one is

This pattern is for the evening you want to step out in something you made with your own hands — a two-panel crochet short built from color-block stripes that reads confident, not fussy. It suits you if you love mixing your own color combinations and want a piece that turns heads without demanding advanced skills. Whether you're headed to a gathering with friends or just want a handmade staple for your closet, these shorts are made for anyone who likes stripes with a little attitude and isn't afraid of some paired decreases.

Your hands spend most of this project working straightforward double crochet rows, swapping colors as often as you like — four or five times a row if you're feeling bold — then settling into a steady rhythm of paired decreases that curve each panel into a leg shape. Between the two panels and the seaming with a darning needle, plan on a few solid sittings rather than one long push. The shaping rows ask for a bit more attention than the plain rows, so budget extra time there.

Try it another way

The chain-93 foundation is built around a 21-inch thigh measurement, so the easiest resize is to redo that math for your own measurement before you chain anything — the ratio stays the same whether you're going smaller or larger. For yarn, swapping in a different fiber changes the whole feel: a cotton blend gives you crisp stitch definition for the color-block stripes, while something with more drape softens the fit through the leg. Color placement is where you can really make this yours — stick to two colors for a bold block look, or lean into the four-to-five changes per row the pattern allows for something closer to a gradient or confetti effect. If you want the shorts to read more toned-down, cluster your color changes near the waist and keep the lower rows in one shade. You can also treat the two panels as separate design statements — mismatched stripe patterns on each leg, seamed together at the end, reads intentional rather than like a mistake. For a different use, work the same construction in a heavier yarn with a slightly larger hook for a cozy lounge version, or stay with the 4.25 mm hook and a lighter yarn for something you'd actually wear out.
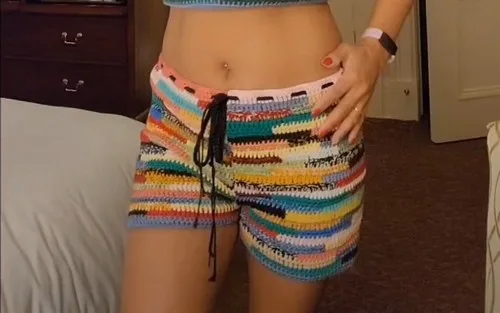
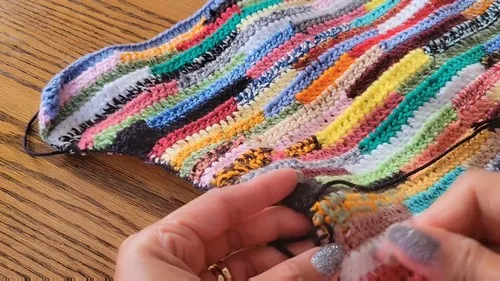
The rounds, in full

Written out, round by round

Intermediate4-6 hours4.25 mmWorsted

Bring to the porch

Everything this one takes, in the order you will reach for it.

  • 4.25 mm crochet hook
  • Measuring tape
  • Darning needle
  • Multiple colors of yarn
  • Scissors
  • Stitch marker (optional)

Main Pattern

  1. Round 1-4Change color. Ch 2 and turn (ch 2 doesn’t count as a stitch). Dc into the first stitch and in each st across.Rep for 4 rows, changing color 4–5 times per row as desired.
  2. Round 5Ch 2 and turn. Dec 1, then dc in each st until 4 sts remain. End with 2 dec. For Row 6Ch 2 and turn.2 dec, then dc in each st until 2 sts remain.Finish with 1 dec.Rows 7–9 Alternate between Row 5 and Row 6.
  3. Round 10-25Ch 2, turn, dc in each stitch across. Use pink and dark pink yarn in Row 25. For Row 26 (Final Row for Panel 1)Ch 1, turn.Sc in each st across.Ch 1 and fasten off.

Use pink and dark pink only.

Panel Two

Part 2

Rows 1–4 Repeat as done for Panel One.

  1. Round 5Ch 2, turn. 2 dec, dc in each st until 2 sts remain, then 1 dec. For Row 6 Ch 2, turn.1 dec, dc in each st until 4 sts remain, then 2 dec.Rows 7–9 Repeat Rows 5 and 6 alternately.
  2. Round 10-25Ch 2, turn, dc in each st. For Row 26 (Final Row for Panel 2) Sc in each stitch, ch 1, and fasten off.Assembly Weave in all yarn ends.For the second side, begin sewing at Row 5 to ensure proper shaping.Sl st into the 2nd ch from the hook.Sl st in each chain across to form a cord.Weave the tie through the waistband of the shorts.

Note: The second panel will mirror the first.

With right sides facing inward, use a darning needle to sew the panels together along both sides.

Waist Tie Chain 250.

Putting it together

Step 1

Weave in all yarn ends.

Step 2

With right sides facing inward, use a darning needle to sew the panels together along both sides.

Step 3

For the second side, begin sewing at Row 5 to ensure proper shaping.

Marlene's notes

Note 01

The 4.25 mm hook keeps this drapey enough to move like shorts rather than stiff like a placemat, so don't size down unless you're deliberately going for a firmer fabric.

Note 02

Keep your color changes at the start of a row so the join sits cleanly at the side seam rather than showing mid-panel.

Note 03

The decrease placement flips between rows in Part 2 (2 dec then 1 dec, then reversed) — a stitch marker on the first stitch of each decrease row helps you keep the pattern straight.

Porch photos

Before you sit down

  • Measure around your thigh before you chain anything — the pattern's math (21 inches = 93 chains) only holds if your gauge matches, so scale your chain count to your own measurement.
  • Lay in a stash of multiple yarn colors ahead of time, since you'll be changing color up to four or five times per row and running out mid-row is frustrating.
  • Work a small dc swatch with your 4.25 mm hook first to check your row height and stitch width match what the chain-93 foundation expects.
  • Read through Part 2's rows 5-9 before you start shaping — the decreases alternate placement (2 dec then 1 dec, then flipped) and it's easier to follow once you've seen the whole sequence.

How the hours go

Panel One (Main Pattern)
about 1.5-2 hours because of the string of decrease rows that shape the leg curve after the first four color-block rows
Panel Two (Part 2)
about 2-3 hours because it runs 26 rows total, including the alternating decrease sequence and a final sc row before fastening off
Seaming and finishing
about 30-45 minutes because both side seams need right-sides-inward sewing, with the second seam starting at row 5 to keep the shaping lined up

Looking after it

  • Hand wash in cool water with a gentle detergent, since color-block pieces like this can bleed if you machine wash on a warm cycle — a quick cool soak keeps your stripes crisp against each other.
  • Lay the shorts flat on a towel to dry and ease them back into their leg shape while damp; hanging them wet can stretch the decrease shaping out of line.
FAQs

Asked on the glider

the ones that come up on the glider

How do I know how many chains to start with?

Measure around your thigh and use the pattern's ratio of 21 inches to 93 chains as your guide, scaling up or down to match your own measurement. Keep your gauge swatch in mind, since a tighter or looser hand changes how many chains you actually need.

Do I need to use a specific number of colors?

No — the pattern calls for changing color four to five times per row as desired, so you're free to use two colors or a dozen. Just make sure you've got enough of each color to finish a full row without running short.

Why does the second panel have more rows than the first?

Part 2 runs the full 26 rows including an alternating decrease sequence in rows 5-9 and a finishing sc row, giving that panel its own shaping rhythm before the two are joined. It's meant to mirror Panel One's fit while closing out with a clean edge.

Why do I start the second seam at row 5 instead of row 1?

Starting the second side seam at row 5 lines up the shaping on both panels so the decreases match instead of drifting out of alignment. If you sew straight through from row 1, the fit can end up twisted at the hip.

Can I use a stitch marker to track the decreases?

Yes, a marker on the first stitch of each decrease row makes it much easier to see where dec 1 and 2 dec fall, especially once the pattern flips the order in rows 5-9 of Part 2. It's optional but worth it if you tend to lose your place.

What hook size should I use if my gauge runs tight or loose?

Start with the 4.25 mm hook the pattern calls for, then size up or down slightly if your swatch comes out stiffer or looser than you want the finished shorts to feel. The main thing to protect is drape, since these are meant to move like shorts, not stand up like a stiff fabric panel.