Intermediate 3-5 hours Super Bulky yarn

Worked on the glider, counted out loud —

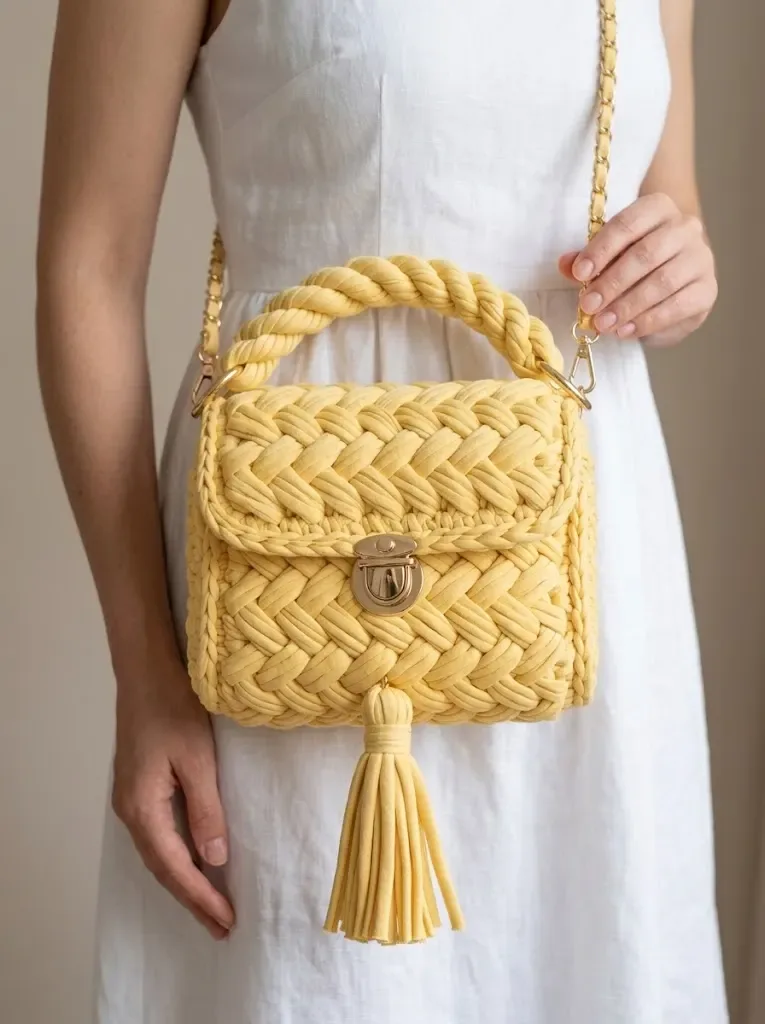
Butter yellow chunky t-shirt yarn tote with gold chain

A chunky butter yellow tote worked in t-shirt yarn with a 9mm hook, ready for confident beginners in a few sittings.

Jump to the rounds

What this one is

I think of this bag as the project for the evening you finally want to work with your hands instead of your phone. It's a beautiful first project if you've never touched t-shirt yarn before, and just as satisfying if you're already a seasoned hook-wielder looking for something quick and showy. The butter yellow color feels sunny without being loud, and it photographs beautifully against denim or a plain white tee.

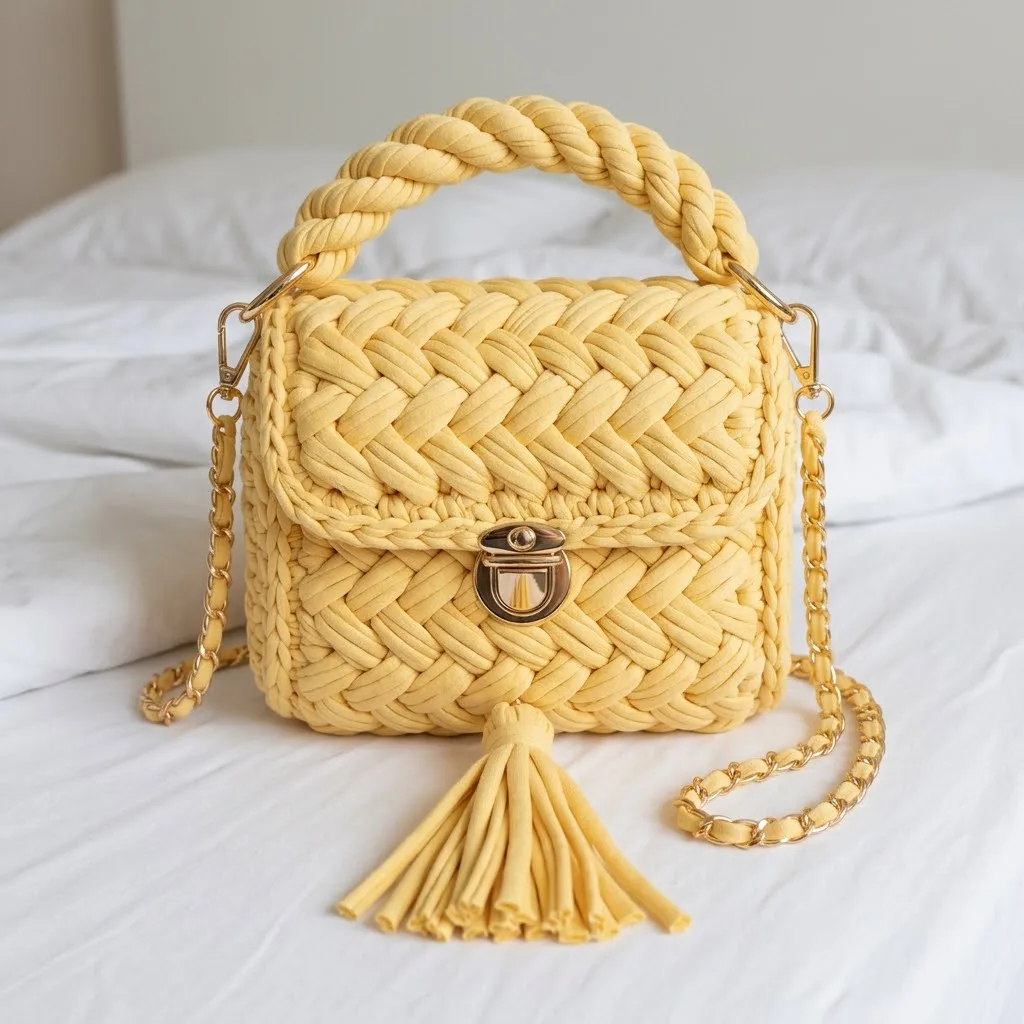
Your hands spend most of their time on herringbone half double crochet, round after round, building up that soft diagonal texture that makes chunky yarn look intentional instead of bulky. Working the body takes twelve rounds before you shape the flap flat and finish the top edge, and with a 9mm or 10mm hook the whole bag moves fast. Plan on a couple of focused sittings, plus a little extra time for attaching the hardware at the end.

Try it another way

Color is the easiest swap — this pattern works just as well in any super bulky t-shirt yarn color you love, so pick whatever feels most like you instead of butter yellow. If you want a smaller everyday bag, stop the body a few rounds short of twelve, since each round adds a bit of height, and you'll still get a clean top edge once you work the two finishing rounds of single crochet. For a roomier tote, keep going a couple of rounds past twelve before starting the top edge shaping. The flap itself is easy to change too — leave it off entirely for an open-top bag, or make it narrower by starting Row 9 with fewer stitches if you want a smaller closure tab. Swap the gold chain for a plain rope handle or a wide fabric strap looped through the same D-ring connectors, and if you can't find a twist-lock clasp, a large magnetic snap sits in almost the same spot. You can also mix two colors by changing yarn every few rounds instead of sticking to one, which reads as soft stripes against the diagonal herringbone texture.

What's satisfying here is the rhythm of herringbone half double crochet itself — that little extra lean in each stitch that gives the surface a woven, almost knit look instead of flat rows of chunky crochet. Watching the body climb from nothing to a solid 60 stitches a round, round after round, until you've got a tall sturdy cylinder standing on its own after round twelve, is its own kind of reward. Then the flap gets worked flat and short, just nineteen stitches across two rows, so you go from big sweeping rounds to tight controlled shaping in a few minutes. Finishing with two clean rounds of single crochet at the top edge, then clipping on the gold chain and twist-lock clasp, turns a soft fabric tube into something that genuinely reads as a finished bag.
The rounds, in full

Written out, round by round

Intermediate3-5 hours9 mmSuper Bulky

Bring to the porch

Everything this one takes, in the order you will reach for it.

Yarn

  • Approximately 250 to 300 grams of t-shirt yarn or trapillo yarn in butter yellow (or any color you love)
  • This is a super bulky weight yarn, sometimes labeled as jumbo or roving weight

Hook

  • 9mm or 10mm crochet hook (adjust based on your tension)

Hardware and Notions

  • 1 twist-lock clasp (also called a turn-lock or push-lock closure)
  • 2 D-ring connectors or swivel clasps for the handle
  • 1 gold chain strap, approximately 100 to 120cm
  • 2 metal loops or rings to attach the chain
  • Tapestry needle with large eye
  • Scissors
  • Stitch markers

Gauge

  • With 9mm hook and t-shirt yarn in herringbone half double crochet: 8 stitches and 6 rows equals approximately 10cm (4 inches) square. Your gauge may vary slightly based on your yarn brand and tension.
  • Skill Level

Setup Round

  1. Round 1Ch 2 (does not count as a stitch throughout). HBhdc in each st around. Sl st to first HBhdc to join. (60 sts)Rounds 2 to 12: Rep Round 1. (60 sts each round) After Round 12, your bag body should stand approximately 15cm (6 inches) tall. The herringbone texture creates that beautiful diagonal pattern visible in the design.

Shaping the Flap Edge

  1. Round 9Ch 1, turn. Sc in each st across. (19 sts)
  2. Round 10Ch 1, turn. Sl st in first st, sc in next 17 sts, sl st in last st. (19 sts) Fasten off, leaving a long tail for attaching to the bag.

Shaping the Top Edge

  1. Round 13Ch 1. Sc in each st around. Sl st to first sc. (60 sts)
  2. Round 14Ch 1. Sc in each st around. Sl st to first sc. Fasten off. (60 sts) This creates a clean finished edge at the top of the bag opening.

Hook

9mm or 10mm crochet hook (adjust based on your tension)

Hardware and Notions

1 twist-lock clasp (also called a turn-lock or push-lock closure)

2 D-ring connectors or swivel clasps for the handle 1 gold chain strap, approximately 100 to 120cm 2 metal loops or rings to attach the chain

Tapestry needle with large eye Scissors Stitch markers

Gauge

With 9mm hook and t-shirt yarn in herringbone half double crochet: 8 stitches and 6 rows equals approximately 10cm (4 inches) square. Your gauge may vary slightly based on your yarn brand and tension.

Attaching the Flap

Position the flap along the back top edge of the bag body. Using your tapestry needle and the yarn tail, whip stitch the first row of the flap to the inside of the bag back. Weave in the end securely.

Finishing Touches

Weave in all remaining yarn ends on the inside of the bag. If desired, you can line the interior with fabric for a more polished finish, though this is entirely optional.

Size adjustments

Skip the chain:

If you prefer a simpler look, make a longer twisted rope handle that works as a shoulder strap instead.

Marlene's notes

Note 01

A 9mm or 10mm hook both work here — go down a size if your trapillo yarn is on the thinner side, and up a size if it's thicker, to keep your gauge close to 8 stitches and 6 rows per 10cm.

Note 02

Trapillo and t-shirt yarn vary a lot by brand in thickness and stretch, so your 250 to 300 grams may go a little further or a little less far than expected.

Note 03

Thread your fastened-off tails onto a tapestry needle with a large eye for attaching the flap and the hardware loops, rather than trying to sew with the yarn end alone.

Porch photos

Before you sit down

  • Weigh out your t-shirt yarn or trapillo — you'll want 250 to 300 grams on hand before you start the first round, since running out mid-round means an awkward join.
  • Work a quick swatch in herringbone half double crochet with your 9mm hook: 8 stitches and 6 rows should measure about 10cm (4 inches) square, so you know your tension matches before committing to 60 stitches a round.
  • Place a stitch marker in the first stitch of Round 1 and move it up each round, since the herringbone texture makes the join point easy to lose track of.

How the hours go

Setup Round (bag body)
about 2 to 3 hours, because you're repeating the same herringbone round twelve times to build the full 15cm (6 inch) height.
Shaping the Flap Edge
about 20 to 30 minutes, because it's only two rows worked flat at 19 stitches, but the sl-st edging in Row 10 asks for a steady hand.
Shaping the Top Edge and attaching hardware
about 45 minutes to 1 hour, because two rounds of 60 stitches plus clipping on the clasp, D-rings, and chain strap all happen at the end.

Looking after it

  • Spot clean with a damp cloth and mild soap first, since t-shirt yarn and trapillo are usually cotton jersey and can stretch out of shape if you machine wash and tumble dry the whole bag.
  • Let it air dry fully flat or over a rolled towel to help the herringbone half double crochet hold its structure, and store it stuffed with a towel or tissue paper so the sides keep their rounded shape.
FAQs

Asked on the glider

the ones that come up on the glider

What exactly is trapillo yarn?

Trapillo is yarn made from long strips of recycled t-shirt fabric, which is why it's also called t-shirt yarn. It's thick, soft, and a little stretchy, which gives this bag its chunky hand-knit look.

Can I use a different hook size?

Yes, the pattern is written for a 9mm or 10mm hook, so pick whichever gives you a fabric close to 8 stitches and 6 rows per 10cm. Going smaller makes the stitches tighter and the bag a touch firmer.

How tall will my finished bag be?

After the twelve rounds of the Setup Round, the body should stand about 15cm (6 inches) tall before you add the top edge rounds. Your exact height depends a little on your yarn thickness and tension.

What if I can't find a twist-lock clasp?

A twist-lock, turn-lock, or push-lock closure are all names for the same type of hardware, so any of those will fit. A magnetic snap closure is a reasonable substitute if that's what you have on hand.

How long should the gold chain strap be?

The pattern calls for a chain in the 100 to 120cm range, attached through two metal loops and your D-ring connectors. Pick the shorter end for a crossbody fit and the longer end if you like your bag worn further down.