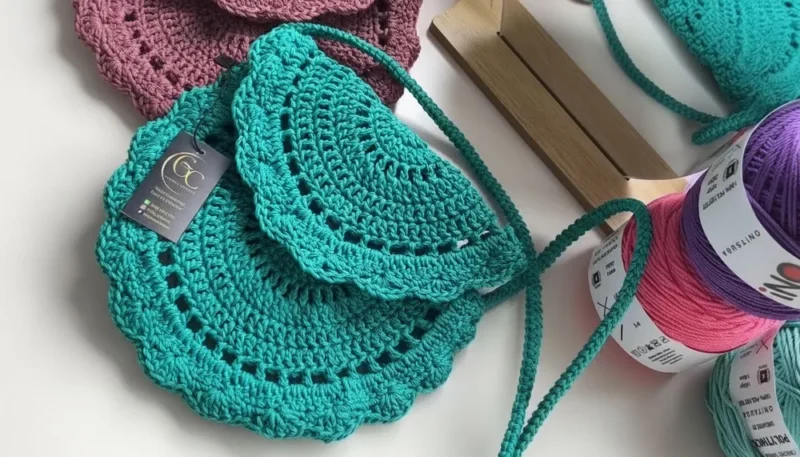
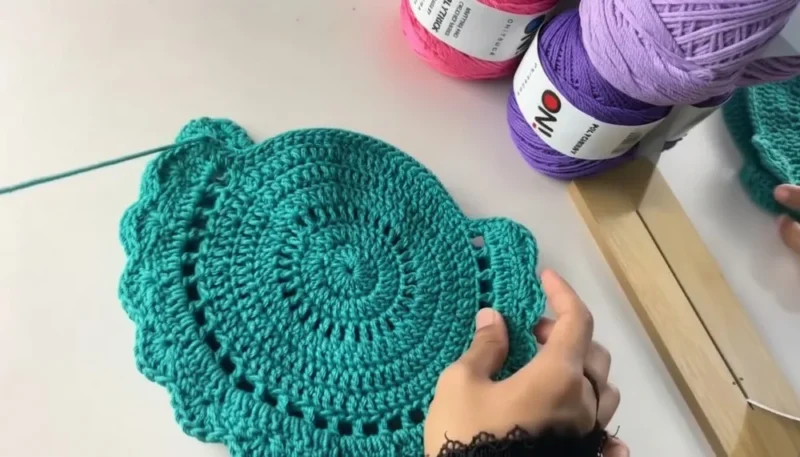
Intermediate 4-6 hours Worsted yarn

Worked on the glider, counted out loud —

Crochet Mandala Bag With a Magnetic Closure

A round mandala bag for confident crocheters, worked flat then joined. Plan on a few evenings, start to finish.

Jump to the rounds

What this one is

This is the bag you make when you want your hands busy and your mind on color instead of the day's noise. It suits the crocheter who already knows their way around a magic ring and isn't afraid of a stitch count that climbs, someone ready to watch a flat mandala grow into something you can actually carry.

Your hands spend most of their time building rounds of double crochet, starting each one in a magic ring and pulling it closed tight before the increases begin. Between the main body and the smaller flap piece worked to Round 7, expect several sittings rather than one long stretch, with the finishing and magnetic button going on at the end.

Try it another way

There's real satisfaction in watching a mandala bloom outward from a single magic ring, each round doubling its promise until you've got a flat, sturdy circle with a clean stitch count you can trust. Working the flap as its own smaller piece, scaled down from the same bag sheets, means you get to repeat the pattern logic you just learned but at a different diameter, which is a good test of whether you really understood the shaping the first time. Reducing to 24 chain spaces on the final flap round is the kind of small, deliberate adjustment that separates a fussy pattern from one that actually fits together, and setting a magnetic button into fabric you built yourself feels like real bag-making, not just a big swatch.

The rounds, in full

Written out, round by round

Intermediate4-6 hours3 mmWorsted

Bring to the porch

Everything this one takes, in the order you will reach for it.

Yarn

  • Polyester thread or medium-weight yarn (choose your preferred color).

Hook Size

  • 3mm (US D/3) for tight and sturdy stitches.

Optional Items

  • Stitch markers (for marking the start of rounds).
  • Tapestry needle (for weaving in ends and sewing parts together).
  • Scissors.
  • Magnetic button (for the bag closure).
  • Lighter (to carefully seal yarn ends when necessary).

Optional Items

Stitch markers (for marking the start of rounds).

Tapestry needle (for weaving in ends and sewing parts together).

Scissors.

Magnetic button (for the bag closure).

Lighter (to carefully seal yarn ends when necessary).

Skill Level Intermediate to Advanced Key Abbreviations (US Terminology)

MR: Magic Ring ch: Chain sc: Single Crochet dc: Double Crochet sl st: Slip Stitch sp: Space st(s): Stitch(es)

Special Notes This bag is worked in the round unless mentioned otherwise.

Use stitch markers to track the beginning of each round if needed.

Be consistent with your tension, especially when working in the round for a flat, even shape.

Each round builds upon the previous one, so ensure accuracy in stitch counts at the end of every round.

Pattern Steps Bag Body – First Sheet

  1. Round 1Start with a Magic Ring (MR) . Ch 2 (counts as the first dc). Make 15 dc into the MR.Pull the ring closed tightly . (Total: 16 dc)
  2. Round 2Skip the slip stitch. Instead, make 1 sc into the 2nd ch of the starting ch-2 .Ch 2 (counts as the first dc).Make 1 dc into the same st where the sc was made.Work 2 dc in each st around (increase in every stitch).(Total: 32 dc)
  3. Round 3Ch 3 (counts as the first dc), then ch 1 . Skip 1 st, then dc into the next st .Ch 1 , dc in the next stitch (skipping the next st).Repeat dc, ch 1, skip 1 st around.Sl st into the 2nd ch of the starting ch-3.(Total: 32 dc + 32 ch spaces)
  4. Round 4Make 1 sc into the first ch sp , followed by ch 2 (counts as the first dc). In the same ch sp , make 1 more dc .Continue: 2 dc in each ch sp around.(Total: 64 dc)
  5. Round 5Ch 2 , then make 1 dc into each st around. (No increases in this round.) (Total: 64 dc)
  6. Round 6Ch 2 , make 1 dc in each of the next 2 sts . In the 4th st, work 2 dc into the same st (increase).Continue: 1 dc in the next 3 sts, 2 dc in the next st around.Sl st to the 2nd ch of the starting ch-2.(Total: 80 dc)
  7. Round 7Ch 4 (counts as 1 dc + ch 2). Skip the next st, then dc into the next st followed by ch 2 .Repeat: Skip 1 st, dc in the next st, ch 2 around.(Total: 40 dc + 40 ch-2 spaces)Rounds 8–9: Repeat the same pattern as Round 7. Ensure the stitch count remains consistent throughout.Second Sheet Create a second sheet identical to the first (Rounds 1–9).

Do not cut the yarn on the second sheet , as it will be used to connect the two sheets .

Connecting the Two Sheets Align the two sheets with the right sides facing out .

Sew or crochet the two pieces together using the back loop of the first sheet and the front loop of the second sheet .

Use a tapestry needle or crochet hook as desired to make a secure join around the edges.

Once you have reached the end, secure your stitches and fasten off.

Bag Flap
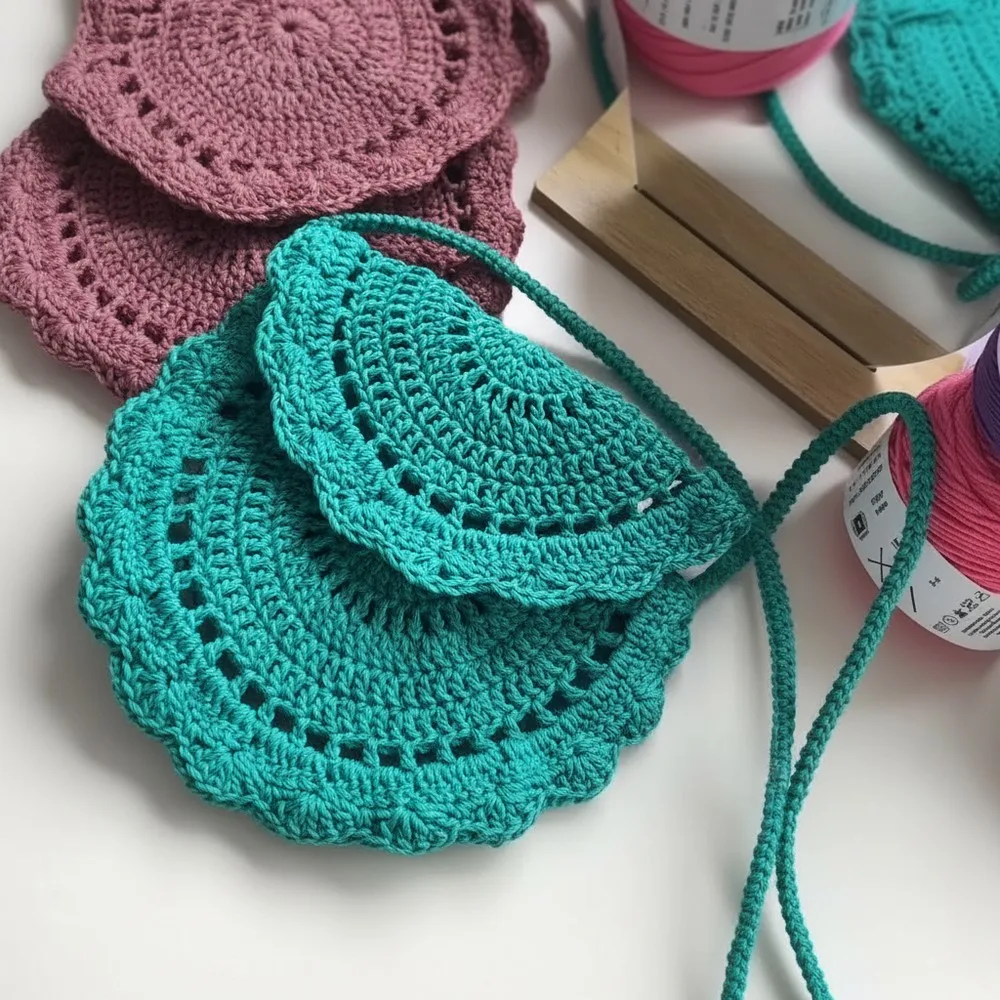
Part 2

  1. Round 1Start with a Magic Ring . Ch 2 , make 13 dc into the MR. Pull the ring closed tightly . (Total: 14 dc).
  2. Round 2Make 1 sc into the first st , followed by ch 2 . Make 2 dc in each st around . (Total: 28 dc).Rounds 3–6: Follow the exact pattern from the bag sheets , scaling down as needed to maintain a smaller diameter for the flap.Round 7: Reduce the number of ch spaces to 24 spaces , maintaining consistency in pattern placement to align with the bag design.

Assembling and Finishing

Marlene's notes

Note 01

Use a 3mm (US D/3) hook throughout and keep your tension snug; a loose gauge will leave the bag floppy instead of sturdy.

Note 02

Mark the start of every round, especially through Rounds 3–6 of Part 2, where you're following the bag sheets at a smaller scale and it's easy to lose your place.

Note 03

Count your stitches at the end of each round before moving on — Round 7's reduction to 24 chain spaces only lines up correctly if your earlier rounds are accurate.

Porch photos

Before you sit down

  • Check how much polyester thread or worsted-weight yarn you have on hand — a mandala this size in multiple colors eats through partial skeins fast, so gather your leftovers before you start.
  • Have your stitch markers ready and put one in place for the very first round; with everything worked in the round, losing track of where a round starts is the easiest way to throw off your count.
  • Read through Part 2's Round 1 and 2 before you pick up your hook, since the jump from 14 dc to 28 dc in one round sets the increase rhythm you'll rely on later.
  • Work up a small test swatch with your 3mm hook first to confirm your tension gives you tight, sturdy stitches — this bag needs to hold its shape, not drape.

How the hours go

Main bag body
about 2-3 hours, because the rounds build up gradually and each one needs an accurate stitch count before you move
Flap (Part 2, Rounds 1-7)
about 1-2 hours, because scaling the pattern down for a smaller diameter takes a bit more attention than the main piece
Assembling and finishing
about 1 hour, because sewing pieces together, weaving in ends, and setting the magnetic button all happen here

Looking after it

  • If you've worked this in polyester thread, hand wash it in cool water with a mild soap and reshape it flat while damp, since polyester holds its form well but can still stretch out of round if hung to dry.
  • Store the finished bag stuffed loosely with a towel or tissue paper to help it keep its circular shape, and keep it away from direct heat if you used a lighter to seal any yarn ends, since those sealed spots can soften again under high heat.
FAQs

Asked on the glider

the ones that come up on the glider

Do I need to know how to work a magic ring before starting this bag?

Yes, both the main body and the flap begin with a magic ring, so it's worth practicing one on scrap yarn first if you haven't used the technique before. Getting the ring pulled closed tightly matters, since a loose center will leave a visible hole at the middle of your mandala.

Is the magnetic button closure required?

No, it's listed as an optional item along with the strap, so you can leave both off if you'd prefer an open-top bag. If you do add the magnetic button, it's worth positioning it after the bag is fully assembled so you can check the placement against the finished shape.

Why does the flap have its own set of rounds separate from the bag body?

The flap, Part 2, is worked as its own smaller piece so it can sit proportionally over the top of the bag rather than being one continuous piece with the body. It follows the same pattern logic as the bag sheets but scales down, finishing with a reduced 24 chain spaces on Round 7 to keep it in proportion.

What hook size does this pattern use?

A 3mm (US D/3) hook is called for throughout, which helps keep the stitches tight and sturdy rather than loose and drapey. This matters more than usual here, since a floppy mandala won't hold its shape as a bag.

Can I use scrap or leftover yarn for this project?

Yes, this is exactly the kind of pattern that welcomes leftover yarn, since the rounds naturally invite color changes as you go. Just be sure whatever fibers or weights you combine feel similar in hand, so your tension stays consistent across the whole bag.

How do I keep track of where each round starts?

Use a stitch marker at the beginning of every round and move it up as you complete each one, since this bag is worked in the round throughout. This becomes especially important during Rounds 3-6 of the flap, where you're following the bag sheets at a smaller, easier-to-lose-count scale.