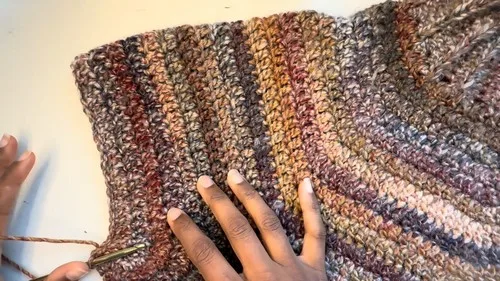
Intermediate 8-10 hours Bulky yarn

Worked on the glider, counted out loud —

Top down seamless sweater you crochet in one piece

A bulky-weight seamless sweater for confident beginners; roughly a weekend of easy rounds, no seaming required.

Jump to the rounds

What this one is

This is the sweater you reach for when the house has gone quiet and you want something warm on your lap that will actually turn into something wearable. It suits anyone who likes working top down, watching a garment take shape without a single seam to sew later, and who doesn't mind a project with a bit of math built in. If you've made a hat or a cowl before, you're ready.

Your hands spend most of the time doing honest, repetitive double crochet, building the yoke round by round until it fits your shoulders, then dividing off for sleeves and letting the body grow straight underneath. There's a stretch of back loop half double crochet for the ribbing that asks for a little patience but no real skill you don't already have. Expect something like a weekend's worth of evenings to get from chain one to a finished sweater.

Try it another way

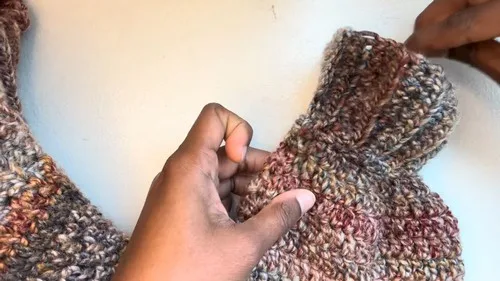
The collar ribbing is worked to a multiple of 5 until it fits your neck, so sizing up or down starts right there -- a longer strip gives you a looser collar, and that same logic carries through the yoke, where you keep increasing until the yoke reaches your shoulder width rather than a fixed round count. That makes this pattern naturally adaptable across sizes without changing a single stitch instruction. For color, try working the Collar Ribbing and Bottom Ribbing in a contrasting shade from the Yoke and Body, since the BLHDC texture reads differently from the plain DC rounds and the contrast highlights that, and you can personalize the whole piece with your favorite yarn colors. If you want a cropped version, stop the Body rounds early and go straight into the Bottom Ribbing once you're happy with the length. Swapping in a different bulky yarn works fine as long as you re-check your gauge swatch, since drape changes a lot between a wool bulky and an acrylic bulky at this weight. You could also make just the Yoke and Collar Ribbing on their own as a cropped shrug if you skip the Divide round's body portion and finish the armholes with a simple ribbed trim instead.
The rounds, in full

Written out, round by round

Intermediate8-10 hours5 mmBulky

Bring to the porch

Everything this one takes, in the order you will reach for it.

  • Bulky weight 5 yarn
  • 5 mm hook
  • Stitch markers
  • Yarn needle
  • Scissors

Collar Ribbing

  1. Round 1Chain 11; HDC in second chain from hook and across.
  2. Round 2Chain 1, turn, BLHDC across.
  3. Round 3Repeat until length fits neck, multiple of 5.
  4. Round 4Slip stitch ends together, turn inside out.

Yoke

  1. Round 1Chain 2, work 2 DC into side of each rib row, slip stitch to join.
  2. Round 2Chain 2, DC in same stitch, DC 9, then 2 DC in next, repeat around, slip stitch to join.
  3. Round 3Chain 2, DC in same stitch, DC 10, then 2 DC in next, repeat around, slip stitch to join.
  4. Round 4Continue increasing one extra DC between increases each round until yoke reaches shoulder width.

Divide for Armholes and Body

  1. Round 1Chain 2, DC in same stitch, DC across first 3 sections; chain 15, skip next 2 sections, slip stitch next to increase line; chain 2, DC in same stitch, DC across next 3 sections; chain 15, slip stitch to first DC to finish round.

Body

  1. Round 1Chain 2, DC in same stitch, DC across body, DC into all 15 chains, DC across, DC into next 15 chains, slip stitch to join.
  2. Round 2DC around until desired length.
  3. Round 3Work decreases before each corner by making 2 DC2TOG over 4 stitches, repeat each side.
  4. Round 4Repeat decrease round until desired shaping.

Bottom Ribbing

  1. Round 1Chain 11; HDC in second chain from hook and across.
  2. Round 2Slip stitch into first body stitch and next 2 stitches.
  3. Round 3Turn, BLHDC across.
  4. Round 4Chain 1, turn, BLHDC, slip stitch 3 times into body, repeat around.
  5. Round 5Slip stitch seam together, fasten off.

Sleeves

Make 2
  1. Round 1Attach yarn to center of 15 chains, chain 2, DC in same stitch, DC evenly around, slip stitch to join.
  2. Round 2Work 2 DC2TOG at two sides for 5 rounds.
  3. Round 3DC around for 21 rounds.
  4. Round 4Work 2 DC2TOG at four points for 2 rounds.
  5. Round 5Next round work DC, DC2TOG around, slip stitch to join.
  6. Round 6Work ribbing same as bottom ribbing.

Putting it together

Step 1

Repeat sleeve on other side.

Step 2

Weave in all ends.

Marlene's notes

Note 01

Place stitch markers at each increase point in the Yoke rounds and keep them moving up as you work, since the Divide round depends on finding those lines again.

Note 02

Tension matters most in the Collar and Bottom Ribbing sections -- work your BLHDC a touch looser than feels natural so the ribbing has stretch rather than pulling tight.

Porch photos

Before you sit down

  • Check your bulky weight yarn quantity against your intended size before you chain the collar ribbing, since the yoke increases will use more yarn than they look like they will.
  • Have your stitch markers ready before the Divide for Armholes and Body round -- you'll want them to mark the increase lines so you don't lose track mid-round.
  • Work a small swatch in HDC and BLHDC with your 5mm hook first to confirm your gauge matches the collar ribbing's fit before you commit to the multiple of 5 length.
  • Read through the Yoke rounds once before starting them, since each round increases by one extra DC between increases and it's easy to lose the pattern if you're working from memory.

How the hours go

Collar Ribbing and Yoke
about 2 hours because the yoke's four rounds of increasing DC take careful counting to keep the shaping even
Divide for Armholes and Body
about 1 hour because the single round of chaining for armholes and realigning stitch markers is fiddly even though it's short
Body, Bottom Ribbing, and two Sleeves
about 5-7 hours because the body and ribbing rounds are quick but each sleeve repeats the same six rounds twice

Looking after it

  • Hand wash your finished sweater in cool water with a gentle detergent, since bulky weight yarn holds a lot of water and machine agitation can felt or distort the BLHDC ribbing.
  • Lay it flat to dry on a towel, easing the Collar Ribbing and Bottom Ribbing back into shape while damp, and store it folded rather than hung so the yoke's increases don't stretch out of shape over time.
FAQs

Asked on the glider

the ones that come up on the glider

Do I need to know how to crochet in the round before starting this sweater?

Yes, since the Yoke, Body, and Sleeves are all worked as joined rounds with a slip stitch. If you've made a hat or cowl in the round before, the techniques here will feel familiar.

How do I know when my collar ribbing is long enough?

Round 3 has you repeat the ribbing row until the length fits comfortably around your neck, in a multiple of 5 rows. Try it on as you go rather than guessing the count ahead of time.

What do the stitch markers actually mark on this pattern?

They're most useful for tracking your increase points through the Yoke rounds and for marking the sections during the Divide for Armholes and Body round. Losing track there makes it hard to find where to chain for the armholes.

Can I make the sleeves a different length than written?

The Sleeves section is worked over 6 rounds per sleeve, and you can lengthen or shorten by adding or removing rounds before finishing. Just repeat the same sleeve instructions a second time for the other arm as the assembly steps note.

Why does the yoke keep adding more DC between increases each round?

This is how the yoke spreads out to fit your shoulders rather than staying a tight tube, with each round adding one extra DC between increase points. You stop increasing once the yoke reaches your shoulder width, which varies from person to person.

Is a 5mm hook with bulky yarn the right pairing for a beginner?

It's a comfortable combination since the bulky weight yarn grows quickly and the stitches are easy to see and count. The main skill to bring is patience through the back loop half double crochet ribbing sections, which take more rounds than the rest of the pattern.