Intermediate 5-7 hours Worsted yarn

Worked on the glider, counted out loud —

Top-down crochet sweater with a textured yoke and elastic hem

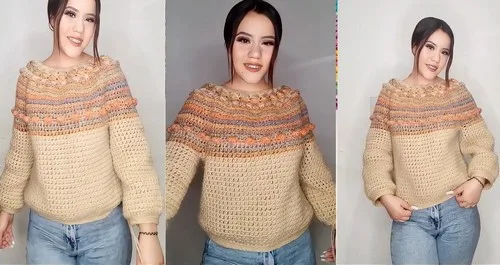
A top-down crochet sweater for confident intermediate crocheters, worked over several sittings for a textured, elastic-hem fit.

Jump to the rounds

What this one is

I make this sweater for the kind of evening when the air turns crisp and you want something on your shoulders that you actually made with your own hands. It's for anyone who likes a top-down build that starts small and grows into something wearable, whether that's you curling up with a book or a friend who mentioned she needed a new cardigan. It works equally well as a weekend project for yourself or a thoughtful handmade gift for someone who appreciates texture and detail.

Your hands spend most of the time working double crochet into chain spaces, watching the round grow from a small neck opening into a full yoke, then dropping into the puff-like stitch and elastic back-loop hem. Expect to work through six rounds just to establish the yoke, then longer, quieter rounds for the body and sleeves. All told, plan on spreading this across several sittings rather than one marathon session, letting the shape reveal itself round by round.
The rounds, in full

Written out, round by round

Intermediate5-7 hours2 mmWorsted

Bring to the porch

Everything this one takes, in the order you will reach for it.

  • 2mm to 3mm yarn
  • 6.5mm crochet hook
  • Scissors
  • Yarn needle
  • Tape measure

Getting Started

Make a slip knot and chain 3.

Double crochet into the first chain.

Chain 2, skip a space, double crochet — repeat until the chain fits comfortably around the head.

For reference, 24 spaces were made.

  1. Round 1Slip stitch to join. Chain 2 (counts as first DC), make 2 DC in the same space. In each space: 3 DC.Slip stitch to close.
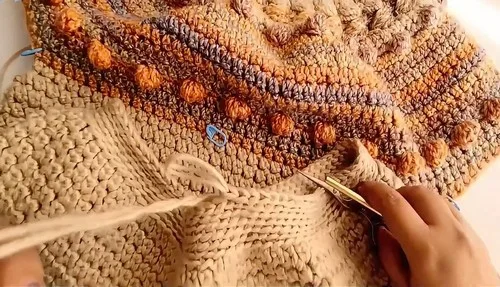
  2. Round 2For Round 2: Change color. Chain 3. Insert hook forward and back through next stitch, pull yarn through center. In next stitch: half double crochet (HDC). Chain 2, HDC in next stitch . Go back to skipped stitch, make 3 DC. Repeat around, slip stitch to join.
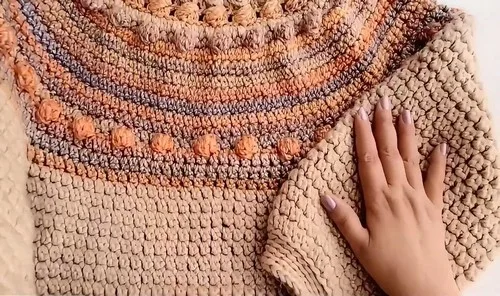
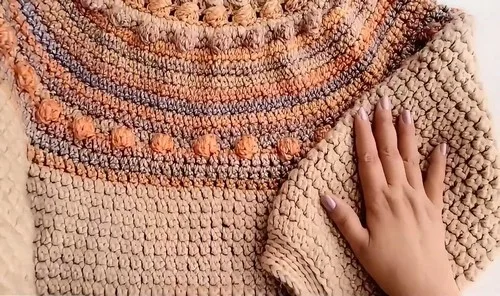
  3. Round 3Chain 1, turn. 1 HDC in next 3 stitches. Puff stitch in next space. Skip next, 3 HDC, puff stitch — repeat.Slip stitch to close and change color.
  4. Round 4Chain 2. Chain 1 in next space, slip stitch to close — repeat. Slip stitch to join.
  5. Round 5For Round 5: Chain 1. 1 SC in same space. 2 SC in next. In next space: 5 DC, close together. 1 SC, 2 SC, 5 DC cluster — repeat around. Slip stitch to join.
  6. Round 6Chain 1. In every second space: chain stitch and close. Repeat around, slip stitch to join.
  7. Round 7Chain 2. Slip stitch in next space — repeat around. Slip stitch to join. For Rounds 8–15: Repeat Round 7 without increasing or decreasing.
  8. Round 16Chain 1. 1 SC in same space. 1 SC in next space. 5 DC cluster in next space. 3 SC in following stitches.Repeat pattern around.Round 17 Onward: Repeat established pattern until the body reaches desired length.

Mark

18 stitches (back)

24 stitches (sleeve)

37 stitches (front)

24 stitches (sleeve)

19 stitches (back)

Join yarn, chain 1.

Crochet across 18 back stitches.

Chain 6, skip 24 sleeve stitches.

Crochet 37 front stitches.

Chain 6, skip 24 sleeve stitches.

Crochet final 19 back stitches.

Slip stitch to join.

Body of the Sweater

Continue crocheting in rounds until desired length is reached.

Example: 19 rounds total.

Bottom Edge

Slip stitch in each space using only the back loop.

Repeat for several rounds to create an elastic hem.

Sleeves

Join yarn to armhole, chain 1.

1 DC in each space around.

Continue in rounds until desired sleeve length is reached (e.g., 22 rounds).

Sleeve Cuffs

Decrease by skipping every 10th stitch.

Make slip stitches in rounds to form an elastic cuff.

Putting it together

Step 1

Fasten off.

Step 2

Weave in all loose ends.

Marlene's notes

Note 01

The 6.5mm hook is much larger than you'd normally pair with 2mm to 3mm yarn, so your fabric will be loose and open by design — don't try to tighten your tension to compensate.

Note 02

Keep your stitch markers in place through the entire Mark section; losing track of where the 18, 24, 37, 24, and 19 stitch groups start is the easiest way to throw off the sleeve division.

Note 03

When you change color for the forward-and-back inserted stitch round, carry or weave in the old color as you go so you're not left with a pile of ends to close up at the end.

Porch photos

Before you sit down

  • Wind off enough of your 2mm to 3mm yarn before you begin — the yoke alone eats up more length than you'd expect once you're past round one.
  • Set aside stitch markers for five sections; you'll need them to hold the back, sleeve, front, sleeve, and back stitch counts (18, 24, 37, 24, 19) apart once you start dividing for sleeves.
  • Work a small swatch with your 6.5mm hook first, since that hook paired with fine 2mm to 3mm yarn creates a specific drape you'll want to test before committing to 24 starting spaces.
  • Read through Round 1 of Getting Started fully before you pick up your hook — the join, chain-2, and 3-DC-per-space sequence sets the pattern for every round after it.

How the hours go

Getting Started
about 1.5 to 2 hours because it covers six rounds plus 22 additional rows building the yoke out from 24 starting spaces
Mark
about 20 to 30 minutes because it's mostly counting and placing markers across five stitch groups rather than active stitching
Bottom Edge
about 45 minutes to an hour because slip-stitching into the back loop only, round after round, is slow, deliberate work

Looking after it

  • Hand wash your finished sweater in cool water and lay it flat on a towel to dry, since the airy 6.5mm-hook fabric can stretch out of shape if you hang it while wet.
  • Store it folded rather than on a hanger, and smooth the bottom edge back into its ribbed curl by hand if it flattens after time in a drawer.
FAQs

Asked on the glider

the ones that come up on the glider

Do I need to know how to change colors mid-round?

Yes, but only once — the pattern calls for a single color change right at the puff-stitch round. Just finish your last stitch in the old color, pull the new one through on the final yarn-over, and carry on.

What is that 'insert hook forward and back' stitch?

It's a puff-style stitch worked by inserting your hook through the front and back of the next stitch and pulling yarn through the center, giving you a raised bump instead of a flat stitch. It sits right after the chain-3 in that round and gives the yoke its textured band.

How many starting chain spaces should I aim for?

The pattern uses 24 spaces around the neck chain as its reference point, made by working double crochet, chain 2, skip a space, and repeating until the chain fits comfortably around the head. Stick close to that number so your later stitch groups of 18, 24, 37, 24, and 19 line up correctly.

Can I skip the stitch markers in the Mark section?

You could try, but with five separate counts to track — 18, 24, 37, 24, and 19 stitches — it's very easy to lose your place. Markers take a few extra minutes and save you from unraveling a full round later.

Is this a good project for a first sweater?

It's rated intermediate mainly because of the raglan-style division into back, sleeve, front, sleeve, and back sections, which asks you to track multiple stitch counts at once. If you're comfortable with double crochet, chain spaces, and reading a stitch count, you can absolutely take this on.