Intermediate 3-4 hours Worsted yarn

Worked on the glider, counted out loud —

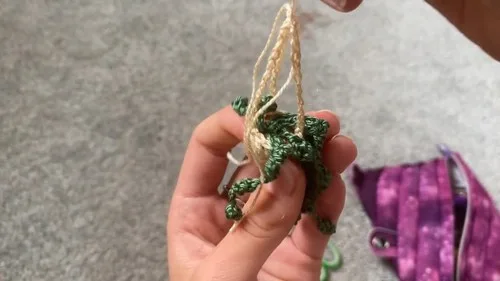
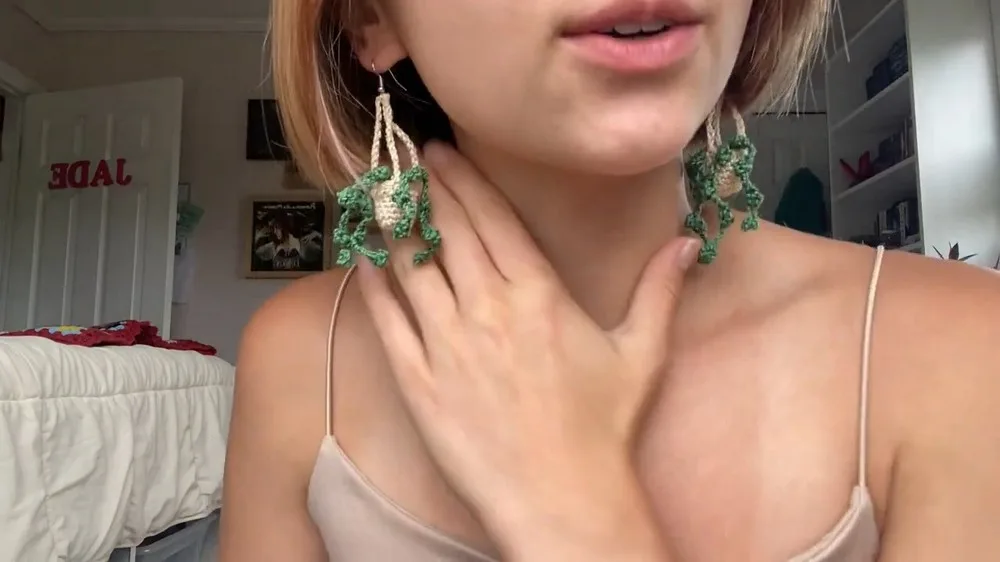
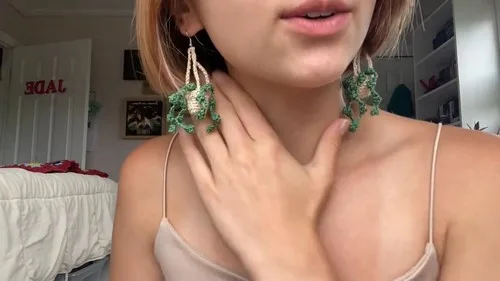
Tiny crochet potted plant for earrings or a keychain

A pocket-size potted plant for earrings or a keychain. Great for an evening project, about 3-4 hours start to finish.

Jump to the rounds

What this one is

You know those little moments when you want to make something that fits in the palm of your hand and still feels like a whole finished thing? This one's for that. It's a sweet little potted plant, scaled down small enough to dangle from an ear or swing from a keychain clip, and it's a good one for a friend who keeps real plants alive better than you do, or for yourself, as a tiny houseplant that never needs water.

Your hands are mostly doing two jobs here: shaping a little pot in rounds of sc that grow and then hold steady, and twisting up small dc bobbles into tendrils that curl like something actually growing. Between the pot, the dirt circle, and three short tendrils, you're looking at a few hours of quiet stitching, the kind you can finish between a pot of tea going cold and the dishes still waiting.

Try it another way

The pot is the easiest place to make this yours, since the materials list leaves its color entirely up to you: try it in terracotta for something classic, or go bold with a color that has nothing to do with real pots at all. If you're making a set, work a few pots in different shades so each earring or keychain reads as its own little plant. The tendrils are where you control how wild or tidy the finished piece looks, the pattern already has you making one with four bobbles, one with three, and one with two, so try arranging the longest one trailing down and the shortest tucked close to the dirt for a natural, uneven look, or sew all three close together for a fuller, bushier plant. You can also connect tendrils at their base before sewing them to the dirt, which bunches them into a single thicker stem instead of three separate sprigs. For use, the same pattern doubles as either an earring (keep it light and skip extra stuffing) or a keychain (stuff it firmly so it holds its shape against keys and pockets). If you're making both, consider two matching pots but swap the dirt-to-tendril ratio so the keychain plant looks a touch fuller than its earring twin.

There's something quietly satisfying about building a whole little scene in miniature: the pot grows from a magic ring through rounds of sc increases, settles into straight rounds, then turns a corner into dc for the rim, all in one piece. The dirt patch is its own small win, a flat sc circle that increases just enough to sit snugly inside. But the real charm is in the bobble tendrils, three dc worked and cinched into one puffed stitch, chained up and repeated into a little climbing vine. Making three tendrils of different lengths, four bobbles, three bobbles, two bobbles, gives you a chance to see the same technique do different work, and watching them take shape into something plant-like out of just chains and bobbles is the kind of small magic that makes miniature crochet worth doing.
The rounds, in full

Written out, round by round

Intermediate3-4 hoursWorsted

Bring to the porch

Everything this one takes, in the order you will reach for it.

  • Brown yarn (for dirt)
  • Green yarn (for plant tendrils)
  • Color of your choice (for basket)
  • Stuffing material
  • Crochet hook, size 2.25 millimeter
  • Stitch marker (or a spare piece of yarn)
  • Needle for sewing

Pot

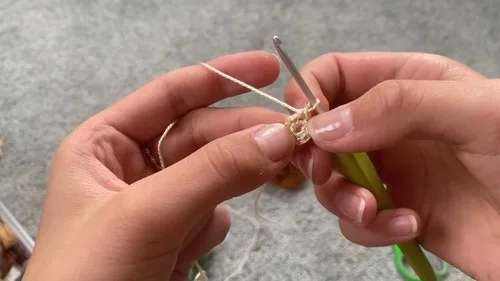
  1. Round 1Start with a magic ring; work 8 sc into the ring; pull the ring closed. (8)Place a stitch marker to mark the end of the round after Round 1.
  2. Round 2Increase in each stitch around (2 sc in each stitch). (16)
  3. Rounds 3–6Work 1 sc in each stitch around, repeat for 4 rounds. (16)Remove the stitch marker and flip the work right side out before starting Round 7.
  4. Round 7Sl st into the next stitch; chain 2 and dc in the same stitch; work 1 dc in each stitch around; join with a sl st to the first dc.
  5. Round 8Chain 14 for the first hanger string, cut the yarn, and pull through.
  6. Round 9Count 5 (or 6) stitches from where you finished and attach yarn and chain 14 again for the second hanger string; cut yarn and pull through.
  7. Round 10Repeat step 13 for the third hanger string: count stitches as before, attach yarn, chain 14, cut the yarn, and pull through.Leave all tail strings on the outside; they will be tucked inside for stuffing later on.

Dirt

  1. Round 1Repeat the magic ring process from the pot; work 8 sc in the magic ring. (8)
  2. Round 2Increase in each stitch. (16 sc)
  3. Round 3Join with a sl st to the next stitch, chain 1 and leave a long tail for sewing.

Plant Tendrils (Bobble Tendrils)

Make 3

Make one tendril with four bobbles, one with three, and one with two.

  1. Round 1Chain 2, work 3 dc into the first stitch, and turn it into a bobble by pulling through the first of the 3 dc.
  2. Round 2Chain 5, then in the second chain from the hook, make another bobble.
  3. Round 3Repeat creating bobbles to the desired length of the tendril.

After completing all bobbles on a tendril, cut yarn and pull through, leaving a tail for sewing if necessary.

Putting it together

Step 1

Hide the tails of the bobbles within the bobbles themselves.

Step 2

Connect tendrils where needed by sewing them together at the base.

Step 3

Sew the plant tendrils onto the dirt patch, spacing them as desired.

Step 4

Insert all tail pieces in the pot and use them as stuffing, with additional stuffing if needed.

Step 5

Sew the dirt patch onto the top of the pot.

Step 6

Before closing the top, ensure it's fully stuffed to give it a nice shape.

Step 7

Tie the strings of the hanger together, cut any excess yarn, and make a knot for hanging.

Step 8

Attach earring hooks to the loop at the top if making them into earrings, or add a jump ring for keychains.

Marlene's notes

Note 01

This pattern works up with a 2.25 mm hook, so keep your tension snug and even, loose stitches will show as gaps in a piece this small.

Note 02

Leave your tail strings on the outside of the pot rather than weaving them in right away; you'll tuck them inside later and use them as part of the stuffing.

Note 03

Make sure the pot is fully stuffed before you close the top so it holds its shape, a half-stuffed pot will look flat and collapsed once it's finished.

Porch photos

Before you sit down

  • Check you've got brown and green yarn on hand plus a color of your choosing for the pot, since this uses three yarn colors total.
  • Set aside a stitch marker (or a spare scrap of yarn) before you start Round 1 of the pot, since you'll need it to track the end of that first round.
  • Read through the Pot instructions for Round 7 ahead of time, since you'll be flipping the work right side out and removing the marker right before working the dc rim.
  • Have your stuffing material within reach before you close up the pot, so you're not stopping mid-round to go hunting for it.

How the hours go

Pot
about 45-60 minutes because it runs 7 rounds including a flip to work the dc rim and a hanger chain
Dirt patch
about 10-15 minutes because it's just 3 short rounds worked flat
Tendrils and assembly
about 1.5-2 hours because you're making 3 separate bobble tendrils of different lengths, then sewing everything together and stuffing

Looking after it

  • Since this is worked in yarn with stuffing inside, hand wash only if needed, gently, in cool water, and never machine wash or tumble dry, both can felt the fiber and distort the shaping.
  • Reshape the pot and tendrils by hand while damp and let the piece air dry fully before wearing or clipping it on, then store it flat or hanging rather than squashed in a bag so the bobbles keep their puff.
FAQs

Asked on the glider

the ones that come up on the glider

Can I make just one for a keychain instead of a pair for earrings?

Yes, the pattern makes one complete pot, dirt patch, and set of three tendrils per project, so a single one is simply a keychain on its own. For earrings you'd repeat the whole thing twice to get a matching pair.

What's the point of flipping the work right side out before Round 7?

The pot is worked so the early rounds sit with the right side facing in, and flipping it before the dc rim brings the finished side out where it'll show. It's a small step but it changes how neat that top rim looks once it's done.

Do the tendrils all need to be the same length?

No, the pattern specifically has you make one tendril with four bobbles, one with three, and one with two, so they're meant to be different lengths. That variation is what gives the finished plant its natural, uneven look.

What do I do with all those tail strings instead of weaving them in?

Leave them on the outside as the pattern directs, then tuck them inside the pot along with your stuffing material before you close the top. It's a neat way to use up what would otherwise be waste yarn.

Is this a good first amigurumi project?

It's better suited to someone who's comfortable with magic rings, sc increases, and basic dc, since the bobble tendrils and the rim shaping ask for a bit of confidence with tension. If you've made a round amigurumi piece before, this one will feel like a natural next step.