Beginner 3-4 hours DK yarn

Worked on the glider, counted out loud —

A Tiny Amigurumi Frog Pattern for Beginners

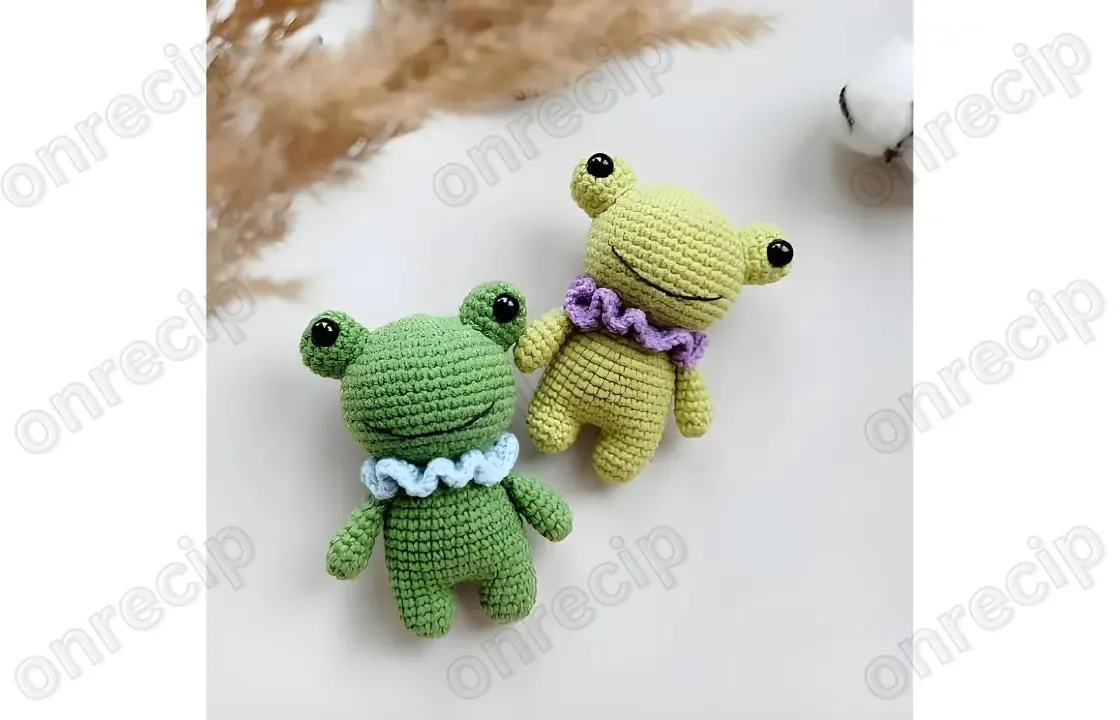
A beginner-friendly amigurumi frog, about 10cm tall, worked in cotton-acrylic yarn in roughly 3 to 4 hours.

Jump to the rounds

What this one is

I made this little frog for the kind of evening when you want to finish something small and whole before bed, a quick, satisfying make for anyone who loves amigurumi but doesn't have a free weekend. It's a lovely first amigurumi if you've only made a ball or two before, and it's just as good for an experienced hooker who wants a palm-sized project to carry in a bag. The legs join right into the body, so you get a taste of real shaping without a long commitment.

Your hands will spend most of the time on single crochet worked in the round, with a handful of increase and decrease rounds to shape the legs, body, and head. You join two legs with a few chains to start the body in one continuous piece, then work steady rounds up to the head before closing with decreases and sewing. All told, this little frog comes together in about 3 to 4 hours, including stuffing and finishing with safety eyes and an embroidered mouth.

Try it another way

What I love about this frog is how much shaping happens in such a small space. You start the legs with simple increase rounds, then join them with a few chains instead of seaming, a neat trick that turns two separate legs into one continuous body round, no sewing required at that step. The head begins the same humble way every amigurumi does, six single crochet into a magic ring, then grows and shrinks again through rounds like R18 and R19, where paired decreases pull the stitches in fast. Because the whole piece finishes around 10cm, every stitch counts, and you can watch the shape appear in your hands within an hour or two.

The rounds, in full

Written out, round by round

Beginner3-4 hours2.25 mmDK

Bring to the porch

Everything this one takes, in the order you will reach for it.

  • for Amigurumi Frog
  • YarnArt Jeans (55 % cotton, 45 % acrylic, 50 g/160 m)
  • 2.25 mm crochet hook
  • 6-7 mm safety eyes
  • Black embroidery floss for a mouth
  • Sewing needle and scissors
  • Fiberfill

Height

  • 10 cm (3.9″)

R 2

  1. Round 1(inc) repeat 6 times [12](12)
  2. Rounds 3–512 sc (3 rows) Fasten off. Crochet the second leg, do not fasten off. Make 3 ch on the second leg and join with the first leg.Continue crocheting the body in the round:
  3. Round 612 sc on the first leg, 3 sc in 3 ch, 12 sc on the second leg, 3 sc in 3 ch (opposite side) [30](30)

R 18

  1. Round 1( 3 sc, dec) repeat 6 times [24](24)
  2. Round 19( 2 sc, dec) repeat 6 times [18] Fasten off and leave a long tail for sewing.

R 1

6 sc in magic ring [6]

Head

Ready to Learn More? Open the next page for Further Guidance!

Pages: 1 2

Marlene's notes

Note 01

Use a 2.25mm hook and keep your tension snug and even, since amigurumi worked this small will show gaps quickly if the stitches sit loose.

Note 02

Stuff as you go rather than waiting until the end, pushing fiberfill firmly into the legs before you join them at R6 so the shape holds once closed.

Note 03

Save your black embroidery floss for the mouth until after stuffing and sewing, so you can center the expression once the head is holding its final shape.

Before you sit down

  • Wind off enough of your cotton-acrylic yarn before starting, since a single 50g/160m ball is sized to cover the whole frog, so check you have a full one on hand.
  • Place a stitch marker at the start of each round; the leg-to-body join around R6 makes it easy to lose your place if you're working from memory alone.
  • Read through R2 to R6 before you pick up your hook, so the leg join with the 3 chains makes sense ahead of time rather than mid-round.
  • Have your 6-7mm safety eyes and fiberfill ready before you close the head, since R19 ends with fastening off and a long tail left for sewing.

How the hours go

Legs and body through R6
about 45 minutes, because you're shaping two legs with increase rounds and then joining them with chains into one 30-stitch body round
Head start at R1
about 10 minutes, because six single crochet into a magic ring works up fast before the real shaping begins
Head shaping and close, R18 to R19
about 30 minutes, because the decrease rounds come quickly one after another and need careful stitch placement to keep the head round

Looking after it

  • Hand wash your frog in cool water with a mild soap, since the cotton-acrylic blend holds its shape best without the agitation of a machine cycle.
  • Let it air dry flat on a towel, gently reshaping the legs and head by hand as it dries, then store it somewhere it won't get squashed so the stuffing stays even.
FAQs

Asked on the glider

the ones that come up on the glider

Can I make this frog bigger than 10cm?

Yes, a larger hook than the 2.25mm called for will loosen your tension and grow the finished frog past 10cm while keeping all the same stitch counts. You can also go up a yarn weight for a chunkier result.

Do I need to join the legs with chains, or can I just sew them together?

The chains at the end of the legs let you continue straight into the body in one continuous round, so skipping them means you'd need to seam the legs separately afterward. It's quicker and neater to follow the chain join as written.

What size safety eyes work best for this frog?

The pattern calls for 6-7mm safety eyes, which suit the small 10cm scale of this frog nicely. Going slightly larger can look sweet too, just test the fit against the head before you snap them in.

Why does the head decrease so quickly at the end?

Rounds R18 and R19 both include decrease stitches worked close together, which is what pulls the head in fast to close it neatly. This is normal for amigurumi heads and just needs a long tail left for sewing afterward.

How much yarn do I actually need?

One 50g/160m ball of the cotton-acrylic blend yarn is sized to cover a frog this small, including the head, body, and legs. Keep a little extra in reserve in case your tension runs looser than average.

Can I skip the embroidered mouth?

You can, though the black floss mouth is what gives the frog its expression against the plain cotton-acrylic body. A simple short stitch or two is all it takes if you want to keep it minimal.