Intermediate 4-6 hours Worsted yarn

Worked on the glider, counted out loud —

Plush mini bunny pattern for a cuddly handmade gift

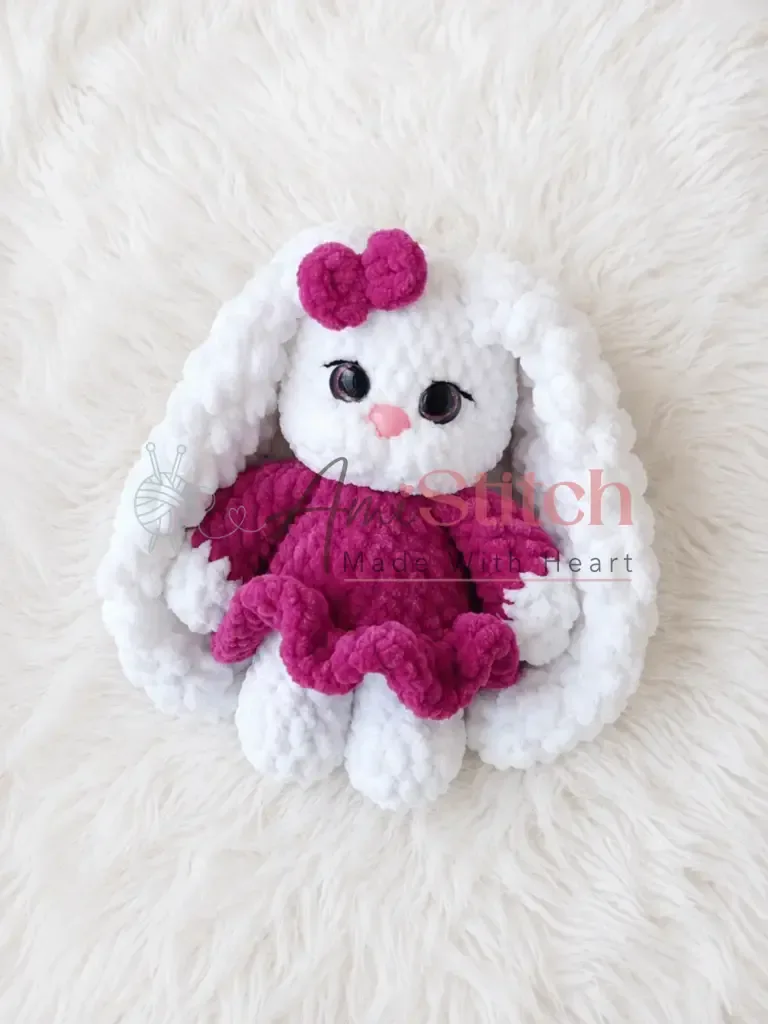
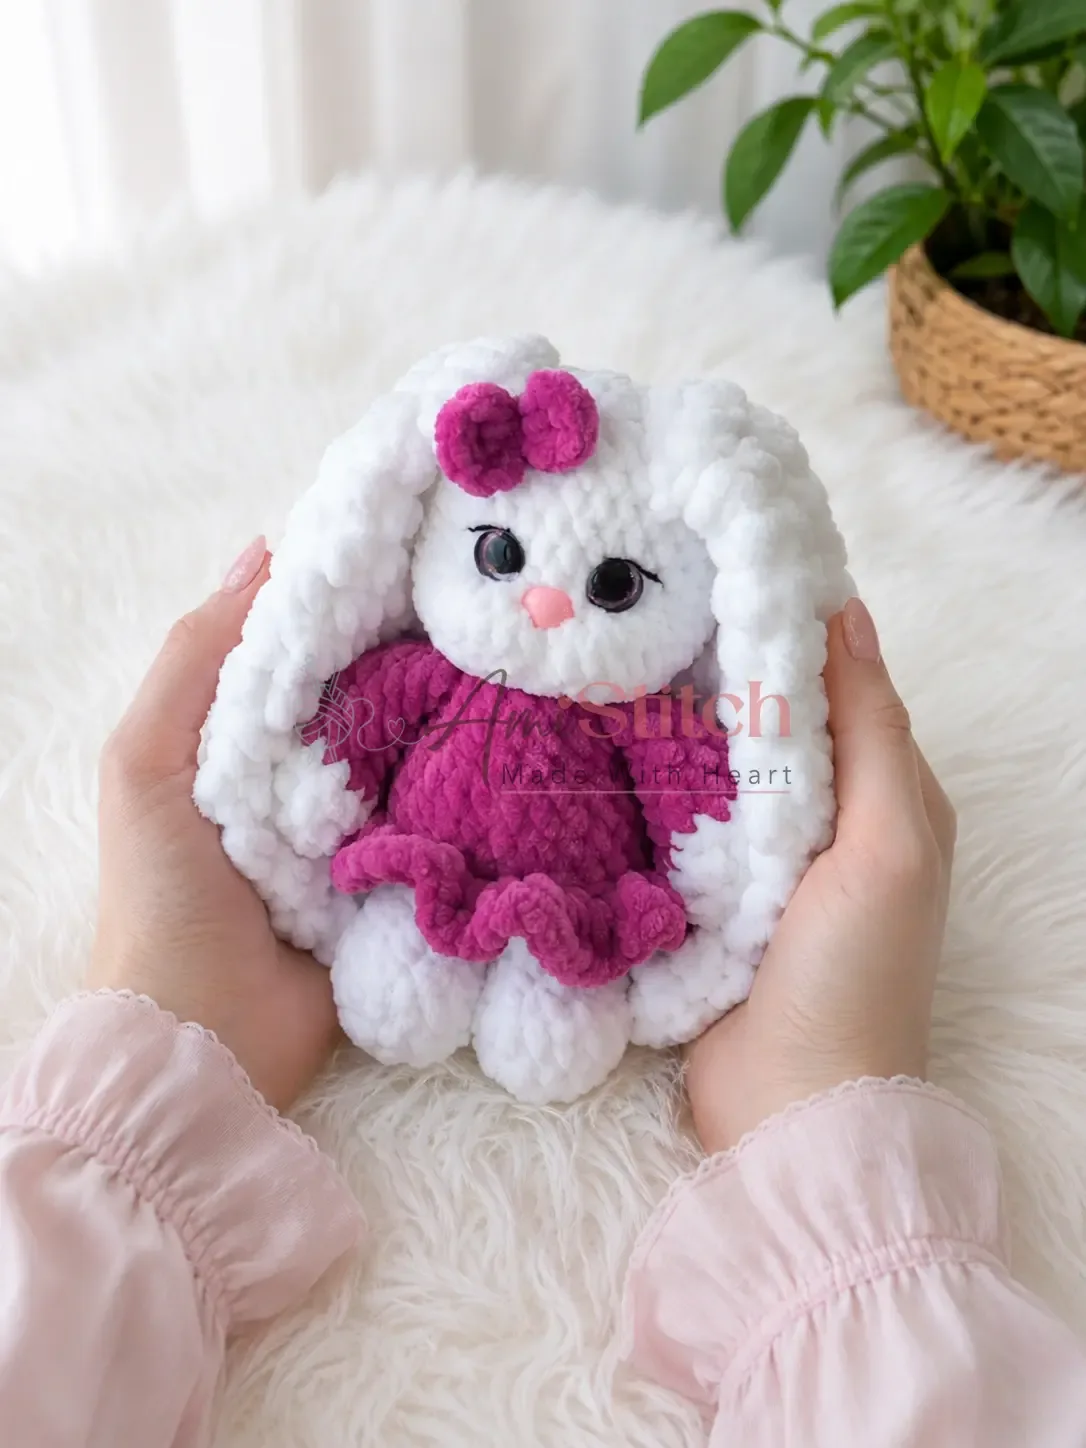
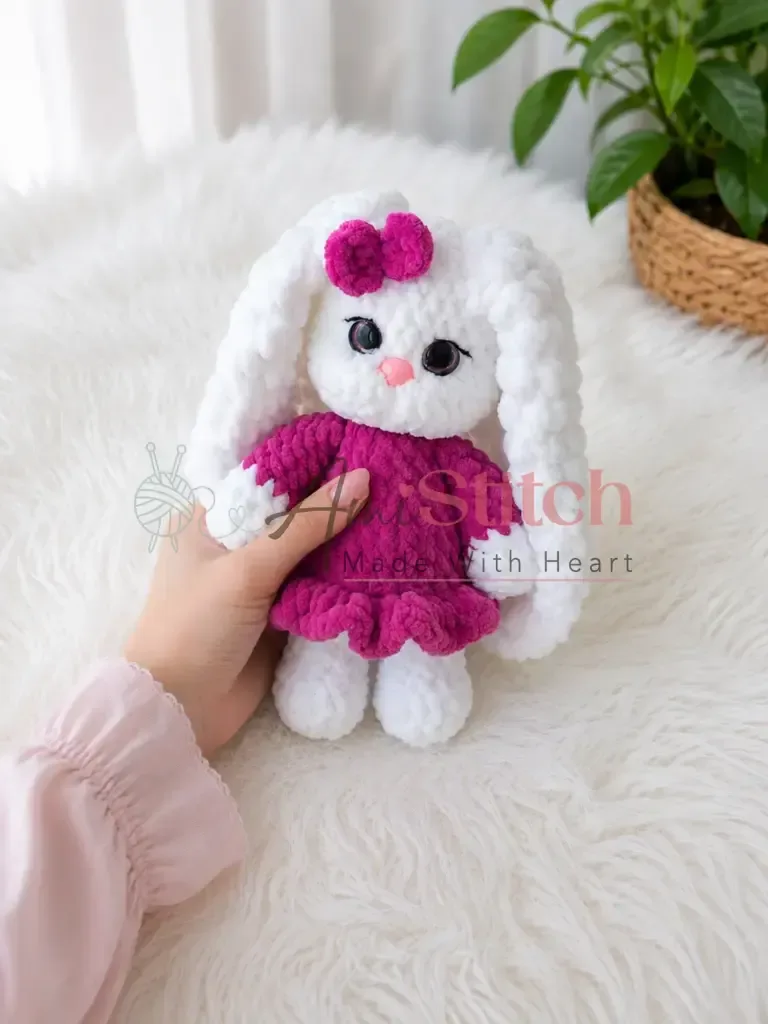
A soft plush bunny with dress and bow, worked in spiral rounds. Suits confident beginners with a free evening or two.

Jump to the rounds

What this one is

You know the kind of gift that gets held onto, not just unwrapped and set aside? That's what you're making here. This little bunny, with her arms, legs, ears, tail, and that small dressed-up skirt and bow, is built for someone who likes things soft and a bit silly. A new baby, a kid who's had a rough week, yourself on a night when you want to make something with its own small face.

Your hands will spend most of the time in continuous spiral rounds, building the body, head, and limbs piece by separate piece before joining them together. There's stuffing to pack in, a face to cinch and shape, a mouth and eyebrows to embroider in black. Expect somewhere around four to six hours total, spread across a sitting or two, with the face work needing your full attention when you get there.

Try it another way

Once you've made this bunny once, there's plenty of room to play. Swap your main plush yarn for a different brand in the same weight if you want a different hand-feel or sheen, and keep the same 4 mm and 7 mm hooks since they're doing the heavy lifting on tension. For the skirt and bow, pick a contrasting color from the body so the little dress pops instead of blending in. If you're making several bunnies as gifts, varying the bow color per bunny is an easy way to tell them apart without changing a single round. You can also leave the skirt off entirely for a plainer, more huggable version, or make the tail in a slightly brighter shade as a small accent since it's only three rounds and barely any extra yarn. If you want a firmer, more durable softie for a child who'll really handle it, stuff the body a touch more than moderate, though keep the legs at their firm stuffing regardless, since that's what gives the bunny her stance. The eyelash and eyebrow embroidery in black is also where you can lighten or soften her expression, just by adjusting how many stitches you take and how long you make them.

There's real satisfaction in a pattern that asks you to build in pieces and then bring them to life at the end. You'll work the arms, legs, tail, and ears separately in tidy spiral rounds, then close the head at round 33 and move into face cinching, which is the part that actually gives this bunny her expression. Embroidering the eyelashes and eyebrows in black yarn afterward is a small, quiet step that changes a stuffed shape into a face. None of the individual rounds are hard, but watching a pile of separate parts turn into one creature who looks back at you is the kind of payoff that makes you want to start a second one.
The rounds, in full

Written out, round by round

Intermediate4-6 hours4 mmWorsted

Bring to the porch

Everything this one takes, in the order you will reach for it.

Main color yarn

  • Plush yarn, approx. 120 m / 100 g (half a skein) — suggested brands: Himalaya Dolphin Baby, YarnArt Dolce, or Wolans Bunny Baby. Have an extra 10–20 g on hand, as tension differences can affect yardage

Contrast color yarn

  • Same plush yarn weight, for the dress and bow

Hook sizes

  • US size G-6 (4 mm) and US size K-10½ (7 mm)

Safety eyes

  • 10–12 mm, 1 pair

Safety nose

  • 12 mm, 1 piece

Stuffing

  • Polyester fiberfill or similar

Strong thread

  • For cinching / shaping the face

Black yarn

  • YarnArt Jeans in black (for embroidered eyelashes and eyebrows)
  • Tapestry needle / yarn needle
  • Scissors
  • Stitch markers

Arms (make 2)

Arms are not stuffed firmly.

  1. Round 15 sc in MR. (5)
  2. Round 2inc in each st around. (10)
  3. Round 34 sc, inc repeat 2 times around. (12)
  4. Round 4sc in each st around. (12)Switch to contrast color yarn.
  5. Round 53 dec, 6 sc. (9)
  6. Rounds 6–9sc in each st around. (9) (4 rounds)(9)
  7. Round 105 sc (partial round), fold the arm in half, then work 4 sc through both layers to close.

Legs (make 2)

  1. Round 15 sc in MR. (5)
  2. Round 2inc in each st around. (10)
  3. Round 31 sc, inc repeat 6 times around. (15) (work into each pair of sts: sc then inc, 6 times)
  4. Round 4sc in each st around. (15)
  5. Round 53 sc, 5 dec, 2 sc. (10)
  6. Rounds 6–8sc in each st around. (10) (3 rounds)On the first leg, fasten off yarn and cut. On the second leg, do not fasten off — continue to the joining round.(10)
  7. Round 9Joining round With the second leg still on your hook, work 1 inc in the current stitch, then sc 9 sts around the second leg. Transfer your hook to the first leg and sc into the stitch that aligns with where you left off (see original diagram for reference), then sc 10 sts around the first leg. You should have 22 sc total in this round. (22)
  8. Round 102 sc, inc repeat 7 times, inc. (30)Switch to contrast color yarn.
  9. Round 11sc in each st around. (30)
  10. Round 12sc in back loop only in each st around. (30)
  11. Round 133 sc, dec repeat 6 times around. (24)
  12. Round 14sc in each st around. (24)
  13. Round 152 sc, dec repeat 6 times around. (18)
  14. Rounds 16–17sc in each st around. (18) (2 rounds)(18)
  15. Round 184 sc, attach Right Arm over next 4 sts (working 4 sc through both the body and the arm simultaneously), 5 sc, attach Left Arm over next 4 sts (working 4 sc through both the body and the arm simultaneously), 1 sc. (18)
  16. Round 191 sc, dec repeat 6 times around. (12)Switch to main color yarn.

Tail

  1. Round 16 sc in MR. (6)
  2. Round 21 sc, inc repeat 3 times around. (9)
  3. Round 34 dec, sl st. Leave a yarn tail for sewing on.

Ears (make 2)

Work with the larger K-10½ (7 mm) hook.

  1. Round 16 sc in MR. (6)
  2. Round 2inc in each st using hdc. (12) (6 hdc increases)(6)
  3. Round 31 hdc, inc repeat 6 times around. (18)
  4. Rounds 4–8hdc in each st around. (18) (5 rounds)(18)
  5. Round 91 hdc, dec repeat 6 times around. (12)
  6. Rounds 10–12hdc in each st around. (12) (3 rounds)(12)
  7. Round 131 hdc, dec repeat 4 times around. (8)
  8. Rounds 14–15hdc in each st around. (8) (2 rounds)Leave a yarn tail for sewing.

Head (continued from body)

Pick up where you left off at Round 19 of the body.

  1. Round 20inc in each st around. (24)
  2. Round 213 sc, inc repeat 6 times around. (30)
  3. Round 224 sc, inc repeat 6 times around. (36)
  4. Round 23sc in each st around. (36)
  5. Round 2416 sc, 3 dec, 8 sc. (30) The decreases run along the front, dividing the muzzle area into two sections.Stuff firmly with fiberfill. Insert the safety nose between Rounds 24 and 25, between the 3rd and 4th decrease of Round 24. Insert safety eyes between Rounds 26 and 27, with 4 sc between them.
  6. Rounds 25–29sc in each st around. (30) (5 rounds)(30)
  7. Round 303 sc, dec repeat 6 times around. (24)
  8. Round 312 sc, dec repeat 6 times around. (18)
  9. Round 321 sc, dec repeat 6 times around. (12)
  10. Round 336 dec around, then pull the opening closed, secure the yarn, and weave in the end.

Skirt

Before continuing with the head, work the skirt separately.

Join contrast color yarn into the front loops of Round 12. Work 30 sc across all front loops of Round 12. In the next (second) skirt round, work 30 dc , placing one dc in each st (1 inc per st = 30 dc increases). Fasten off and weave in ends.

Face Cinching (shaping the eye area)

Using a strong thread and a needle, shape the eye area as follows:

Insert the needle at the midpoint between Rounds 19 and 20 (Point 0) and bring it out at the outer edge of the left eye (Point A). Then insert at the inner edge of the left eye (Point B) and bring out at Point 0, offset by 1 sc.

Insert at Point 0 and bring out at the outer edge of the right eye (Point C). Insert at the inner edge of the right eye (Point D) and bring out at Point 0. Repeat both steps twice if needed for a deeper set.

Insert from Point 0 and bring out at Point 1 (directly below), then back to Point 0.

Insert at Point 0, bring out at Point A, then insert at Point C and bring back out at Point 0.

Pull gently but firmly at each step to create the characteristic eye-socket shaping. Secure all thread ends invisibly.

Mouth

Embroider the mouth using 2 ch stitches and sew in place at the center of the muzzle.

Bow

Make 1 ch, but do not tighten it all the way — leave it as a loose loop.

Chain 2 more.

Yarn over and work 1 dc into the first ch (the loose loop).

Repeat Step 3 once more (2 dc total in the first ch).

Chain 2 and sl st into the first ch (the loose loop).

Chain 2 more.

Yarn over and work 1 dc into the first ch again.

Repeat Step 7 once more (2 dc total for this wing).

Chain 2 and sl st into the first ch.

Fasten off. Wrap the yarn tail around the center of the bow several times to cinch it in.

Secure the wrap with a knot, then sew the bow onto the head.

Putting it together

Step 1

Stuff the legs firmly before joining, and the body moderately after joining the legs and arms.

Step 2

Close the head at Round 33 and ensure it is well stuffed before pulling closed.

Step 3

Sew the ears onto the top of the head, positioning them symmetrically. Use the yarn tails and a tapestry needle with a whipstitch or mattress stitch for a secure seam.

Step 4

Sew the tail onto the back center of the body, using the yarn tail left after Round 3 of the tail.

Step 5

Embroider the eyelashes and eyebrows using black YarnArt Jeans yarn, stitching directly onto the face above and at the outer corners of the safety eyes.

Step 6

Sew the bow onto the head, centered between the ears or slightly off to one side.

Step 7

Weave in all remaining ends securely.

Marlene's notes

Note 01

This pattern is worked entirely in continuous spiral rounds, so keep a stitch marker at the start of every round or you'll lose track fast, especially on the sixteen-round legs.

Note 02

Legs need firm stuffing before you join them to the body, while the body itself only wants moderate stuffing once the legs and arms are attached.

Note 03

Keep your gauge tight enough that the fiberfill doesn't peek through the stitches, and drop to the smaller G-6 hook if your fabric feels loose or gappy.

Note 04

This pattern is written in US crochet terminology.

Porch photos

Before you sit down

  • Check you have your full plush yarn amount plus that extra 10-20 g on hand, since plush yarn tension varies more than you'd expect.
  • Set out your two hook sizes, the G-6 (4 mm) and K-10½ (7 mm), so you're not hunting for the right one mid-round.
  • Have a stitch marker ready before Round 1 of the body, since everything here is worked in a continuous spiral with no joining.
  • Read through the Head section once before you start, especially the note about closing at Round 33, so you know what's coming while you stuff.

How the hours go

Limbs and tail (arms, legs, tail)
about 1-1.5 hours because the legs alone run sixteen rounds plus firm stuffing before joining
Head, ears, and body assembly
about 1.5-2 hours because the head's ten rounds include closing at Round 33 and careful stuffing beforehand
Face cinching, mouth, and embroidery
about 1-1.5 hours because shaping the eye area and embroidering eyelashes and eyebrows by hand takes a slow, steady touch

Looking after it

  • Hand wash in cool water with a gentle soap, since plush yarn like this tends to hold onto odors if machine washed on a regular cycle, then press out excess water in a towel rather than wringing.
  • Lay flat to dry and reshape the ears and limbs gently with your fingers while damp, then store the finished bunny somewhere dry and out of direct sun so the plush fiber keeps its loft.
FAQs

Asked on the glider

the ones that come up on the glider

Can I use a different plush yarn than the suggested brands?

Yes, any plush yarn that gives you about 120 m per 100 g will work fine. Just keep the extra 10-20 g buffer on hand since plush yarns vary in how much yardage they actually use up.

Why do I need two different hook sizes?

The G-6 (4 mm) and K-10½ (7 mm) hooks are used for different parts of the pattern to control tension and fabric density. Keep both within reach so you're not stopping mid-round to search for the right one.

How firmly should I stuff the bunny?

The legs need firm stuffing before you join them, but the body only wants moderate stuffing once the legs and arms are attached. The arms themselves are deliberately left not stuffed firmly, so don't overpack them.

What happens at Round 33 of the head?

That's where you close the head, and the pattern notes you should make sure it's well stuffed before pulling it closed. It's worth reading that section once before you get there so you're not improvising.

Do I need to join rounds as I go?

No, the body, head, and limbs are all worked in a continuous spiral, so you should not join rounds unless specifically instructed. A stitch marker at the start of each round is how you'll keep track of where you are.

What's the black yarn for?

The YarnArt Jeans in black is used afterward for embroidering the eyelashes and eyebrows, which is what gives the bunny her expression. It's a small amount, worked in after the face cinching and mouth steps are done.