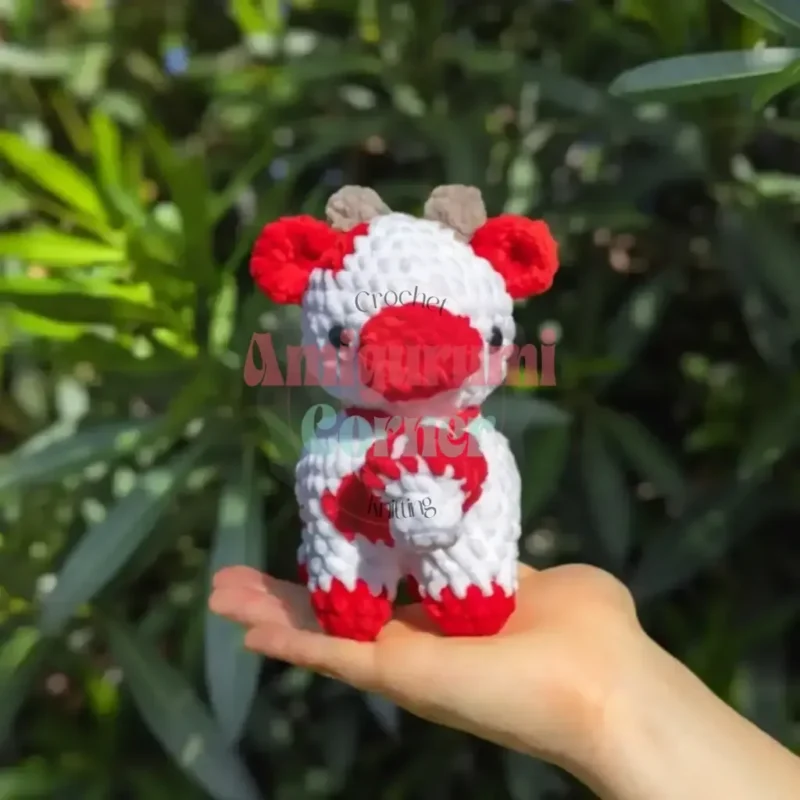
Intermediate 4-6 hours Chunky yarn

Worked on the glider, counted out loud —

Amigurumi cow pattern with strawberry and mushroom accessories

A chunky-yarn cow amigurumi with a strawberry or mushroom hat option, good for confident beginners in about 4-6 hours.

Jump to the rounds

What this one is

I made this cow for anyone who wants a soft toy with real character, not just a round ball with ears stuck on. Picture it on a quiet evening, pulled out for a baby shower gift, a nursery shelf, or just a cheerful thing to prop on your desk. You get sturdy standing legs, a patch of whatever secondary color you like best, and then — because one cow is never quite enough — a strawberry or mushroom hat to dress her up however you please.

Your hands spend most of their time in plain single crochet, working in a spiral through a 13-round body and a 10-round head, with the safety eyes set in early so the face has somewhere to look before the stuffing goes in. The four legs come together fast at just 4 rounds each, and the chosen accessory adds only 6 more rounds. All told, this is a project you can carry start to finish in roughly 4 to 6 hours, depending how fussy you get with the embroidered details.

Try it another way

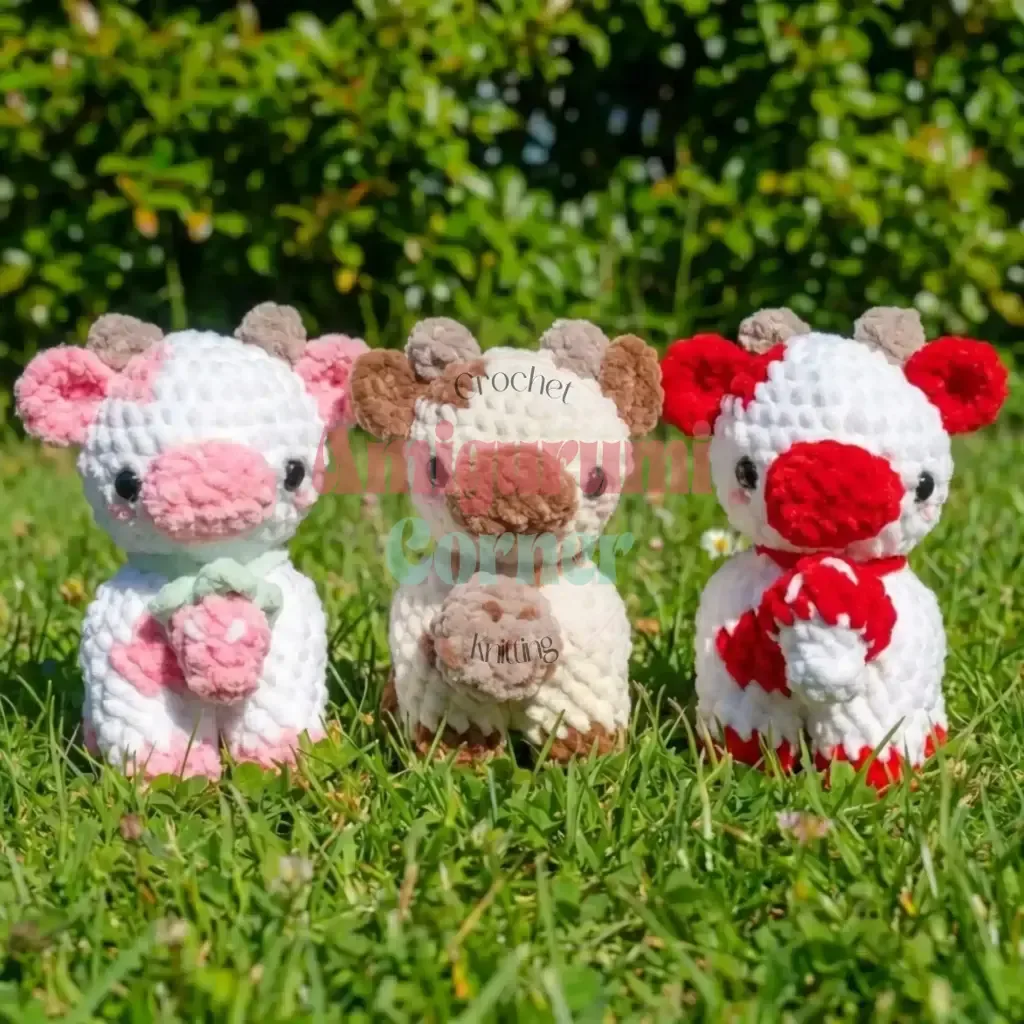
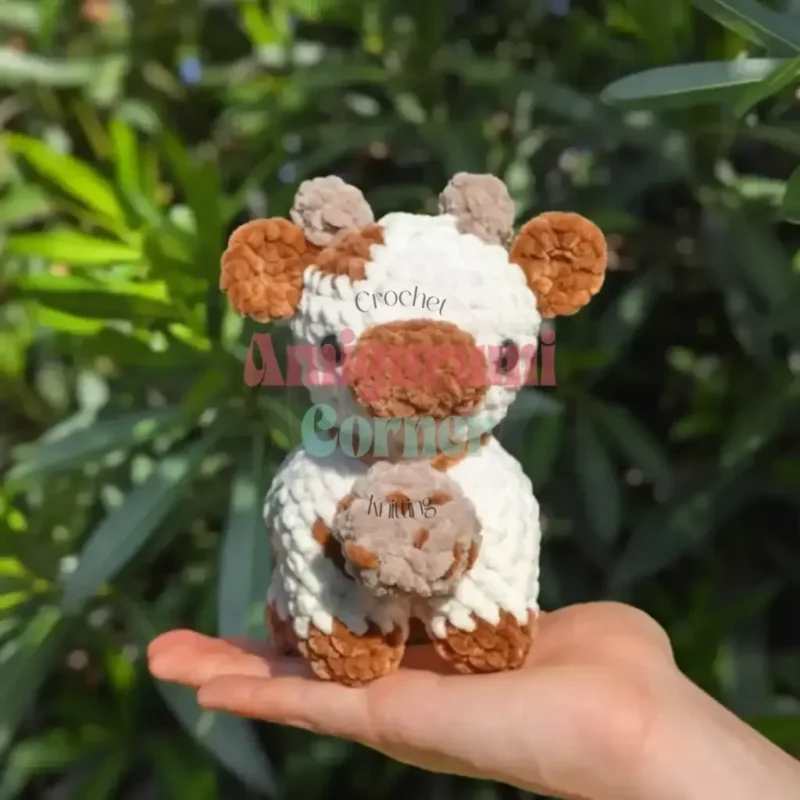
The easiest swap is the accessory itself: make the strawberry for something sweeter, the mushroom for something a bit more woodland, or make one of each if you've got the yarn for two 6-round projects. Your choice of Color B changes the whole personality of the piece too, since pink, red, and brown all read completely differently against the cream Color A body and head. If you want a smaller cow for a bag charm or a bigger one for a nursery shelf, try stepping down or up a hook size and yarn weight together, keeping the same round counts from Legs through Horns so the proportions still match. You can also play with where the patches land, since the pattern already builds them into specific rounds of the body and head, so moving Color B to start a round or two earlier or later shifts the patch without changing any stitch counts. For gifting, skip the blush and embroidered details listed as optional in the materials, or lean into them with black yarn for freckles and pink for the blush if you want her looking a little shyer.

The real pleasure here is the 'sc with leg' join on round 3 of the body, where you crochet through an inside stitch of each leg and a body stitch at the same time, and four floppy legs suddenly become one sturdy standing cow with no separate sewing marathon after. The head's inc shaping, climbing from 6 stitches in the magic ring up through 12, 18, and 24, gives you that rounded calf face without a single fiddly short row. Swapping in Color B for the body and head patches keeps your fingers busy without getting technical, just carrying a second color and reading where it starts each round. And choosing between strawberry and mushroom at the end lets you practice the same clean amigurumi shaping twice, in miniature, before the project is even finished.
The rounds, in full

Written out, round by round

Intermediate4-6 hours5 mmChunky

Bring to the porch

Everything this one takes, in the order you will reach for it.

To create your adorable cow, gather the following supplies

  • 5mm crochet hook
  • Chunky yarn in cream/white (Color A) and your choice of secondary color for patches (Color B: pink, red, or brown)
  • Polyester stuffing
  • 12mm safety eyes
  • Yarn needle
  • Scissors
  • Stitch marker
  • Black yarn for embroidered details (optional)
  • Pink yarn for blush details (optional)

Legs (Make 4)

Starting in Color B:

Step by step: Starting in Color B:.

Step by step: Starting in Toffee:.

Step by step: Starting in Toffee:.

  1. Round 15sc in mr (5)
  2. Round 25 inc (10)
  3. Round 3SC round (10)Switch to Color A:
  4. Rounds 4–5SC for 2 rounds (10)Step by step: (sc, inc) x 6 (18).Step by step: Finish off, leaving tail for sewing.Finish off. Leave a tail for sewing or use the body tail later to close gaps between legs and body.

Body

Starting in Color A:

  1. Round 18 sc in mr (8)
  2. Round 28 inc (16)
  3. Round 32 sc with leg, 3sc, 2 sc with leg, sc, 2 sc with leg, 3sc, 2 sc with leg, sc (40)

Note: “sc with leg” means crocheting through both an inside stitch of the leg and a body stitch simultaneously. Regular “sc” goes into body only.

  1. Round 48sc, 3inc, 17sc, 3inc, 9sc (46)
  2. Round 5sc in A, 3sc in B, 6sc in A, 3sc in B, 11sc in A, 3sc in B, 7sc in A, 3sc in B, 9sc in A (46)
  3. Round 6sc in A, 4sc in B, 5sc in A, 4sc in B, 10sc in A, 4sc in B, 6sc in A, 4sc in B, 8sc in A (46)
  4. Round 7sc in A, 3sc in B, 6sc in A, 3sc in B, (8sc, dec, sc) in A, 3sc in B, 7sc in A, 3sc in B, (7sc, dec) in A (44)Continue in Color A. Add stuffing to legs and some of the body.
  5. Round 810sc, 2dec, 8sc, dec, 8sc, 2dec, 6sc, dec (38)
  6. Round 94sc, dec, 3sc, dec, sc, dec, 2sc, dec, 5sc, dec, 2sc, dec, sc, dec, 3sc, dec, sc (30)

Tip: Work decreases into front loops only in the next few rounds to prevent gaps (invisible decrease method).

  1. Round 10(3sc, dec) x 6 (24)
  2. Round 11(2sc, dec) x 6 (18)Finish stuffing.
  3. Round 12(sc, dec) x 6 (12)
  4. Round 136 dec (6)Step by step: Finish off and sew shut. Weave in tail.

Use brown yarn to embroider “chocolate chips” into the cookie, then leave a long tail from that yarn to wrap around the cow’s neck later.

Finish off and sew shut. If you haven’t sewn up the holes between legs and body, leave a tail and do so now.

Head

Starting in Color A:

  1. Round 16sc in mr (6)
  2. Round 26 inc (12)
  3. Round 3(sc, inc) in B, (sc, inc) x 5 in A (18)
  4. Round 4(2sc, inc) in B, (2sc, inc) x 5 in A (24)
  5. Round 5(3sc, inc) in B, (3sc, inc) x 5 in A (30)Continue in Color A:
  6. Rounds 6–9SC for 4 rounds (30)
  7. Round 10(3sc, dec) x 6 (24)
  8. Round 11(2sc, dec) x 6 (18)Insert safety eyes between R8 and R9, positioning the left eye directly below the end of the patch. Eyes should be approximately 7-8 stitches apart.
  9. Round 12(sc, dec) x 6 (12)
  10. Round 136 dec (6)Finish off and sew shut. Leave a long tail for attaching the head to the body.

Strawberry

Starting in Pink:

  1. Round 16sc in mr (6)
  2. Round 2SC round (6)
  3. Round 3(sc, inc) x 3 (9)
  4. Round 4SC round (9)
  5. Round 5(sc, dec) x 3 (6)Switch to green:
  6. Round 6FLO ((slst, 2ch, inc in 1st ch, slst back into same stitch) in one stitch, slst in next stitch) x 3

Mushroom

Starting in White:

  1. Round 16sc in mr (6)
  2. Rounds 2–3SC for 2 rounds (6)
  3. Round 46 inc (12)Switch to red:
  4. Rounds 5–6SC for 2 rounds (12)
  5. Round 7(sc, dec) x 4 (8)
  6. Round 84 dec (4)Finish off and sew shut. Leave long tail to wrap around cow’s neck.

Use white yarn to embroider lines on the red part of the mushroom.

Snout

Starting in Color B: R1: 6ch

  1. Round 24sc, 3sc into last chain, (continue round other side of chain) 4sc, 3sc into one stitch (14)
  2. Round 3SC round (14)Finish off, leaving tail for sewing.

Tail

In Color B: Make a slip knot, then slip stitch into the back of the cow. Chain 6, then sc back down the chains, and slip stitch back into the same stitch as the first slip stitch. Hide the tails in the body (double knotting them together is recommended).

Putting it together

Step 1

Follow these steps to bring your cow to life:

Step 2

Attach the snout: Sew the snout onto the head between the eyes. Position the top of the snout between R7 and R8, and the bottom between R10 and R11. Add stuffing as you sew.

Step 3

Attach the ears: Sew the ears between R5-7 of the head. The left ear should be positioned just behind the patch on the head.

Step 4

Attach the horns: Sew the horns just between and behind the ears on the top of the head.

Step 5

Attach the head to body: Sew the head onto the body. The front of the head should lean over the front of the body slightly—approximately R10 of the body should attach to R13 of the head at the very front. Sew around the head multiple times to ensure it’s secure.

Step 6

Add the accessory: Use the yarn tail from your chosen accessory to wrap it around the cow’s neck. Sew the end of the tail back into the accessory so it’s secure and won’t come off.

Step 7

Optional embellishments: Use thin black yarn to embroider a smile on the cow’s snout, and pink chunky yarn to add blush in the stitch below and beside the cow’s eyes.

Marlene's notes

Note 01

Use the 5mm hook from the materials list and keep your tension snug, since a looser gauge lets stuffing peek through the bigger stitches that chunky yarn naturally makes.

Note 02

Move your stitch marker up at the end of every single round rather than leaving it put, since there's no round break to catch a miscount otherwise.

Note 03

Add stuffing as you sew the snout and head together rather than stuffing everything first, so the face keeps its shape instead of going lumpy or flat.

Porch photos

Before you sit down

  • Check you have enough chunky yarn in both Color A and your chosen Color B, plus a little extra for whichever accessory (strawberry or mushroom) you've picked.
  • Have your 12mm safety eyes within reach before you finish the head rounds, since they get set in early while the piece is still open and easy to work inside.
  • Place a stitch marker at the start of round 1 and plan to move it up every round, since the whole cow works in a continuous spiral with no true round break.
  • Read through round 3 of the Body before you start it, since the 'sc with leg' join is the one tricky moment where two pieces come together at once.

How the hours go

Legs and Body
about 1.5 to 2 hours because you're working 4 separate leg pieces at 4 rounds each, then the 13-round body with the fiddly sc-with-leg join on round 3
Head, Snout, Ears, and Horns
about 1.5 hours because the head's 10 rounds plus two small ears and two horns all need careful placement before you stitch them into place
Accessory and Assembly
about 1 to 2 hours because the strawberry or mushroom, at 6 rounds each, still needs stuffing and sewing on top of the full 7-step assembly for the cow itself

Looking after it

  • Hand wash the finished cow in cool water with a mild soap, since chunky yarn can felt or shrink if it goes through a machine wash, then press out the water gently rather than wringing it.
  • Lay it flat to air dry away from direct heat, and reshape the ears, horns, and any patches with your fingers while still damp so everything dries sitting the way you stitched it.
FAQs

Asked on the glider

the ones that come up on the glider

Can I make both the strawberry and the mushroom accessory?

Yes, there's nothing stopping you from working both, since each one is only 6 rounds on its own. Just plan for a bit of extra yarn and time beyond the roughly 4 to 6 hours for the base cow.

What yarn weight does this pattern use?

The materials list calls for chunky yarn throughout, both for Color A and your chosen Color B. That weight is what gives the finished cow its soft, rounded look with fairly few rounds overall.

Does the patch color have to be pink, red, or brown?

Those three are just the suggested options for Color B. Any secondary color will work the same way in the pattern, since it's simply carried in for the patches on the body and head.

How exactly do the legs attach to the body?

round 3 of the Body, you work certain stitches as 'sc with leg,' crocheting through both an inside stitch of a leg and a body stitch at the same time. That single round is what joins all four legs to the body without any extra sewing step.

When do I put in the safety eyes?

The eyes go in during the head rounds, while the piece is still open enough to reach inside and fasten the backs. It's much easier to set them before you start closing up and stuffing.

Is this a good pattern for a confident beginner?

If you've already made a basic amigurumi ball shape and know your increases, you should be fine here, since most of the work is plain single crochet in a spiral. The one new skill is the sc-with-leg join on the body, which just takes reading the round carefully the first time through.