Intermediate 4-6 hours DK yarn

Worked on the glider, counted out loud —

Textured V-Stitch Crochet Sweater From One Skein

An intermediate V-stitch sweater from 100g of yarn, ribbed cuffs and all, worked in about 4-6 hours.

Jump to the rounds

What this one is

You know that stretch of the year when a plain tee feels like too little and a heavy sweater feels like too much. This one sits right in the middle. It's for you if you want something with a bit of texture and structure but still light enough to wear under a jacket or on its own, cotton-alpaca blend keeping it soft against the skin without any bulk.

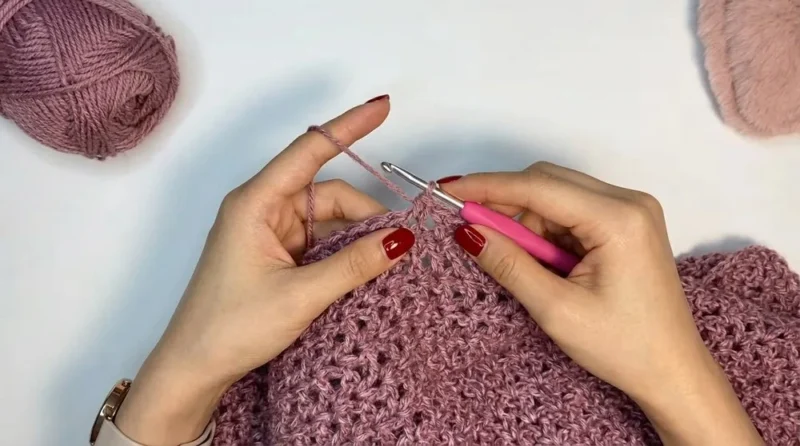
Your hands spend most of the time on two rhythms here: the tight, even sc of the ribbing, then the open, breathing V-stitch of the body. You'll swap hooks partway through, dropping from the 4mm to the 3.5mm, which changes the whole feel of the fabric under your fingers. Give yourself somewhere between four and six hours, worked in whatever pockets of time you've got.

Try it another way

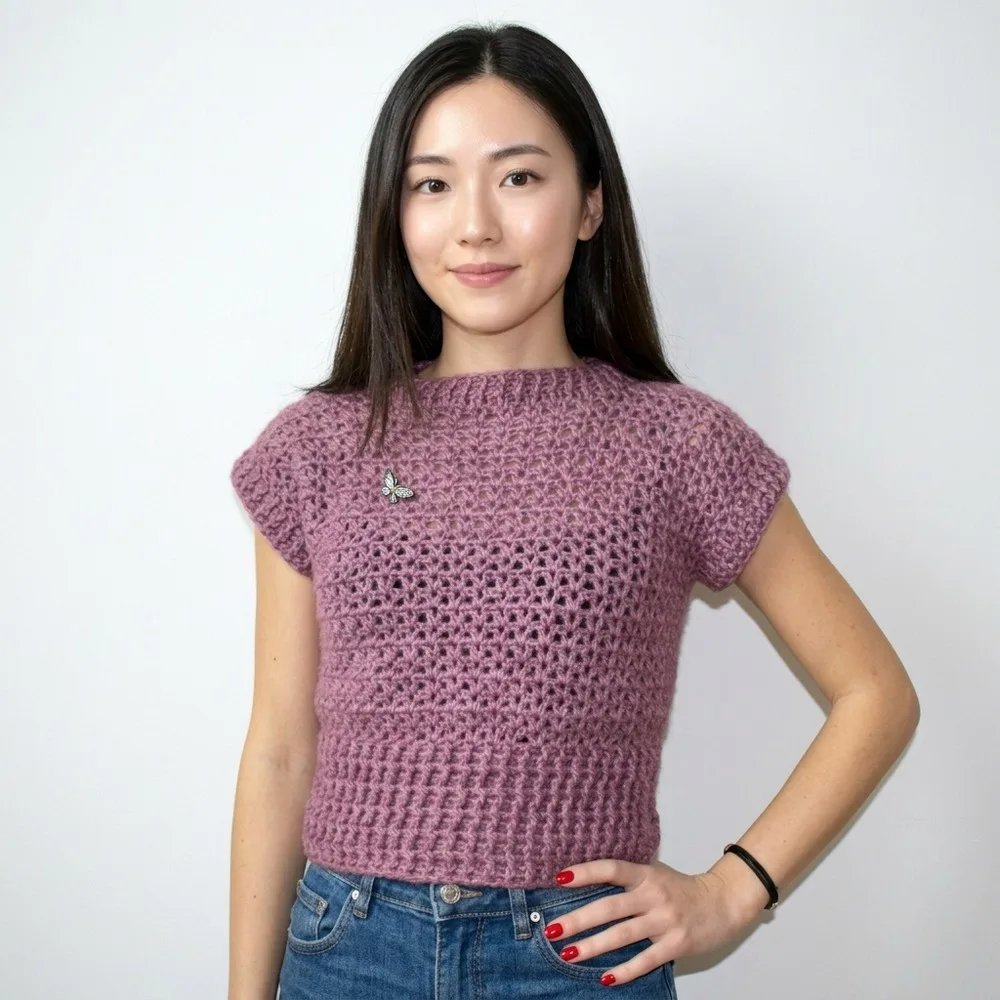
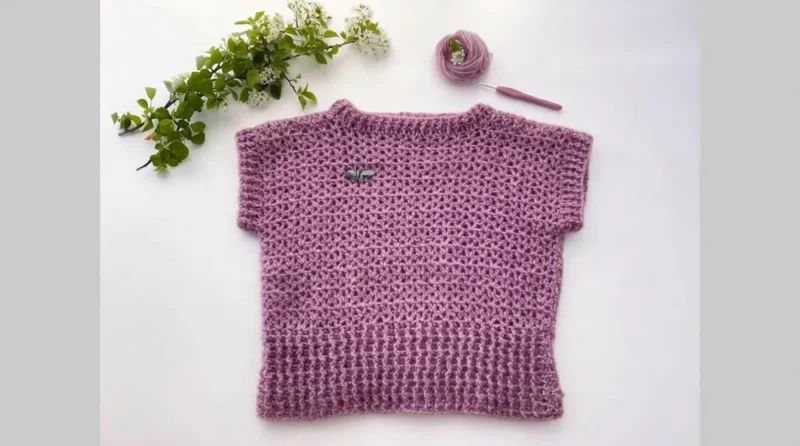
The easiest way to make this yours is through the foundation chain. Add or subtract in pairs to keep that 2+1 multiple, and you'll get a wider or narrower shirt without touching the rest of the pattern. If you want a warmer version for cooler months, swap the cotton-alpaca blend for a wool or acrylic yarn in a similar weight, the V-stitch pattern will still show through clearly. Color-wise, this piece is lovely worked in a single soft neutral so the ribbing and V-stitch textures do the talking, but you could also work the ribbing in one shade and the body in another for a bit of contrast at the waistband. If you'd rather skip sleeves entirely, the pattern already treats them as optional, so you can leave the armholes as simple sc-finished openings for a breezier, tank-style version. And if you want a snugger neckline, work that optional third ribbing round around the neck rather than stopping at two.
The rounds, in full

Written out, round by round

Intermediate4-6 hours4 mmDK

Bring to the porch

Everything this one takes, in the order you will reach for it.

Yarn

  • 100% cotton mixed with alpaca or wool (44% cotton, 56% alpaca/wool blend), approx. 440m (480 yards)

Crochet Hooks

  • 4mm (US G/6) : For the ribbing or elastic portion
  • 3.5mm (US E/4) : For the main textured body
  • Scissors

Tapestry Needle

  • For weaving in ends and sewing seams

Stitch Markers

  • To mark key points like sleeve openings for ease during assembly

Ribbing Section

Foundation Chains: Using the 4mm hook , chain 57 ch (or adjust for desired width as per sizing, ensuring stitch multiple is 2+1 ).

  1. Row 1Ch 1 , sc into each chain across ( 57 sc for size S).(57)
  2. Row 2(Begin Ribbing): Ch 1, turn. Work sc into the back loop only (BLO) for each stitch across.Repeat Row 2 until the ribbing reaches 11 rows or your desired height for the waistband.

Main V-Stitch Body

Switch to the 3.5mm hook for a tighter texture for the body.

  1. Row 1Ch 1, turn. Dc into the first stitch. Skip 1 st, work (dc, ch 1, dc) into the next st (this is a V-stitch).Repeat (skip 1, V-stitch) across, ending the row with 1 dc into the last st .
  2. Row 2Ch 3 (counts as first dc), turn. Work a V-stitch in the ch-1 space of each V-stitch from the previous row: (Dc, ch 1, dc) into each ch-1 sp.End row with 1 dc into the last stitch. Repeat Row 2 until the body section (above the ribbing) reaches 22 rows or desired length, leaving space for the shoulder section.

Shoulder Shaping

To create the shoulder width , leave 7 V-stitches (or desired number for your size) on each side.

Work the Shoulder Rows:

  1. Row 1Ch 3 (counts as first dc), turn. Work V-stitches across the first 7 V-stitch spaces, ending with 1 dc into the top of the last V-stitch.Row 2: Repeat the same steps as Row 1 above. Finish the Shoulder: After completing the two rows, cut and tie off the yarn, leaving a tail for sewing. Repeat for the opposite shoulder on the same panel. Make another panel following the same instructions.

Putting it together

Step 1

Seam the Shoulders: Place the front and back panels right sides together.

Step 2

Leaving space for the neckline, sew each shoulder seam using your tapestry needle and whip stitch or mattress stitch. For size S, leave a 16 cm (6.5") head opening.

Step 3

Fasten off and weave in ends.

Step 4

Seam the Sides: Fold the panels vertically, aligning the sides. Mark a 16 cm (6.5") arm opening from the top using stitch markers.

Step 5

Starting from the marker, seam the sides down to the bottom ribbing using your preferred stitching method: whip stitch, mattress stitch, or crochet sl sts together. For durability, use the same yarn for seaming.

Step 6

Neckline: Attach yarn at any point along the neckline using the 3.5mm hook.

Step 7

Round 1: Work sc into each stitch evenly around the neckline.

Step 8

Round 2: Work front post/back post stitches alternately to create a ribbed texture.

Step 9

Round 3 (Optional): If you prefer a snug neckline, work another round of ribbing stitches.

Step 10

Fasten off and weave in ends.

Step 11

Sleeves (Optional): Attach yarn at the armhole with the 3.5mm hook.

Step 12

Round 1: Work sc evenly around the armhole.

Step 13

Round 2: Work front post/back post stitches to match the neckline ribbing.

Step 14

For longer sleeves, continue with dc rounds or V-stitch rounds until the desired sleeve length is achieved.

Step 15

Fasten off and weave in ends.

Step 16

Weave in Loose Ends: Use your tapestry needle to hide any remaining yarn tails neatly within the stitches.

Step 17

Block the Shirt: Lightly block your shirt to smooth the stitches, even out seams, and perfect the shape.

Marlene's notes

Note 01

Keep your stitch count a multiple of 2+1 throughout the V-stitch body, since sizing the shirt up or down only works cleanly if that ratio holds.

Note 02

Mark your armhole and sleeve points as you go, since the assembly steps rely on finding those spots accurately once the main panel is finished.

Note 03

This pattern is for size S (40 cm wide x 46 cm long). Adjust the initial chain to achieve your desired width for larger or smaller sizes, ensuring it follows the stitch multiple rule.

Note 04

Measure the initial chain's width against the desired dimension before proceeding, and measure your stitches periodically as you work to ensure the shirt keeps fitting correctly.

Note 05

The shirt consists of two panels (front and back), stitched together at the sides and shoulders, with optional finishing for the sleeves and neckline.

Note 06

clean edges, make sure to maintain consistent stitch placement at the beginning and end of each row.

Porch photos

Before you sit down

  • Check you've got enough of your cotton-alpaca blend on hand. About 100g should see you through the whole shirt, but buy a touch extra if you're sizing up.
  • Have both hooks ready before you sit down, the 4mm for ribbing and the 3.5mm for the body, so you're not hunting mid-row.
  • Work a small swatch in the V-stitch pattern first to see how your tension sits, since the whole body depends on that ch-1 space staying consistent.
  • Read through the Main V-Stitch Body row twice before you start it, especially the ending, so the first and last dc of each row land in the right place.

How the hours go

Ribbing Section
about 45 minutes to an hour, because eleven rows of BLO sc across 57 stitches takes patience even though the stitch itself is simple
Main V-Stitch Body
about 2 to 3 hours, because tracking the ch-1 spaces row over row is the slowest, most attention-heavy part of the whole shirt
Shoulder Shaping and Assembly
about 1 to 1.5 hours, because isolating V-stitch spaces for the shoulders and then working the neckline and sleeve rounds is fiddly, careful work

Looking after it

  • Hand wash in cool water with a gentle detergent, since the alpaca or wool content in this blend can felt or shrink under heat and agitation.
  • Lay the shirt flat to dry on a towel, easing it back into shape as you go, and store it folded rather than hung so the ribbing keeps its stretch.
FAQs

Asked on the glider

the ones that come up on the glider

Can I make this shirt bigger without changing the whole pattern?

Yes, just add stitches to your foundation chain in multiples of 2, keeping the overall count at 2+1 for the V-stitch pattern. Everything else in the pattern works the same regardless of width.

How much yarn will I actually need?

The pattern is built around roughly 100g of a cotton-alpaca or cotton-wool blend, about 440m or 480 yards. If you're sizing up, it's worth having a bit extra on hand just in case.

Is the sleeve section required?

No, sleeves are marked optional in the assembly steps, so you can finish the armholes with a simple sc round and leave it sleeveless. It's an easy way to get a lighter, tank-style version of the same shirt.

What if my V-stitch spaces don't line up row to row?

This usually comes down to tension or miscounting the ch-1 spaces from the previous row. Working a small swatch first, as suggested before you start, helps you catch this early rather than partway through the body.

Can I use a different fiber than the cotton-alpaca blend?

Yes, any lightweight or blended yarn at a similar weight will work, and swapping to acrylic or wool suits a warmer version well. Just be sure to swatch first, since fiber changes can affect how the V-stitch drapes.