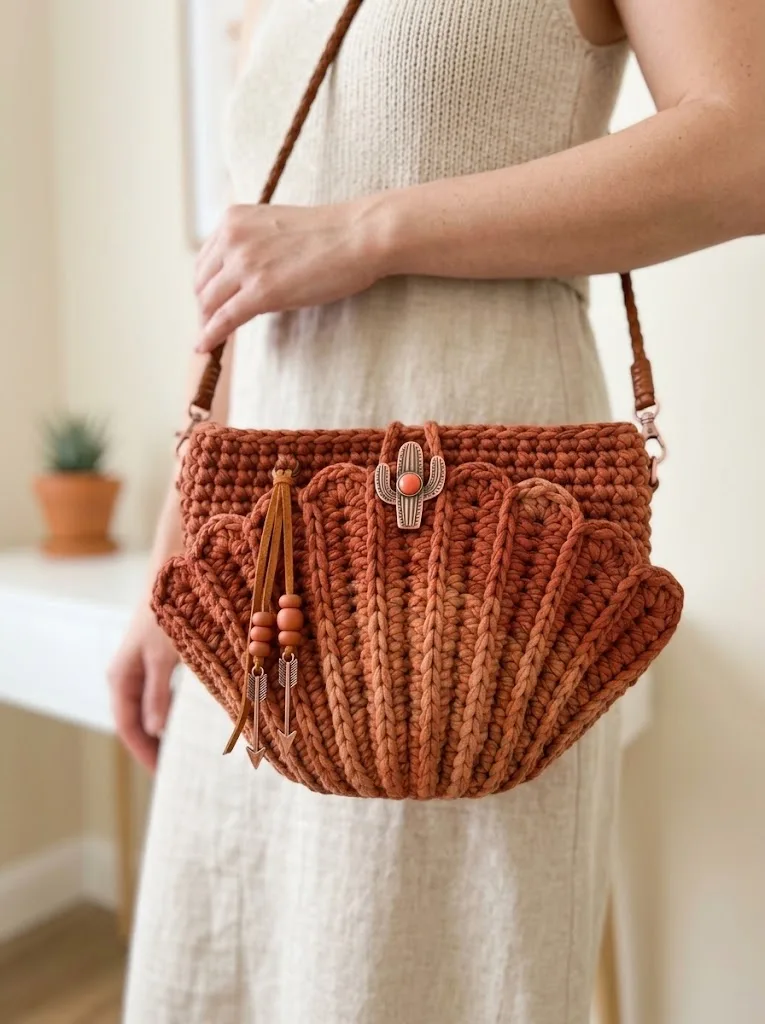
Intermediate 4-6 hours Super Bulky yarn

Worked on the glider, counted out loud —

A terracotta shell purse you crochet in two panels

An intermediate crochet purse pattern with radial shaping and surface ridges, worked in two panels over a weekend.

Jump to the rounds

What this one is

I made this one for the evening you want a bag that does the talking for you — something with a bit of shape and warmth to it, not another flat tote. If you've finished a simple beanie or a basic bag before and you're comfortable joining rounds, you're ready for this one. It's the kind of project that rewards someone who likes watching a shape emerge from a handful of increases.

Your hands spend most of the time here building two matching half-circle panels, starting from just three stitches and growing them row by row before settling into straight sides. After that come the ridges, worked right on the surface with a smaller hook, then the joining and hardware. Plan on an evening or two, maybe four to six hours total once you count blocking.

Try it another way

Once you've made this panel shape once, it's easy to play with. For color placement, try swapping which shade dominates — a lighter terracotta border over a deep rust body flips the whole mood of the bag. The color variations already mentioned — cream and sage, navy and dusty rose, classic black and gray — all work because the pattern only needs two yarns that contrast enough to read clearly at the border and in the ridges. For size, you could work a few extra straight-side rows beyond the 11 given before starting the contrast border, which deepens the bag without touching the shaping rows that take you from 3 sc up to the full 27 sc width. Swap the recycled cotton t-shirt yarn for a different stiff cotton blend if you want a different hand-feel, just keep it structured rather than soft so the shell holds its curve. And for use, skip the crossbody strap entirely and clip on short handles instead if you want this to sit more like an everyday handbag than a slouchy shoulder bag — the swivel clasps and D-rings make swapping straps simple whenever the mood strikes you.

There's real satisfaction in watching a shell shape build itself from almost nothing — you start with a chain of four and by the time you've worked through the increase rows you've got a proper half circle, no fancy stitches required, just inc and sc doing the work. The contrast border gives you a clean color break near the top, and the surface slip stitch ridges are the kind of detail that looks like it took real skill but is really just a hook, a steady hand, and some patience running from bottom to top. Then there's the hardware: swivel clasps, D-rings, a southwestern button. Attaching real purse findings to something you made with a hook turns a crochet project into an actual, carry-it-out-the-door bag.

The rounds, in full

Written out, round by round

Intermediate4-6 hours6.0 mmSuper Bulky

Bring to the porch

Everything this one takes, in the order you will reach for it.

Yarn

  • Main Color (MC): Approximately 200 yards of super bulky weight yarn (weight category 6) in a lighter terracotta or rust shade
  • Contrast Color (CC): Approximately 100 yards of the same weight yarn in a deeper rust or brick shade

Hook

  • US Size J/10 (6.0 mm) crochet hook or size needed to obtain gauge
  • A slightly smaller hook (5.5 mm) for surface crochet ridges can help keep them neat

Notions

  • Stitch marker
  • Tapestry needle
  • Two swivel lobster claw clasps (approximately 1.5 inches)
  • Two D-ring hardware pieces or bag strap connectors
  • One decorative clasp or southwestern-style button for closure
  • Braided leather crossbody strap (approximately 45-50 inches)

Panel One (Make 2)

Foundation Row: With MC, ch 4.

  1. Round 1Sc in 2nd ch from hook, sc in each remaining ch. Ch 1, turn. (3 sc)
  2. Round 2Inc in first st, sc in next st, inc in last st. Ch 1, turn. (5 sc)
  3. Round 3Inc in first st, sc across to last st, inc in last st. Ch 1, turn. (7 sc)
  4. Round 4Inc in first st, sc across to last st, inc in last st. Ch 1, turn. (9 sc)
  5. Round 5Inc in first st, sc across to last st, inc in last st. Ch 1, turn. (11 sc)
  6. Round 6Inc in first st, sc across to last st, inc in last st. Ch 1, turn. (13 sc)
  7. Round 7Inc in first st, sc across to last st, inc in last st. Ch 1, turn. (15 sc)
  8. Round 8Inc in first st, sc across to last st, inc in last st. Ch 1, turn. (17 sc)
  9. Round 9Inc in first st, sc across to last st, inc in last st. Ch 1, turn. (19 sc)
  10. Round 10Inc in first st, sc across to last st, inc in last st. Ch 1, turn. (21 sc)
  11. Round 11Inc in first st, sc across to last st, inc in last st. Ch 1, turn. (23 sc)
  12. Round 12Inc in first st, sc across to last st, inc in last st. Ch 1, turn. (25 sc)
  13. Round 13Inc in first st, sc across to last st, inc in last st. Ch 1, turn. (27 sc) You have now completed the fan-shaped bottom section. Your piece should look like a wide triangle or half circle.

Building the Straight Sides

Now we work even (no increases) to build the purse walls.

  1. Rounds 14–24Sc in each st across. Ch 1, turn. (27 sc per row) Work 11 rows total without any increases. This creates the straight sides of your shell shape.At the end of Row 24, fasten off MC. Do not cut a long tail yet.

Contrast Border Section

Join CC with a slip stitch in the first stitch of Row 24.

  1. Rounds 25–30Sc in each st across. Ch 1, turn. (27 sc per row) Work 6 rows in the contrast color for the top border.
  2. Round 31Top Edge Sc in each st across. Fasten off, leaving a 6-inch tail. (27 sc) Repeat the entire panel instructions to create your second panel.

Creating the Vertical Ridge Details

This is where the magic happens. Those bold surface slip stitch chains transform a simple bag into a showstopper.

How Surface Slip Stitch Works:

Hold your yarn behind the crocheted panel. Insert your hook from front to back through the fabric between stitches. Yarn over and pull up a loop to the front. You now have one loop on your hook. Insert the hook through the next row up, yarn over, pull through fabric AND through loop on hook. This creates a chain that sits on the surface.

Placement:

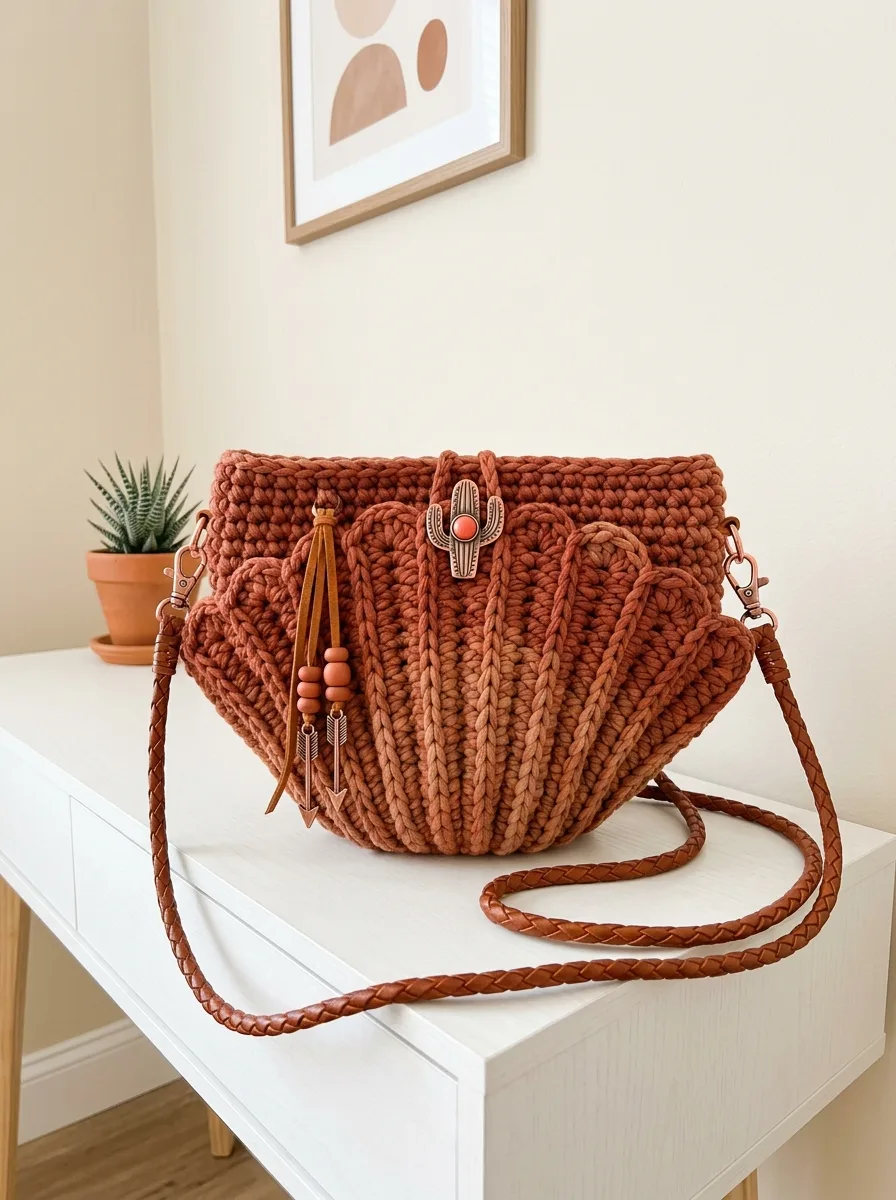
Starting at the bottom point of each panel, create 5 vertical ridge lines that radiate outward like the ribs of a shell or fan.

Center ridge: Start at the very bottom point (Row 1), work surface slip stitch straight up through the center of the panel to the top edge.

Inner side ridges (2): Starting about 3 stitches from center at the bottom, work surface slip stitch upward, angling slightly outward as you go. End approximately 5 stitches from the side edge at the top.

Outer side ridges (2): Starting about 6 stitches from center at the bottom, work surface slip stitch upward with more dramatic outward angle. End approximately 2 stitches from the side edge at the top.

Work all ridges in MC yarn for a tone-on-tone textured effect.

Do not stress about perfect placement. The organic variation makes each purse unique.

Assembling the Purse

Step 1: Align Panels

Place both panels with wrong sides together (ridges facing outward on both sides). Line up the edges carefully.

Step 2: Seam the Sides and Bottom

Using MC and your tapestry needle, whip stitch or mattress stitch along both side edges and the bottom pointed edge. Leave the top edge completely open.

Alternatively, you can single crochet the panels together through both layers for a decorative raised seam. This creates a neat braided look along the edges.

Step 3: Attach Hardware

On each side of the purse opening, fold down approximately 1 inch of fabric to create a loop. Stitch in place, securing the D-ring hardware inside the loop. The swivel clasps will attach to these D-rings.

Adding the Closure and Strap

Decorative Clasp:

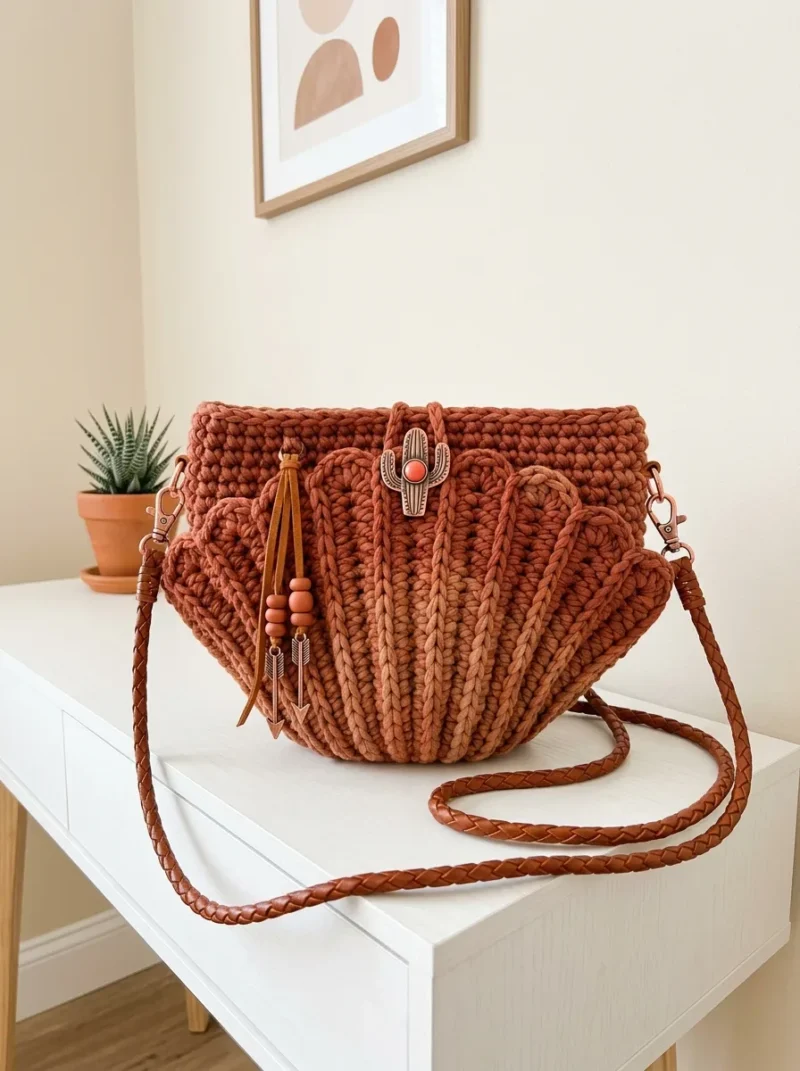
Position your southwestern-style clasp (the cactus design shown works perfectly) centered on the front panel, about 1 inch below the top edge. Many decorative clasps have prongs that push through the fabric and bend flat on the inside. Follow your specific hardware instructions.

Leather Strap:

Clip your braided leather crossbody strap to the swivel clasps on each side. A 45-50 inch strap provides comfortable crossbody length for most adults.

Optional Embellishments:

The tassel shown features a leather fringe, wooden beads, and arrow charms. Attach this to one of the D-rings or clasp for extra southwestern flair. This is completely optional but adds beautiful movement.
Marlene's notes

Note 01

Keep a stitch marker on hand from the first increase row — with rows of inc, sc, inc building fast from 3 stitches to 27, it's easy to lose track of where a round or row started.

Note 02

Wet block both panels before you join them — it evens out the increase rows and helps the finished shell shape lie flat rather than cupping at the edges.

Porch photos

Before you sit down

  • Confirm you've got roughly 200 yards of MC and 100 yards of CC in a super bulky cotton or cotton-blend t-shirt yarn — stiffer fiber is what keeps this shell shape standing up.
  • Set out both hooks before you begin: the J/10 (6.0 mm) for the panels, and the smaller 5.5 mm for the surface ridges later, so you're not hunting mid-project.
  • Work up a small swatch in your chosen cotton yarn with the J/10 hook first — super bulky cotton blends vary a lot, and you want your stitch count to match the pattern's before you commit two full panels to it.
  • Read through Row 24 and the Contrast Border section before you start Panel One, so you know exactly where MC fastens off and CC joins in, and can plan your color change without stopping mid-row to check.

How the hours go

Panel One (Make 2)
about 1.5-2 hours per panel because the increase rows from 3 sc up through 9 sc and beyond need careful counting at each turn
Straight Sides and Contrast Border
about 1-1.5 hours per panel because there are 11 rows worked even plus 6 more in the contrast color, so it's steady repeat work rather than fiddly shaping
Vertical Ridges, Assembly and Closure
about 1-2 hours total because the surface slip stitch ridges want a slower hand, and attaching the clasps, D-rings, and button is fine detail work at the end

Looking after it

  • Spot clean with mild soap and water rather than soaking the whole bag, then lay it flat to dry — cotton t-shirt yarn holds color well but doesn't love a hard wringing.
  • Expect a little stretch with heavy use since that's normal for this fiber, and store the bag stuffed with tissue paper so the shell shape holds its curve between wears.
FAQs

Asked on the glider

the ones that come up on the glider

Why does the pattern use two different hook sizes?

The J/10 (6.0 mm) hook keeps the main panel fabric dense enough to hold the shell shape, while the smaller 5.5 mm hook tightens up the surface slip stitch ridges so they sit neat and defined on top rather than loose. It's a small swap but it makes a visible difference in how crisp those vertical lines look.

Do I need to block both panels before joining them?

Yes, wet blocking each panel first is worth the extra time. It evens out the increase rows and encourages the half-circle shape to lie flat, which makes assembly much easier than trying to join two panels that are still curling.

Where do the vertical ridge details actually go?

They're worked as surface slip stitch chains applied after the main body is finished, running from the bottom center up to the top edge of each panel. No special stitches are involved, just a hook, your contrast or main yarn, and a steady hand.

What hardware do I need to source, and where do I find it?

You'll want two swivel lobster claw clasps around 1.5 inches, two D-rings or bag strap connectors, and a decorative clasp or southwestern-style button for the closure. These turn up easily if you search for purse hardware or bag making supplies, often in the leather crafting section of a craft store.

Can I skip the braided leather strap and use something else?

Absolutely, since the D-rings and swivel clasps are designed to let you swap straps freely. A fabric strap, a chain strap, or even repurposed webbing would clip right on in place of the 45-50 inch braided leather crossbody strap.