Beginner 4-6 Hours Worsted yarn

Worked on the glider, counted out loud —

Teddy Bear Amigurumi Crochet Pattern for Beginners

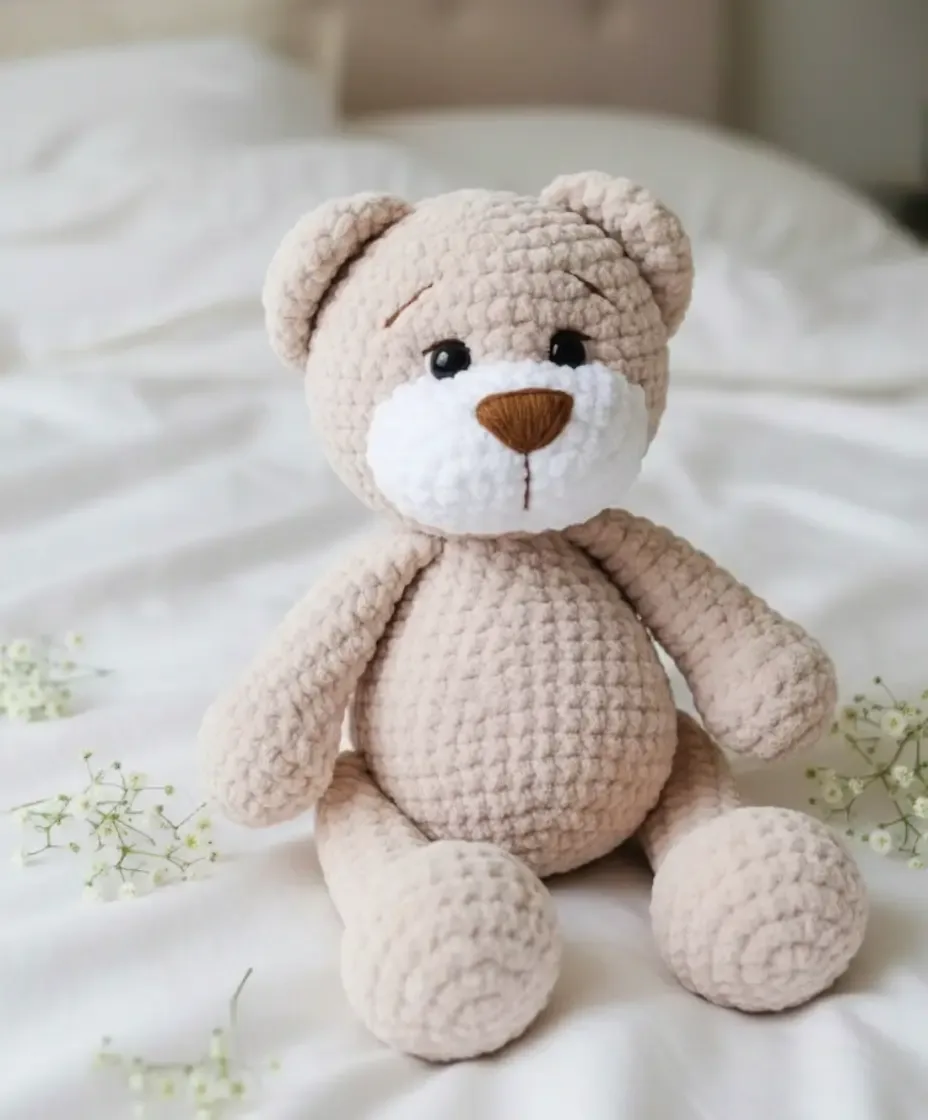
Make a cuddly teddy bear amigurumi with this free beginner-friendly crochet pattern featuring simple rounds, safe eyes, and a soft huggable finish.

Jump to the rounds

Before you sit down

Crochet the head first, working rounds of increases and decreases to build its signature rounded amigurumi shape.

Stuff the head firmly with fiberfill as you close the final rounds so it holds a smooth, plump form.

Make two small ears separately, then stitch them onto the head once you've decided on their placement.

Work the muzzle as its own piece, stuff it lightly, and sew it securely onto the face for dimension.

Attach the 12mm safety eyes and embroider the nose and eyebrows using black yarn for expression.

Crochet the upper paws and lower legs as separate pieces, stuffing each before closing them up.

Work the body, stuffing it generously to match the plush look of the head and limbs.

Sew the head, paws, and legs onto the finished body to complete your cuddly teddy bear.

What this one is

This teddy bear amigurumi pattern turns a handful of yarn skeins into the sweetest cuddly companion you'll ever hook. With its round head, perky ears, and a distinct muzzle piece that gives it that classic teddy bear charm, this little guy has personality baked into every stitch. It's an ideal project for anyone who wants to make a heartfelt handmade gift, whether for a new baby, a birthday, or simply to keep a soft friend on your own shelf.

Working up in worsted weight yarn with a 4.5mm hook, this pattern relies on foundational amigurumi skills — magic rings to start each piece, single crochet increases and decreases to shape the rounded head and body, and separate limb pieces you'll stitch on afterward. With the head worked over 14 rounds, the muzzle in just 5, and paws and legs rounding out the rest, expect a satisfying weekend project that takes roughly 4-6 hours from first stitch to final seam.

The finished bear is plush, round, and irresistibly soft thanks to a generous fiberfill stuffing, with safety eyes and hand-embroidered details giving it real personality. It sits at a comfortable amigurumi size that fits nicely in small hands or on a shelf as a decorative piece. Whether gifted to a little one or kept as a nostalgic desk companion, this teddy bear amigurumi feels like the kind of handmade treasure that gets passed down and loved for years.

Variations

There's something so satisfying about watching a plain ball of yarn transform into a chubby-cheeked teddy bear, and this pattern delivers that magic in every round. I love how the muzzle piece gets worked separately and then sewn on — it's a small technique that makes a huge difference in giving your bear that soft, expressive teddy bear face instead of a flat one. The head's 14 rounds build up a beautifully rounded shape that holds its form once stuffed, and stitching the ears on afterward lets you fine-tune their placement for just the right amount of cuteness. I also love how the upper paws and lower legs are worked as distinct pieces with their own gentle shaping, so the bear ends up with real dimension instead of stick-straight limbs. Adding the 12mm safety eyes is honestly my favorite moment in the whole project — that's when the bear suddenly looks back at you and comes alive. This pattern strikes that perfect balance of being genuinely achievable for beginners while still producing a bear that looks like it came from a boutique shelf.

Common mistakes

  • Starting each piece with a loosePull the tail yarn firmly after your first round of single crochets and check that the center closes completely before continuing — give it an extra tug if needed.
  • Losing track of stitch countUse a stitch marker at the start of every round and count your stitches after each increase round before moving forward, especially through the head's 14 rounds.
  • Overstuffing or understuffing the headStuff in small pinches as you go rather than all at once at the end, checking the shape against a round object and firming up any soft spots before closing the piece.
  • Placing the safety eyes symmetricallyCount rounds and stitches from the center of the face to place both eyes at the same round and equal distance from center before securing the backing washers.
  • Sewing the ears, muzzle, or limbsUse straight pins or scrap yarn to temporarily hold each piece in place, step back to check symmetry, and adjust before stitching with your thin matching thread.
  • Rushing the muzzle attachmentStuff the muzzle lightly before attaching and sew through both the muzzle and head fabric with small, even whip stitches to preserve its rounded shape.

The rounds, in full

Written out, round by round

Beginner4-6 Hours4.5 mmWorsted

Materials

Everything this one takes, in the order you will reach for it.

Yarn

  • Himalaya Dolphin Baby (you’ll need more than one skein of your main color for a plush result)
  • Hook Size: 4.5 mm

Accent Yarn

  • Black YarnArt Jeans yarn for embroidering eyebrows and the nose

Safety Eyes

  • 12 mm for that expressive gaze

Sewing Thread

  • Thin thread in a color matching your main yarn for seamlessly attaching details

Tools

  • Sewing needle and scissors

Stuffing

  • Fiberfill to give your bear its cuddly shape

keep this to hand

Abbreviations

US crochet terms, as used in this pattern.

  1. MRAmigurumi Magic Ring
  2. scSingle Crochet
  3. incIncrease (make two single crochets in the same stitch)
  4. decDecrease (single crochet two stitches together)
  5. trTriple Crochet/Treble Crochet
  6. stStitch
  7. dcDouble Crochet
  8. hdcHalf Double Crochet
  9. slstSlip Stitch
  10. chChain
  11. ..incMake increases into the same stitch as many times as the number given before “inc” (e.g., 3inc, 4inc).
  12. FLOCrochet into front loops only
  13. BLOCrochet into back loops only

Head

  1. Round 16 sc in Magic Ring (6)
  2. Round 2(inc)x6 (12)
  3. Round 3(1 sc, inc) repeat 6 times (18)
  4. Round 4(2 sc, inc) repeat 6 times (24)
  5. Round 5(3 sc, inc) repeat 6 times (30)
  6. Round 6(4 sc, inc) repeat 6 times (36)
  7. Round 7(5 sc, inc) repeat 6 times (42)
  8. Round 8(6 sc, inc) repeat 6 times (48)
  9. Round 9-1448 sc (6 rnds) Insert safety eyes between Rnd 9 and Rnd 10.(48)
  10. Round 15(6 sc, dec) repeat 6 times (42)
  11. Round 16(5 sc, dec) repeat 6 times (36)
  12. Round 17(4 sc, dec) repeat 6 times (30)
  13. Round 18(3 sc, dec) repeat 6 times (24)
  14. Round 19(2 sc, dec) repeat 6 times (18)Stuff quite tightly, the head should be a correct round shape.

Remember it later!

Ears (Make 2)

  1. Round 18 sc in Magic Ring (8)
  2. Round 2(inc) repeat 8 times (16)
  3. Round 316 sc(16)
  4. Round 4(3 sc, inc) repeat 4 times (20)

Muzzle

We make a chain of 7 ch

  1. Round 1We start knitting from the second ch: 5sc, 3sc in 1 loop, we continue knitting on the other side of the chain: 4sc, inc (14sc)
  2. Round 21 ch, inc, 4 sc, (inc) repeat 3 times, 4 sc, (inc) repeat 2 times (20)
  3. Round 31 ch, inc, 5 sc, (1 sc, inc) repeat 4 times, 5 sc, inc (26)
  4. Round 41 ch, inc, 6 sc, (2 sc, inc) repeat 4 times, 6 sc, inc (32)
  5. Round 532 sc(32)

Upper Paws (Make 2)

  1. Round 16 sc in Magic Ring (6)
  2. Round 2(inc) repeat 6 times (12)
  3. Round 3(5 sc, inc) repeat 2 times (14)
  4. Round 4(3 sc, inc) repeat 3 times, 2 sc (17)
  5. Round 517 sc(17)
  6. Round 6dec, (1 sc, dec) repeat 5 times (11)
  7. Round 7-1111 sc (5 rnds)(11)
  8. Round 129 sc, dec (10)
  9. Round 13-1410 sc (2 rnds)(10)
  10. Round 158 sc, dec (9)
  11. Round 16-179 sc (2 rnds) Fold top of arm flat and 5 sc through both sides across. Similarly, knit the second paw.(9)

Lower Legs (Make 2)

We make a chain of 7 ch

  1. Round 1From the 2nd ch from hook: 5 sc, 4 sc in last st, turn and crochet on the opposite side of the chain: 4 sc, 3 sc in one st (16)
  2. Round 2inc, 4 sc, (inc) repeat 4 times, 4 sc, (inc) repeat 3 times (24)
  3. Round 3inc, 1 sc, 4 sc, (inc, 1 sc) repeat 4, 4 sc, (inc, 1 sc) repeat 3 times (32)
  4. Round 4BLO 32 sc(32)
  5. Round 532 sc(32)
  6. Round 67 sc, (dec)x6, 8 sc, (dec)x2 times, 1 sc (24)
  7. Round 76 sc, (dec)x4 times, 10 sc (20)
  8. Round 83 sc, (dec)x6 times, 5 sc (14)
  9. Round 9-1314 sc (5 rnds)(14)
  10. Round 1412 sc, dec (13)
  11. Round 1513 sc(13)
  12. Round 1611 sc, dec (12)
  13. Round 17-1912 sc (3 rnds) Fold top of leg flat and 6 sc through both sides across.(12)

Body

  1. Round 16 sc in Magic Ring (6)
  2. Round 2(inc)x6 times (12)
  3. Round 3(1 sc, inc) repeat 6 times (18)
  4. Round 4(2 sc, inc) repeat 6 times (24)
  5. Round 5(3 sc, inc) repeat 6 times (30)
  6. Round 6(4 sc, inc) repeat 6 times (36)
  7. Round 7(5 sc, inc) repeat 6 times (42)
  8. Round 842 sc(42)
  9. Round 98 sc, 6 sc together with sc of the 1st leg, 14 sc, 6 sc together with sc of the 2nd leg, 8 sc.
  10. Round 10-1142 sc (2 rnds)(42)
  11. Round 12(5 sc, dec) repeat 6 times (36)
  12. Round 13-1436 sc (2 rnds)(36)
  13. Round 15(4 sc, dec) repeat 6 times (30)
  14. Round 1630 sc(30)
  15. Round 17(3 sc, dec) repeat 6 times (24)
  16. Round 18-1924 sc (2 rnds)(24)
  17. Round 20(2 sc, dec) repeat 6 times (18)
  18. Round 213 sc, (5 sc together with sc of the 1st arm, 4 sc, 5 sc together with sc of the 2nd arm, 1 sc)
  19. Round 2218 scStuff, fasten off.(18)

Important notes

Note 01

💡 Stuff the head and body firmly but in small amounts at a time, working the fiberfill into the corners and rounds so the shape stays smooth rather than lumpy.

Note 02

💡 Place a stitch marker at the start of every round, especially through the head's 14 rounds, so you never lose your place during increases and decreases.

Note 03

💡 Attach your 12mm safety eyes before you finish stuffing the head completely — it's much easier to position the washer backing while there's still room to reach inside.

Note 04

💡 Use thin thread that matches your main yarn color when sewing on the ears, muzzle, and limbs so your seams stay invisible against the finished bear.

Note 05

💡 Save a long yarn tail when finishing each piece (ears, muzzle, paws, legs) so you have plenty of length to sew everything together without needing to add new yarn mid-seam.

FAQs

Asked on the glider

the ones that come up on the glider

What yarn weight and hook size does this teddy bear pattern use?

This pattern uses Himalaya Dolphin Baby yarn with a 4.5mm hook, and you'll want more than one skein of your main color to get a nice plush result. Any worsted weight yarn with similar hook sizing will work as a substitute.

Do I need special safety eyes for this bear?

Yes, the pattern calls for 12mm safety eyes to give the bear its expressive gaze. These plastic eyes come with backing washers that lock securely from inside the head, which is safer than sewn-on buttons for anyone gifting the bear to a child.

How much yarn will I need to complete the whole bear?

Since the head, muzzle, ears, upper paws, and lower legs are all worked separately with a good amount of fiberfill stuffing, plan for more than one skein of your main color plus a small amount of black yarn for the embroidered nose and eyebrows.

Can I embroider the face details with regular embroidery floss instead of yarn?

Absolutely — while the pattern suggests black YarnArt Jeans yarn for the eyebrows and nose, embroidery floss gives you finer detail and works beautifully for smaller facial features. Just make sure it's securely knotted on the inside so it holds up to handling.

Is this pattern really suitable for beginners with all these separate pieces?

Yes, each piece — head, ears, muzzle, paws, and legs — is worked with basic single crochet increases and decreases, so the individual rounds stay simple. The main beginner learning curve is in assembling and sewing the pieces together neatly, which just takes a little patience and pinning.