Intermediate 4-6 hours Worsted yarn

Worked on the glider, counted out loud —

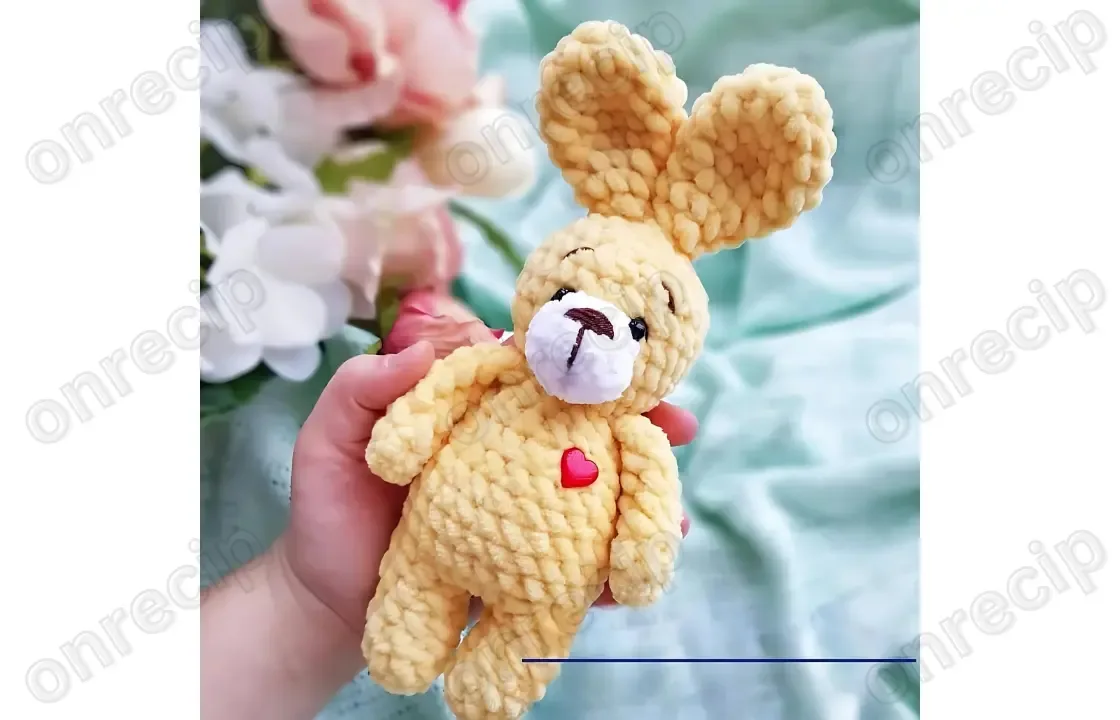
Sunny bunny amigurumi: a soft, button-nosed keeper

A 20-round amigurumi bunny with button details, worked in worsted-weight yarn. Suits an intermediate crocheter with a few evenings

Jump to the rounds

What this one is

You know the kind of evening this is for: the one where you want something small and finished in your lap, not a blanket that eats a whole season. This bunny is for the friend who just had a baby, for the shelf that needs one more soft thing, or for you, honestly, because a floppy-eared rabbit with bead eyes and a button somewhere on it is hard to argue with.

Your hands will spend most of their time on the long Legs-Body-Head piece, twenty rounds of single crochet that climb and shape themselves as you go, then shift to the small stuff: two arms, a tail, ears, a face worked flat and folded in. Between sitting down and sewing the last eyelid stitch, you're looking at a handful of hours, not a marathon.

Try it another way

Once you've made this bunny once, it's easy to make it yours. Swap Himalaya Dolphin Baby for another worsted-weight yarn of the same softness and your gauge should hold close enough for a 3.5 mm hook. Play with color placement: keep the body one shade and work the ears and tail in a second color, since both are separate pieces sewn on at the end rather than joined mid-round. The face detail piece, worked from 6 stitches up to 12 in round 2, is small enough to try in a scrap color if you want a contrast muzzle. If you want a slightly different personality, skip the decorative button or move it to a different spot; it's listed as optional decoration, not structural. You could also make a small family: since the arms, tail, and ears are quick, low-round pieces, a friend making a matching mini version could shorten just the Legs-Body-Head rounds while keeping the same limb counts, though that changes the pattern math so treat it as a project for a confident improviser rather than a straight substitution. Sewing the eyes slightly pulled together, as the pattern calls for, is worth doing regardless of size, since it softens the expression every time.

There's a real satisfaction in a piece built almost entirely from magic rings and plain single crochet, where the shaping does the work instead of fancy stitches. You'll like watching the face round go from 6 stitches to 12 with a single increase round, then fold flat under your fingers before you even sew it on. The arms teach you a neat trick, too, folding the tube in half and closing it with just 3 single crochets rather than stuffing and shaping separately. And sewing the eyes on round 21, pulling the beads slightly toward each other so they sit close and gentle rather than staring, is the kind of small, fussy step that turns a toy into a face.
The rounds, in full

Written out, round by round

Intermediate4-6 hours3.5 mmWorsted

Bring to the porch

Everything this one takes, in the order you will reach for it.

Yarn

  • Himalaya Dolphin Baby or its equivalent;
  • Hook size: 3.5 mm;
  • Eyes (beads): 6 mm;
  • Stuffing (holofiber);
  • YarnArt Jeans for the face details;
  • Scissors, needle for sewing parts together;
  • Decorative button.

Arms

Make 2
  1. Round 17 SC in MR.
  2. Rounds 2–77 SC. (6 rounds)
  3. Round 8Fold in half and crochet 3 SC across, do not stuff.

Tail

  1. Round 17 SC in MR.
  2. Round 27 SC, SL ST.Leave a long tail for sewing.

Face

  1. Round 16 SC in MR.
  2. Round 2INC in each stitch. (12)
  3. Round 39 SC, SL ST (do not finish the row).Leave a long tail for sewing.

Legs – Body – Head

  1. Round 19 SC in MR, pull tight, fasten off.
  2. Round 29 SC. (9)
  3. Round 33 SC, INC, 3 SC, DEC. (9)
  4. Round 49 SC. (9)
  5. Round 53 SC, INC, 3 SC, DEC. (9)
  6. Round 6 (Leg 1)First leg 8 SC, SL ST; on the first leg, cut the yarn and leave a short tail.
  7. Round 6 (Leg 2)Second leg Work rounds 1-5 as for the first leg; then 9 SC, 1 CH.
  8. Round 7Join the first leg and continue crocheting; 9 SC, 3 SC in the chain, 9 SC, 3 SC in the chain. (24)
  9. Rounds 8–1124 SC. (4 rounds)
  10. Round 12(6 SC, DEC) x 3. (21)
  11. Round 1321 SC. (21)
  12. Round 14(DEC, 5 SC) x 3. (18)
  13. Round 1518 SC. (18)
  14. Round 16(1 SC, DEC) x 6. (12)
  15. Round 1712 SC, attach the arms as you go: 2 SC, 3 SC with the arm, 3 SC, 3 SC with the arm, 1 SC. (12)
  16. Round 18INC in each stitch. (24)
  17. Rounds 19–2324 SC. (5 rounds)

If you are using safety eyes, insert them in round 21.

  1. Round 24(2 SC, DEC) x 6. (18)
  2. Round 25(1 SC, DEC) x 6. (12)
  3. Round 266 DEC. (6)Cut the yarn and sew the opening shut with a needle.

Ears

Make 2
  1. Round 16 SC in MR.
  2. Round 2INC in each stitch. (12)
  3. Round 3(3 SC, INC) x 3. (15)
  4. Rounds 4–515 SC. (15)
  5. Round 6(3 SC, DEC) x 3. (12)
  6. Round 7(2 SC, DEC) x 3. (9)
  7. Round 89 SC. (9)
  8. Round 9(1 SC, DEC) x 3. (6)
  9. Round 10Work 1 SL ST, leave a long tail for sewing.

Putting it together

Step 1

Sew the tail, face, and ears.

Step 2

Attach the eyes at around round 21, close to the face; when sewing them, pull the beads slightly together to make them look neater and less prominent.

Step 3

Embroider the nose, eyebrows, and add a couple of stitches near the eyes to create eyelids.

Step 4

You can decorate the bunny with a decorative button.

Marlene's notes

Note 01

Keep your tension fairly firm and even throughout the Legs-Body-Head piece. This is the part that carries the toy's shape, and loose stitches here will show once it's stuffed.

Note 02

Leave a long tail when you finish the tail and the face, as both are sewn on afterward and a short tail will leave you short of thread mid-seam.

Note 03

The arms are left unstuffed, folded, and closed with just 3 single crochet across, so don't reach for the stuffing on those until you're sure that's the intended finish.

Before you sit down

  • Check that you have enough Himalaya Dolphin Baby (or its equivalent) for the full body plus a contrast amount if you want ears or a tail in a second color.
  • Have your 3.5 mm hook and 6 mm bead eyes on hand before you start the head, since the eyes go on around round 21 and you'll want them close by rather than mid-project shopping.
  • Read through the Legs-Body-Head section once before your first stitch. Twenty rounds without a break between legs and body means you want to know where the shaping happens ahead of time.
  • Set aside your holofiber stuffing and a sewing needle now. The arms are worked unstuffed until round 8, so it helps to know which pieces need filling and which don't before you're holding several finished parts.

How the hours go

Legs, Body, and Head
about 2-3 hours because it runs 20 rounds and carries all the main shaping
Arms, Tail, and Ears
about 1-1.5 hours because they're short pieces (2-9 rounds each) but there are five of them to make and stuff or fold
Face and assembly
about 1-1.5 hours because sewing the face, ears, eyes, and embroidering the nose and eyelids takes patience even though the face itself is only 3 rounds

Looking after it

  • Hand wash the finished bunny in cool water with a gentle detergent, since Himalaya Dolphin Baby and YarnArt Jeans are both soft acrylic-based yarns that hold their shape better without hot water or a washing machine cycle.
  • Reshape the toy while damp, easing the ears and limbs back into place, and lay it flat to dry away from direct heat; store it stuffed and upright rather than folded so the holofiber filling doesn't compress into odd lumps.
FAQs

Asked on the glider

the ones that come up on the glider

How much yarn do I need for one bunny?

The pattern doesn't specify exact yardage, so it's safest to buy a full skein of Himalaya Dolphin Baby (or its equivalent) plus a small amount of YarnArt Jeans for the face details. Any leftover is easily used for a second bunny's ears or tail.

Why are the arms left unstuffed?

The arms are folded in half after 7 rounds and closed with 3 single crochet across rather than stuffed, which keeps them soft and floppy rather than firm. This is intentional in the pattern, not a step to skip by accident.

Where exactly do the eyes go?

The eyes are attached around round 21 of the Legs-Body-Head piece, close to the face. Pull the beads slightly toward each other as you sew so they sit neatly rather than looking too prominent.

Can I skip the decorative button?

Yes, the button is listed purely as an optional decoration in the assembly steps. Leave it off, or move it to the belly, ear, or wherever suits the bunny you're making it for.

What size hook and eyes does this pattern use?

You'll need a 3.5 mm hook throughout and 6 mm bead eyes for the face. Both are listed in the materials and don't change across any of the parts.

Do I need to stuff every part?

No. The main Legs-Body-Head piece and the ears take stuffing, but the arms are explicitly left unstuffed after folding, and the tail and face are small pieces meant to be sewn on rather than filled.