Intermediate 4-6 hours Bulky yarn

Worked on the glider, counted out loud —

Strawberry dinosaur plush doll crochet pattern

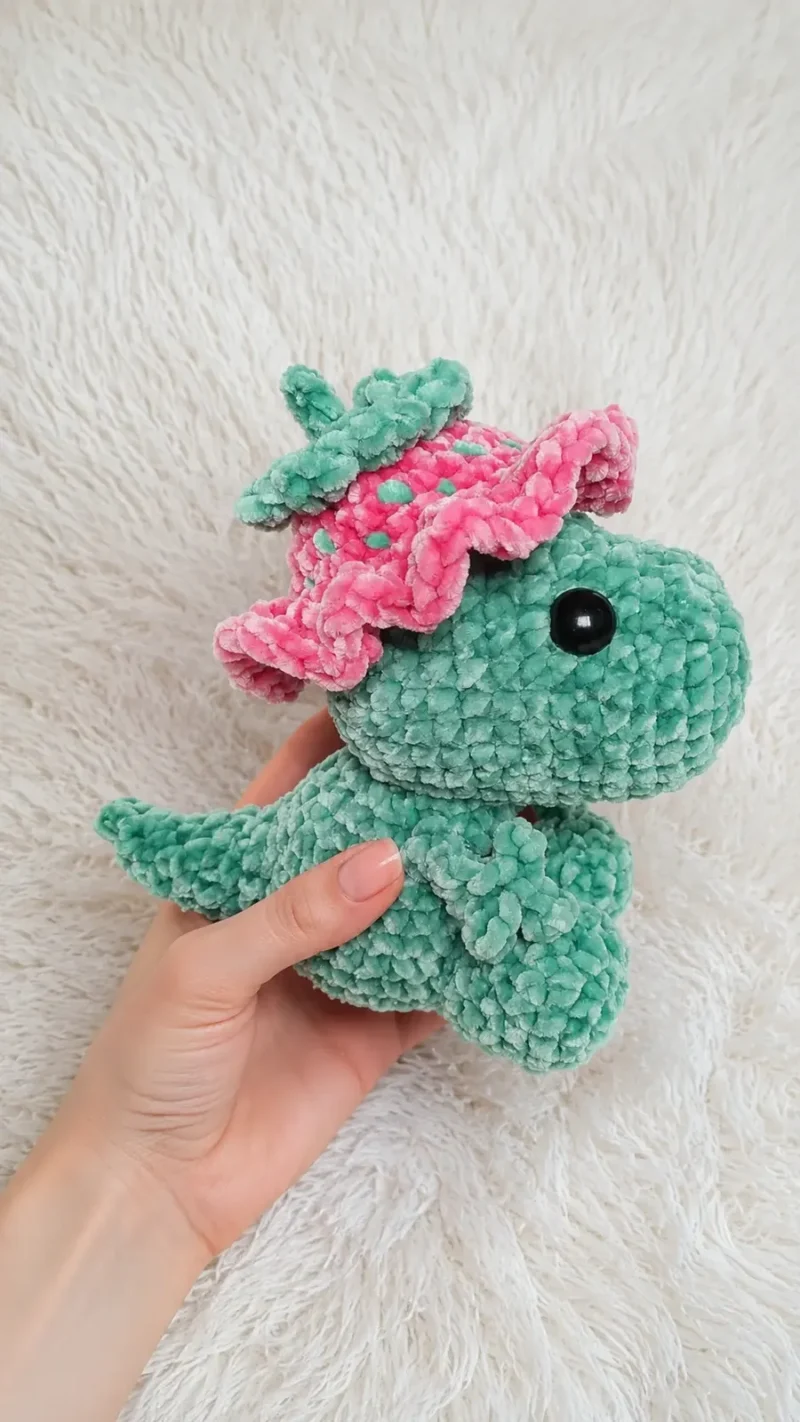
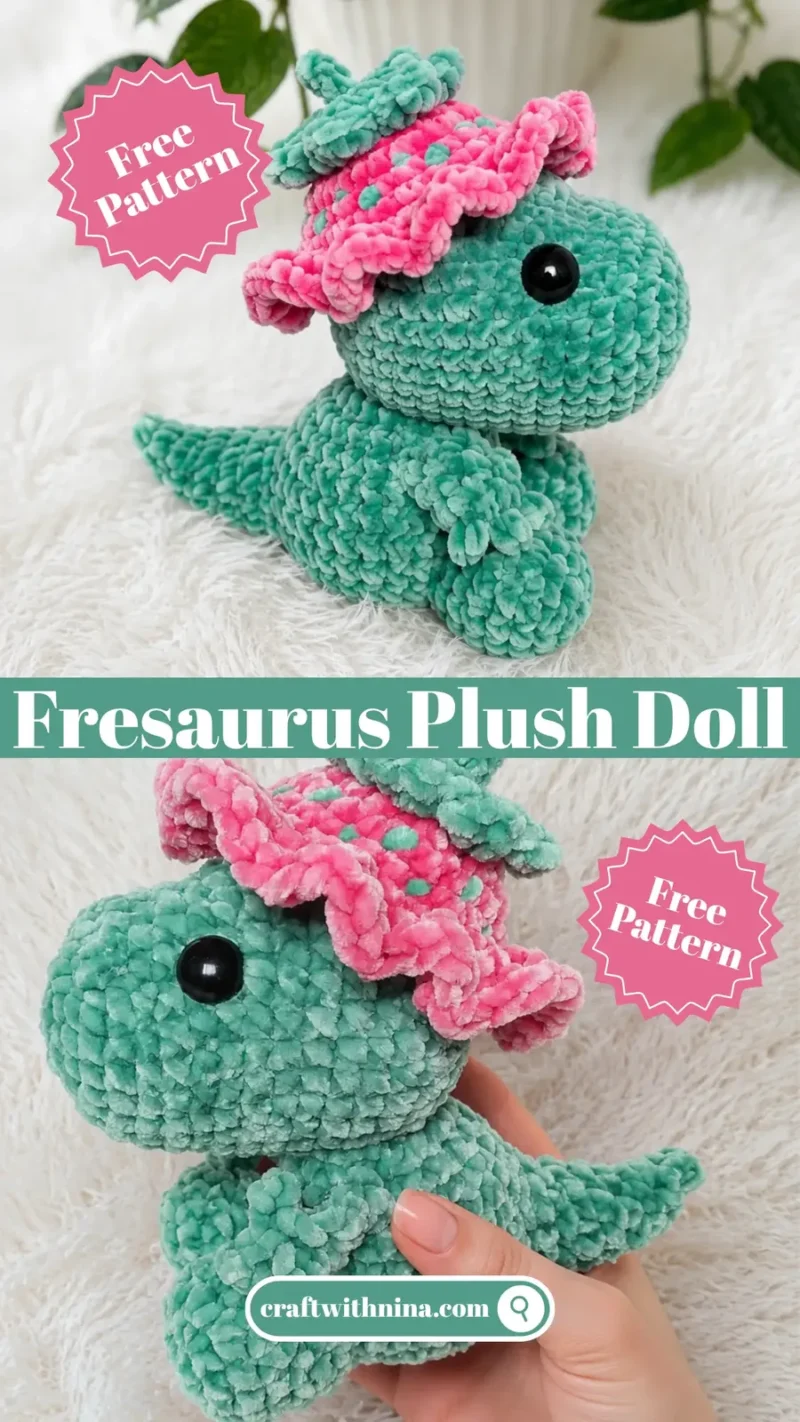
A velvet strawberry-dino amigurumi for confident beginners, about 4-6 hours from magic ring to sewn-on hat.

Jump to the rounds

What this one is

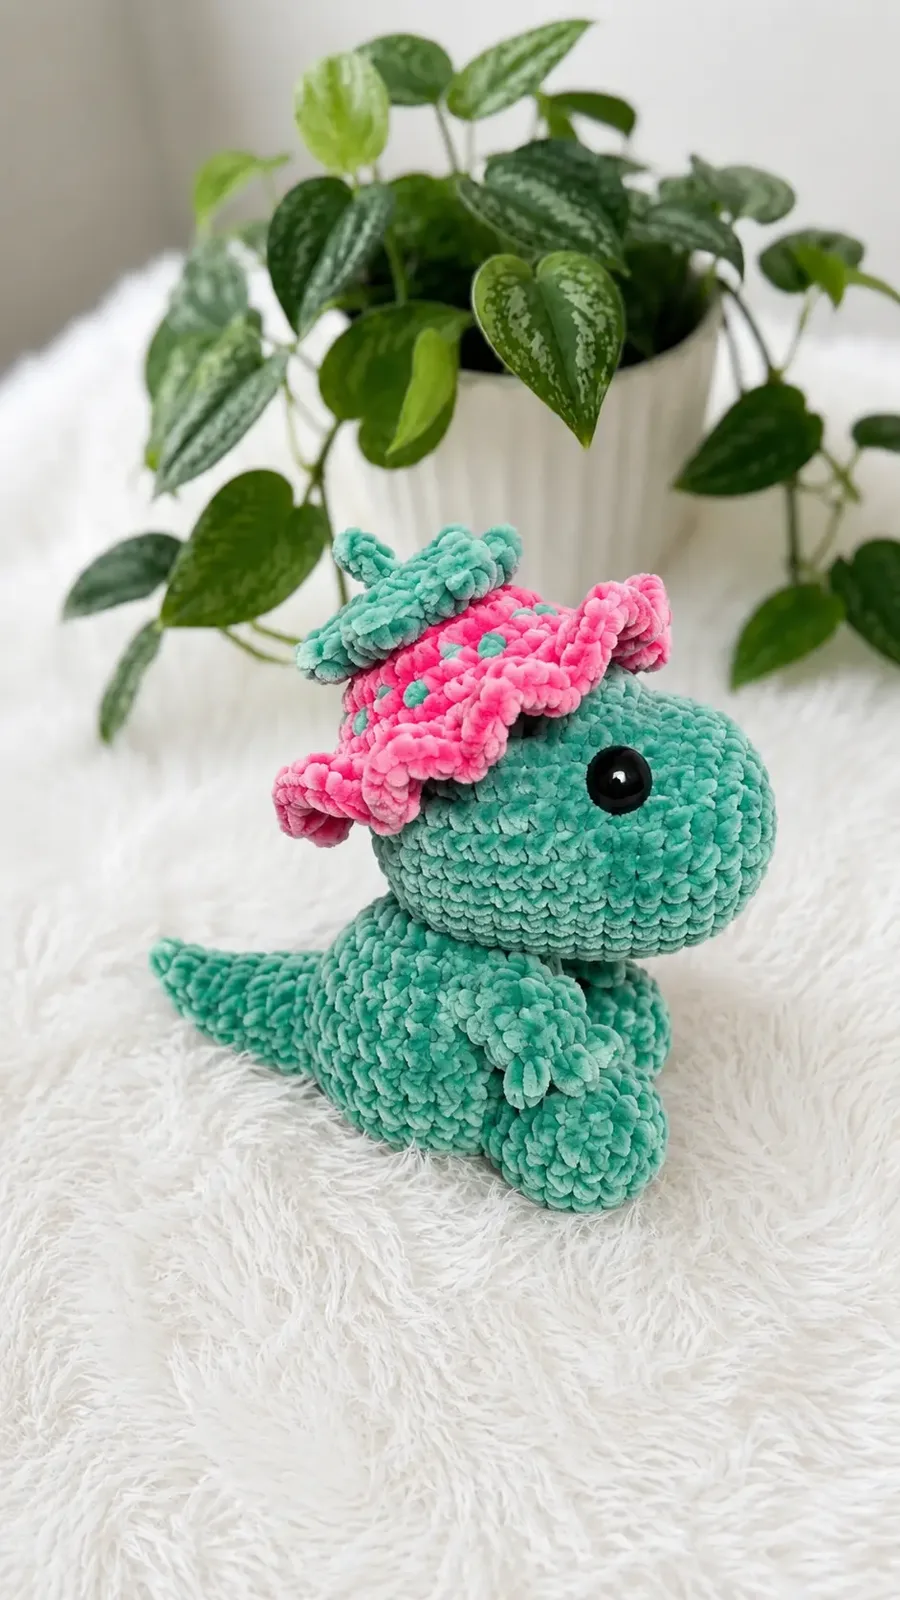
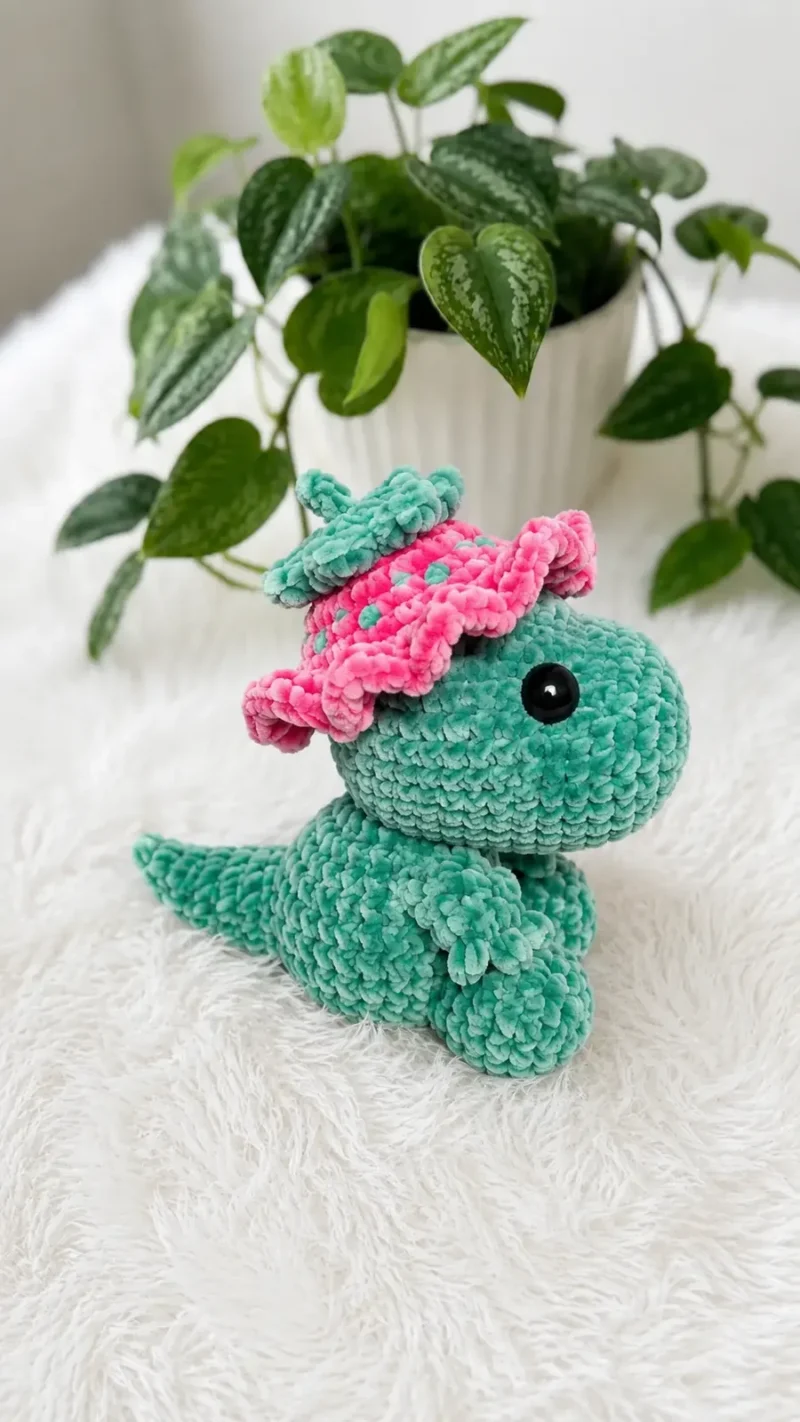
This is the kind of project you pull out when you want something soft in your hands and a little bit silly on the shelf when it's done. It's for the person in your life who likes their dinosaurs sweet rather than fierce, or for you, if you've been eyeing that green and pink chenille and looking for an excuse. The strawberry hat is what sells it - equal parts fruit and fantasy.

Your hands will spend most of the time in single crochet, building up the head, body, and that curved little tail round by round, then shaping two small arms and two legs before the fun part: sewing on a whole strawberry as a hat. Between the stitching and the stuffing and the assembly, plan on somewhere around four to six hours, likely split across a couple of sittings.

Try it another way

If you want a smaller doll, try worsted weight acrylic yarn with a 3.5mm or 4.0mm hook instead of the bulky chenille and 6mm hook - it won't match exactly, but your finished dinosaur will be much smaller and still hold its shape. For a different look entirely, swap the green and pink for any two-color combination you like; the hat's upper part and lower part are worked as separate pieces, so you could make the stem in a third color if you have scraps. If you're not sewing this for a child, consider leaving off the safety eyes and embroidering the face instead - useful if you want to give it to a baby or just prefer a softer expression. The tail takes light stuffing as you sew it on, so you can leave it unstuffed for a flatter, more relaxed curl, or add extra for a tighter curve. And if you want a set, this doll would be fun worked in a strawberry-and-mint pairing for one and a classic red-and-green for another, using the same green and pink structure just recolored. The arms are quick, only two rounds each, so they're a good place to experiment with a contrast color without much risk.

There's real satisfaction in watching a shapeless magic ring turn into a snout you can pinch between your fingers - the head alone runs twenty rounds, so you get to see the increases build a proper face before you even place the safety eyes. The tail is where the technique gets interesting: eight rounds of shaping plus a bit of stuffing added right as you sew it on, so it holds a curve instead of flopping. And then there's the strawberry hat itself, worked in two colors with its own tiny stem sewn through the magic ring center - a small, fiddly finishing touch that makes the whole doll look intentional rather than just cute. It's the kind of piece where every part teaches you something slightly different.
The rounds, in full

Written out, round by round

Intermediate4-6 hours6 mmBulky

Bring to the porch

Everything this one takes, in the order you will reach for it.

  • Chenille / Velvet yarn (bulky weight) green and pink.
  • 6mm crochet hook (J)
  • 16mm Safety eyes
  • Stuff material
  • Yarn needle
  • Scissors

Head

Between rounds 8 and 9, place the safety eyes about 8 visible stitches apart, making sure each eye is on each side of the face.

Stuff the snout securely by firmly pushing stuffing into the snout area between rounds 9 and 15 before closing the head.

Stuff as you decrease.

Cut and close with a yarn needle.

  1. Round 16 sc into magic ring.
  2. Round 2Inc in each st around. (12)
  3. Round 31 sc, inc * (repeat around). (18)
  4. Round 42 sc, inc * (repeat around). (24)
  5. Rounds 5–8Sc around. (24)
  6. Round 92 sc, 4 inc, 18 sc. (28)
  7. Round 10(2 sc, inc) x 4, 16 sc. (32)
  8. Rounds 11–15Sc around. (32)
  9. Round 167 sc, 2 dec, 21 sc. (30)
  10. Round 173 sc, dec * (repeat around). (24)
  11. Round 182 sc, dec * (repeat around). (18)
  12. Round 191 sc, dec * (repeat around). (12)
  13. Round 206 dec around. (6)

Body

  1. Round 16 sc into magic ring.
  2. Round 2Inc in each st around. (12)
  3. Round 31 sc, inc * (repeat around). (18)
  4. Round 42 sc, inc * (repeat around). (24)
  5. Round 53 sc, inc * (repeat around). (30)
  6. Rounds 6–7Sc around. (30)
  7. Round 83 sc, dec * (repeat around). (24)
  8. Rounds 9–10Sc around. (24)
  9. Round 112 sc, dec. (18)
  10. Rounds 12–13Sc around. (18)Make a sl st, leave a long tail to sew, and cut.

Tail

Finish with a sl st, leave a long tail to sew, and cut.

  1. Round 14 sc into magic ring.
  2. Round 21 sc, inc * (repeat around). (6)
  3. Round 3Sc around. (6)
  4. Round 42 sc, inc * (repeat around). (8)
  5. Round 53 sc, inc * (repeat around). (10)
  6. Round 64 sc, inc * (repeat around). (12)
  7. Round 75 sc, inc * (repeat around). (14)
  8. Round 86 sc, inc * (repeat around). (16)

Arms

Make 2

Leave a long tail to sew.

Note: The final strand will end up under a finger.

  1. Round 1Make the 3 fingers first: ch 3, from the second ch work 2 sl st, repeat this 2 more times; join with the first ch with a sl st to close the "hand".
  2. Round 2Ch 4, sc 3 from the second ch (to form the arm); finish with a sl st in the middle of the hand.

Legs

Make 2

Finish with a sl st, leave a long tail to sew, and cut.

  1. Round 16 sc into magic ring.
  2. Round 2Inc in each st around. (12)
  3. Round 34 inc, 8 sc. (16)
  4. Round 4Sc around. (16)
  5. Round 51 sc, 4 dec, 7 sc. (12)
  6. Rounds 6–7Sc around. (12)

Hat - Upper Part (Green)

Worked with green yarn.

Finish with a sl st, leave a long tail to sew, and cut.

  1. Round 18 sc into magic ring.
  2. Round 2Inc in each st around. (16)
  3. Round 3(sl st, dc inc) x 8.

Small Stem

Worked with green yarn.

  1. Round 1Ch 4, from the second ch, sc 3; leave a thread to sew in the center of the magic ring at the top.

Hat - Lower Part (Pink)

Worked with pink yarn.

  1. Round 18 sc into magic ring.
  2. Round 2Inc in each st around. (16)
  3. Round 31 sc, inc * (repeat around). (24)
  4. Rounds 4–6Sc around. (24)
  5. Round 73 sc, inc * (repeat around). (30)Close the round with a sl st, then work the edge of the hat.
  6. EdgingRepeat this sequence around the edge of the hat: (ch 2, dc inc).End with a sl st, cut, and hide the strand.

Putting it together

Step 1

Sew the head, tail, arms, legs, and hat to the body using the long tails left for sewing.

Step 2

Move the arm yarn tail down to the underside of the arm before sewing it to the body so the tiny hands lay flat.

Step 3

Add a light amount of stuffing to the tail as you sew it to the back of the body to help it hold a cute, curved shape.

Step 4

Sew the small stem to the top of the green hat piece: pass the yarn tails through the center of the magic ring with a tapestry needle, tie a firm knot on the back, and weave in the ends.

Step 5

Position the strawberry hat slightly tilted on the head before sewing; pin it in place first to ensure it stays centered.

Step 6

With a piece of green yarn, embroider little dots around the hat.

Step 7

Add two green embroidered marks around round 5/6 from the head for the "nose".

Marlene's notes

Note 01

This pattern calls for a 6mm (J) hook with bulky chenille or velvet yarn, which is a looser combination than you might be used to - keep your tension even so the stitches don't gap.

Note 02

Chenille yarn sheds if you pull a magic ring closed too hard, so close each ring - especially the smaller ones on the tail and arms - with slow, gentle tension.

Note 03

Stuff the snout firmly between rounds 9 and 15 before closing the head, and keep stuffing as you decrease on the body and legs so the shapes stay full rather than caving in later.

Note 04

Use the colors and crochet technique most comfortable for you.

Note 05

Work carefully with velvet yarn: use gentle, steady tension when pulling magic rings closed, since pulling too hard can cause the fibers to shed.

Note 06

Use stitch markers for every round to keep track of continuous rounds when working with bulky chenille.

Note 07

Finished size is not specified in the original pattern - it will vary depending on the yarn weight and tension you use.

Porch photos

Before you sit down

  • Check you have enough bulky chenille in both green and pink before you start the head - running short partway through the body is a headache with this yarn.
  • Set aside a full set of stitch markers; with twenty rounds on the head alone and no stitch markers, you will lose your place in continuous rounds.
  • Read through the tail's eight rounds once before you begin it, since the increase pattern shifts every round and it helps to know where you're headed.
  • Have your 16mm safety eyes and stuffing within reach before round 8 of the head, since you'll be placing the eyes and starting to stuff shortly after.

How the hours go

Head
about 90 minutes because it runs twenty rounds and includes placing the safety eyes and stuffing the snout before closing
Body, tail, arms and legs
about 2 hours because you're working four separate pieces with their own shaping, including the tail's curved stuffing
Hat and assembly
about 1 to 1.5 hours because the two-part strawberry hat, small stem, and sewing everything to the body all take a careful hand

Looking after it

  • Hand wash the finished doll in cool water if it needs cleaning, since chenille and velvet yarns can lose their soft texture in a machine wash or with high heat.
  • Reshape the head, body, and tail gently while damp and let the doll air dry flat, then store it somewhere it won't get compressed, so the stuffed shapes hold rather than flatten over time.
FAQs

Asked on the glider

the ones that come up on the glider

Why does the pattern say to use stitch markers for every round?

Bulky chenille makes it hard to see where a round starts and ends, so without a marker it's easy to lose count. This matters most on longer pieces like the head's twenty rounds and the body's thirteen.

When exactly do I add the safety eyes?

Place them between rounds 8 and 9 of the head, spacing them about eight visible stitches apart so one lands on each side of the face. Do this before you close up the head, since you won't be able to reach inside afterward.

How much should I stuff the tail?

Just a light amount, added as you sew it to the back of the body rather than stuffed in advance. This is what gives it that curved shape instead of a straight, floppy tail.

My chenille yarn is shedding when I close magic rings - what am I doing wrong?

You're likely pulling the tail too hard. Chenille fibers pull loose under sharp tension, so close every magic ring with slow, steady pressure instead of one hard tug.

Do the arms attach a particular way?

Yes - move the yarn tail to the underside of each arm before sewing it to the body. This keeps the tiny hands lying flat against the body instead of twisting outward.

How is the stem attached to the hat?

Pass both yarn tails through the center of the magic ring on the green hat piece with a tapestry needle, then tie a firm knot on the back. It is a small step but it is what keeps the stem sitting upright.

What kind of yarn works best for this project?

Bulky weight chenille or velvet yarn works best because it gives the dinosaur its plush, squishy feel and hides seam lines nicely.

Can I use a smaller yarn weight and hook?

Yes, you can use worsted weight acrylic yarn with a 3.5mm or 4.0mm hook, but your finished dinosaur will be much smaller.

How do I keep the safety eyes from popping out of plush yarn?

Because velvet yarn stitches are soft and flexible, you can add a tiny circle of felt on the back inside the head before snapping the washer into place for extra security.