Intermediate 4-6 hours Worsted yarn

Worked on the glider, counted out loud —

Strawberry cow amigurumi: a sweet crochet softie pattern

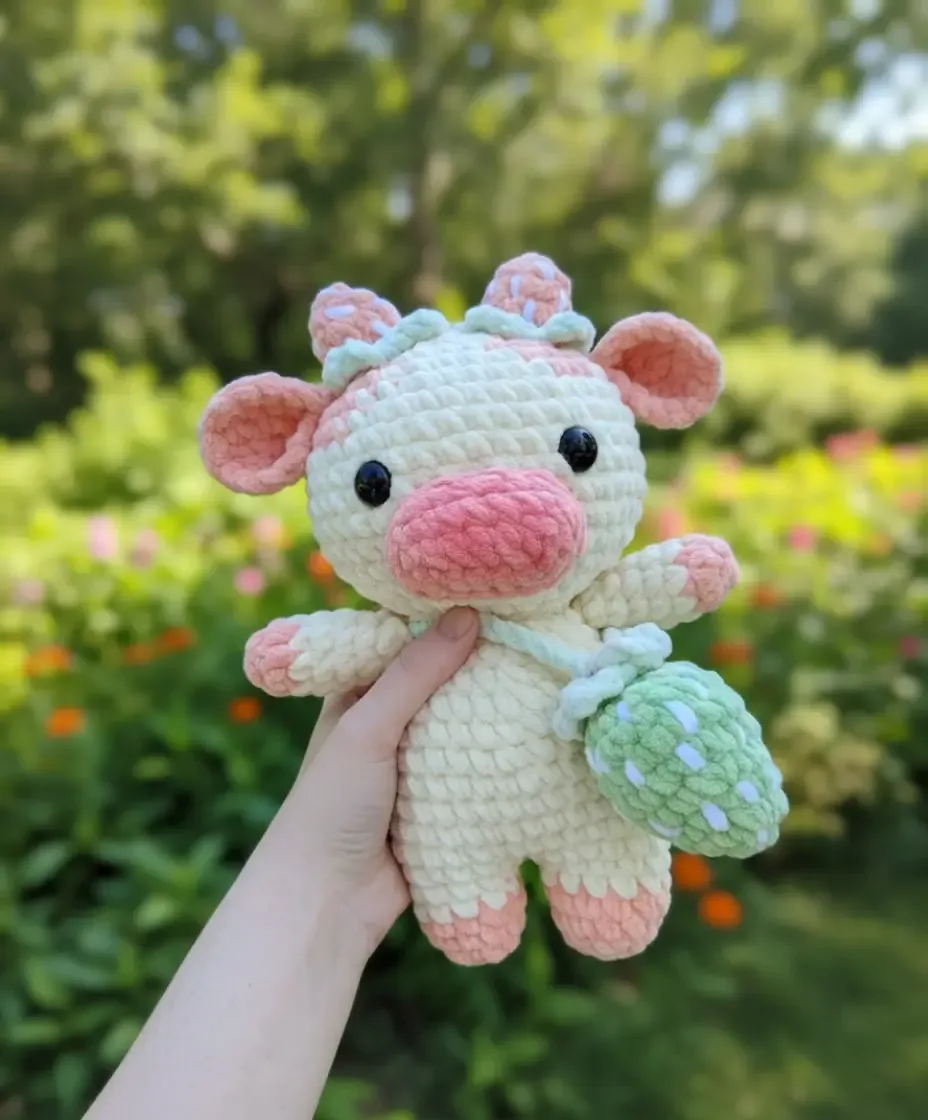
An intermediate amigurumi cow with strawberry hat and bag. About 4-6 hours, great for confident sc crocheters.

Jump to the rounds

What this one is

This is the project for a quiet stretch of evenings when you want something a little whimsical on the hook. You know the kind of friend this is for: the one who'd love a cow wearing a strawberry hat and carrying a tiny strawberry bag, no questions asked. It's for the crocheter who's made a few amigurumi already and is ready for a piece with more personality and more parts to fuss over.

Try it another way

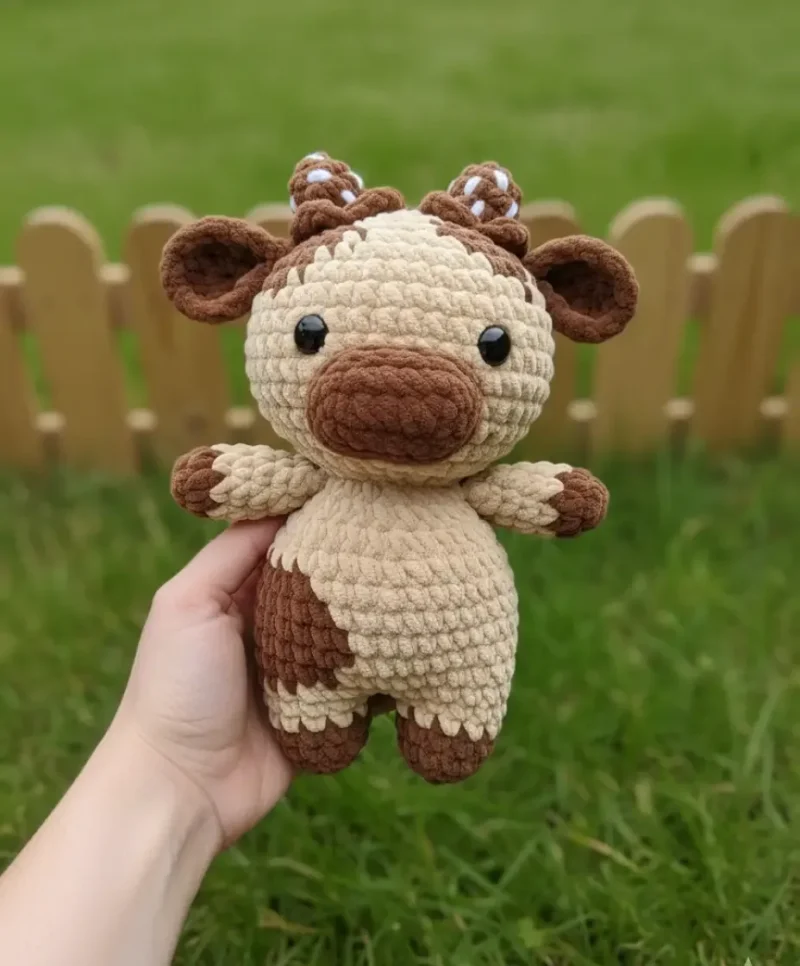
You can play with color placement well beyond pink and off-white — try the body in a soft brown for a more traditional cow look, or swap the strawberry bag's pink and green for any fruit palette you like, since the shaping doesn't depend on the color. If you want a smaller or larger toy, go up or down a hook size from the 4.5 mm called for; the pattern notes that the 4.5 mm hook with worsted-weight yarn gives you roughly a 12-inch finished cow, so a smaller hook with the same yarn will shrink it and a larger hook will grow it without changing a single stitch count. The two strawberry hair accessories are an easy place to experiment too — make just one for a single hair tie, or make a few extra in different shades to clip onto the ears or the bag strap instead. If you're making this as a gift and want it washable for a child, stick with the Himalaya Dolphin Baby yarn as written rather than swapping in a delicate natural fiber, since the toy's small parts (horns, ears, snout) will see a lot of handling.

There's real pleasure in the color-change moments here: pink into off-white on the legs and arms, worked mid-round so the transition sits clean. You get to practice continuity crochet, too — the body picks up straight from the second leg without a single cut, which feels like a neat trick once you see it work. The head's thirteen rounds give you room to actually feel the shaping happen under your fingers rather than just following numbers. And the small add-ons — snout, horns, ears, tail, plus the strawberry bag and matching hair accessories — turn this from one plain toy into a little costume party of parts, each one quick enough to finish in a sitting but detailed enough to keep you interested.

The rounds, in full

Written out, round by round

Intermediate4-6 hoursWorsted

Bring to the porch

Everything this one takes, in the order you will reach for it.

  • Sewing needle
  • Black yarn for embroidery
  • White sewing thread
  • Using the specified materials will create a toy approximately 12 inches (30 cm) tall. Different yarn weights or hook sizes will alter the final size.

Legs

Make 2

Crochet with pink color.

Fasten off and cut the yarn after completing the first leg.

Do not cut the yarn after the second leg; continue crocheting.

Step by step: Crochet with pink color; Change the color to green before Round 7.

Stuff the detail. Cut the yarn, tighten the hole. Fasten the yarn, hide the end inside. Embroider grains with Off-White yarn.

Step by step: Crochet two pieces in the same way.

  1. Round 1First Leg 6 sc in MR. (6)
  2. Round 2First Leg Inc x 6 times. (12)
  3. Round 3First Leg (3 sc, inc) x 3 times. (15)Step by step: (4 sc, inc) x 2. (12); 12 sc.
  4. Round 4First Leg 15 sc, change the color to Off-White.
  5. Rounds 5–7First Leg 15 sc. (3 rounds)
  6. Rounds 1–6Second Leg Repeat as for the first leg.
  7. Round 7Second Leg 15 sc, 1 ch.

Arms

Make 2

Crochet with pink color.

Stuff only the bottom of the arm before folding and closing.

Fasten off and cut the yarn, hide the end.

Crochet the second arm in the same way.

  1. Round 16 sc in MR. (6)
  2. Round 2Inc x 6 times. (12)
  3. Round 312 sc, change the color to Off-White.
  4. Round 4(2 sc, dec) x 3 times. (9)
  5. Rounds 5–89 sc. (4 rounds)
  6. Round 9Fold the detail in half and crochet 4 sc, grasping the stitches of both edges.Step by step: (1 sc, 4 ch) x 5, sl st.

Body

Continue crocheting directly from the second leg without cutting the yarn.

Move the marker to the middle of the body, crochet sc to the marker. Attach the arms with pins on the sides of the body. In the next round, crochet together the stitches of the body and arms (before Round 14).

Stuff the legs and body before Round 15.

Do not cut the yarn, continue crocheting into the Head.

  1. Round 115 sc in the first leg, 1 sc in ch, 15 sc in the second leg, 1 sc in ch. (32)
  2. Round 2(3 sc, inc) x 8. (40)
  3. Rounds 3–740 sc. (5 rounds)
  4. Round 8(5 sc, dec) x 5, 5 sc. (35)
  5. Round 935 sc.
  6. Round 10(4 sc, dec) x 5, 5 sc. (30)
  7. Round 1130 sc.
  8. Round 12(3 sc, dec) x 6. (24)
  9. Round 13(2 sc, dec) x 6. (18)
  10. Round 1418 sc.
  11. Round 15(1 sc, dec) x 6. (12)

Snout

Crochet with pink color.

Crochet sl st. Fasten off and cut the yarn.

  1. Round 1Ch 6; sc in 2nd ch from hook, 3 sc, 3 sc in last st, Underside: 3 sc, inc. (12)
  2. Round 2(3 sc, 3 inc) x 2. (18)
  3. Round 3(3 sc, (1 sc, inc) x 3) x 2. (24)
  4. Rounds 4–524 sc.

Ears

Make 2

Crochet with pink color.

Fasten and cut the yarn, leaving a tail for sewing.

Crochet the second ear in the same way.

  1. Round 16 sc in MR. (6)
  2. Round 26 inc. (12)
  3. Round 3(1 sc, inc) x 6. (18)
  4. Round 4Crochet sl st, 1 ch; fold the detail in half and crochet 2 sc, grasping the stitches of both edges.

Horns

Make 2

Crochet with pink color.

Change the color to green before Round 5.

Crochet sl st. Fasten off and cut the yarn. Embroider grains with Off-White yarn.

Crochet two pieces in the same way.

  1. Round 15 sc in MR. (5)
  2. Round 25 inc. (10)
  3. Rounds 3–410 sc.
  4. Round 5(1 sc, 4 ch, 1 sc) x 5.

Tail

Crochet with Off-White color.

Cut the yarn, leaving the tails for sewing. At the end of the tail, make a brush with pink yarn (5-6 elongated loops), tie the ends with a knot, cut and burn.

  1. Round 112 ch, 11 sl st in 2nd ch from hook.

Strawberry Bag

Crochet with Green color.

Change the color to light green color before Round 10.

Fasten off and cut the yarn. Embroider grains with Off-White yarn.

  1. Round 16 sc in MR. (6)
  2. Round 2(1 sc, inc) x 3. (9)
  3. Round 3(2 sc, inc) x 3. (12)
  4. Round 4(3 sc, inc) x 3. (15)
  5. Round 5(4 sc, inc) x 3. (18)
  6. Rounds 6–718 sc.
  7. Round 8(1 sc, dec) x 6. (12)
  8. Round 96 dec. (6)
  9. Round 10Crochet for the front loops only ((1 sc, 4 ch, 1 sc) in one loop), repeat 6 times, sl st.
  10. Round 11Crochet for the back loops only of the 9th round, 6 sc.
  11. Round 12Crochet 30 ch, sl st.

Head

Move the marker to the middle of the head, crochet sc to the marker. In the next round, begin crocheting pink spots, changing Off-White and pink yarn, leaving broaches (floats) inside the head. Spots can be any shape, but make 6 decreases in each round (before Round 25).

Fasten off and cut the Off-White yarn. Stuff the head (before Round 31).

Cut the yarn, tighten the hole. Fasten the yarn, hide the end inside the head (after Round 31).

  1. Round 1612 inc. (24)
  2. Round 17(3 sc, inc) x 6. (30)
  3. Round 18(4 sc, inc) x 6. (36)
  4. Round 19(5 sc, inc) x 6. (42)
  5. Round 20(6 sc, inc) x 6. (48)
  6. Rounds 21–2448 sc. (4 rounds)
  7. Round 25Off-White (6 sc), pink (dec, 6 sc), Off-White (dec, (6 sc, dec) x 4). (42)
  8. Round 26Off-White (4 sc), pink (1 sc, dec, 5 sc, dec, 1 sc), Off-White (4 sc, dec, (5 sc, dec) x 3). (36)
  9. Round 27Off-White (3 sc), pink (1 sc, dec, 4 sc, dec, 4 sc), Off-White (dec, (4 sc, dec) x 2, 2 sc), pink (2 sc), Off-White (dec). (30)
  10. Round 28Off-White (2 sc), pink (1 sc, dec, (3 sc, dec) x 2, 1 sc), Off-White (2 sc, dec, 3 sc, dec, 1 sc), pink (2 sc, dec). (24)
  11. Round 29Off-White (2 sc), pink (dec, (2 sc, dec) x 2, 2 sc), Off-White (dec, 2 sc), pink (dec, 2 sc, dec). (18)
  12. Round 30Off-White (1 sc), pink (dec, (1 sc, dec) x 5). (12)
  13. Round 31pink, 12 dec. (6)

Putting it together

Step 1

Attach the Eyes: Position the safety eyes between rounds 24 and 25, spacing them 9 stitches apart. Secure with glue. You can add black felt circles behind the eyes for extra definition.

Step 2

Stuff Components: Carefully stuff the snout and horns with fiberfill.

Step 3

Pin and Position: Use pins to temporarily attach all the details (ears, horns, snout, tail, and bag) to the body. This allows you to adjust positioning before permanently sewing.

Step 4

Sew Details: Using a needle and Off-White strong thread, sew all pieces securely in place. The ears can be sewn using the leftover pink yarn tails.

Step 5

Create Eye Tightening: For a professional finish, insert a needle with thread through the bottom of the snout into the eye area. Work through points as follows: through 1-2, then 3-4, and finally 5-6. Gently pull the thread to create small depressions around the eyes, then tie a secure knot. Hide the thread ends inside the head.

Step 6

Embroider Features: Using thick black thread, embroider the nostrils on the snout, add eyelashes above the eyes, and create a sweet smiling mouth.

Step 7

Sew strawberries to hair clips, headbands, or ponytail holders for matching accessories!

Marlene's notes

Note 01

Keep your single crochets tight and even throughout; a looser gauge on the head or body will let the fiberfill peek through at the thirteen- and eleven-round marks.

Note 02

Stuff as you go rather than all at once at the end; the pattern calls for stuffing the legs and body before a specific later round, and the arms only at the bottom before folding.

Note 03

Using the specified materials will create a toy approximately 12 inches (30 cm) tall. Different yarn weights or hook sizes will alter the final size.

Note 04

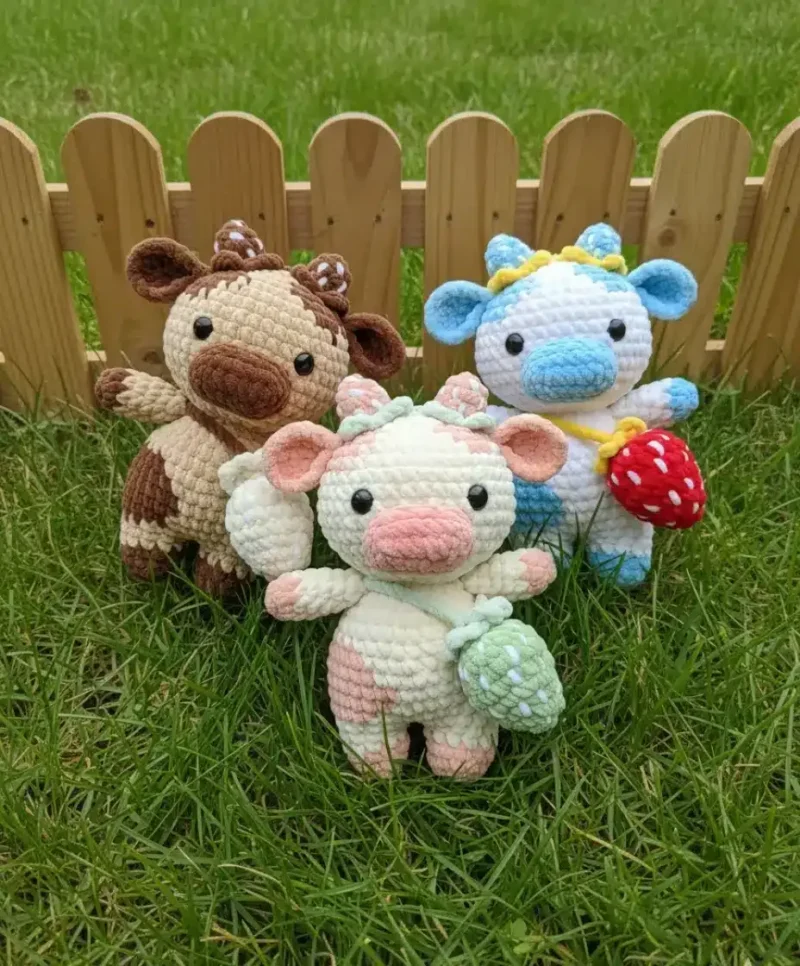
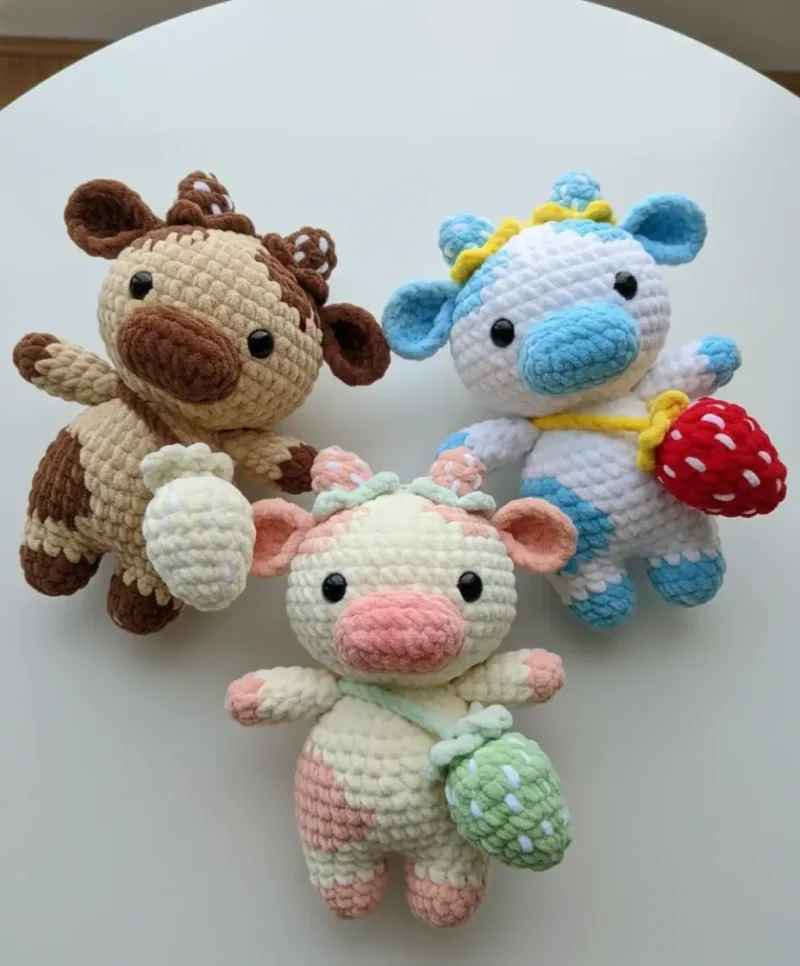
These cows can be made in any colors you like! Feel free to customize and use your favorite color combinations.

Porch photos

Before you sit down

  • Confirm you have enough Off-White (the main skein) and only need about half a skein each of Pink and the light Green — the green amount is small, so don't overbuy.
  • Set a stitch marker aside before you cast on; you'll use it to track the start of rounds and later to find the middle of the body for arm placement.
  • Crochet a quick swatch with your size 7 (4.5 mm) hook to check your sc rounds are snug enough to hide stuffing — amigurumi gauge is tighter than garment gauge.
  • Read through the Legs section first, since both legs are worked before the body, and the second leg's yarn is left uncut to flow straight into Round 1 of the body.

How the hours go

Legs and Arms
about 45-60 minutes because you're making two of each with a color change partway through every piece
Body and Head
about 90-120 minutes because the body runs eleven rounds with arm attachment mid-way, and the head's thirteen rounds include the eye placement step
Small details and assembly
about 90-120 minutes because snout, ears, horns, tail, bag, and two hair accessories all need pinning, stuffing, and sewing before the eyes can go

Looking after it

  • Hand wash the finished cow in cool water with a mild detergent, since the acrylic-blend baby yarn holds its shape best without hot water or a washing machine's agitation.
  • Reshape the stuffed parts gently while damp and lay flat to dry away from direct heat, then store the toy somewhere it won't be squashed so the horns and ears keep their rounded form.
FAQs

Asked on the glider

the ones that come up on the glider

Do I need to finish both legs before starting the body?

Yes, both legs are worked first, with the first one fastened off and the second left uncut. That second leg's yarn continues directly into Round 1 of the body, so don't cut it.

How do I know where to attach the arms?

The pattern has you move your stitch marker to the middle of the body and crochet around to that point, then pin the arms in place on the sides. The following round joins the body and arm stitches together, so pinning first lets you check the position before committing.

When do I put in the safety eyes?

The eyes go in between rounds 24 and 25 of the head, spaced nine stitches apart. Secure them with the transparent glue, and add felt circles behind them if you want extra contrast.

Can I skip the wire or extra stiffening in the horns?

The pattern only calls for fiberfill in the snout and horns, no wire, so stuffing them firmly with polyester fiberfill is all you need. Just pack it in evenly so the horns hold their small shape.

What size hook and yarn weight does this actually need?

You'll want a size 7 (4.5 mm) hook paired with the Himalaya Dolphin Baby yarn, which is the lighter worsted weight. That combination is what gives you the roughly 12-inch finished cow mentioned in the pattern notes.

Is the strawberry bag functional or just decorative?

It's worked as a standalone piece with its own eleven rounds, pinned and sewn onto the body like the other details. It holds its shape as a small bag, but it's really there as a sweet accessory rather than a working pocket.