Intermediate 6-8 hours Worsted / Medium (4) yarn

Worked on the glider, counted out loud —

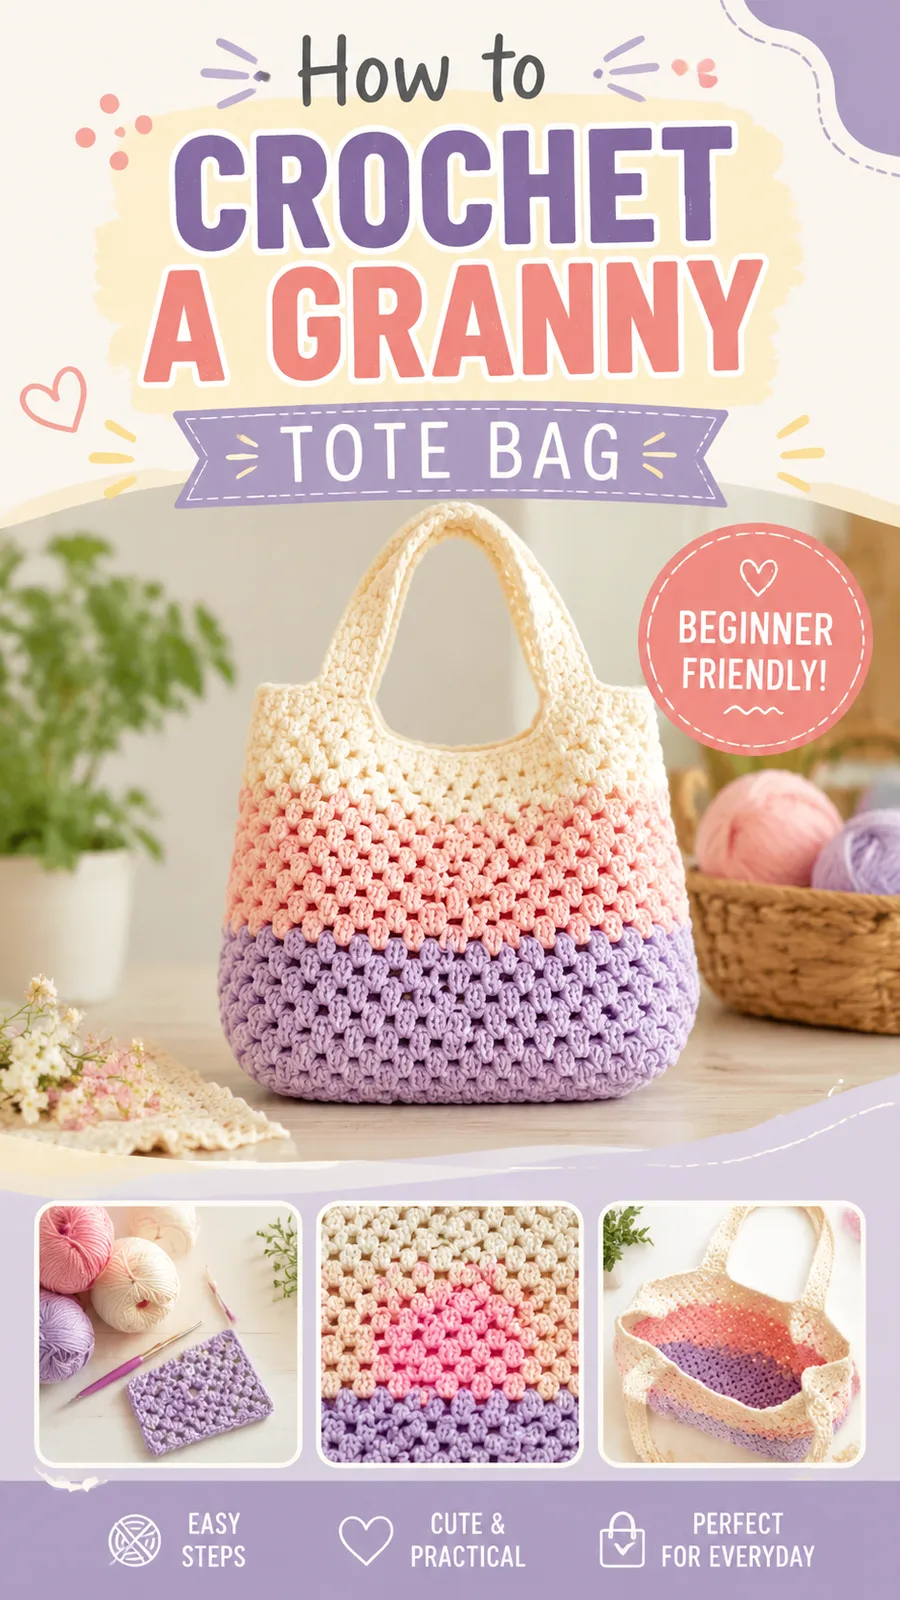
Soft pastel cluster tote bag crochet pattern for beginners

A confident-beginner crochet tote with cluster texture and pastel color blocks, worked over about 6-8 hours in cotton yarn.

Jump to the rounds

What this one is

This is the bag for the version of you who wants one reliable tote that goes with everything — farmers market, beach bag, the thing you grab for a weekend away. It suits a confident beginner who has made a few projects already and is ready to track stitch counts across color changes without too much hand-holding. If you've been eyeing that rounded bucket shape in soft cream, pink, and lavender, this is where you start.

Your hands spend most of this project doing two different jobs: building the oval base round by round, then settling into the easy rhythm of the cluster pattern as the body grows and the colors shift. The handle section asks for a little more patience, since it's worked back and forth in matching rows before you fold and attach it. All told, you're looking at something you can finish over a few relaxed sittings rather than one long stretch.

Try it another way

Once you've made this tote as written, there's plenty of room to play. Swap the pastel trio for a single colorway and let the cluster texture do all the talking, or flip the proportions so pink or lavender takes up more of the body instead of cream. If you want a smaller version, you can shorten the foundation chain from the 31 chains used here, though you'll need to keep the increase logic in Rounds 1 through 3 proportional so the oval still lies flat. For a sturdier everyday bag, add the optional fabric lining mentioned in the materials list, which also hides yarn ends and gives structure for heavier loads. The handle rows are worked at a fixed 20 stitches wide and 18 rows long, but you could repeat those rows a few extra times if you prefer a longer drop for shoulder carrying. Cotton gives the firmest shape, but a cotton-acrylic blend softens the drape if you want something a little more relaxed. However you adjust it, the cluster-and-chain-space pattern stays simple enough to absorb these changes without any real risk to the construction.

There's real satisfaction in watching an oval foundation chain turn into a proper rounded base, increase by increase, until the stitch count settles and the sides start climbing straight. The cluster stitch pattern is the quiet star here — groups of double crochet tucked into chain spaces, round after round, building a texture that looks far more complicated than it actually is to work. Then the color changes arrive, cream giving way to pink and then lavender, and suddenly the fabric has that calm, blocked look without any fussy colorwork technique. The handle is its own small victory: twenty stitches wide, worked flat for eighteen rows, then folded and seamed into place so it reads as one continuous loop rather than two sewn-on straps. By the end you've used oval construction, clusters, color blocking, and a built handle — four skills, one bag.
The rounds, in full

Written out, round by round

Intermediate6-8 hours4.5 mmWorsted / Medium (4)

Bring to the porch

Everything this one takes, in the order you will reach for it.

Color A

  • Cream, approximately 200 yards (183 meters)

Color B

  • Soft pink, approximately 125 yards (114 meters)

Color C

  • Lavender, approximately 125 yards (114 meters)
  • 4.5 mm crochet hook
  • Yarn needle
  • Stitch marker
  • Scissors
  • Optional fabric lining

Bag Base

  1. Round 1With Color A, ch 31. Dc in 3rd ch from hook and in each ch across. Work 5 dc in the last chain. Continue along the opposite side of the foundation chain with dc in each stitch. Work 4 dc in the starting chain space. Join with sl st. (66 dc)
  2. Round 2Ch 2. Dc in each stitch around. Work 2 dc in each of the 5 end stitches on both oval ends. Join. (76 dc)
  3. Round 3Ch 2. Dc around evenly, placing 2 dc in every increase stitch from previous round. Join. (86 dc)
  4. Round 4Ch 1. Sc in each stitch around. Join. (86 sc)

Main Pattern

  1. Round 1Sc across the marked handle section. Ch 1, turn.
  2. Round 2to 18: Sc across the handle stitches. Ch 1, turn after each row. (20 sc each row)Fold the handle upward and attach the second end to the opposite marked section using slip stitches or whip stitch.Work one final round of sc around the handle edges for reinforcement.(20)

Bag Body

  1. Round 5Ch 2. Work cluster stitch around, placing one cluster every 3 stitches. Adjust spacing slightly if needed to maintain an even round. Join.
  2. Round 6Ch 2. Work cluster stitches into each chain space around. Join.Rounds 7 to 10: Repeat Round 6. Change to Color B at the end of Round 10.
  3. Round 11to 14: Continue cluster stitch pattern with Color B.
  4. Round 15to 18: Change to Color C and continue cluster stitch pattern.
  5. Round 19to 22: Change back to Color A and work cluster stitch pattern.
  6. Round 23Ch 1. Sc in every stitch and chain space around. Join.

Special Stitch

Cluster stitch: Ch 1, work 3 dc into the same stitch or space. This creates a small textured group.

Putting it together

Step 1

Proper finishing helps a handmade crochet tote maintain its shape. After weaving in ends, gently wash or dampen the bag according to the yarn instructions. Shape the tote on a flat surface and allow it to dry completely.

Step 2

Hand wash gently when possible.

Step 3

Avoid excessive heat that may damage cotton fibers.

Step 4

Store the bag flat or lightly stuffed to preserve the shape.

Step 5

Use a lining if carrying heavier items regularly.

Marlene's notes

Note 01

Use a 4.5 mm hook throughout and keep an eye on your stitch count at the end of each base round, since the increases in Rounds 1 through 3 are what shape the oval correctly.

Note 02

Move your stitch marker up into the first stitch of each new round as you go, especially once you're deep into the repeating cluster rounds and it's easy to lose track of where a round began.

Before you sit down

  • Check your yarn amounts against the materials list — roughly 200 yards of cream and 125 yards each of pink and lavender — so you're not caught short mid-round.
  • Have your stitch marker ready before Round 1; you'll place it in the first stitch of every round and it's much easier to keep moving if it's already clipped on.
  • Work a small cluster swatch first so you know how the double crochet groups and chain spaces behave with your hook and tension before committing to Round 5.
  • Read through the Main Pattern handle rows once before you reach them, since the fold-and-attach step makes more sense if you've seen where it's heading.

How the hours go

Bag Base
about 45-60 minutes because four rounds of increases need careful counting to land on the right stitch totals
Bag Body cluster rounds
about 3-4 hours because there are fourteen rounds total across three colors, each needing an even cluster placement
Main Pattern handle
about 1.5-2 hours because eighteen rows of back-and-forth single crochet plus the fold-and-seam step take a steady hand

Looking after it

  • Hand wash the finished tote gently in cool water, since cotton holds its shape best without harsh agitation or hot water.
  • Shape the damp bag on a flat surface and let it air dry completely before storing it flat or lightly stuffed, so the rounded base and sides keep their form.
FAQs

Asked on the glider

the ones that come up on the glider

Can I make this bag with acrylic yarn instead of cotton?

Yes, acrylic blends will work for the main pattern. Cotton or a cotton blend is recommended because it holds the tote's shape better over repeated use.

How do I keep my stitch count accurate across the base rounds?

Place your stitch marker in the first stitch of every round and recount after each increase round. The target counts are given at the end of each round, so checking against those as you go catches mistakes early.

Is the handle attached separately or built into the bag?

The handle is worked flat across marked handle stitches for eighteen rows, then folded upward and attached to the opposite marked section with slip stitch or whip stitch. A final reinforcing round of single crochet goes around the handle edges afterward.

What does the cluster stitch actually look like once it's worked?

It's a modified cluster made from groups of double crochet separated by chain spaces, which creates small raised texture across the fabric. It looks more intricate than it is, since you're simply repeating the same grouped stitch into each chain space.

Do I need a lining for this tote?

A lining is optional and listed in the materials as such. It's worth adding if you plan to carry heavier items regularly, since it gives the cotton fabric extra support.