Beginner about 4 hours Worsted yarn

Worked on the glider, counted out loud —

A Soft Crochet Mohair Beanie for Babies and Kids

A worsted-weight mohair-blend beanie for babies and toddlers, shaped with simple single crochet. About four hours to make.

Jump to the rounds

What this one is

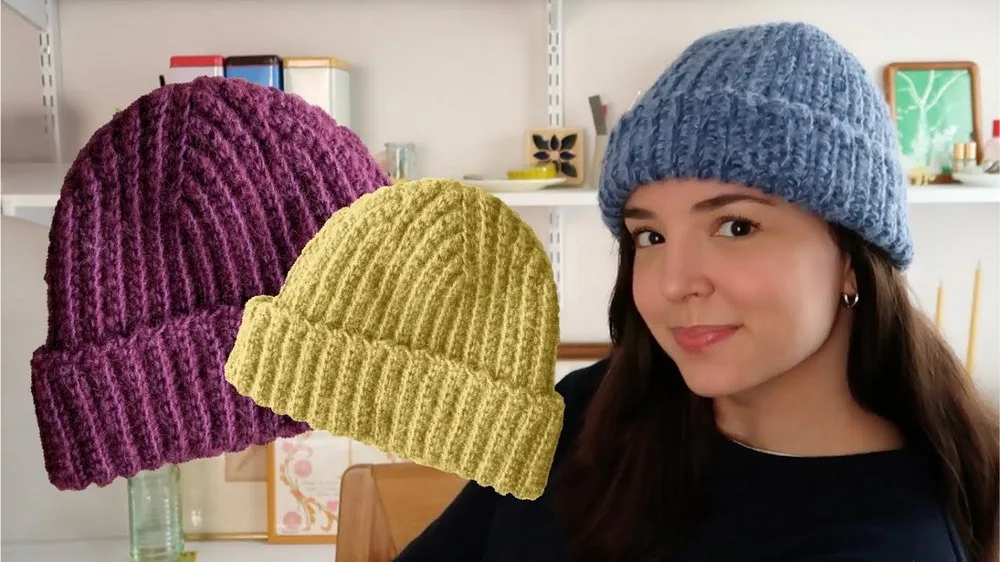
This beanie is the kind of project you pull out on a quiet evening when you want something small and finished by bedtime. It's sized for babies and little kids, so it works up fast and uses only a bit of yarn. If you've got a new baby to welcome, a toddler with a bare head, or just want a soft little cap to keep on hand, this one fits the bill. The mohair-cotton blend makes it soft enough for the most sensitive skin.

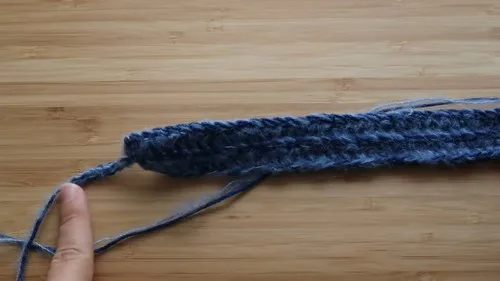
Your hands will spend most of their time turning, single crocheting into back loops only, and sneaking one extra stitch into the foundation chain at the end of every row. That small, repeated extension is what tapers the hat into shape instead of a flat rectangle. Six rows gets you there, then a seam and a cinched top finish the job. All told, you're looking at about four hours from first stitch to woven-in ends.

Try it another way

This shape scales nicely if you want to play with it. Add a row or two beyond the six here and you'll get a deeper beanie for an older kid, since each row simply repeats the same turn, back-loop SC, and foundation-chain extension. You could also swap the yarn pairing: try two strands of worsted cotton for a cooler summer version, or a different fuzzy yarn in place of the alpaca silk if mohair isn't on hand, as long as you keep to a 4mm hook and worsted weight. Color placement is easy to change too -- since you're holding two strands together anyway, swap one strand's color halfway through the six rows for a subtle two-tone fade, or change both strands together between rows for stripes. Row 3's 36 SC count gives you a sense of the width to expect, so use it as a checkpoint if you're adjusting gauge. For a non-baby use, this same construction makes a soft headband if you stop after a couple of rows and seam it into a loop instead of cinching the top. Scrap yarn from other worsted projects works well here too, since the finished piece is small.

What makes this one satisfying is the shaping trick hiding inside an otherwise simple single crochet fabric. You hold the cotton and the mohair-look alpaca silk together the whole way, so every stitch carries both the structure of the cotton and the halo of the alpaca silk without any color changes to track. Working into the back loops only on every row builds a neat ridged texture that reads almost like garter stitch. The real payoff is the end of each row, where you extend one stitch into the unworked foundation chain -- a small move that quietly tapers the whole piece into a fitted shape. Seaming the outside loops together and cinching the last row closed turns a flat strip into a beanie with almost no fuss.
The rounds, in full

Written out, round by round

Beginnerabout 4 hours4 mmWorsted

Bring to the porch

Everything this one takes, in the order you will reach for it.

Yarn

  • Lion Brand 24/7 Cotton (Worsted weight, 100% cotton) and Drops Alpaca Silk (Worsted weight, the actual material used is alpaca silk but referred to as mohair for its texture).

Hook

  • 4 mm crochet hook.

Additional

  • Scissors, tapestry needle.

Main Pattern

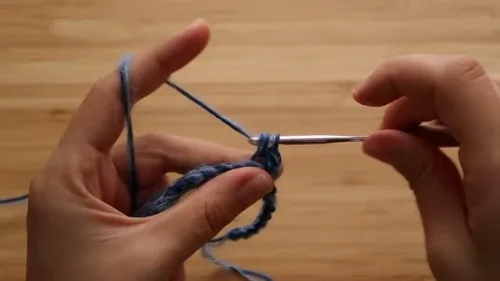
  1. Round 2Turn your work, do not chain 1. SC right back into the SS and down the row you just created, using the back loops only for SC.Forming the Pattern: Each following row will start with a turn, then SC in back loops only.

The end of each row will extend one stitch into the unworked foundation chain before ending with a SS. This creates a gradual increase along one side.

Follow this pattern:

  1. Round 336 SC + SS.
  2. Round 4Work back. After Row 5: 38 SC + SS.

Row 6: Work back.

  1. Round 740 SC + SS. For Row 8: Work back.
  2. Round 942 SC + SS.
  3. Round 10Work back, completing the pattern repeat. Continue repeating these steps, minus the initial chain, until the piece is long enough to wrap around your head.

The original instruction was to repeat this pattern seven times.

Closing the Hat

After the final row, cut a long tail for sewing.

Sew the seam together matching the outside loops (right loop of right side to the left loop of left side).

Close the top of the hat by running the yarn through the last row's stitches and pulling tight.

Weave in all ends.

Putting it together

Step 1

Turn the hat right-side out, fold the brim to your liking, and wear it proudly!

Step 2

Remember, the creator emphasized working with both yarns together, keeping the tension even throughout.

Step 3

Also, it was noted the unique technique used in this hat creates a nicely tapered and fitting shape that's quite simple once you get the hang of it.

Step 4

The total time estimated to make the beanie is about four hours.

Marlene's notes

Note 01

Use a 4mm hook throughout, and hold the cotton and alpaca silk strands together as a single working yarn for every stitch -- dropping one partway through will change the texture and the warmth.

Note 02

Because every row works into the back loop only, keep your tension even and avoid pulling too tight, or the ridge pattern will pucker instead of lying flat.

Note 03

The increase happens only at one end of each row, so don't be tempted to even it out -- that one-sided extension into the foundation chain is what creates the tapered, fitted shape.

Porch photos

Before you sit down

  • Have both yarns, the 24/7 Cotton and the Drops Alpaca Silk, wound and ready to hold together from the very first stitch.
  • Check that your 4mm hook gives you a fabric that feels dense enough to hold its shape but still soft against a baby's skin.
  • Work a small swatch in back-loop-only single crochet with both strands held together, so your tension matches before you commit to the full six rows.
  • Read through the shaping note about extending one stitch into the foundation chain at the end of each row, so you recognize it the first time it comes up in Row 3.

How the hours go

Main Pattern
about 3 hours because six rows each need a turn, back-loop SC across, and a careful one-stitch extension into the foundation chain
Closing the Hat
about 45 minutes because the seam has to match outside loops precisely before you cinch the top tight
Assembly & Finishing
about 30 minutes because turning the hat right-side out, folding the brim, and weaving in ends takes a little patience with two strands held together

Looking after it

  • Hand wash the finished beanie in cool water with a gentle wool-safe soap, since the alpaca silk fibers can felt or mat if you agitate them or use hot water.
  • Lay it flat on a towel to dry and ease it back into its rounded shape while damp, then store it folded rather than hung so the brim doesn't stretch out of shape.
FAQs

Asked on the glider

the ones that come up on the glider

Why do I turn my work instead of chaining 1 at the start of each row?

Skipping the chain 1 keeps the edge from building up extra bulk along the straight side of the hat. Turning and working the SC straight back into the slip stitch keeps that edge clean and flat.

Why work every row in the back loop only?

Back-loop-only single crochet leaves the front loop sitting on the surface as a little ridge, which gives the hat its texture. It also keeps the fabric a bit more flexible, which matters once you start shaping it.

What exactly does extending into the foundation chain do?

Each time you add that one extra stitch into the unworked foundation chain, you're widening one side of the strip just slightly. Repeated over six rows, that small widening is what curves the flat piece into a tapered, fitted shape.

Can I make this with just one yarn instead of holding two together?

You can, but you'll lose the halo and warmth the alpaca silk adds alongside the cotton's structure. If you go with one strand, pick a soft worsted weight and expect a slightly thinner, less fuzzy fabric.

How do I know when the hat is the right size for my kid's head?

Since the shaping comes from six set rows, the easiest check is to wrap your work around the head it's intended for after Row 3's 36 SC, before you finish the remaining rows. If it's snug there, the finished piece should land in a comfortable range once seamed and cinched.

What if my seam doesn't line up neatly along the outside loops?

Go slowly and match the right loop of the right side to the left loop of the left side stitch by stitch, rather than rushing. If a stitch or two is off, it's an easy fix to unpick a few inches and reseam before you weave in the tail.