Intermediate 4-6 hours Worsted yarn

Worked on the glider, counted out loud —

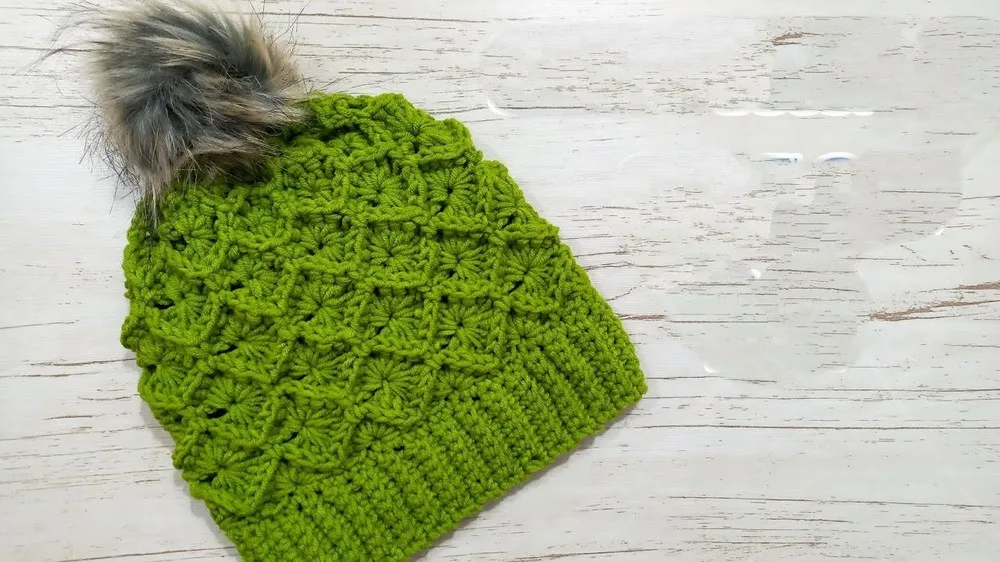
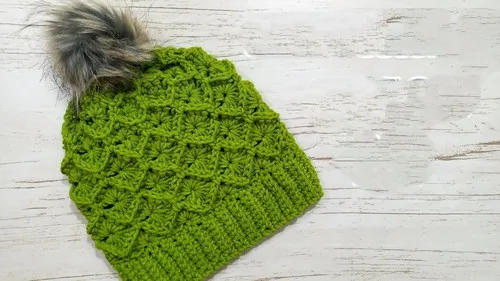
Ribbed band fan stitch crochet beanie for fall

A cozy fan-stitch beanie with a ribbed band, good for confident beginners. About 4-6 hours from slip knot to finished brim.

Jump to the rounds

What this one is

This is the hat you reach for once the air turns crisp and you want something with a little texture under your fingers, not just another plain stockinette dome. It suits the crocheter who likes two different rhythms in one project: the back-and-forth snap of a ribbed band, then the open, lacy give of fan stitches building up and around. Make it for yourself, for someone whose ears get cold first, or as the kind of gift that looks far more complicated than it actually is.

Your hands do two distinct jobs here. First they work the ribbed band flat, row after row, turning a straight strip into a stretchy loop. Then, after a hook change, they join that band into a round and start building fan stitches on top of decrease rounds, repeating that two-round rhythm until the hat reaches your head's height. Altogether, from slip knot to the last join, you're looking at a few focused hours, easily split across two sittings.
The rounds, in full

Written out, round by round

Intermediate4-6 hours4.5 mmWorsted

Bring to the porch

Everything this one takes, in the order you will reach for it.

  • Worsted weight yarn
  • 4.5 mm crochet hook (for the ribbed band)
  • 5.0 mm crochet hook (for the body of the hat)
  • Tapestry needle for weaving in ends
  • Scissors

Ribbed Band

Begin with a 4.5 mm hook.

Make a slip knot.

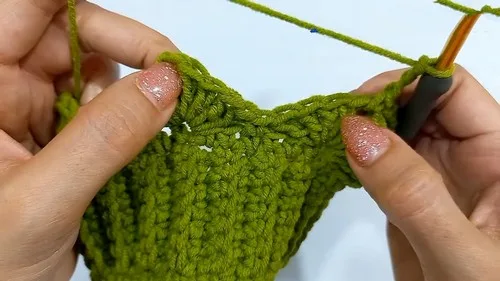
Chain 9 to start. These chains determine the width of the ribbed band. Adjust the number of chains for width as needed.

  1. Row 1Skip the first chain. Single crochet into the second chain and then into each chain across (8 single crochets).(8)
  2. Row 2Chain 1, turn. Single crochet into the first stitch under both loops, then make a single crochet into the back loop of the next and each stitch across until the last stitch, which is under both loops. Repeat Row 2, making sure the total number of rows is a multiple of 6, until the rib band reaches your desired circumference.
  3. JoiningLay flat and fold so the first row and the last row are touching. Join using slip stitches through the back loop of the first row and both loops of the last row.

Setup Round

Change to a 5.0 mm hook.

  1. Body SetupRotate the band so the seam is inside, and working along the top edge of the ribbed band, evenly space single crochets around. The number of single crochets should match the number of rows in your ribbed band.
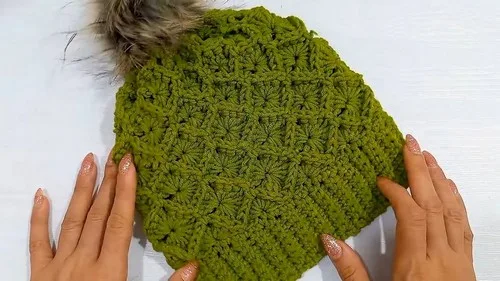
  2. Setup RoundChain 1, single crochet in the same space. Skip two stitches, then in the next stitch, make 4 double crochets, chain 1, and 4 more double crochets (creating a Fan Stitch), skip two stitches, then single crochet in the next stitch. Repeat from * to * around. Join with a slip stitch to the first single crochet.
  3. Round 1Decrease Round Chain 1, single crochet in the same space, chain 3. Make an incomplete back post double crochet around each of the next 4 double crochets, chain 3, then pull through all loops on the hook (this forms a decrease). Chain 3, single crochet into the next chain-1 space, and repeat this sequence around.
  4. Round 2Fan Stitch Round Repeat the setup round, placing fan stitches on top of each decrease stitch from the previous round.Repeat Rounds 1 and 2 until the hat reaches the desired height.

Closing the Hat

  1. Closing RoundsDecrease the number of stitches in each fan by crocheting 3 double crochets instead of 4, and then in the next round decrease to 2 double crochets per fan. Continue until there is only 1 double crochet, 1 chain, and 1 double crochet for each fan stitch.
  2. Finish OffFinish by cutting the yarn, leaving a long tail. Use a tapestry needle to weave through the chain-1 spaces of the last round, pull tight to close the top, secure, and weave in ends.

Putting it together

Step 1

Turn the hat right side out.

Step 2

You can attach a pom-pom at the top if desired.

Marlene's notes

Note 01

You change hooks partway through this pattern, from a 4.5 mm for the ribbed band to a 5.0 mm for the body, so keep both within reach rather than hunting for the second one once the band is done.

Note 02

Your total row count on the ribbed band needs to be a multiple of 6, so it's worth counting rows as you go rather than guessing at the end.

Note 03

The number of single crochets you space around the top of the band must match your row count exactly, so count rows once more before you start that evenly-spaced round.

Porch photos

Before you sit down

  • Check you have enough worsted weight yarn on hand to cover both the ribbed band and the full fan-stitch body, since running out mid-round means a less tidy join.
  • Swatch the ribbed band first with your 4.5 mm hook, just a few rows, to confirm your row count will land on a multiple of 6 for your head size.
  • Place a stitch marker in the first single crochet of the setup round before you join, since that join point gets easy to lose once the fan stitches are in place.
  • Read through the Setup Round once fully, especially the back post double crochet decrease, before you start Round 1, so the 'pull through all loops' step doesn't catch you off guard mid-round.

How the hours go

Ribbed Band
about 45-60 minutes, because every row is worked back loop only and the total rows need to land on a multiple of 6
Joining and Setup Round
about 20-30 minutes, because spacing the single crochets evenly around the band takes a careful count before you join
Fan Stitch and Decrease Rounds
about 2.5-4 hours, because the incomplete back post double crochet decrease and the repeated fan placement take a slower, steady pace until the hat reaches your desired height

Looking after it

  • Hand wash your finished beanie in cool water with a gentle detergent, since worsted weight wool or wool-blend yarn holds its shape far better than it does in a machine wash.
  • Lay it flat to dry on a towel, easing the ribbed band back into shape while damp, then store it folded rather than hung so the fan stitch crown doesn't stretch out of round over time.
FAQs

Asked on the glider

the ones that come up on the glider

Can I make this hat bigger without changing the whole pattern

Yes, start by adjusting your initial chain of 9 for a wider or narrower band, then keep your total row count a multiple of 6 so the stitch count stays even. The body will naturally follow the band's circumference once you join and start the setup round.

Why do I need two different hook sizes

The 4.5 mm hook keeps the ribbed band dense and stretchy, which is what gives the brim its snug, knit-like fit. The 5.0 mm hook opens the fan stitches up a bit more, so the body of the hat has a looser, lacier drape than the band.

How do I know when to stop repeating Rounds 1 and 2

You stop once the hat reaches your desired height, measured from the top of the ribbed band to the crown. There's no fixed round count given, so it helps to try the hat on as you go, especially once you're a few repeats in. Once you reach that height, you'll move into the closing rounds to shape and finish the crown.

What if I lose count of my rows on the ribbed band

Lay the band flat and count the ridges along one edge, since each row leaves a visible line once you're working back loop only. If the count isn't a multiple of 6, it's easier to add or remove a row now than to adjust the setup round later.

Do I have to attach a pom-pom at the end

No, that step is listed as optional in the assembly. The hat is complete and wearable right after you turn it right side out, the pom-pom is just a finishing touch if you want one.