Intermediate 4-6 Hours Worsted yarn

Worked on the glider, counted out loud —

Snail Shell Hat Free Crochet Pattern: Stylish and Cozy

Make the Snail Shell Hat, a cozy worsted weight crochet pattern with a spiraling shell-like crown that's stylish, warm, and fun to stitch.

Jump to the rounds

Before you sit down

Begin with a small foundation ring to establish the very top center point of the crown.

Work three increase rounds that steadily widen the ring into the start of a spiral shape.

Continue into the Main Pattern rounds, shifting each increase slightly to build the signature shell swirl.

Keep tension even throughout so the spiral curls neatly instead of lying flat or puckering.

Transition into the Body of the Hat, working plain rounds without further increases for a smooth fit.

Try the hat on periodically to judge when the plain rounds have reached your desired length.

Finish off and weave in your tail ends securely at both the crown and the bottom edge.

Block the finished hat gently to help the spiraled crown sit flat and look its best.

What this one is

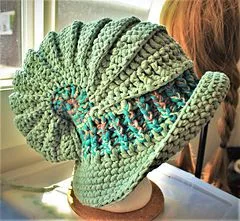
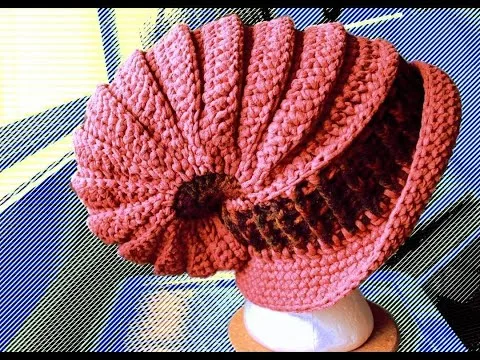
The Snail Shell Hat is exactly what it sounds like — a beanie topped with a beautifully spiraled crown that mimics the gentle swirl of a snail's shell. Worked in worsted weight yarn, this pattern builds from a simple foundation round into a series of increase rounds that create that signature coiled texture before settling into the smooth, fitted body of the hat. It's perfect for crocheters who love a little visual drama in their headwear without needing complicated colorwork or lace techniques.

This pattern relies on foundation ring work, careful increase placement, and steady tension to get that satisfying spiral effect in the crown. If you're comfortable working in continuous rounds and following an increase pattern, you'll find this an approachable step up from a basic beanie. Expect to spend about 4 to 6 hours from start to finish, including working the foundation round, three increase rounds, the main pattern rounds, and the plain body of the hat before finishing off.

Once complete, you'll have a cozy, close-fitting hat with roughly 200 yards of yarn worked into a striking spiral crown and a smooth, warm brim. It looks equally at home paired with a chunky scarf on a crisp fall walk or tucked under a jacket hood in winter. Because it's quick to whip up and endlessly customizable in color, it also makes a thoughtful, handmade gift for the yarn-lovers and nature enthusiasts in your life.
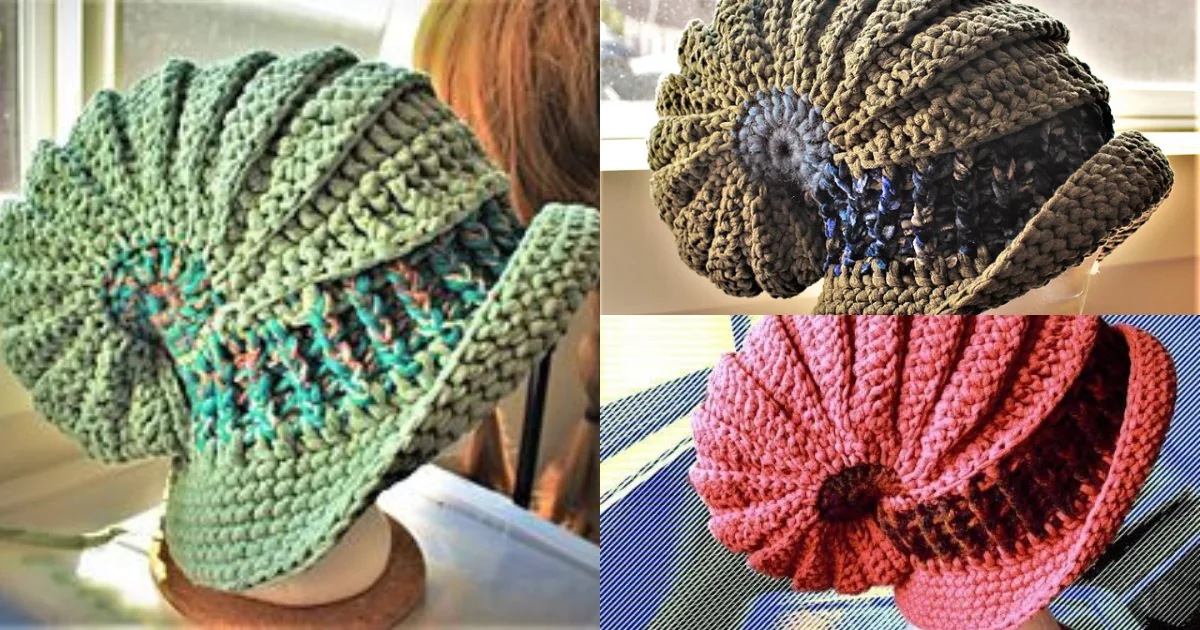
Variations

I adore this pattern because the increase rounds do all the heavy lifting for that gorgeous spiral effect — you're not fighting with charts or juggling multiple colors, just steadily increasing and watching the shell shape bloom right before your eyes. There's something genuinely meditative about working the foundation round, then feeling the hat widen with each increase round, and finally settling into the calm, repetitive rhythm of the plain body rounds. It's the kind of project where the first third feels like discovery and the last two-thirds feel like a cozy, mindless scroll-and-stitch session. I also love how forgiving worsted weight yarn is here — mistakes are easy to spot and just as easy to frog back a round or two. And honestly, the payoff is huge: you finish with a hat that looks far more advanced than the actual skills required. Friends will assume you followed some intricate colorwork chart, when really it's just smart increase placement. It's a fantastic confidence-builder for anyone ready to move past basic beanies into something with real textural personality.

Common mistakes

  • Losing track of the foundation roundPlace a stitch marker in the first stitch of the foundation round and count your stitches twice before moving into Step 2, since an incorrect base count will throw off the whole spiral shape.
  • Working increase rounds too looselyKeep your tension consistent and slightly snug during the three increase rounds in Step 2 — a looser gauge here softens the signature spiral bump that defines this hat.
  • Forgetting to move the stitch markerSince this pattern is worked in continuous rounds, always slip your marker up into the first stitch of the new round immediately after finishing the previous one to avoid losing your round count.
  • Rushing through the Main Pattern roundsIncreases should stack in a spiral, not a straight line, so check that each increase point shifts slightly from the round below it before continuing to the Body of the Hat.
  • Using a hook size that doesn't matchStick with the recommended size H/8 - 5.00mm hook for worsted weight yarn, and check your gauge on a small swatch first if your stitches tend to run tight or loose.

The rounds, in full

Written out, round by round

Intermediate4-6 Hours5.00 mmWorsted

Materials

Everything this one takes, in the order you will reach for it.

  • Worsted weight yarn in your preferred color (approximately 200 yards)
  • Crochet hook suitable for the yarn weight (size H/8 - 5.00mm)
  • Scissors
  • Yarn needle

Step 1: Foundation Round

  1. Round 1To begin, create a magic ring and work 10 single crochet stitches into it. Pull the ring tight, and slip stitch into the first single crochet to join the round. (10 stitches)(10)

Step 2: Increase Rounds

In this section, we will be increasing the number of stitches in each round to shape the hat. Follow the instructions below:

  1. Round 1Chain 1, 2 single crochet in the next stitch, 1 single crochet in the next stitch. Repeat from to around. Slip stitch to the first single crochet to join the round. (15 stitches)(15)
  2. Round 2Chain 1, 2 single crochet in the next stitch, 1 single crochet in each of the next 2 stitches. Repeat from to around. Slip stitch to the first single crochet to join the round. (20 stitches)(20)
  3. Round 3Chain 1, 2 single crochet in the next stitch, 1 single crochet in each of the next 3 stitches. Repeat from to around. Slip stitch to the first single crochet to join the round. (25 stitches)Continue increasing the number of stitches in each round until you reach the desired circumference of the hat. This will vary depending on the size you want to achieve.(25)

Step 3: Body of the Hat

Once you have reached the desired circumference, continue working single crochet stitches in each stitch around for several rounds, without increasing. This will form the body of the hat.

Repeat the single crochet rounds until the hat reaches the desired length, typically 7-8 inches for an adult-sized hat. Feel free to adjust the length to your preference.

Step 4: Snail Shell Stitch Pattern

Now, we will introduce the snail shell stitch pattern to add texture and visual interest to the hat. Follow the instructions below:

  1. Round 1Chain 3 (acts as the first double crochet), skip the next stitch, double crochet in the next stitch, skip the next stitch. Repeat from to around. Slip stitch to the top of the chain-3 to join the round.
  2. Round 2Chain 1, single crochet in the next double crochet, chain 2, skip the next double crochet. Repeat from to around. Slip stitch to the first single crochet to join the round.Repeat Round 2 for the desired number of rounds to create the snail shell stitch pattern. This will depend on how many rows you want to include.

Assembly

Step 1

To complete the Snail Shell Hat, fasten off the yarn and weave in any loose ends using a yarn needle. Give the hat a gentle stretch to shape it, and it's ready to be worn or gifted to someone special!

Important notes

Note 01

💡 Use a locking stitch marker at the start of your foundation round and move it up every single round — with no turning chains to guide you, it's easy to lose your place.

Note 02

💡 Stick to the size H/8 - 5.00mm hook recommended for worsted weight yarn; sizing down can make the increase rounds too tight to shape properly into the shell spiral.

Note 03

💡 Count your stitches after each of the three increase rounds in Step 2 before moving on, since even one missed increase will throw off the symmetry of the crown.

Note 04

💡 Leave a long yarn tail (at least 12 inches) at both the start and end of your work so you have plenty of length for weaving in and closing up the crown neatly.

Note 05

💡 Block your finished hat gently over a bowl or balloon of a similar size to your head to help the spiral crown lie flat and show off its shape.

Note 06

💡 If your yarn is a variegated or self-striping worsted weight, expect the shell pattern to look even more dramatic as the increase rounds catch the color changes at different points.

More photos

FAQs

Asked on the glider

the ones that come up on the glider

How much yarn do I really need for the Snail Shell Hat?

The pattern calls for approximately 200 yards of worsted weight yarn, which is generally enough for one adult-sized hat with a little leftover for weaving in ends. If you're using a heavier or more textured yarn, buy an extra 20-30 yards just in case.

What size hook should I use if I crochet tightly or loosely?

Start with the recommended size H/8 - 5.00mm hook and crochet a small test swatch of the foundation round and first increase round. If your spiral looks too tight or curls excessively, size up to an H/9 or I/9; if it looks loose or floppy, size down slightly.

Why does my spiral shell pattern look uneven?

Uneven spirals usually come from increases that aren't shifted consistently between rounds, so double check that each increase point in Step 2 and the Main Pattern rounds moves slightly around the round rather than stacking in the same spot. Consistent tension throughout also helps keep the shell shape symmetrical.

How do I know when to stop working the plain body rounds in Step 3?

Try the hat on as you go and stop the plain rounds in Step 3 once the hat reaches your desired length from the bottom of the crown to the brim edge. Most adult hats look best ending just above or at ear level, but this is easy to adjust to personal preference.