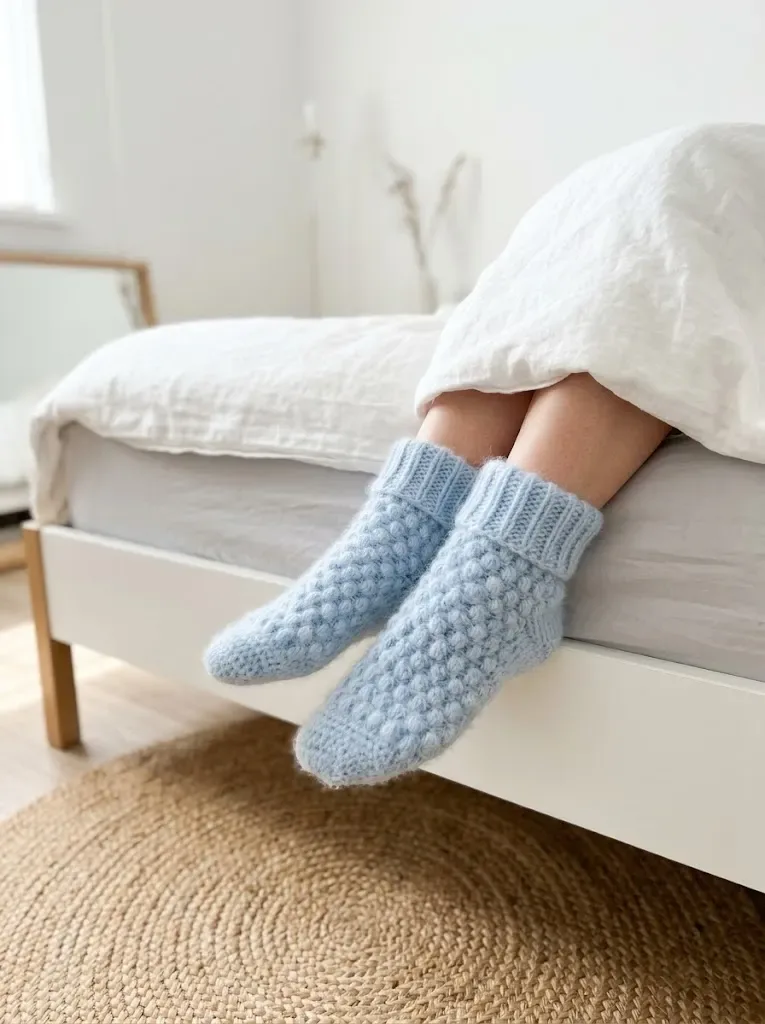
Intermediate 4-6 hours DK yarn

Worked on the glider, counted out loud —

Powder blue cloud soft crochet socks pattern

Soft DK-weight crochet socks with a ribbed cuff, perfect for confident beginners with a few quiet evenings to spare.

Jump to the rounds

What this one is

You know that stretch of evening when the house goes quiet and your feet get cold before the rest of you does. These socks are for that moment — something soft and a little cloud-like to pull on while you read or watch the same show you've seen three times. They're sized for women's medium, fitting a US shoe size 7 to 8, so you're making something you'll actually reach for.

Your hands start at the toe with a magic ring and build outward in tidy increase rounds until the foot takes shape, then move into a bubble stitch pattern that gives the leg its texture before finishing with a ribbed cuff worked back and forth in back loops only. Between the shaping, the bubble repeats, and the ribbing, you're looking at a few solid sittings rather than one quick project.

The rounds, in full

Written out, round by round

Intermediate4-6 hours4.0 mmDK

Bring to the porch

Everything this one takes, in the order you will reach for it.

  • Approximately 200 to 250 yards of DK weight yarn (category 3)
  • A soft blend with wool or acrylic works well for warmth and durability
  • The sample uses a light blue with a slight halo, suggesting a wool or alpaca blend
  • 4.0mm (G/6) crochet hook for main body
  • 3.5mm (E/4) crochet hook for ribbed cuff (optional for tighter ribbing)
  • Stitch marker
  • Tapestry needle for weaving in ends
  • Scissors

Finished Size

Written for women’s medium (fits shoe size US 7 to 8)

  1. Round 1Make a magic ring. Work 6 sc into the ring. Pull tight. (6 sts)
  2. Round 2Inc in each st around. (12 sts)
  3. Round 3*Sc in next st, inc in next st* repeat around. (18 sts)
  4. Round 4*Sc in next 2 sts, inc in next st* repeat around. (24 sts)
  5. Round 5*Sc in next 3 sts, inc in next st* repeat around. (30 sts)
  6. Round 6*Sc in next 4 sts, inc in next st* repeat around. (36 sts)
  7. Round 7*Sc in next 5 sts, inc in next st* repeat around. (42 sts)
  8. Round 8*Sc in next 6 sts, inc in next st* repeat around. (48 sts) Your toe should now measure about 2.5 to 3 inches across when laid flat. If you need a smaller sock, stop at 42 stitches. For larger sizes, continue the increase pattern until the toe matches your foot width.Foot Section with Bubble Stitch Now we transition into the beautiful textured body. This section works in a 2-round repeat.
  9. Round 9Sc in each st around. (48 sts)
  10. Round 10Bubble Round *Bubble st in next st, sc in next st* repeat around. (24 bubbles, 48 sts total)
  11. Round 11Sc in each st around, working into the top of each bubble and each sc from the previous round. (48 sts)
  12. Round 12Offset Bubble Round Sc in first st, *bubble st in next st, sc in next st* repeat around, ending with sc in last st. (24 bubbles, 48 sts total)
  13. Round 13Sc in each st around. (48 sts) Repeat Rounds 10 through 13 until your foot section measures approximately 5 inches from the tip of the toe, or about 2 inches shorter than your actual foot length. This allows room for the heel.End on a plain sc round.

Heel Construction

The heel uses short rows to create a shaped cup that hugs your heel. This part looks tricky on paper, but trust the process.

Setting up: Your next round will only work across half of your stitches (24 sts) for the heel. The remaining 24 stitches form the instep and will be worked later.

Heel Row 1 (RS): Ch 1, sc in next 24 sts, turn. Leave remaining 24 sts unworked. (24 sts)

Heel Row 2 (WS): Ch 1, sc in next 22 sts, turn. Leave last 2 sts unworked. (22 sts)

Heel Row 3: Ch 1, sc in next 20 sts, turn. (20 sts)

Heel Row 4: Ch 1, sc in next 18 sts, turn. (18 sts)

Heel Row 5: Ch 1, sc in next 16 sts, turn. (16 sts)

Heel Row 6: Ch 1, sc in next 14 sts, turn. (14 sts)

Now we reverse direction to fill in the heel cup: Heel Row 7: Ch 1, sc in next 14 sts, sc in next unworked st, turn. (15 sts)

Heel Row 8: Ch 1, sc across all sts, sc in next unworked st, turn. (16 sts)

Continue in this manner, picking up one unworked stitch at the end of each row, until all 24 heel stitches have been worked back into the row.

Final Heel Row: Sc across all 24 heel sts. Do not turn.

Rejoining for Leg Now we rejoin to work in the round again.

Joining Round: Continue around by working sc evenly along the side of the heel (approximately 8 to 10 sts), sc across the 24 instep stitches, sc evenly along the other side of the heel (8 to 10 sts), sl st to first sc of heel to join. Place marker. (approximately 48 to 52 sts)

If your stitch count is not 48, work an adjustment round with a few decreases evenly spaced to return to 48 stitches.

Leg Section Resume the bubble stitch pattern for the leg portion.

Part 5

Rounds 1 through 12: Repeat the bubble stitch pattern (Rounds 10 through 13 from the foot section) three times total.

Your leg should now measure approximately 3 to 4 inches from the top of the heel.

Ribbed Cuff Switch to your smaller hook if desired for a snugger cuff.

  1. Round 1Cuff Round 1: Ch 8. Working in BLO, sl st in 2nd ch from hook and in each ch across (7 sl sts). Sl st to next st on sock, turn.
  2. Round 2Cuff Row 2: Working in BLO, sl st in each st across the ribbing strip. Sl st to next st on sock, turn. (7 sts in ribbing)
  3. Round 3Repeat Cuff Row 2 around the entire top of the sock, attaching each row of ribbing to the next stitch of the sock body. When you complete the full round, sl st to the first row of ribbing to close the cuff.Fasten off and weave in all ends.

Finishing

Fold the cuff down once for that polished look you see in the photos. The ribbing naturally wants to fold, creating a beautiful finished edge.

Weave in all your ends securely. For socks, I recommend weaving ends in two directions to prevent them from working loose with wear.

Make a second sock following the same instructions.

Tips for Success

Try on as you go. Because we work toe up, you can slip the sock onto your foot at any point to check the fit. Do this before starting the heel to make sure your foot length is right.

Block gently. Wet blocking can help even out your stitches, but don’t stretch the socks aggressively. You want them to retain their natural elasticity.
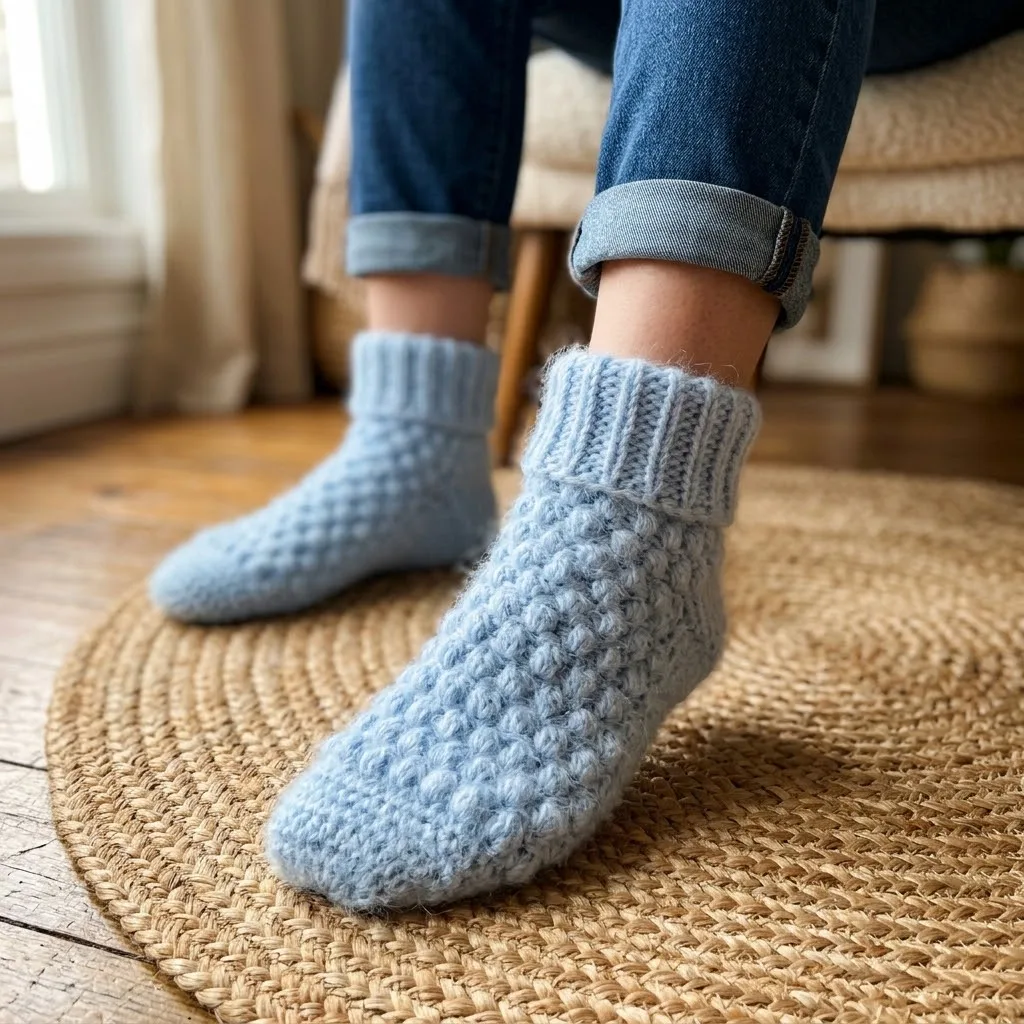
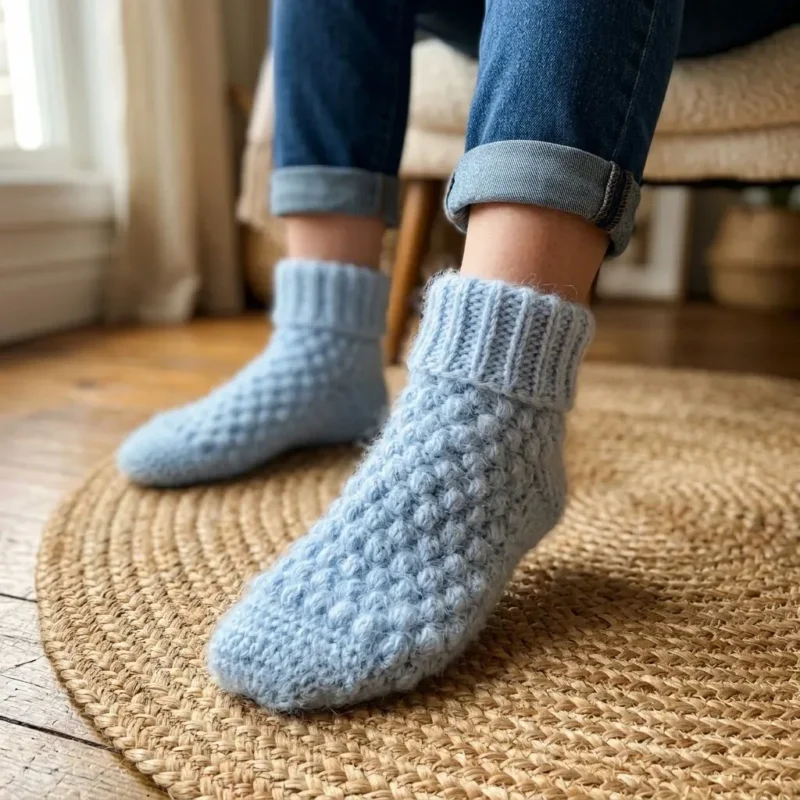
Marlene's notes

Note 01

Keep your stitch marker moving up each round from the very first magic ring — with 30-plus rounds ahead, it's easy to lose your place without it.

Note 02

The ribbed cuff is worked flat in back loops only and then joined to the sock as you go with slip stitches, so keep your turning chain and tension consistent across each short row.

Porch photos

Before you sit down

  • Check you have 200 to 250 yards of DK weight yarn on hand — a wool or alpaca blend with a little halo, like the sample, gives the coziest result.
  • Have both hooks ready: a 4.0mm (G/6) for the main body and a 3.5mm (E/4) if you want a snugger ribbed cuff.
  • Place a stitch marker before you start Round 1 so you don't lose track of where each round begins through the increase sections.
  • Read through the bubble stitch repeat (Rounds 10 through 13 from the foot section) before you hit the leg, since you'll be working it three times total.

How the hours go

Toe and foot shaping
about 1 to 1.5 hours, because the early increase rounds move fast but the pattern grows to 24 stitches and beyond before settling
Leg with bubble stitch
about 1.5 to 2 hours, because the bubble pattern repeats three full times to build the 3 to 4 inches of leg above the heel
Ribbed cuff
about 1 to 1.5 hours, because the back-loop-only ribbing is worked row by row and slip-stitched to the sock as you go

Looking after it

  • Hand wash in cool water with a wool-friendly soap if your yarn has any wool or alpaca content, then lay flat to dry so the bubble stitch texture and ribbing keep their shape.
  • Store folded rather than balled up, and reshape gently while damp if the ribbed cuff needs coaxing back into its snug fit after washing.
FAQs

Asked on the glider

the ones that come up on the glider

What size do these socks fit?

As written, the pattern is sized for a women's medium, fitting US shoe sizes 7 to 8. You can adjust the foot length slightly by adding or skipping a round or two before the increases finish.

Do I need two different hook sizes?

The 4.0mm hook handles the main body of the sock, while the 3.5mm hook is only needed if you want a tighter, more fitted ribbed cuff. If you skip the smaller hook, the cuff will simply be a bit looser.

What yarn works best for this pattern?

You'll want 200 to 250 yards of DK weight yarn, ideally a wool or acrylic blend for warmth and durability. The sample uses a light blue yarn with a slight halo, which suggests a wool or alpaca blend.

How long does the bubble stitch section take?

You repeat the bubble stitch pattern from the foot section three times total to build the leg. Expect your leg to measure about 3 to 4 inches from the top of the heel once that's done.

Is the ribbed cuff worked in the round or flat?

The ribbed cuff is worked flat, back and forth in back loops only, and joined to the sock with a slip stitch at the end of each row. This is what gives it that stretchy, ribbed look without ribbing stitches.

Can I use a stitch marker throughout the whole pattern?

Yes, and it's worth keeping one in place from the very first magic ring through all the increase and bubble stitch rounds. It becomes less necessary once you reach the flat rows of the ribbed cuff.