Intermediate 4-6 Hours DK/Light Worsted yarn

Worked on the glider, counted out loud —

Simple Crochet Socks Pattern for Cozy Year-Round Wear

Learn to make this simple crochet socks pattern with a snug toe, smooth heel, and ribbed cuff for a comfy, custom fit any season.

Jump to the rounds

Before you sit down

Start at the toe, working shaping rounds that build outward to form a snug, rounded point.

Continue into the foot section, working even rounds to extend the length before shaping the heel.

Shape the heel over its rounds, turning flat stitching into a smooth, cupped heel that fits the foot.

Try the sock on after the heel to confirm the fit feels snug through the arch and ankle.

Move into the ribbed cuff section, working rounds that create stretchy, textured fabric up the leg.

Weave in all yarn tails from color changes and give the sock a light blocking to help it hold its shape.

Repeat the entire process for the second sock so you have a matching, wearable pair.

What this one is

This simple crochet socks pattern turns two colors of DK weight yarn into a pair of snug, wearable socks built from the toe up. What makes it special is the smart construction: a shaped toe, a smooth heel, and a stretchy ribbed cuff all come together to hug your foot without gaps or bunching. It's ideal for crocheters who want a genuinely useful, everyday project rather than another decorative piece, and it makes a thoughtful handmade gift for anyone who appreciates cozy, custom-fit accessories.

You'll work through four distinct sections, the toe, foot, heel, and cuff, each building on simple stitches with just enough shaping to keep things interesting. This pattern is a great next step after basic amigurumi or hat projects, since it introduces sock-specific construction without overwhelming techniques. Expect to spend roughly 4 to 6 hours total, and don't skip the elastic thread finish worked with a 2mm hook, it's a small step that makes a big difference in how the cuff holds its shape.

The finished socks have a snug, close-fitting silhouette with a smooth heel turn and a ribbed leg that stretches comfortably around the ankle. Using one variegated and one solid yarn color gives each pair a personalized, hand-dyed look even though you're working from a simple formula. Whether you keep them ankle-length for slippers or extend the cuff for taller socks, they're endlessly giftable, perfect tucked into a care package or wrapped up for a cozy night in.

Variations

This pattern is wonderfully easy to make your own once you understand the four-part structure. For color play, try a deep forest green solid with a autumn-toned variegated yarn for a woodland-inspired pair, or swap in a soft blush solid with a pastel variegated skein for baby-safe gifting (just size down your hook slightly). Brands like Mandala or With Love work beautifully for the variegated strand, while Cascade 220 Superwash or Paintbox Simply DK are lovely solid-color options that hold their shape well in the ribbed cuff. For sizing, if you're working for smaller feet, reduce your toe section starting stitch count and work one fewer round in both the foot and cuff sections to shorten the overall length; for larger feet, add a round to the foot section before starting the heel shaping. Want ankle socks instead of crew-length? Simply stop after completing the cuff's first round instead of both. For a bold seasonal twist, work the toe and heel in a rich burgundy solid with a plaid-look variegated yarn for the foot and cuff, instant cozy-cabin vibes. You can also experiment with self-striping sock yarn in place of the variegated skein for a totally different, more subtle gradient effect. If you want extra grip for house socks, add fabric paint dots to the sole after blocking. And for a matched set, crochet a simple headband or wrist warmers using the same ribbed cuff stitch pattern from the caña section.

I designed this pattern because I wanted socks that actually fit like socks, not just tube-shaped covers for your feet. What I love most is how the heel section works its magic in just four rounds, turning flat rows into a real heel cup that cradles your foot properly. Pairing a variegated yarn with a solid color for the cuff and toe gives every pair a one-of-a-kind look, so no two socks ever feel mass-produced. The ribbed caña section is deeply satisfying to crochet because you can feel the fabric gain stretch and structure as you go, and finishing the edge with elastic thread and a tiny 2mm hook is such a clever trick, it keeps the cuff snug without ever feeling tight or restrictive. This is one of those patterns where every section has a clear purpose, nothing feels filler, and the payoff is a pair of socks you'll genuinely reach for on repeat. If you've been wanting to move beyond amigurumi and try garment-style crochet, this is the perfect low-stakes place to start.
Common mistakes

  • Losing track of stitch count during the toe section's increase roundsPlace a stitch marker at the start of each round and count your stitches after every increase round before moving forward, this catches errors while they're still easy to fix.
  • Working the heel section too loosely, leaving a gap at the heel turnKeep your tension slightly tighter through the heel's four rounds than you would in the foot section, since this area gets the most wear and needs to stay snug against the foot.
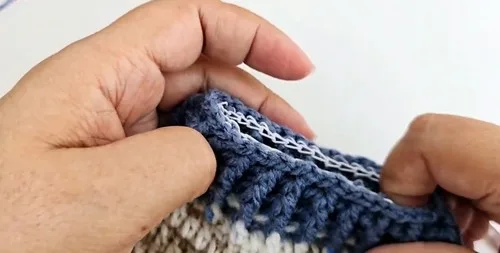
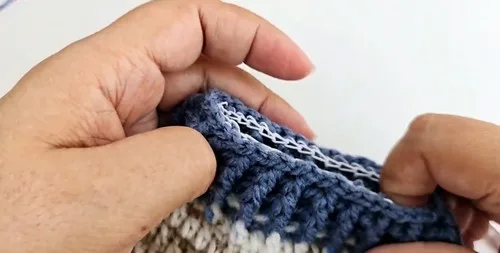
  • Skipping or rushing the elastic thread finish on the cuff edgeTake your time working the elastic thread with the 2mm hook one stitch at a time; going too fast can cause the thread to twist or snap, so pause and check your tension every few stitches.
  • Mismatching where the solid and variegated colors change between sectionsRefer back to the materials list before starting each new section (toe, foot, heel, cuff) to confirm which color belongs there, and weave in color-change ends immediately so you don't lose track.
  • Forgetting to try the sock on before finishing the cuffSlip the sock onto your foot after completing the heel section and before starting the cuff to confirm the fit is snug but not tight, adjusting your round count if needed.

The rounds, in full

Written out, round by round

Intermediate4-6 Hours3.5 mmDK/Light Worsted

Materials

Everything this one takes, in the order you will reach for it.

Yarn

  • Two colors of size 3 (Light Worsted/DK) yarn (one variegated, one solid)

Hook

  • 3.5 mm (E-4 or F-5)

Optional

  • Elastic thread and a 2 mm hook for the final edge

Notions

  • Stitch marker, yarn needle, scissors

keep this to hand

Abbreviations

US crochet terms, as used in this pattern.

  1. chchain
  2. ststitch
  3. stsstitches
  4. dcdouble crochet

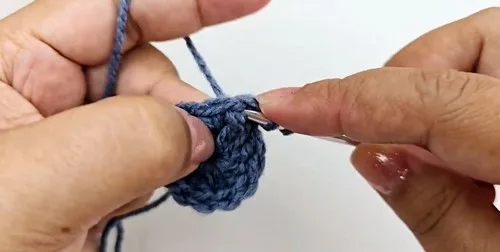
Toe Section (Punta)

Magic Ring, Ch 2 (does not count as a stitch).

  1. Round 112 Double Crochet (DC) into the ring, join with Slip Stitch (SS) to first DC. (12 DC)
  2. Round 2Ch 2, 2 DC in each stitch around, join with SS. (24 DC)
  3. Round 3Ch 2, (1 DC, 2 DC in next st) repeat around, join with SS. (36 DC)

2. Foot Section (Pie)

  1. Round 4Ch 2, 1 DC in every stitch around, join with SS. (36 DC)
  2. Round 5R12: Change to variegated yarn, Ch 2, 1 DC in every stitch around, join with SS. (36 DC)

Heel Section (Talón)

Mark 18 stitches on one side of the opening.

  1. Round 13Attach solid color, Ch 2, 1 DC in each of 18 marked stitches, turn. (18 DC)
  2. Round 14R15: Ch 2 (counts as st), skip 1st st, 1 DC in next 17 sts, turn. (18 sts)
  3. Round 16Ch 2, skip 1st st, 2 DC, 4 DC2tog, 3 DC, turn. (9 sts)
  4. Round 17Ch 1, 1 DC, 3 DC2tog, 2 DC. (6 sts) Fold heel and close back with SS. Fasten off.

Cuff/Leg Section (Caña)

  1. Round 18Attach variegated yarn, Ch 2, pick up stitches around heel edges and foot front (~41–42 DC total), join with SS.
  2. Round 19R23: Ch 2, 1 DC in each stitch around, join with SS. (41–42 DC)

Assembly

Step 1

Ribbing R1: Ch 2, alternate Front Post Double Crochet (FPDC) and Back Post Double Crochet (BPDC), join with SS.

Step 2

Ribbing R2–R3: Repeat FPDC/BPDC pattern, join with SS after each round.

Step 3

With 2 mm hook and elastic thread, work 1 round of SS along cuff edge for stretch.

Step 4

Fasten off and weave in all ends neatly.

Important notes

Note 01

💡 Keep your 3.5mm hook (E-4 or F-5) consistent throughout the toe, foot, heel, and cuff sections, only swap to the 2mm hook for the final elastic thread edge.

Note 02

💡 Use a stitch marker to mark the beginning of each round, especially through the toe's increase rounds, so you always know where a new round starts.

Note 03

💡 Try the sock on your foot after the heel section (round 4) is complete, this is your best checkpoint before committing to the cuff length.

Note 04

💡 Work the elastic thread finishing round slowly and evenly; if the thread feels too tight, loosen your grip slightly so the cuff stays stretchy rather than constrictive.

Note 05

💡 Block your finished socks lightly by dampening and laying flat to help the ribbed cuff relax into shape and the heel section sit smoothly against the foot.

More photos

FAQs

Asked on the glider

the ones that come up on the glider

What yarn weight works best for this crochet socks pattern?

This pattern is written for size 3 (Light Worsted/DK) weight yarn, which gives the fabric enough structure to hold sock shape while still feeling soft against skin. Sticking close to this weight with your 3.5mm hook will give you the best fit.

Why do I need elastic thread and a separate small hook?

The elastic thread worked with the 2mm hook creates the stretchy, snug edge at the top of the cuff so the sock stays up without slipping. Regular yarn alone won't give you that same secure, elastic hold around the ankle.

Can I make these socks a different length?

Yes, the cuff (caña) section can easily be extended by working additional rounds in the ribbed stitch pattern before finishing with the elastic thread edge. Just try the sock on periodically to check your desired height.

Do I need to know how to turn a heel to make these?

You'll work through the heel section's four rounds, which shape a smooth heel turn using basic increases and decreases, no special heel-turning technique from traditional sock knitting required. It's approachable even if you're newer to garment-style crochet.