Intermediate 4-6 hours Worsted yarn

Worked on the glider, counted out loud —

Cozy shell stitch bucket hat crochet pattern

An easygoing bucket hat in shell stitch for confident beginners, ready in about 4-6 hours.

Jump to the rounds

What this one is

This is the hat you reach for on a cold winter evening when you want something with a bit more shape than a basic beanie. It suits anyone who likes texture without lace, and who doesn't mind a project that builds steadily, round by round, into something sturdy enough to hold its own brim.

Your hands spend most of the time in plain double crochet, building a dome from a tight ring of 12 stitches up to 60, before the shell stitch rounds give your fingers something more interesting to do. Between the body and the brim, you're looking at a few focused hours, easily finished in one sitting with a cup of something warm nearby.

Try it another way

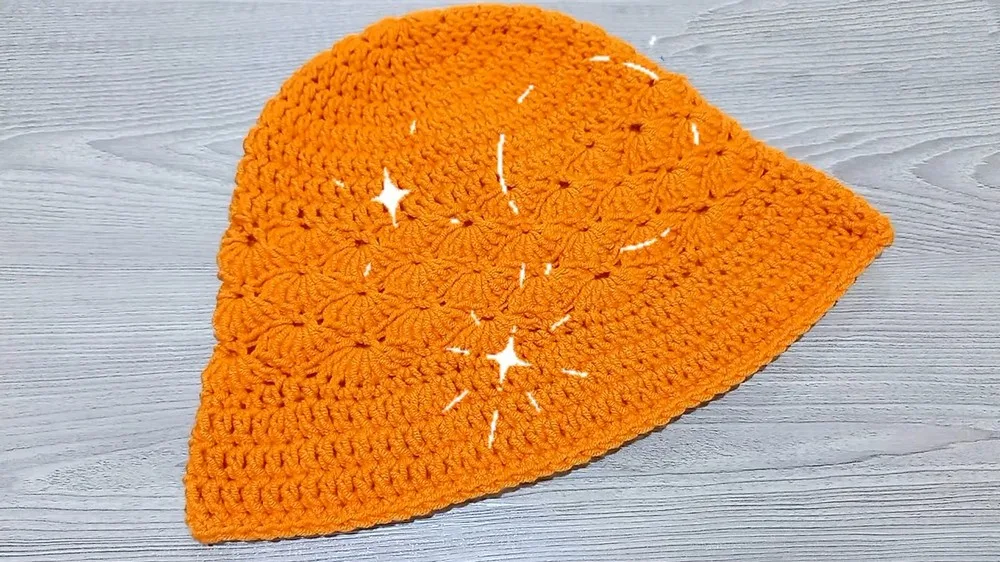
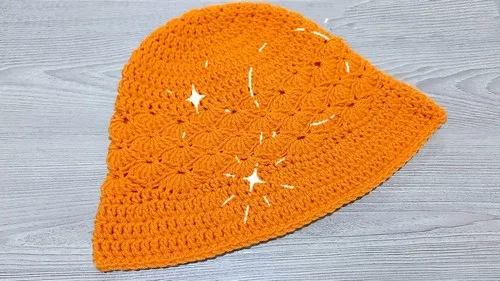
What makes this one satisfying is the way the shape earns itself honestly. You start with a ring of 12 double crochets and watch it double, then step up again, until the crown rounds out on its own without any shaping tricks. Then the mood shifts entirely: round 9 turns plain stitches into a ring of shells, each one built from seven double crochets fanned into a single space, skipped stitches holding the rhythm steady. Round 10 lets you work right back into those same shell spaces, so the texture reads as deliberate rather than accidental. By the time you reach the brim, alternating half double crochet and single crochet across each shell, you've used nearly every basic stitch in one hat, which is a quietly good feeling.
The rounds, in full

Written out, round by round

Intermediate4-6 hours5.5 mmWorsted

Bring to the porch

Everything this one takes, in the order you will reach for it.

  • Worsted weight yarn
  • 5.5 mm crochet hook

Starting the Hat

Start with a slip knot.

Chain 4. Connect with the first chain to form a ring.

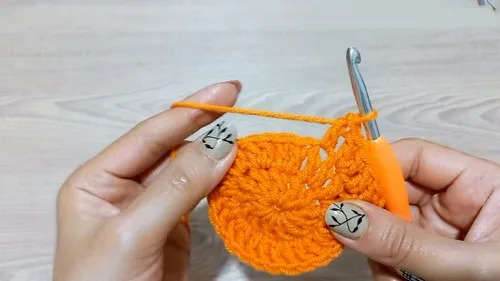
  1. Round 1Chain 2 (does not count as a stitch). Make 12 double crochets into the ring. Join with a slip stitch to the top of the first double crochet.

Increasing Rounds

  1. Round 2Chain 2. Make two double crochets into each double crochet from the previous round (24 double crochets total).Join with a slip stitch to the top of the first double crochet.
  2. Round 3Chain 2. 2 double crochets in the first stitch, 1 double crochet in the next – repeat around (36 stitches total).Join with a slip stitch.(36)
  3. Round 4Chain 2. 2 double crochets in the first stitch, 1 double crochet in the next two stitches – repeat around (48 stitches total).Join with a slip stitch.(48)
  4. Round 5Chain 2. 2 double crochets in the first stitch, 1 double crochet in the next three stitches – repeat around (60 stitches total).Join with a slip stitch.(60)

Continuing the Body

  1. Rounds 6–8Chain 2. Make 1 double crochet in each stitch around (60 double crochets). Join at the end of each round with a slip stitch.
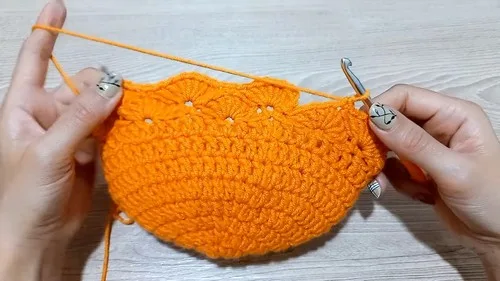
  2. Round 9Chain 1. Make 1 single crochet, skip 2, 7 double crochets in the next stitch (this forms a shell), skip 2 – repeat around.Join with a slip stitch into the first single crochet.
  3. Round 10Make shell stitches as per set pattern, working into spaces from the previous round's shells.Join with a slip stitch.Repeat Round 10 and 11 until the desired height of the hat is reached.

Third Round

  1. Brim Round 3Chain 2, make double crochets around without increasing.
  2. Finishing RoundFinish with a round of single crochets, Chain 1, make single crochets around, join with a slip stitch, fasten off and weave in the ends.

Putting it together

Brim Round 1

Chain 2. 1 half double crochet in first and last stitch of each shell and 1 single crochet in the middle 5 stitches of each shell – repeat around.

Brim Round 2

Chain 2. Increase by making double crochets and creating extra stitches at several points around.

Marlene's notes

Note 01

A 5.5 mm hook keeps the fabric firm enough to hold the shell texture without getting floppy, so stick close to that size even if your usual gauge runs a little loose or tight.

Note 02

Mark the first stitch of every round once you start the shell stitch rounds, since losing track of where round 9's shells begin makes round 10's placement much harder to line up.

Note 03

Keep your tension even through the plain rounds 6 through 8, because any looseness there shows up clearly once the shell stitches sit on top and catch the light differently.

Porch photos

Before you sit down

  • Make sure you have enough worsted weight yarn wound and ready before you start the ring, since this pattern works in one continuous build with no breaks for color changes.
  • Set a stitch marker you can move round to round, especially once you pass round 4, so the slip-stitch joins don't get lost in the taller shell stitches later.
  • Work a small swatch in double crochet with your 5.5 mm hook first, just to confirm your 12-stitch starting ring sits flat rather than cupping or flaring.
  • Read through round 9 before you get there, since the shell stitch depends on skipping two stitches cleanly on either side of each 7-double-crochet group, and it helps to know the rhythm in advance.

How the hours go

Starting the Hat and Increasing Rounds
about 45 minutes because you're working four rounds of steady increases from 12 stitches up to 48
Continuing the Body
about 2 hours because rounds 6 through 8 are plain but worked over 60 stitches, and rounds 9 to 10 need careful shell placement
Brim assembly
about 1 hour because working half double crochet and single crochet accurately into each shell takes a slower, steadier pace

Looking after it

  • Hand wash in cool water with a gentle detergent and avoid wringing, since agitation and heat are what cause worsted weight yarn to felt or lose its shape fastest.
  • Lay the hat flat on a towel to dry, gently reshaping the brim and the crown's dome while it's still damp, then store it folded rather than hung so the shell stitch edge doesn't stretch out of shape.
FAQs

Asked on the glider

the ones that come up on the glider

Why does the shell stitch round use a single crochet between shells?

The single crochet in round 9 acts as the anchor point between each shell, giving your hook a clean stitch to skip around on either side. Without it, the skipped stitches wouldn't line up evenly, and the shells would start to crowd or gap.

Can I make this hat smaller or larger?

The increase rounds are built to take you from 12 stitches up to 48, and the plain rounds hold steady at 60, so the easiest way to size up or down is to add or skip a plain round in the Continuing the Body section. Just keep the shell and brim rounds as written once you reach them.

Do I need stitch markers for this pattern?

You don't strictly need them for the early rounds since the slip-stitch joins mark the spot clearly enough, but once you're into the 60-stitch plain rounds and the shell rounds, a marker saves you from losing count. It's a small habit that pays off especially around round 9.

What does round 10 actually do differently from round 9?

Round 9 establishes the shells by working seven double crochets into single stitches with skips on either side, while round 10 works back into the spaces those shells created rather than into new base stitches. That shift is what gives the finished texture its layered, scalloped look.

Why is the hook size 5.5 mm specifically?

That hook size keeps worsted weight yarn firm enough to hold the shell stitch's shape without the fabric sagging. A smaller hook would make the shells tight and hard to work into on round 10, while a larger one could leave the brim too loose.

Is the brim assembly difficult for a newer crocheter?

It's more about patience than difficulty, since you're placing half double crochet at the two outer stitches of each shell and single crochet across the middle five. Taking it slowly and checking each shell's stitch count before moving to the next one makes it manageable.