Intermediate 4-6 hours 4-ply yarn

Worked on the glider, counted out loud —

Cozy short row crochet beanie for beginners

A six-section short row beanie in 4-ply yarn, simple enough for beginners, about 4-6 hours from slip knot to seam.

Jump to the rounds

What this one is

This is the beanie you reach for on a cool evening when you want something handmade but don't have weeks to spend on it. It suits anyone really — a sister who's always cold, a friend who just had a baby, or your own head on a walk. Because it's built from short-row sections, it comes together in wedges rather than the usual spiral, which makes it a nice change if you've only ever crocheted hats top-down.

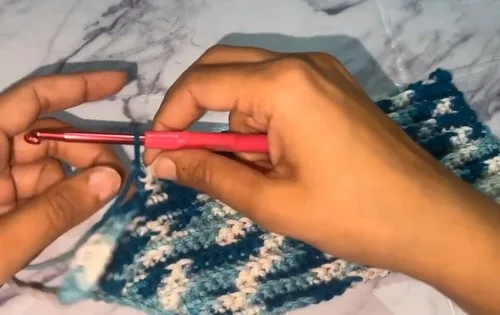
Your hands will spend most of the time doing single crochet through the back loop, row after row, turning at the end of each one and watching the piece grow as a flat panel rather than a round. It's the kind of project you can pick up for a quiet stretch and set down again without losing your place, since each section is its own small chunk of eight rounds. Plan on an evening or two, start to finish, including the seaming at the end.

Try it another way

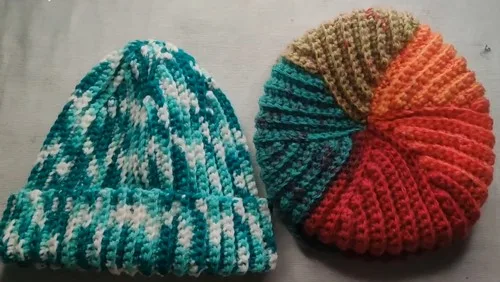
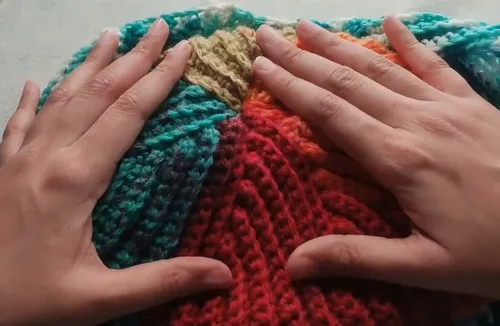
The easiest change is size: stick with six sections for an adult and drop to five for a child between four and eight years old, no other adjustments needed. Yarn choice matters too — this pattern is written for 4-ply, but if you want a chunkier, cozier hat, try a soft wool-blend in the same weight for extra warmth, or a cotton blend for a lighter, breathable version. Color placement is where you can really have fun: work each of the six sections in a different shade for a pinwheel effect radiating from the crown, or keep it to two alternating colors so the short-row wedges read as stripes running from brim to top. A single solid color will show off the ridge texture from the back-loop-only stitching all on its own, which is lovely if you want something understated. If you're making it as a gift, consider matching the yarn to the recipient's coat or favorite scarf. And since the construction is just sections joined with a slip stitch seam, you could experiment with working one section in a textured or fuzzy yarn for a contrast panel, as long as it's a similar weight to your 4-ply so the tension stays even across the whole hat.

What I love about this one is the shaping trick at its heart — those partial rows where you work 31 sc, slip stitch, and leave 11 stitches unworked, then come back through the back loop only on the next pass. It's such a simple move, but it's the reason the finished hat curves into a dome instead of lying flat. Watching one section after another line up into that gentle wedge shape, knowing it's all just sc BLO and a turn, feels like a small bit of magic for so little technical fuss. Then there's the seam: a slip stitch join through the back loops that closes the whole thing into a rounded crown, followed by that satisfying cinch at the top when you pull the tail tight and the opening disappears.
The rounds, in full

Written out, round by round

Intermediate4-6 hours5 mm4-ply

Bring to the porch

Everything this one takes, in the order you will reach for it.

  • 4-ply yarn
  • 5 mm crochet hook
  • Tapestry needle

Section 1 (First of Six Sections)

Work a slip knot and chain 44

  1. Row 1Work 31 sc, 1 sl st, leave 11 unworked
  2. Row 2Ch 1, turn, sc BLO across
  3. Row 3Ch 1, turn, 32 sc BLO, 1 sc in next chain, 1 sl st
  4. Row 4Ch 1, turn, sc BLO across
  5. Row 5Ch 1, turn, 34 sc BLO, 1 sc, 1 sl st
  6. Row 6Ch 1, turn, sc BLO across
  7. Row 7Ch 1, turn, 36 sc BLO, 1 sc, 1 sl st
  8. Row 8Ch 1, turn, sc BLO acrossRows 9–13: Continue short rows and increases until 43 stitches are reached

Subsequent Sections (2 through 6)

  1. Row 14Ch 1, turn, sc BLO across
  2. Row 15Work as Row 1 of Section 1
  3. Rows 16–27Repeat Rows 2–13 of Section 1Continue repeating until six full sections are complete for adult size

Putting it together

Step 1

Fold the beanie with right sides together

Step 2

Slip stitch seam through BLO

Step 3

Cut yarn with a long tail

Step 4

Thread tail through stitches around top edge

Step 5

Pull tightly to close and knot securely

Step 6

Weave in ends and turn right side out

Marlene's notes

Note 01

Because every row after the first works through the back loop only, it's easy to slip and catch both loops when you're tired, so check your hook placement each time you turn.

Note 02

Tension matters more than usual here since each section's width determines how neatly the six (or five) pieces curve together into a dome — a swatch really does pay off.

Note 03

Adult size uses six sections; child size (4–8 years) uses five sections.

Porch photos

Before you sit down

  • Check you have enough 4-ply yarn on hand for all six sections plus a little extra for seaming, since running short mid-section means frogging back to a clean row.
  • Read through Row 1 of Section 1 carefully before you pick up your hook — the 31 sc, slip stitch, and 11 unworked stitches set the whole shape, so it's worth understanding that line first.
  • Work a small swatch in sc through the back loop with your 5 mm hook to check your tension feels right against the 4-ply yarn before committing to a full chain of 44.
  • Decide now whether you're making the adult version with six sections or the child size with five, since that choice affects how many times you'll repeat the section instructions.

How the hours go

Chaining and the first section
about 45 minutes, because you're getting used to the short-row rhythm of 31 sc, slip stitch, and the unworked stitches before the BLO rows settle in
Remaining sections
about 2.5 to 4 hours total, because each section repeats the same 8-round short-row pattern and the work goes faster once your hands know the sequence
Seaming and closing the crown
about 30 minutes, because the slip stitch seam through the back loops and the gathering of the top edge both want a careful, unhurried hand

Looking after it

  • Hand wash your finished beanie in cool water with a gentle detergent, since 4-ply yarn can lose its shape if machine washed or wrung out roughly.
  • Lay it flat to dry on a towel, gently reshaping the crown and brim with your hands while damp, and store it folded rather than hung so it keeps its dome shape.
FAQs

Asked on the glider

the ones that come up on the glider

Can I make this hat for a child instead of an adult?

Yes, the notes say a child size for ages four to eight just needs five sections instead of six. Everything else about the construction stays the same.

Why do I leave 11 stitches unworked in Row 1?

That's the short-row trick that creates the wedge shape for each section. Leaving those stitches unworked means the next rows build up height gradually on one side before you come back for them.

What does 'sc BLO' mean and why does it matter here?

It means single crochet through the back loop only, which you'll do across most rows after the first. It leaves a distinct ridge texture and keeps the fabric stretchy enough to seam neatly into a dome.

How do I know if my gauge is right before starting?

Work a small swatch in sc BLO with your 5 mm hook and 4-ply yarn to see how your tension feels. If your sections come out noticeably wider or narrower than expected, adjust your hook size before starting the chain of 44.

What yarn works best for this beanie?

The pattern calls for 4-ply yarn, and a soft wool or wool blend gives a warm, classic finish. A cotton or cotton blend in the same weight works too if you want something lighter for cooler evenings rather than deep cold.

How do I close up the top of the hat once all sections are joined?

After the slip stitch seam through the back loops joins your sections with right sides together, cut your yarn leaving a long tail, thread it through the stitches around the top edge, and pull tightly to close before knotting securely. Weave in your ends and turn the hat right side out to finish.