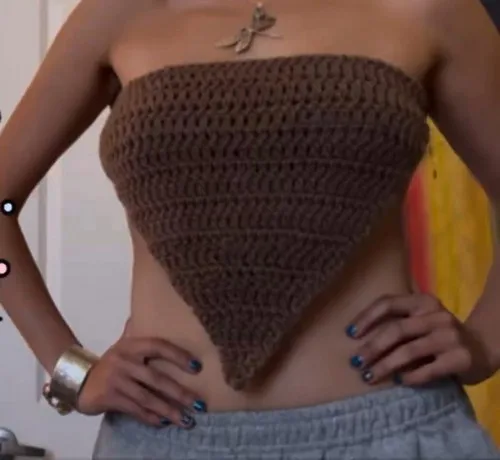
Intermediate 4-6 hours Worsted yarn

Worked on the glider, counted out loud —

Crochet triangle top with shaping that actually fits

A double-crochet triangle top shaped to your own armpit-to-armpit measurement. About 4-6 hours for confident beginners.

Jump to the rounds

What this one is

You know that stretch of warm weather when you want something on your shoulders that isn't a full shirt, just enough coverage with plenty of breeze getting through. This top is for that stretch, and for whoever in your life keeps saying they wish they could find a crochet top that actually sits right instead of gaping or riding up. It's built around your own measurements from the start, so the fit isn't a guess.

Your hands spend most of this project doing one thing very well: double crochet, row after row, with decreases sneaking in at the edges and then the middle as the triangle takes shape. There's no seaming to fuss over until the very end, just braiding for the straps. Plan on somewhere between four and six hours from slip knot to tied bow, spread across a few relaxed sessions.
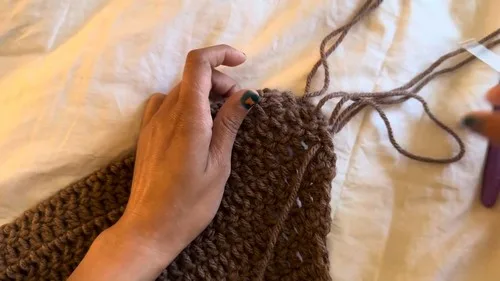
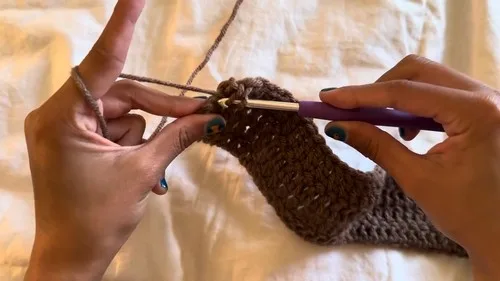
Try it another way

There's real satisfaction in a garment that's shaped entirely by decreases you control yourself. You start with a straightforward chain and three rows of plain double crochet, then watch the fabric narrow as you decrease at both ends for ten more rows. The best part is the middle decreases, where you go from a wide seven-stitch spacing down to three stitches between each point, and the triangle pulls itself into shape right in your hands. Finishing with a braided strap instead of a seamed one means every top comes out a little different, and tying the straps yourself means you get to decide exactly how it sits before you ever put it on.

The rounds, in full

Written out, round by round

Intermediate4-6 hours5 mmWorsted

Bring to the porch

Everything this one takes, in the order you will reach for it.

  • 5mm crochet hook
  • 100% acrylic yarn or yarn of choice
  • Scissors

Main Pattern

  1. Rows 1–3Getting Started & Base Begin with a slip knot; chain 42 or the number that fits from your left to right armpit; hold the chain up to your chest and adjust as needed; work into the second chain from the hook; make double crochets across the entire row; at the end, chain two and turn your work; repeat for a total of three rows or until desired length is reached.
  2. Rows 4–13Decreasing Rows From Row 4, begin decreasing at both ends of each row; start each row with a decrease in the first two stitches; work regular double crochets until the last two stitches; decrease in the last two stitches; chain two, turn, and repeat the pattern; continue until you've completed about 13 rows or your preferred length.
  3. More DecreasesAdding More Decreases Begin decreasing in the middle of the row as well; decrease at the beginning, crochet seven stitches, decrease, crochet seven stitches, and decrease at the end; in the next row, reduce spacing: crochet three stitches between each decrease; continue adjusting the spacing of decreases as the top narrows; for the final rows, decrease only at the start and end, with regular double crochets in between; to finish the last row with three stitches, decrease across all three.

Putting it together

Step 1

Yarn over, cut the tail, and pull through the loop to secure the last row.

Step 2

Cut three 60-inch yarn strands.

Step 3

Insert them into the corner stitches of one side and fold in half.

Step 4

Braid the six strands to form one strap.

Step 5

Tie a knot at the end and trim excess.

Step 6

Repeat for the opposite side.

Step 7

Tie the top using a bow or simple knot.

Marlene's notes

Note 01

Use your 5mm hook consistently throughout, since the fit relies on your gauge staying steady from the wide first rows down to the final three-stitch point.

Note 02

Keep track of which row you're on once you hit Row 4, because the decreases at both ends only start there and it's easy to lose count.

Note 03

When you reach the middle decreases, count your stitches between each one carefully, since the spacing shifts from seven stitches down to three as the triangle narrows.

Porch photos

Before you sit down

  • Measure from your left armpit to your right armpit across your chest so you know whether chain 42 needs adjusting for you.
  • Check that you have enough yarn on hand for a piece with 3 rows of base fabric plus 10 more decrease rows before you start chaining.
  • Read through the 'Adding More Decreases' section once before you get there, since the spacing between decreases changes more than once as the top narrows.
  • Cut your three 60-inch strands for each strap ahead of time so they're ready the moment you finish the last row.

How the hours go

Getting Started & Base (Rows 1-3)
about 30-45 minutes because it's just three straight rows of double crochet before any shaping begins
Decreasing Rows (Rows 4-13)
about 1.5-2 hours because ten rows of edge decreases take steady counting to keep both sides even
Middle Decreases & Straps
about 1.5-2.5 hours because the shifting decrease spacing needs attention, plus braiding and knotting both straps

Looking after it

  • Since this is worked in 100% acrylic yarn, you can machine wash it on a gentle cool cycle and lay it flat to dry rather than hanging it, which keeps the straps from stretching out of shape.
  • Acrylic holds its shape well in storage, so fold the top flat in a drawer instead of on a hanger to keep the triangle point from drooping over time.
FAQs

Asked on the glider

the ones that come up on the glider

How do I know if chain 42 is the right length for me?

Chain 42 and hold it up across your chest from armpit to armpit before you turn to Row 2. If it's too long or short, undo stitches or add more chains until it sits where you want.

What happens if I lose count during the middle decreases?

Stop and count your stitches between each decrease point before continuing, since the spacing changes from seven stitches down to three as you go. It's worth unraveling back a row rather than guessing, since the fit depends on those decreases lining up.

Can I make the straps shorter than 60 inches?

Yes, the 60-inch strands are simply what gets braided into one strap, so you can cut them shorter if you want a snugger tie. Just cut both sets of three strands the same length so your two straps match.

Do I need stitch markers for this pattern?

They're not required, but placing one at the first and last stitch of each row makes the decrease sections much easier to track. It's especially useful once you reach the rows with decreases at the start, middle, and end.

How many rows total does this pattern have?

There are 3 base rows plus 10 decreasing rows, followed by the additional rows where middle decreases narrow the piece down to a final row of three stitches. Exact row count in that last stretch depends on how your spacing plays out.

What yarn works best for this top?

The pattern calls for 100% acrylic or any yarn of your choice, so cotton or a cotton blend would also work nicely if you want a more breathable feel. Just keep your gauge consistent with the 5mm hook regardless of which fiber you pick.