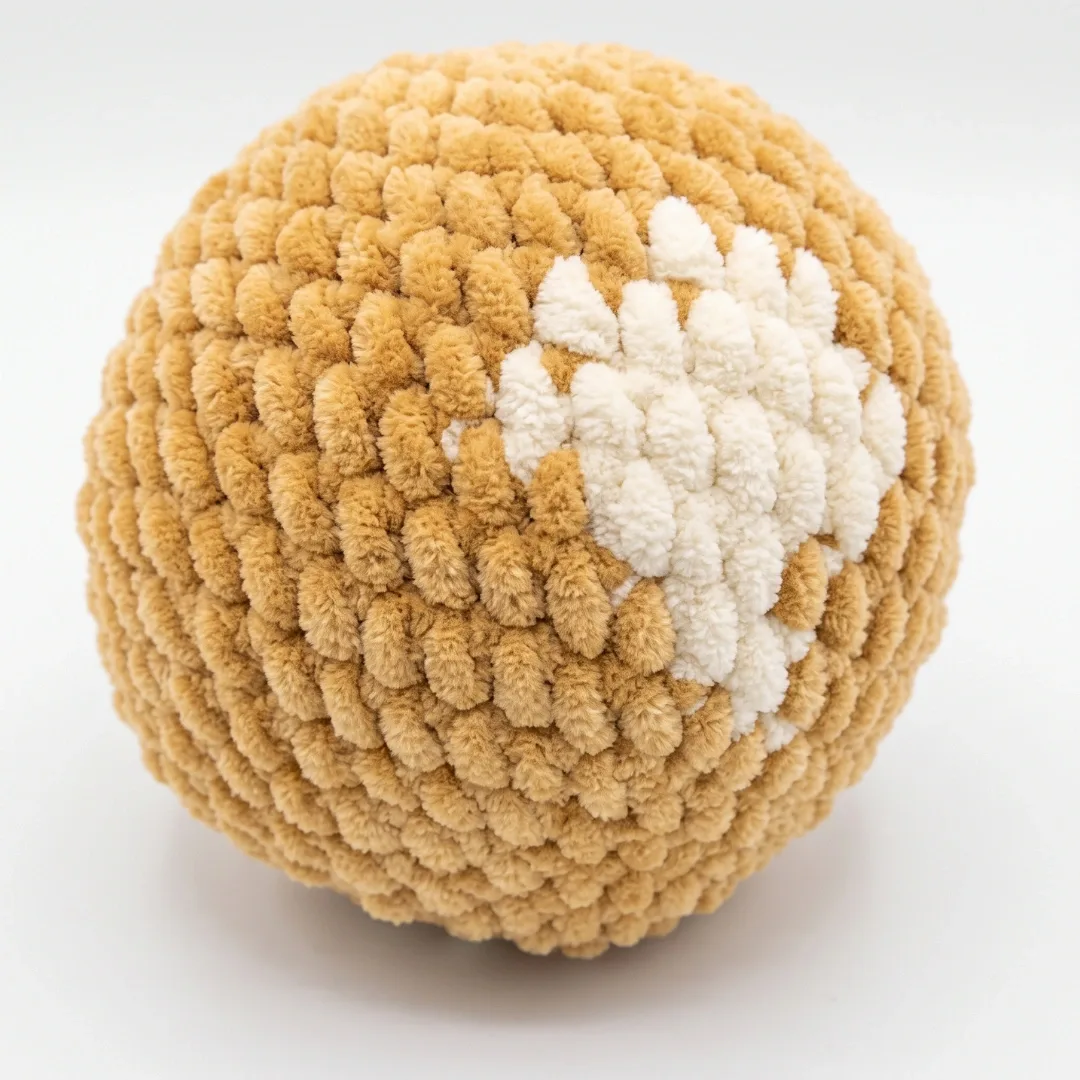
Intermediate 4-6 Hours Bulky yarn

Worked on the glider, counted out loud —

Senya the Bull Calf Amigurumi Pattern: Beginner-Ready Crochet Toy

Crochet Senya the Bull Calf, a beginner-ready amigurumi with cozy Dolce yarn, cute horns and hooves, and a sweet safety-eyed face perfect for gifting.

Jump to the rounds

Before you sit down

Crochet the head first, shaping it through rounds of increases and decreases to form a firm, rounded amigurumi base.

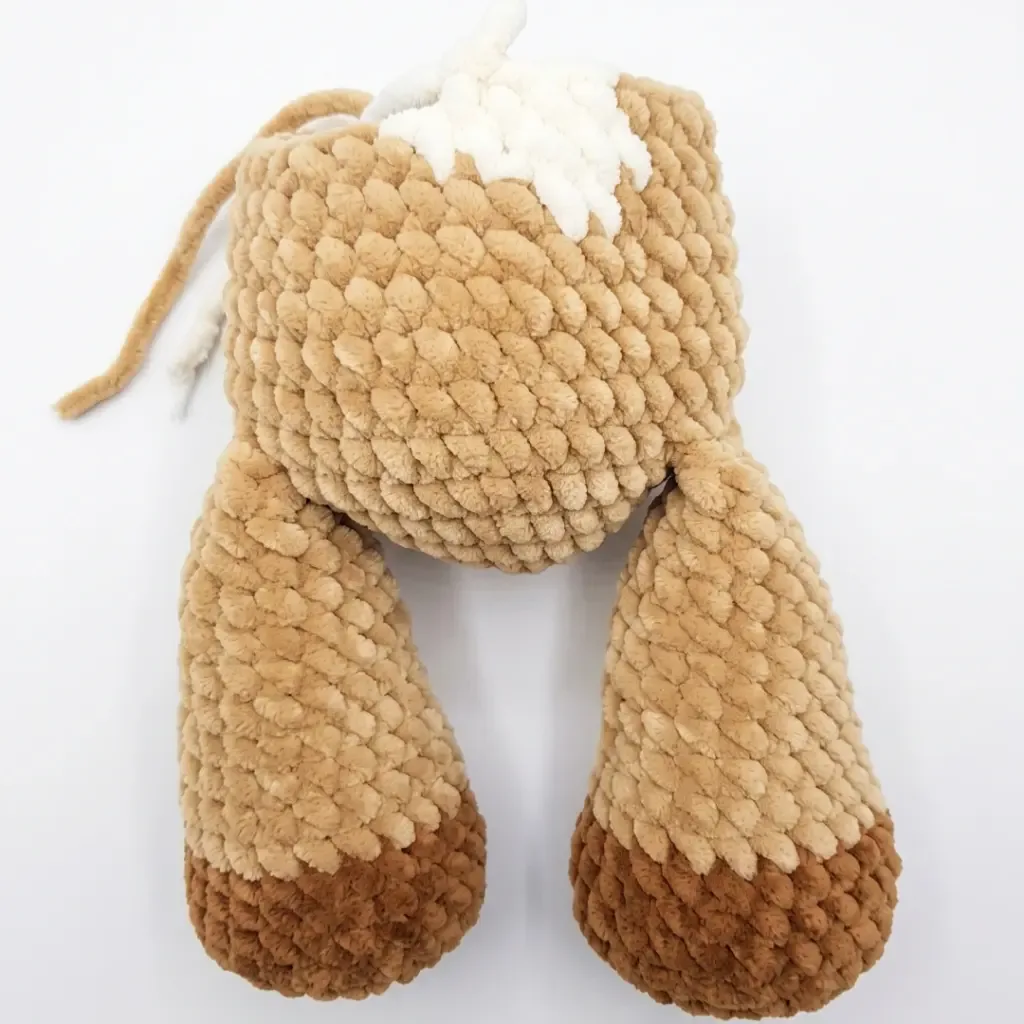
Work all four leg and arm pieces back to back so your tension stays consistent across every limb.

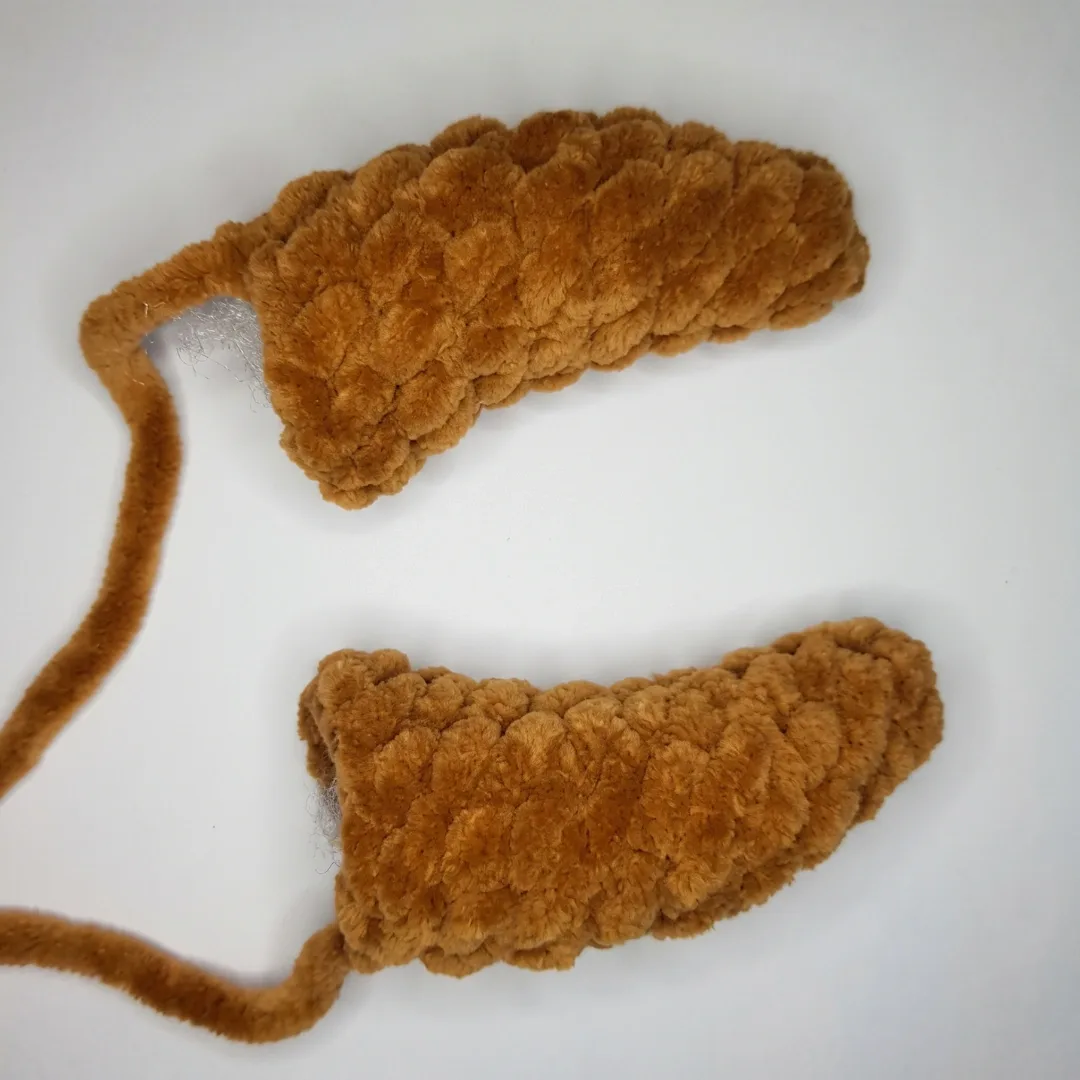
Stitch up two matching ears and two horns using the smaller round counts for quick, satisfying progress.

Stuff each piece firmly in stages as you close it, rather than waiting until assembly to add fiberfill.

Attach the 20mm safety eyes and check their placement from multiple angles before securing them permanently.

Follow the 9-step assembly sequence to sew the head, limbs, ears, and horns onto the body.

Finish with optional decorative lashes stitched on last, adjusting their angle for the sweetest expression.

What this one is

Senya the Bull Calf is a plush little amigurumi with a big personality — a round head, stubby horns, soft hooves, and a muzzle that gives him that unmistakable calf charm. Worked in cozy YarnArt Dolce bulky yarn, he's the kind of project that turns a quiet afternoon into a finished friend. He's perfect for crocheters who love farm-animal amigurumi and want a toy with real character, not just a generic round blob with ears.

This pattern uses continuous spiral rounds throughout, so you'll build confidence with consistent increases and decreases across the head, four matching limbs, two ears, and two horns. With 14 rounds for the head, 17 for each leg and arm, and shorter 9-10 round pieces for the horns and ears, expect roughly 4-6 hours total between stitching and assembly — a satisfying weekend project for a beginner ready to level up.

Once assembled, Senya stands as a huggable, firmly stuffed bulky-yarn calf with a distinctly plump, soft silhouette thanks to the thick YarnArt Dolce fiber. The contrast color used for his muzzle, hooves, and horns gives him a polished, professional look despite being genuinely approachable for newer makers. He makes a wonderful nursery shelf-sitter, a farm-themed nursery gift, or a keepsake for anyone who loves a calf with personality.

Variations

Senya is easy to customize once you've got the basic construction down. For a classic black-and-white Holstein look, swap your main color to white and use black for the muzzle, hoof tips, and patchy spots added with surface crochet or duplicate stitch. For a soft nursery version, try a dusty pink or sage green main color with cream for the contrast pieces, and skip the decorative lashes for a more gender-neutral finish. If you want a highland cattle vibe, use a warm rust or ginger bulky yarn and add longer, shaggy loop stitches around the head and back for texture. To make a mini Senya, drop down to a US E-4 or F-5 hook with a worsted weight yarn like Wool-Ease or With Love, which will naturally shrink the finished size while keeping the same round counts. For a jumbo huggable version, size up to a US J-10 hook with super bulky yarn such as Bernat Blanket, keeping stitch counts the same but expecting a notably bigger finished calf that needs more fiberfill. Yarn substitutions work well too — Comfy Cotton Blend or Hobbii Amigo give a similarly soft, sturdy amigurumi fabric if YarnArt Dolce isn't available in your area. Seasonal fans could add a tiny crocheted flower crown for spring, a knit-look scarf for winter gifting, or small fabric wings and a halo for a whimsical twist. However you style him, keep the horn and ear proportions in mind since even small color or size changes can shift his overall expression dramatically.

I adore how much personality comes through in Senya's small details — those stubby horns, the contrast-color muzzle and hooves, and his little 20mm safety eyes give him so much charm for a relatively quick make. Working entirely in continuous spiral rounds means no seam lines interrupting his round head or his four matching limbs, and I love how satisfying it is to watch the shaping happen through simple increase and decrease rounds. The head alone, with its 14 rounds, builds that classic amigurumi roundness beautifully. Making four identical legs and arms is a great way to practice consistency — by the fourth one, your tension will feel so much more even. The horns and ears, worked in fewer rounds, are quick wins that keep momentum going between the bigger pieces. And swapping in that second yarn color for the muzzle, hooves, and horns is such a simple trick that makes him look far more polished than the effort required. Assembly, with its 9 steps, is where he really comes to life — that's always my favorite part, watching a pile of parts become a face with an expression.
Common mistakes

  • Losing track of the beginningPlace a stitch marker in the first stitch of every round and move it up as you go — never skip this step, since spiral rounds have no seam to orient you.
  • Working increases and decreases inCount stitches at the end of every round against the pattern's stitch count, and rip back immediately if the number is off rather than continuing forward.
  • Using a loose invisible decreasePull the decrease snug immediately after completing it, and give it a gentle tug from the wrong side to tighten any residual slack.
  • Understuffing the head and limbsStuff in small pinches as you close each piece rather than all at once at the end, pushing fiberfill into corners with the blunt end of your tapestry needle.
  • Making the four legs and armsCrochet all four limb pieces back-to-back in one sitting using the same hook grip and yarn tension, rather than spreading them across different days.
  • Attaching the 20mm safety eyes beforeInsert eyes loosely and check placement from multiple angles with the head still unstuffed before pushing the washers on permanently.

The rounds, in full

Written out, round by round

Intermediate4-6 Hours4 mmBulky

Materials

Everything this one takes, in the order you will reach for it.

Main color yarn

  • YarnArt Dolce (100g / 120m) — approximately 1.5 skeins; Bulky weight

Contrast color yarn

  • YarnArt Dolce (100g / 120m) — approximately 0.5 skein; used for the muzzle, hooves, and horns; Bulky weight

Hook

  • US G-6 / 4 mm

Safety eyes

  • 20 mm, 1 pair

Eyelashes

  • decorative lashes for finishing (optional but recommended)

Stuffing

  • Polyester fiberfill
  • Stitch markers
  • Tapestry needle / yarn needle (large eye, plastic)
  • Sewing needle and thread for attaching details
  • Scissors

keep this to hand

Abbreviations

US crochet terms, as used in this pattern.

  1. BLOBack Loop Only
  2. chChain
  3. decInvisible Decrease (insert hook through front loops of next 2 sts, yo and pull through both, yo and pull through 2 loops)
  4. incIncrease (2 sc in same stitch)
  5. MRMagic Ring
  6. scSingle Crochet
  7. sl stSlip Stitch
  8. st / stsStitch / Stitches

Head

  1. Round 16 sc in MR. (6)
  2. Round 2inc in each st around. (12)
  3. Round 3sc, inc repeat 6 times around. (18)
  4. Round 42 sc, inc repeat 6 times around. (24)
  5. Round 53 sc, inc repeat 6 times around. (30)
  6. Round 64 sc, inc repeat 6 times around. (36)
  7. Round 75 sc, inc repeat 6 times around. (42)
  8. Round 86 sc, inc repeat 6 times around. (48)
  9. Round 9-16sc in each st around. (48)
  10. Round 176 sc, dec repeat 6 times around. (42)
  11. Round 185 sc, dec repeat 6 times around. (36)
  12. Round 194 sc, dec repeat 6 times around. (30)
  13. Round 203 sc, dec repeat 6 times around. (24)Begin stuffing the head firmly at this point. Install safety eyes after attaching the muzzle — see Assembly.
  14. Round 212 sc, dec repeat 6 times around. (18)Fasten off and weave in ends.

Legs and Arms (Make 4)

Begin with contrast color yarn for the hoof section.

  1. Round 16 sc in MR. (6)
  2. Round 2inc in each st around. (12)
  3. Round 3sc, inc repeat 6 times around. (18)
  4. Round 42 sc, inc repeat 6 times around. (24)
  5. Round 524 sc in BLO. Working in BLO here creates a defined ridge that helps the legs stand flat and stable. (24)
  6. Round 6-8sc in each st around. (24)Switch to main color yarn.
  7. Round 910 sc, dec, 10 sc, dec. (22)
  8. Round 10sc in each st around. (22)
  9. Round 119 sc, dec, 9 sc, dec. (20)
  10. Round 12sc in each st around. (20)
  11. Round 138 sc, dec, 8 sc, dec. (18)
  12. Round 14sc in each st around. (18)
  13. Round 157 sc, dec, 7 sc, dec. (16)
  14. Round 16sc in each st around. (16)
  15. Round 176 sc, dec, 6 sc, dec. (14)
  16. Round 18-19sc in each st around. (14)
  17. Round 20Flatten the piece and crochet through both layers to close: for legs — work 7 sc across; for arms — work 6 sc across.Do not stuff the limbs past the point where the color changes — leave the hoof section lightly stuffed and the upper limb flat for easier attachment. Fasten off, leaving a long tail for sewing.

Ears (Make 2)

  1. Round 16 sc in MR. (6)
  2. Round 2sc, inc repeat 3 times around. (9)
  3. Round 3sc in each st around. (9)
  4. Round 42 sc, inc repeat 3 times around. (12)
  5. Round 5sc in each st around. (12)
  6. Round 63 sc, inc repeat 3 times around. (15)
  7. Round 7sc in each st around. (15)
  8. Round 83 sc, dec repeat 3 times around. (12)
  9. Round 92 sc, dec repeat 3 times around. (9)
  10. Round 10sc, dec repeat 3 times around. (6)Flatten the ear and sl st or sc through both layers to close. Fasten off, leaving a long tail for sewing.

Muzzle

Worked in contrast color yarn on a foundation chain.

  1. FoundationCh 6, plus 1 ch to turn. Starting in the 2nd ch from hook: 5 sc across the chain, 3 sc in the last ch (corner), then working along the opposite side of the foundation chain: 4 sc, inc in the first st. (14)
  2. Round 2inc, inc, 4 sc, inc, inc, inc, 4 sc, inc, inc, inc. (22)
  3. Rounds 3-5sc in each st around. (22)Fasten off, leaving a long tail for sewing onto the head.

Horns (Make 2)

Worked in contrast color yarn.

  1. Round 16 sc in MR. (6)
  2. Round 2sc in each st around. (6)
  3. Round 3sc, inc repeat 3 times around. (9)
  4. Round 4sc in each st around. (9)
  5. Round 5inc, 3 sc, dec, 3 sc. (9)
  6. Round 6sc, inc, 3 sc, dec, 2 sc. (9)
  7. Round 72 sc, inc, 6 sc. (10)
  8. Round 83 sc, inc, 4 sc, dec. (9)
  9. Round 94 sc, inc, 3 sc, dec. (9)Fasten off, leaving a long tail for sewing. Horns are not stuffed — the yarn body gives them enough shape.

Body

  1. Round 16 sc in MR. (6)
  2. Round 2inc in each st around. (12)
  3. Round 3sc, inc repeat 6 times around. (18)
  4. Round 42 sc, inc repeat 6 times around. (24)
  5. Round 53 sc, inc repeat 6 times around. (30)
  6. Round 64 sc, inc repeat 6 times around. (36)
  7. Round 75 sc, inc repeat 6 times around. (42)
  8. Round 88 sc, then join the first leg by working 7 sc through the open loops of the leg simultaneously with the next 7 sts of the body, 12 sc, then join the second leg by working 7 sc through the open loops of the second leg simultaneously with the next 7 sts of the body, 8 sc. (42)
  9. Rounds 9-11sc in each st around. (42)
  10. Round 125 sc, dec repeat 6 times around. (36)
  11. Round 13sc in each st around. (36)
  12. Round 144 sc, dec repeat 6 times around. (30)
  13. Rounds 15-16sc in each st around. (30)
  14. Round 173 sc, dec repeat 6 times around. (24)
  15. Round 18sc in each st around. (24)
  16. Round 194 sc, then join the first arm by working 6 sc through the open loops of the arm simultaneously with the next 6 sts of the body, 8 sc, then join the second arm by working 6 sc through the open loops of the second arm simultaneously with the next 6 sts of the body. (24)
  17. Round 20sc in each st around. (24)
  18. Round 212 sc, dec repeat 6 times around. (18)
  19. Round 22sc in each st around. (18)Stuff the body moderately firmly before closing. Fasten off and weave in ends.

Assembly

Step 1

Sew the muzzle onto the front of the head , centering it on the lower half of the face. Use the yarn tail and a tapestry needle with a whipstitch around the edge.

Step 2

With the muzzle in place, position the safety eyes above the muzzle — measure and mark their placement symmetrically before inserting. Push the posts through and secure the washers from inside the head.

Step 3

Finish stuffing the head fully, then close the remaining opening by working the yarn tail through the front loops of the last round and pulling tight. Weave in the end.

Step 4

Sew the head to the top of the body , aligning the centers. Use the yarn tail to whipstitch around the full base of the neck for a secure join.

Step 5

Sew the horns onto the head at approximately Rnd 4 from the top, spacing them evenly on either side of the center.

Step 6

Sew the ears directly below the horns, leaving one round of space between the base of each horn and the top of each ear.

Step 7

Add finishing details to the muzzle as desired: embroider nostrils with a short length of contrast yarn, attach decorative lashes above the eyes, and embroider or stitch on eyebrows.

Step 8

For the tail : at the back of the body, insert your hook and draw through a length of main color yarn. Work 8 ch, then cut a small bundle of yarn, fold it in half, and attach it to the end of the chain to form a tassel.

Step 9

Weave in all remaining ends.

Important notes

Note 01

💡 Use a US G-6 / 4mm hook and keep your tension firm — bulky YarnArt Dolce yarn shows gaps easily if stitches are loose, so aim for a closed, no-peek-through fabric.

Note 02

💡 Keep a separate small ball of your contrast color wound and ready before starting the muzzle, hooves, and horns so color changes don't interrupt your rhythm mid-round.

Note 03

💡 Since this pattern is worked in continuous spiral rounds, resist the urge to slip stitch to join — that will create a visible seam where none should be.

Note 04

💡 Stuff the head and body firmly but in stages, checking the shape against the pattern photo as you go rather than waiting until the very last round to add fiberfill.

Note 05

💡 With four identical leg and arm pieces (17 rounds each), consider labeling them or working in pairs so you keep track of which two are legs versus arms during assembly.

Note 06

💡 Save the decorative lashes for last — attach them with sewing needle and thread only after the eyes are securely placed, so you can adjust their angle for the most charming expression.

Note 07

💡 This pattern is written in US crochet terminology.

Note 08

💡 Gauge is not critical for this project — consistent tension that produces a firm, closed fabric matters more than matching a specific gauge. Avoid loose tension so stuffing does not show through.

More photos

FAQs

Asked on the glider

the ones that come up on the glider

What yarn weight does this pattern use, and can I substitute something else?

This pattern uses YarnArt Dolce, a bulky weight yarn, for both the main color body and the contrast muzzle/hooves/horns. Any soft bulky yarn with good stitch definition will work as a substitute, just keep your US G-6 / 4mm hook and check gauge produces a firm fabric.

How much yarn do I actually need to finish Senya?

You'll need about 1.5 skeins of your main color and roughly 0.5 skein of your contrast color for the muzzle, hooves, and horns. It's worth having a little extra on hand in case your tension runs looser than expected.

Is this pattern really beginner-friendly, or do I need prior amigurumi experience?

It's labeled beginner-ready but does involve continuous spiral rounds, increases, decreases, and basic assembly, so some comfort with amigurumi basics helps. If you've made even one simple amigurumi before, you'll be well prepared for Senya's 9-step assembly process.

What size eyes should I buy, and are they safe for young children?

The pattern calls for 20mm safety eyes, one pair, which give Senya an expressive, slightly oversized look. As with any amigurumi with small attached parts, this toy is best suited as a decorative gift or for older children rather than infants.

Why does the pattern use two different yarn colors?

The main bulky yarn forms the head, body, and legs, while the contrast color is reserved specifically for the muzzle, hooves, and horns to give Senya his distinctive calf markings. This two-tone approach is what makes him instantly readable as a bull calf rather than a generic animal shape.