Intermediate 4-6 hours Super Bulky yarn

Worked on the glider, counted out loud —

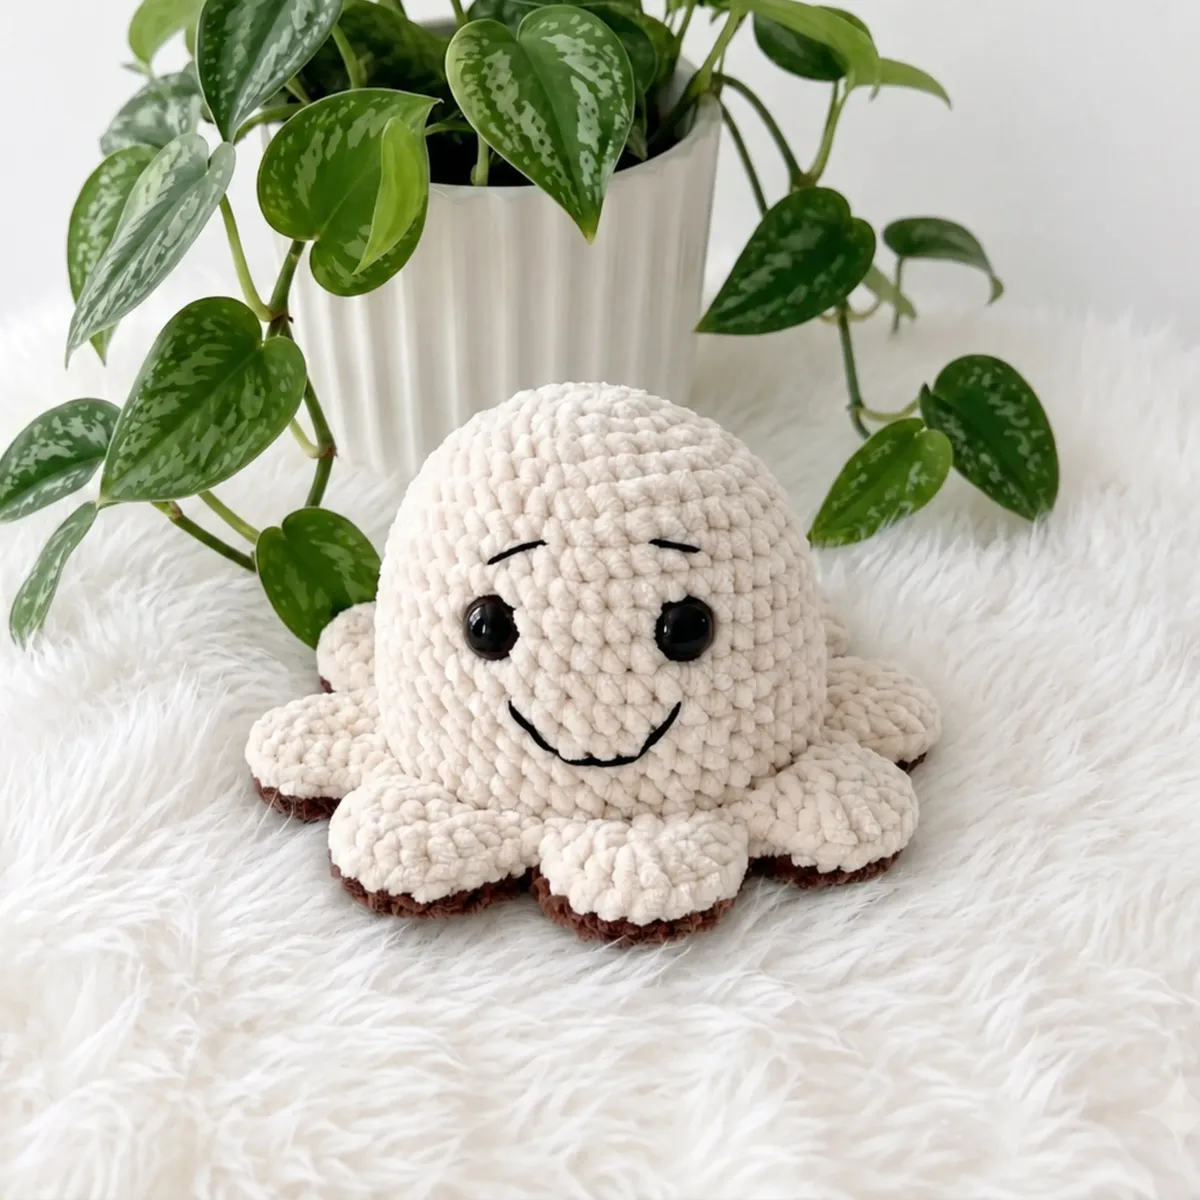
A reversible crochet octopus amigurumi for both sides

A plush two-sided octopus amigurumi in velvet yarn, seamed back-to-back — about 4-5.5 hours, good for confident beginners.

Jump to the rounds

What this one is

You know the kind of toy that gets carried everywhere until it's soft at the seams and a little gray at the edges? That's this one. Two identical faces, stitched back to back, so however it lands in a lap or a bed it's looking right back at you. Good for a little one who likes to flip things over and check both sides, and honestly, good for you too if you like a project with a small twist in the construction.

Your hands spend most of the time in a plain continuous spiral — single crochet, increase, single crochet, increase — building two matching Head + Tentacle pieces of twelve rounds each. Safety eyes go in, a light stuffing, some embroidery for the mouth and eyebrows, then the quiet part: seaming the two halves together through the half-loops with dental floss so the fabric holds. Set aside an afternoon, worked in two sittings if you like.

Try it another way

The reversible construction gives you more room to play than a single-sided amigurumi does. Since both halves are made from the same twelve-round piece, try working one half in your main body color and the other in a contrasting color before you seam them wrong sides together — you'll end up with a two-toned octopus that genuinely looks different depending on which way it's turned. You can also swap which color goes on the tentacle trim on each half independently, since the two pieces aren't joined until assembly. The tentacle trim color is what shows most prominently once the toy is displayed, so choose it thoughtfully — a deep espresso brown against ivory reads classic and cozy, while coral against sky blue reads playful and modern. If you want a slightly larger finished toy, working the same round counts in a thicker plush yarn than the CYCA #6 called for will size everything up proportionally without changing the shaping. For a smaller version, a lighter-weight plush yarn with the same hook will pull the stitches in tighter and shrink the finished piece down, though you'll want to stuff a little less to match. If you're making it as a bag charm or keychain rather than a bedtime toy, skip the heavier polyfill in the tentacles and stuff the head only, so it stays flat and floppy in the arms.

There's a particular satisfaction in making something twice and having it fit together like it was always meant to. Both Head + Tentacle pieces are worked identically — same twelve rounds, same increase pattern from 6 stitches up through 30 — so once you've made the first, the second goes almost on memory. Then comes the part that makes it worth the two pieces: holding them wrong sides together and seaming through the half-loops of the round, which locks the tentacles into alignment all the way around and gives you a toy with no obvious back. The plush yarn does a lot of the work for you, hiding stitch definition and giving the finished octopus a soft, dense hand-feel. Embroidering the mouth and eyebrows on both faces afterward is the moment it actually starts looking back at you.
The rounds, in full

Written out, round by round

Intermediate4-6 hours4 mmSuper Bulky

Bring to the porch

Everything this one takes, in the order you will reach for it.

Yarn

  • Plush/velvet yarn (CYCA #6 Super Bulky), two colors — one for the body, one for the tentacle trim — approximately half a skein of each. Himalaya Dolphin Baby or YarnArt Dolce are ideal; any comparable plush velvet yarn works.

Hook

  • G-6 / 4 mm

Safety eyes

  • 16 mm × 2 pairs (one pair per side)

Stuffing

  • Polyfill fiberfill, light amount

Notions

  • Stitch marker, yarn needle / tapestry needle, scissors

Thread

  • Dental floss or strong thread for seaming the two halves together

Embroidery Floss

  • Black, for embroidering the mouth and eyebrows on both sides

Head + Tentacles — Make 2

  1. Round 16 sc in MR. (6)
  2. Round 2inc in each st around. (12)
  3. Round 3sc, inc repeat 6 times. (18)
  4. Round 42 sc, inc repeat 6 times. (24)
  5. Round 53 sc, inc repeat 6 times. (30)
  6. Round 64 sc, inc repeat 6 times. (36)
  7. Round 75 sc, inc repeat 6 times. (42)
  8. Round 8sc in each st around. (42)
  9. Round 96 sc, inc repeat 6 times. (48)
  10. Rounds 10–18sc in each st around. (48) (9 rounds total) Insert 16 mm safety eyes between Rnds 11 and 12, spaced 7 stitches apart, before continuing.Mark Round 19 before you start it. The BLO tentacle round is the trickiest part of this pattern. Place a stitch marker in the back loop of the first stitch you'll work into so you don't accidentally slip into the front loop — working into the front loop here would change the finished look of the tentacle edge significantly.
  11. Round 19BLO — skip 2 sts, 8 dc in next st, skip 2 sts, 1 sc repeat 8 times. (72)
  12. Round 202 sc, inc 4 times (working into dc sts), 5 sc, inc 4 times (working into dc sts) repeat 7 times, 3 sc.Add a small amount of stuffing to the head now, before assembly.

Putting it together

Step 1

Finish both Head + Tentacle pieces completely, including safety eyes, embroidery, and light stuffing on each.

Step 2

Embroider the mouth and eyebrows onto the face side of both pieces using black embroidery floss.

Step 3

Hold both pieces with wrong sides facing each other , aligning the tentacles evenly around the perimeter.

Step 4

Using dental floss or strong matching thread threaded onto a yarn needle, seam the two pieces together first through the half-loops of Round 20 all the way around.

Step 5

Continue seaming around the full outer perimeter of the tentacle edge to secure the join completely.

Step 6

Weave in all yarn ends securely.

Marlene's notes

Note 01

Work with a firm, closed tension on your G-6 / 4 mm hook — plush yarn is forgiving on gauge, but a tighter fabric hides the polyfill better and keeps the reversible seam from gaping.

Note 02

Keep your stitch marker moving every round without fail; because the pattern is worked in a continuous spiral rather than joined rounds, it's easy to lose your place without it.

Note 03

Use dental floss or another strong thread for the final seam rather than the plush yarn itself — plush fiber alone can stretch and let the two halves shift apart over time.

Note 04

This pattern is written in US crochet terminology.

Note 05

Gauge is not critical for this project, but tighter tension produces a cleaner fabric that hides stuffing. Aim for a firm, closed fabric.

Note 06

The finished toy measures approximately 10 cm (about 4 inches) when made with the recommended Super Bulky plush yarn and a 4 mm (G-6) hook. Your size may vary based on your personal tension — crocheters who work loosely may get a slightly larger toy, while those who work tightly may get a slightly smaller one. Neither is wrong; just adjust stuffing to match your finished size.

Note 07

Add only a small amount of stuffing — just enough to give the head light shape. Over-stuffing will prevent the pieces from sitting flat once joined.

Note 08

Choosing your color pair matters — the tentacle trim color is what you'll see most prominently when the toy is displayed. A deep espresso brown against ivory reads classic and cozy; coral against sky blue reads playful and modern.

Before you sit down

  • Check that you have roughly half a skein each of your two plush yarn colors before you start the first piece — running short mid-tentacle is annoying to fix.
  • Place a stitch marker in the first stitch of round one and move it up every round; both pieces are worked in a continuous spiral with no joins, so it's the only thing keeping your round count honest.
  • Read through the assembly steps once, especially the note about seaming through the half-loops of the round, before you finish off either piece — it changes how you want to leave your tail ends.
  • Have both pairs of 16 mm safety eyes and your polyfill on hand before round twelve of the first piece, so you're not stalling with a half-finished head in your lap.

How the hours go

First Head + Tentacles piece
about 1.5-2 hours because it's twelve rounds of steady increases from 6 stitches up to 30 before the tentacle shaping settles in
Second Head + Tentacles piece
about 1.5-2 hours, usually a bit faster the second time since the increase rhythm is already familiar
Eyes, embroidery, and seaming both halves
about 1-1.5 hours because the half-loop seam around the whole perimeter, plus aligning tentacles evenly, takes patience even once the eyes and embroidery are done

Looking after it

  • Hand wash in cool water with a mild detergent and lay flat to dry — plush and velvet-style yarns hold water in the pile, so avoid wringing or machine drying, which can flatten the nap permanently.
  • Reshape the head and tentacles gently while still damp and let the toy air dry fully before handling; store it away from direct sunlight or heat sources so the color and pile stay soft over time.
FAQs

Asked on the glider

the ones that come up on the glider

Do I really need to use dental floss for seaming?

It's strongly recommended, especially with plush velvet yarn. Plush fibers can separate and tangle when used as seaming thread, making it hard to pull cleanly through both layers. Dental floss is thin, strong, and nearly invisible once knotted and woven in. Waxed floss in an off-white or clear tone works for almost any yarn color.

Can I use a different yarn than the recommended plush velvet?

Yes — any plush or velvet yarn in a Super Bulky (CYCA #6) weight will work well here. Avoid substituting with a standard acrylic or cotton at the same weight, as those yarns won't produce the same soft, rounded texture that makes the tentacle detail look its best. If you go down a yarn weight, size your hook down accordingly and expect a smaller finished toy.

How do I keep the tentacles even in Round 19?

The key is counting carefully before and after each tentacle repeat. Place a stitch marker at the start of the round and count your skipped stitches precisely — skipping exactly 2 before and after each 8-dc fan creates the uniform scallop shape. If your tentacles look uneven after the first attempt, frog back to the beginning of Round 19 and try again with a fresh marker. This round is worth getting right.

What is the finished size of this octopus?

The finished toy measures approximately 10 cm (about 4 inches) when made with the recommended Super Bulky plush yarn and a 4 mm (G-6) hook. Your size may vary based on your personal tension — crocheters who work loosely may get a slightly larger toy, while those who work tightly may get a slightly smaller one. Neither is wrong; just adjust stuffing to match your finished size.