Intermediate 4-6 hours Worsted yarn

Worked on the glider, counted out loud —

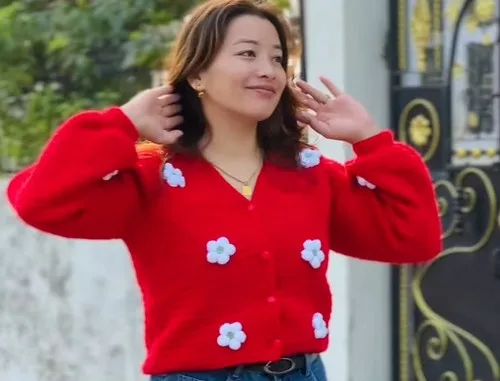
Red crochet cardigan with puff sleeves and shaped neckline

A warm red crochet cardigan with puff sleeves, suited to confident beginners with a free weekend to spare.

Jump to the rounds

What this one is

I made this one with the kind of evening in mind where you want a sweater that does the work of a hug. It's for you if you've been eyeing a cardigan in every shop window this season and thinking, I could just make that myself. The red is bold enough to wear on its own and friendly enough to throw over anything you already own.

Your hands will spend most of their time on two flat panels and a back piece before the sleeves ever come into it, and there's a real satisfaction in watching three rectangles turn into a shape you'd actually wear. Between the straightforward rows and the fiddlier neckline shaping, you're looking at a project that stretches comfortably across a few sittings rather than one long haul.

Try it another way

Once you've got the three-piece shape down, there's room to play. Swap the red for a different worsted-weight yarn in a color that suits your closet better, the construction doesn't change at all. You could also use the decrease pattern as a guide and work the front panels a few rows shorter or longer than the 35 rows given, depending on how deep you want the neckline to sit, just keep in mind the final stitch count of 25 is what gives the collar its shape. For the sleeves, if you want a less dramatic puff, ease back on how aggressively you increase before the cuff, though the pattern's own route to 24 cuff stitches is a good benchmark to stay near. You could also try working the back and front panels in one color and the sleeves in another for a two-tone look, since all three pieces are seamed together at the end anyway with that same yarn and needle. And if you want it for layering rather than as a standalone piece, a slightly looser gauge throughout will give you more ease to wear it over a sweater instead of just a shirt.

There's something deeply satisfying about a garment built from just three pattern pieces that still ends up looking tailored. The back is pure meditative rhythm, 63 rows of regular crochet where your hands can go on autopilot. The front panels are where it gets interesting: you work 35 clean rows, then start that neckline decrease, dropping a stitch at a time until you land at 25 stitches, which gives the collar its proper curve instead of a blunt square cut. And the sleeves have their own small drama, increasing every other row to puff them out before you pull the stitch count back to 24 for a snug cuff. Sewing it all together at the end, watching a pile of flat pieces become something with sleeves and a shape, is the real payoff.
The rounds, in full

Written out, round by round

Intermediate4-6 hoursWorsted

Bring to the porch

Everything this one takes, in the order you will reach for it.

  • Yarn: Red

Hook

  • Crochet hook

Tools

  • Yarn/Tapestry needle for sewing pieces together

Back

Chains: Begin with 75 chains.

  1. Round 163 Continue with regular crochet until you have completed 63 rows.

Front Sides

Make 2

The front of the cardigan is made with two separate panels.

The total number of rows for each front panel.

Chains: For each panel, start with 40 chains.

  1. Round 135 Crochet 35 rows without any decreases.Neckline Decreases: After row 35, start decreasing stitches to shape the neckline; on the side that will form the neckline, skip one stitch and continue crocheting; continue this decrease every row until you have 25 stitches.

Sleeves

Make 2

The total number of rows for the sleeve should be 50 rows.

Chains: Start the sleeve with a foundation of 36 chains.

  1. Rounds 1–8Crochet 8 rows.Increasing Stitches: To create the puff sleeve shape, increase by two stitches every other row.Cuffs: Decrease the stitch count to 24 stitches and work approximately 8 rows to form the cuff.

Putting it together

Step 1

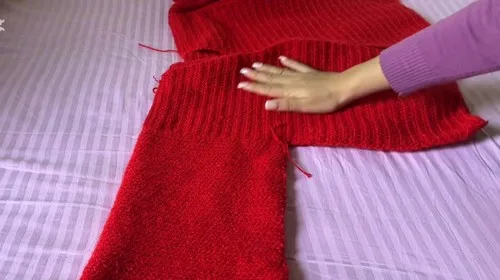
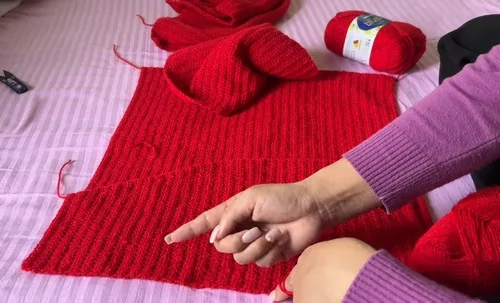
Attach the two front panels to the back panel.

Step 2

Attach the sleeves to the main body of the cardigan.

Step 3

Sew the side seams from the bottom of the body up to the underarm, and then along the underside of the sleeves.

Step 4

The creator uses a crochet needle and the same red yarn to stitch the pieces together.

Marlene's notes

Note 01

Keep your tension even across the back's 63 rows especially, since any drift in gauge there will throw off how well the front panels and sleeves line up against it later.

Note 02

Use a stitch marker on the sleeve rounds where you're increasing every other row, so you don't lose track of which row is an increase row and which isn't.

Note 03

The whole piece is sewn with the same red yarn and a tapestry needle, so there's no color matching to worry about when you assemble the seams.

Porch photos

Before you sit down

  • Check you have enough red yarn on hand for one back panel, two front panels, and two sleeves before you commit to a hook size.
  • Place a marker at the start of your foundation chain on each piece so you don't lose count across long rows like the 63-row back.
  • Work a small swatch with your chosen hook to see how the stitches sit before you chain the full 75 or 40 stitches for the main pieces.
  • Read through the Front Sides neckline decrease section once before row 35 so you know exactly which side to decrease on when you get there.

How the hours go

Back panel
about 1.5 hours because it's 63 straightforward rows with no shaping to slow you down
Front side panels
about 2 hours for both because the neckline decrease from row 35 down to 25 stitches needs careful attention
Sleeves and assembly
about 1.5 to 2 hours because the puff increases, cuff decreases, and four-step seaming all take a steadier pace

Looking after it

  • Hand wash the cardigan in cool water and lay it flat on a towel to dry, since red yarn worked in worsted weight will hold its shape best without being hung up wet.
  • Reshape the panels gently while damp, easing the neckline and cuffs back into their curves, then store the finished piece folded rather than on a hanger to keep the shoulders from stretching.
FAQs

Asked on the glider

the ones that come up on the glider

How many pieces do I actually crochet before assembly?

You make five pieces total: one back panel, two front side panels, and two sleeves. Everything is worked flat and then seamed together at the end.

Do the front panels and back line up in row count?

Not exactly, the back runs 63 rows while each front panel runs 35 rows before the neckline decreases begin. That difference is intentional and accounts for the neckline shaping on the front pieces.

What's the point of the neckline decreases on the front panels?

After row 35, you start skipping a stitch on the neckline side every row until you're down to 25 stitches. This curves the front edge inward so the collar sits properly instead of meeting the back at a hard right angle.

Why do the sleeves increase and then decrease?

The increase every other row builds the puff shape partway up the sleeve, and then you decrease back down to 24 stitches to form a snug cuff. It's the shaping that gives the sleeve its rounded silhouette instead of a straight tube.

How do I join all the pieces together?

You attach the two front panels to the back first, then add the sleeves to the main body, and finally sew the side seams from the bottom hem up to the underarm and along the underside of each sleeve. All of it is done with a tapestry needle and the same red yarn.

Can I work on this in short sessions instead of one sitting?

Yes, the back, front panels, and sleeves are each separate pieces, so they're easy to pick up and set down between pattern parts. Just use a marker to hold your place within a row if you're stopping mid-piece, especially during the neckline or sleeve shaping.