Intermediate 4-6 hours Super Bulky yarn

Worked on the glider, counted out loud —

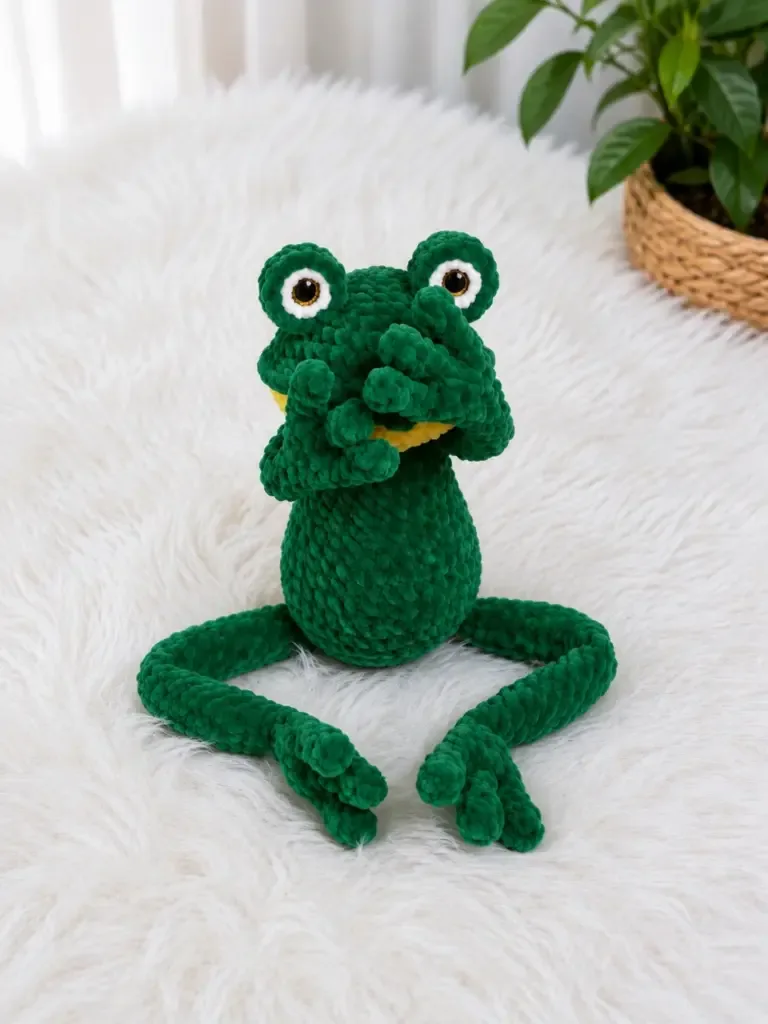
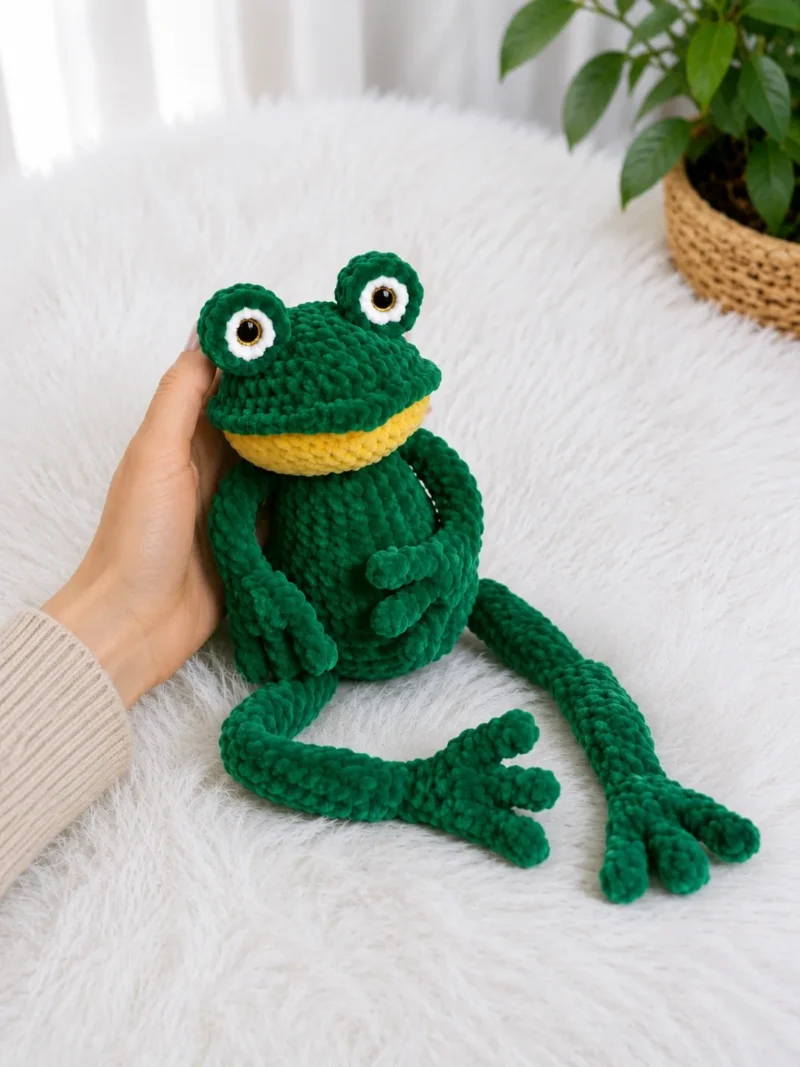
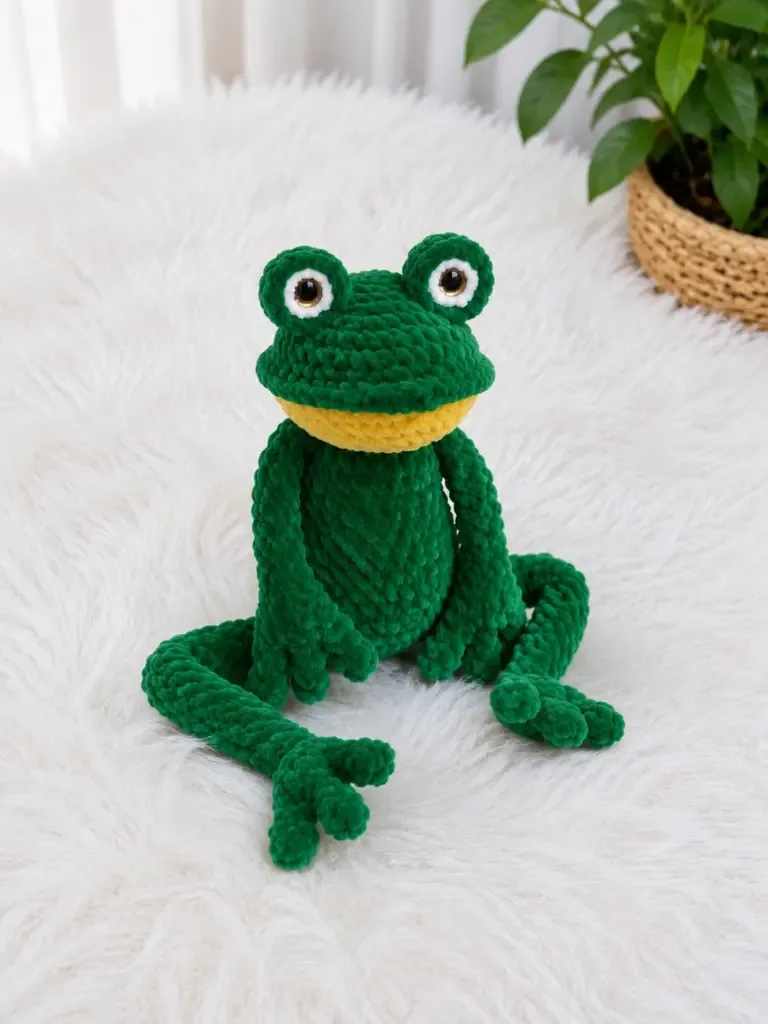
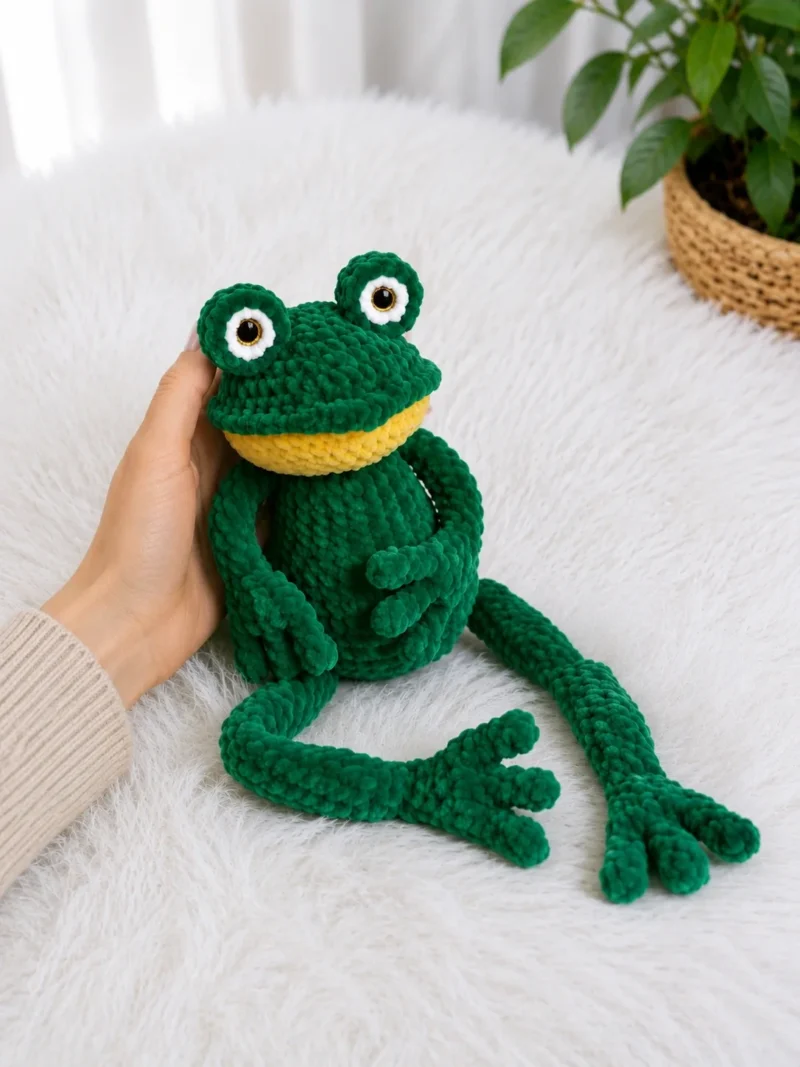
Plush Frog Amigurumi With Toe Detail Feet

A 16-inch squishy plush frog pattern for confident beginners with a few evenings to spare on toes and joins.

Jump to the rounds

What this one is

This one's for the evening you want something with real heft in your hands by the time you set the hook down. A 16-inch plush frog isn't a quick gift-along project — it's for the person who wants to sit with plush bulky yarn and feel a body actually grow round by round. Good for the crocheter who's made an amigurumi or two already and is ready for a piece with more parts to keep track of.

Your hands spend most of the time in continuous spirals — legs, arms, body, head, all built the same steady way, with the toes on the lower legs and upper arms asking for a little extra patience since you make three of them per limb before joining. Between the plush bulky yarn working up fast and the components adding up, plan on spreading this over a few sittings rather than one straight-through evening.

Try it another way

The color layout is the easiest thing to play with here — swap which parts get green versus yellow, or make the toes a contrasting white to stand out against the leg color instead of blending in. If you want a smaller frog, going down a hook size or two while keeping the same round counts will shrink the whole thing noticeably without changing a single instruction. You could also use a smooth worsted-weight yarn instead of plush bulky if you want a firmer, less fuzzy finish — just expect a smaller finished size since the stitch gauge will tighten up. For the eyes, try swapping the white piece for a pale yellow to tie the whole face into the body color instead of standing apart. If this frog is headed for a shelf rather than a child's arms, you could firm up the stuffing more than usual since you won't need the extra squish for handling. And if you're making a pair — say, a green frog and a yellow one — swap the two main colors between the body and toes on the second one so they read as a matched set rather than duplicates.

There's something genuinely satisfying about working with plush bulky-weight yarn — the fabric fills in almost as you go, so you're not second-guessing whether the stuffing will peek through. The toe construction is the real charm here: three toes made separately per lower leg and per upper arm, then joined before you continue, so each limb ends up with actual dimensional feet and hands instead of a smooth stub. The two-part eyes, a white piece joined to a green one, add a bit of color-block precision that breaks up the plush texture nicely. And because the legs get built into the body directly at Round 6, you get that pleasant click of pieces locking together rather than sewing everything on at the very end.

The rounds, in full

Written out, round by round

Intermediate4-6 hours5.0 mmSuper Bulky

Bring to the porch

Everything this one takes, in the order you will reach for it.

Yarn

  • Plush bulky-weight yarn in three colors — green, yellow, and white (approximately Himalaya Dolphin Baby weight or equivalent super bulky plush yarn)

Accent yarn

  • Thin cotton yarn in a matching tone for sewing parts together (Fingering weight, e.g., Iris knitting thread or similar)

Embroidery yarn

  • Black semi-cotton yarn for embroidering the nose detail (e.g., a cotton-blend sport weight)

Hook

  • US H-8 / 5.0 mm

Stuffing

  • Polyester fiberfill / hollowfiber stuffing
  • Stitch markers
  • Yarn needle / tapestry needle
  • Scissors

Lower Legs — Make 2

Each lower leg requires 3 toes. Make all 3 toes first, then join them.

Toes — Make 3 per leg (6 toes total)

Each upper arm also requires 3 toes. Make all 3 toes first, then join them exactly as for the lower legs.

Step by step: Toes — Make 3 per arm (6 toes total).

Each eye is made of two parts: a white piece and a main (green) piece. Both are crocheted separately and then joined.

Step by step: Eye Whites — Make 2.

  1. Round 14 sc into the 2nd ch from hook. (4)
  2. Rounds 2–4sc in each st around. (4)Step by step: Fasten off and leave a tail. Set aside; Main Eye Piece — Make 2.

Step by step: Joining the Toes (Rnd 5):.

Do not fasten off the last toe. You will use the working yarn to join all three.

Joining the Toes (Rnd 5):

  1. Round 52 sc across the first toe, 2 sc across the second toe, 4 sc across the third toe, 2 sc across the back side of the second toe, 2 sc across the back side of the first toe. Sew closed any gaps between the toes with your tapestry needle. (12)Step by step: 4 sc, inc repeat 6 times around. (36).

Step by step: Continuing the Upper Arm:.

Continuing the Lower Leg:

  1. Round 6sc in each st around. (12)

Before joining, install a 12 mm safety eye in the center of each main eye piece and snap the washer on securely from the inside.

Step by step: Joining the Eye Pieces:.

With the main eye piece and white piece held together, work 12 sc through both layers simultaneously to join them. Stuff lightly before the seam closes completely. Then work 12 sl st around the joined edge to finish. Fasten off and cut yarn.

  1. Round 7sc, dec repeat 4 times around. (8)
  2. Round 8sc in each st around. (8)Work this round in FLO. At the center front of the head, work the nose as follows: 2 hdc, 2 hdc in the next st, ch 1, 2 hdc in the same st as the last hdc. This forms the raised nose bump. Continue sc in FLO around the remainder of the round. (42)Switch to yellow yarn and work in BLO of Round 10, then continue in both loops — 42 sc across both rounds. (42)
  3. Round 9sc, dec, 2 sc, dec, sc. (6)
  4. Round 10sc in each st around. (6)Step by step: 4 sc, dec repeat 6 times around. (30); 3 sc, dec repeat 6 times around. (24); 2 sc, dec repeat 6 times around. (18); sc, dec repeat 6 times around. (12); dec 6 times around. (6).Stuff the head firmly before the opening becomes too small. Fasten off and pull the tail through the remaining 6 stitches to close.
  5. Round 11Fold the leg flat and work 3 sc through both layers to close the edge. (3)
  6. Round 12Working in FLO all the way around the folded edge, work 6 sc. (6)
  7. Round 13sc in each st around. (6)
  8. Round 14sc, inc, 2 sc, inc, sc. (8)
  9. Rounds 15–21sc in each st around. (8)
  10. Round 222 sc, dec repeat 2 times around. (6)
  11. Round 23Fold the leg flat and work 3 sc through both layers to close the edge. (3)
  12. Round 24Working in FLO all the way around the folded edge, work 6 sc. (6)
  13. Round 25sc in each st around. (6)Fold the arm flat and work 3 sc through both layers to close the edge. Fasten off and leave a long yarn tail for sewing.
  14. Round 26sc, inc, 2 sc, inc, sc. (8)
  15. Rounds 27–33sc in each st around. (8)
  16. Round 342 sc, dec repeat 2 times around. (6)
  17. Round 35Fold the leg flat and work 3 sc through both layers to close the edge. Fasten off and weave in ends.

Body

Have both finished lower legs on hand before beginning Round 6 — they are incorporated directly into the body at that point.

  1. Round 16 sc into the 2nd ch from hook. (6)
  2. Round 2inc in each st around. (12)
  3. Round 3sc, inc repeat 6 times around. (18)
  4. Round 42 sc, inc repeat 6 times around. (24)
  5. Round 53 sc, inc repeat 6 times around. (30)
  6. Round 64 sc, inc repeat 6 times around, incorporating the lower legs as you work this round. (36)
  7. Round 75 sc, inc repeat 6 times around. (42)
  8. Rounds 8–9sc in each st around. (42)
  9. Round 105 sc, dec repeat 6 times around. (36)
  10. Round 11sc in each st around. (36)
  11. Round 124 sc, inc repeat 6 times around. (30)

Wait — the original text reads “пр” (increase) here, but this is within a decreasing section of the body. The stitch count (30) is consistent with an increase round re-shaping the upper torso. Follow the count as written.

  1. Rounds 13–14sc in each st around. (30)
  2. Round 153 sc, inc repeat 6 times around. (24)

Note: The stitch count at Rnd 15 resolves to 24 as written in the original pattern.

  1. Rounds 16–21sc in each st around. (24)Do not fasten off — continue directly into head assembly or set aside with the loop secured on a stitch marker.
Putting it together

Step 1

Position the Body with the wider base at the bottom. The body top opening (24 sts at Round 21) will attach to the head.

Step 2

Sew the Head to the top of the Body using your tapestry needle and a length of matching thin cotton yarn. Use a whipstitch around the entire opening, pulling snugly for a clean join.

Step 3

Attach the Upper Arms to either side of the Body at approximately Rounds 14–16, using the long yarn tail left at the end of each arm. Stitch through securely and weave the tail inside.

Step 4

The Lower Legs were incorporated during the body construction at Round 6, so they should already be in place. If any gaps remain at the attachment points, close them with a few extra stitches.

Step 5

Position the Eyes symmetrically on either side of the upper head, just above the yellow section. Sew them in place firmly using your thin cotton yarn.

Step 6

Use your black embroidery yarn to add any final nose detail stitches directly over the raised nose bump created in Head Round 10.

Step 7

Weave in all remaining ends securely, burying the tails deep into the plush body so they cannot be pulled out.

Marlene's notes

Note 01

Work with your US H-8 / 5.0 mm hook at a tension tight enough that fiberfill doesn't show through the stitches; if you spot gaps, go down a hook size rather than fight it with extra stuffing.

Note 02

Keep a stitch marker moving with you at the start of every round on the body, head, legs, and eyes, since none of these parts close off — they're all continuous spirals.

Note 03

Have both lower legs completely finished before you reach Round 6 of the Body, because they get incorporated directly into the body at that point rather than sewn on afterward.

Porch photos

Before you sit down

  • Check you have enough plush bulky yarn in all three colors — green, yellow, and white — since the body, head, arms, legs, and eyes all draw from the same stash.
  • Set aside your thin cotton yarn for sewing and keep it separate from your black semi-cotton nose-embroidery thread so you don't grab the wrong one mid-assembly.
  • Read through the Lower Legs section before you start, since each leg needs three separate toes made and joined before the leg body continues.
  • Have a stitch marker ready and placed at the start of your first round — everything here works in a continuous spiral, so losing your place costs real backtracking.

How the hours go

Lower Legs (make 2)
about 1.5 to 2 hours because each leg needs three separate toes made first, then joined, before the 21 rounds of leg proper
Body
about 1 hour because it's 14 rounds worked in one spiral, plus pausing at Round 6 to attach the finished legs
Head, Eyes, and Assembly
about 1.5 to 2 hours because the eyes are two-part pieces joined together, and the final whipstitch assembly across the head, arms, and body opening takes a steady hand

Looking after it

  • Hand wash gently in cool water if needed, since the plush bulky yarn and fiberfill inside hold water longer than you'd expect — avoid the washing machine and let it air dry fully before handling.
  • Reshape the toes, arms, and head gently while damp and let the frog dry lying on its back so the stuffing settles evenly, then store it somewhere it won't get compressed under other things.
FAQs

Asked on the glider

the ones that come up on the glider

Why does the pattern have me make the toes before the rest of the leg?

Each lower leg and upper arm needs three toes made separately first, then joined together before the limb continues. Building them this way gives the feet and hands real dimension instead of a flat rounded end.

Do I need to finish both legs before starting the body?

Yes — the pattern has you incorporate both finished lower legs directly into the body at Round 6, rather than sewing them on afterward. Have them both fully done before you reach that round.

What yarn weight works if I don't have the exact plush yarn listed?

Any super bulky plush yarn similar to Himalaya Dolphin Baby weight will substitute well. Just keep your tension snug enough with the US H-8 / 5.0 mm hook that the fiberfill doesn't show through the fabric.

Why are there two different thin yarns besides the main plush yarn?

The thin cotton yarn is for sewing all the pieces together neatly without adding bulk, while the black semi-cotton yarn is reserved just for embroidering the nose detail. Keeping them separate stops you from accidentally using the wrong thread on the face.

How are the eyes constructed?

Each eye is two pieces — a white part and a main green part — crocheted separately and then joined together before attaching to the head. This gives a cleaner color break than trying to work the color change directly into one piece.

Is this a good project if I've only made small amigurumi before?

It's a step up in scale and part count, but the actual stitches stay simple throughout, worked in continuous spirals. If you've handled increases, stitch markers, and basic assembly before, the toe shaping and multi-part eyes are the main new skills you'll pick up here.