Intermediate 4-6 hours Worsted yarn

Worked on the glider, counted out loud —

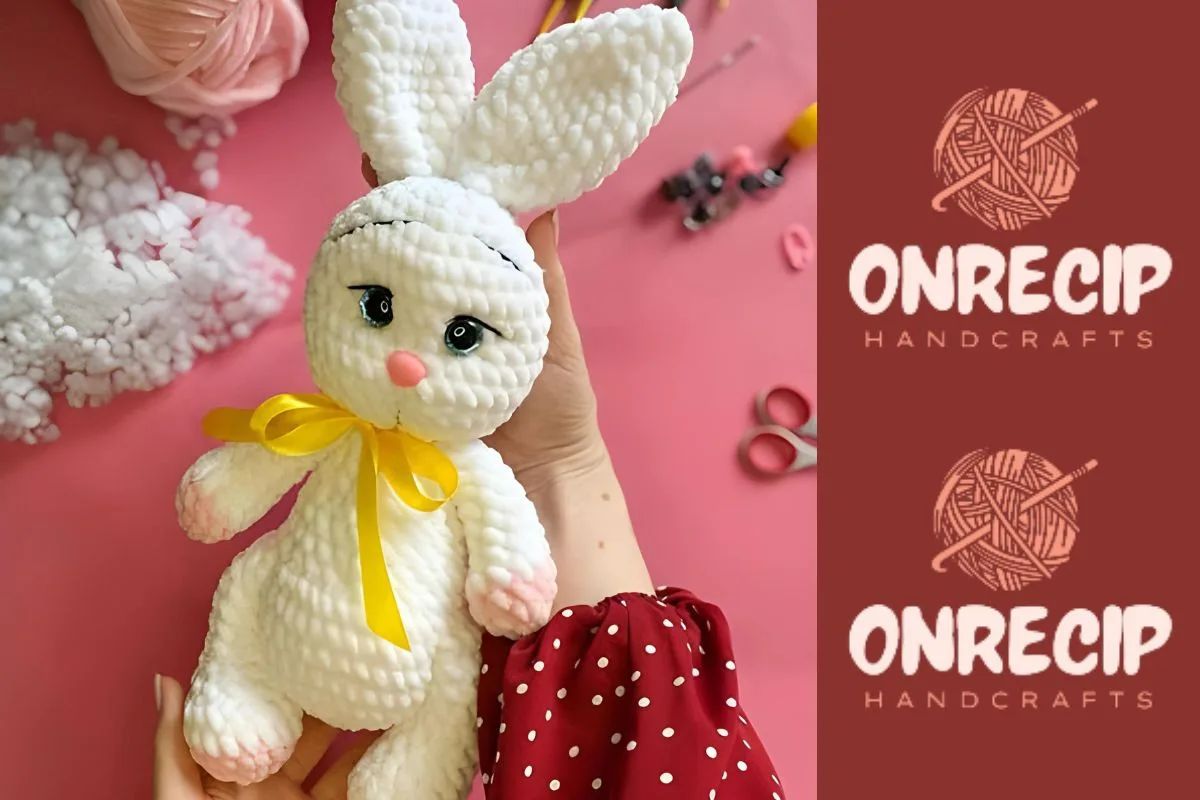
Plush crochet bunny with safety eyes and floppy ears

A soft amigurumi bunny for confident beginners, worked in plush yarn over a relaxed evening or two.

Jump to the rounds

What this one is

This is the bunny you make when you want something soft in your hands and no deadline hanging over you. It's a good one for a first amigurumi animal, or for someone who's made a few rounds of single crochet before but never shaped a whole creature. You'll end up with a plush little friend suited to a shelf, a gift box, or a kid who likes things that are round and huggable.

Your hands spend most of the time on plain single crochet in the round, with increase rounds doing the shaping work for the ears, body, arms, and legs. The body alone runs sixteen rounds, so there's a rhythm to settle into before you assemble the pieces and set the safety eyes. Plan on a few hours split across a sitting or two, depending on how quickly you work the increases.

Try it another way

This bunny takes well to small changes once you've got the basic shape down. Swap the plush yarn for a smooth worsted-weight cotton or acrylic if you want crisper stitch definition on the increase rounds, especially useful if this is your first time following the shaping in the Body or Ears. You can also play with color placement: work the Ears in a contrast shade from the Body, or give the Tail its own color since it's only three rounds and an easy place to experiment without much yarn commitment. If you'd rather skip the 14 mm safety eyes for a piece meant for a very young child, embroidered eyes in matching or contrasting thread work just as well and keep the whole toy soft with no hard parts. For size, working the same round counts in a bulkier yarn with a larger hook gives you a bigger, huggier bunny, while a finer yarn and smaller hook shrinks it down to a pocket-sized version - just expect the stitch counts at the end of each round to feel tighter or looser accordingly, since the pattern's numbers stay fixed even as gauge shifts.

There's real satisfaction in watching flat rounds turn into a shape you can recognize. The ears build up over ten rounds with a steady 3-sc increase pattern, so you get to watch that dome curve emerge stitch by stitch. The tail is the fast reward in between: just three rounds, a MR start, one increase round, one decrease round, done. By the time you're on the body's later rounds, your fingers know the rhythm well enough that the tension evens out on its own. Setting the 14 mm safety eyes is the moment this stops being a pile of parts and starts looking back at you, which is honestly the best part of any amigurumi make.
The rounds, in full

Written out, round by round

Intermediate4-6 hours14 mmWorsted

Bring to the porch

Everything this one takes, in the order you will reach for it.

  • Plush yarn
  • A nose
  • 14 mm safety eyes
  • 4 mm crochet hook
  • Yarn needle
  • Scissors
  • Holofiber

Ears

Let's start by making the ears of the plush crochet bunny.

  1. Round 16 sc in a MR
  2. Round 2(1sc,inc)x3 (9)
  3. Round 3(2sc,inc)x3 (12)
  4. Round 4(3sc,inc)x3 (15)
  5. Round 5(4sc,inc)x3 (18)
  6. Rounds 6–918 sc (4 row)
  7. Round 10(4sc,dec)x3 (15)
  8. Round 1115 sc
  9. Round 12(3sc,dec)x3 (12)
  10. Round 1312 sc, slst. Cut the yarn, fasten it off (don’t stuff). We have completed the ears, now we are making the tail.

Tail

  1. Round 16 sc in a MR
  2. Round 26 inc (12)
  3. Round 36 dec (6), slst. Cut the yarn, leaving a tail for sewing. Now that it’s ready in the tail, we can start making the bunny’s body.

Body

  1. Round 16 sc in MR
  2. Round 26 inc (12)
  3. Round 3(1sc,inc)x6 (18)
  4. Round 4(2sc,inc)x6 (24)
  5. Round 5(3sc,inc)x6 (30)
  6. Round 6(4sc,inc)x6 (36)
  7. Rounds 7–936 sc (3 row)
  8. Round 10(6sc tog with leg), 12 sc, (6 sc tog with leg), 12 sc (36)
  9. Round 116 sc, 6 dec, 18 sc (30)
  10. Round 1230 sc
  11. Round 13(3sc,dec)x6 (24)
  12. Round 1424 sc
  13. Round 15(2sc,dec)x6 (18)Begin stuffing.
  14. Round 1618 sc
  15. Round 17(1sc,dec)x6 (12)
  16. Round 183 sc, (3 sc tog with arm), 3 sc (3 sc tog with arm), 3 sc, slst. After a long process, we completed his body. Now his arms and legs are left. We do them step by step.

Arms

  1. Round 16 sc in MR
  2. Round 26 inc (12)
  3. Round 312 sc (color changes in the last stitch 3th row)
  4. Round 412 sc
  5. Round 53 sc, 3 dec, 3 sc (9)
  6. Round 69 sc (begin stuffing)
  7. Rounds 7–119 sc (5 row) Slst, cut the yarn, fasten it off.

Legs

  1. Round 16 sc in a MR
  2. Round 26 inc (12)
  3. Round 3(1sc,inc)x6 (18) (color changes in the last stitch 3th row).
  4. Rounds 4–518 sc (2 row)
  5. Round 65 sc, 4 dec, 5 sc (14)
  6. Round 76 sc, 1 dec, 6 sc (13)Begin stuffing.
  7. Round 85 sc, 1 dec, 6 sc (12)
  8. Rounds 9–1312 sc (5 row) Slst, cut the yarn, fasten it off. Finally, the head of the bunny is left, let’s complete it and finish it.

Head

  1. Round 16 sc in a MR
  2. Round 26 inc (12)
  3. Round 3(1sc,inc)x6 (18)
  4. Round 4(2sc,inc)x6 (24)
  5. Round 5(3sc,inc)x6 (30)
  6. Round 6(4sc,inc)x6 (36)
  7. Rounds 7–1136 sc (5 row)Place the eyes between 8th and 9th rounds. Place the nose between circles 10 and 11.
  8. Round 12(4sc,dec)x6 (30)
  9. Round 1330 sc
  10. Round 14(3sc,dec)x6 (24) (begin stuffing).(24)
  11. Round 15(2sc,dec)x6 (18)
  12. Round 16(1sc,dec)x6 (12)
  13. Round 176 decFinish stuffing. Cut the yarn and close the hole.

Marlene's notes

Note 01

Work with your 4 mm hook a touch tighter than usual, since plush yarn is naturally loose and airy and you don't want stuffing peeking through gaps.

Note 02

Move your stitch marker up every round without fail - plush yarn's fuzzy surface hides the top of your working stitch more than a smooth cotton or acrylic would.

Note 03

Stuff as you go rather than waiting until each part is closed, packing the holofiber firmly into the ears and body so the shaping from the increase rounds actually shows once finished.

Before you sit down

  • Check your plush yarn quantity against all six parts combined - ears, tail, body, arms, legs, and head each need enough for their full round count without a mid-piece color break.
  • Have your holofiber stuffing pulled apart and fluffed before you finish your first piece, so you're not stopping mid-round to dig through a bag.
  • Read through the Body's opening rounds (R1-R5) before you start, since the increase pattern shifts each round and it helps to see where it's heading.
  • Set a stitch marker or scrap yarn at the start of round one on every part - with plush yarn's texture, the round's beginning gets hard to spot by eye alone.

How the hours go

Ears
about 45-60 minutes, because ten rounds of steady increases take patience even though the stitch pattern stays simple
Body
about 90-120 minutes, because sixteen rounds is the longest single piece and includes both the increase shaping and the plain rounds before closing
Arms and Legs together
about 60-75 minutes, because seven and eight rounds respectively go quickly once you're warmed up, but there are two of each to finish and stuff
Head
about 60-90 minutes, because seventeen rounds include shaping at both ends plus setting the safety eyes and nose partway through

Looking after it

  • Hand wash the finished bunny in cool water with a gentle detergent, since plush yarn can mat or lose its soft halo under a machine's agitation, and press out water in a towel rather than wringing.
  • Lay the bunny flat to dry away from direct heat, reshaping the ears and limbs by hand while damp so the holofiber stuffing settles evenly and the piece keeps its rounded shape in storage.
FAQs

Asked on the glider

the ones that come up on the glider

Can I use a different yarn instead of plush yarn?

Yes, any worsted-weight yarn that plays nicely with your 4 mm hook will work. Plush yarn gives the softest, fuzziest finish, but smooth yarns make the increase rounds on the Ears and Body easier to count if you're still learning to read your stitches.

Why did my bunny's ears come out a different size than expected?

Check your tension against the ten-round pattern - if your increases are looser or tighter than the pattern's counts, the ear dome will curve differently. Working a small gauge swatch first with your specific plush yarn and hook helps catch this before you commit to all ten rounds.

Do I need both safety eyes, or can I embroider the eyes instead?

The 14 mm safety eyes give a classic amigurumi look and are quick to set, but embroidered eyes work just as well and are the safer choice for a toy meant for a very young child.

How much holofiber stuffing will I need?

The pattern doesn't specify an exact quantity, so keep extra on hand and stuff firmly as you close each part - the Body, being the largest piece at sixteen rounds, will take noticeably more than the Tail's three rounds.

In what order should I make the parts?

Starting with the Ears is a good warm-up since the increase pattern repeats cleanly, then the Tail gives you a fast finish before you commit to the longer Body. Save the Arms and Legs for when you're ready to make two matching pieces of each, and finish with the Head last.