Intermediate 4-6 hours Worsted yarn

Worked on the glider, counted out loud —

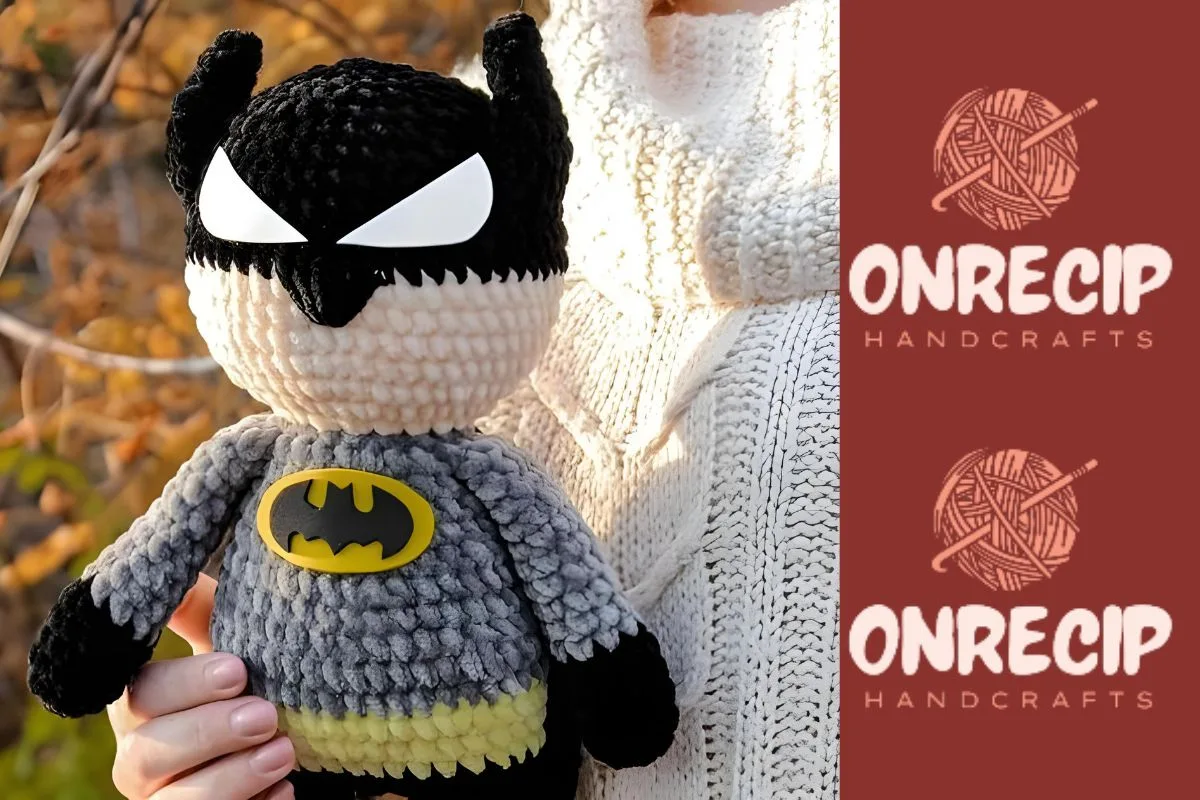
Plush crochet bat hero amigurumi pattern

A caped amigurumi hero in black and gray, worked flat in sc. Suits confident beginners; about 4-6 hours start to finish.

Jump to the rounds

What this one is

This one's for whoever in your house asks for the same caped hero at bedtime, over and over, and never seems to tire of it. You'll build him from the legs up, in a serious black and gray palette with just a flash of yellow at the emblem, so the finished doll reads as bold on a shelf as it does soft in a hand. If someone you know has been wearing a cape around the house lately, this is the pattern that finally gives them their own small one.

Your hands will spend most of their time on plain single crochet in the round, with the real shaping happening in short bursts at the legs, hands, and head. Nothing here asks for anything you haven't done before, just steady counting and a willingness to change colors on cue. Set aside an evening or two, work the parts separately, then let the assembly step pull it all together at the end.

Try it another way

Once you've got the shape down, there's plenty of room to make this bat hero your own. Swap the flesh tone for a different shade if you want a different face, or drop the yellow altogether and pick out the emblem in a color that matches a cape you're already using elsewhere. If you'd rather skip the foamiran step, you can embroider the eyes and emblem directly onto the head and cloak with plush yarn instead of gluing on cut shapes. For a softer, more huggable finish, go up a hook size and expect a slightly looser, larger doll, though you'll want to fill more generously to keep the shape firm. You could also crochet the Ears in gray instead of black to pick up the same tone used partway through the Hands and Legs, tying the whole palette together. And if you're making more than one, varying just the Body's yellow band, whether wider or set higher, is an easy way to give each doll its own small identity without touching the stitch counts at all.

There's a nice rhythm to a piece built in named sections. You crochet the legs first, joining the second one to the first with a short chain so they end up facing the same direction, which is a small trick that makes the whole figure sit properly once stuffed. The body carries three color changes as it grows, so you watch the doll's palette shift right under your hook rather than sewing panels together after the fact. The ears, at just eight rounds each, are a satisfying quick win between the longer parts. And the cloak, worked as its own 20-round piece, is the part that turns a stuffed shape into a character the moment you set it on his shoulders.
The rounds, in full

Written out, round by round

Intermediate4-6 hoursWorsted

Bring to the porch

Everything this one takes, in the order you will reach for it.

  • Himalaya Dollpfin Baby yarn – black (311), gray (320), flesh (333) and a little yellow (313)
  • Foamiran for eyes and emblems (white, yellow and black)
  • Hook number 4
  • Needle for sewing on parts with a blunt end
  • Filler
  • Hot glue
  • Scissors

Hands

Make 2

We start crocheting in black.

Change color to gray at round 3-6.

We fill with holofiber for 2/3 hands.

  1. Round 12 ch and in the 2nd from the hook we crochet 6 sc. (6)
  2. Round 26 inc. (12)
  3. Rounds 3–612 sc, change the color to gray. (12)
  4. Round 7(4 sc, dec)*2. (10)
  5. Rounds 8–1610 sc (9 rows), slst and cut the yarn. (10)

Legs

Make 2

We start crocheting in black.

Color change to gray at round 9, back to black at rounds 11-16.

  1. Round 16 ch and from the 2nd loop we crochet around the chain – inc, 3 sc, 3sc on last loop, 4 sc on second side. (12)
  2. Round 22 inc, 3 sc, 3 inc, 3 sc, inc. (18)
  3. Round 3(sc, inc)*2, 3 sc, (sc, inc)*3, 4 sc, inc. (24)
  4. Rounds 4–524 sc + 3 sc at the end of the 5th row for offset. (24)
  5. Round 67 sc, (sc, dec)*3, 8 sc. (21)
  6. Round 77 sc, 3 dec, 8 sc. (18)
  7. Round 8(sc, dec)*6. (12)
  8. Round 912 sc, change the color to gray. (12)
  9. Round 1012 sc for BLO. (12)
  10. Rounds 11–1612 sc, and change the yarn to black. (12)
  11. Round 1712 sc. Cut the yarn at the first leg, not at the second. (12)

Body

We make 4 ch from the second leg and attach it to the 1st, so that the legs looked in one direction.

We fill the legs tightly with filler, and the body during crocheting.

Color changes to yellow at rounds 2-3, to gray at round 6.

  1. Round 112 sc on the leg, 4 sc chain from ch, 12 sc on the leg, 4 sc on a chain of ch. (32)
  2. Rounds 2–332 sc, change the color to yellow. (32)
  3. Round 4(7 sc, inc)*4. (36)
  4. Round 5(5 sc, inc)*6. (42)
  5. Round 642 sc, change the color to gray. (42)
  6. Round 742 sc. (42)
  7. Round 8(5 sc, dec)*6. (36)
  8. Rounds 9–1036 sc. (36)
  9. Round 11(4 sc, dec)* 6. (30)
  10. Round 1230 sc. (30)
  11. Round 13(3 sc, dec)*6. (24)
  12. Round 1424 sc. (24)
  13. Round 15we crochet our hands. (24)
  14. Round 16(2 sc, dec)*6, change the color to flesh and continue crocheting the head. (18)

Head

Change the color to black before round 8. Stuff the head and neck tightly as we crochet.

  1. Round 118 inc. (36)
  2. Round 2(5 sc, inc)*6. (42)
  3. Round 3(6 sc, inc)*6. (48)
  4. Rounds 4–748 sc (4 rows). (48)
  5. Rounds 8–1148 sc (4 rows). (48)
  6. Round 12(6 sc, dec)*6. (42)
  7. Round 13(5 sc, dec)*6. (36)
  8. Round 14(4 sc, dec)*6. (30)
  9. Round 15(3 sc, dec)*6. (24)
  10. Round 16(2 sc, dec)*6. (18)
  11. Round 17(1 sc, dec)*6. (12)
  12. Round 186 dec. Pull off the opening and hide the end of the yarn. (6)

Ears

Make 2

Cut the yarn, leave it for sewing.

Sew on the ears between the 9th and 12th rows of the head, so that they hold and do not fall.

  1. Round 12 ch and in the 2nd from the hook – 6 sc. (6)
  2. Round 26 sc. (6)
  3. Round 3(sc, inc)*3. (9)
  4. Round 4(2 sc, inc)*3. (12)
  5. Round 5(3 sc, inc)*3. (15)
  6. Rounds 6–715 sc. (15)
  7. Round 87 sc for both walls, ch. (7)

Cloak

We crochet in black in pivoting rows.

At the beginning of ch set, leave the long end of the yarn to be sewn on.

Cut and hide the yarn.

  1. Round 111 ch turn.
  2. Round 210 sc. (10)
  3. Round 310 hdc. (10)
  4. Round 4inc (we make from hdc), 8 hdc, inc. (12)
  5. Round 512 hdc. (12)
  6. Round 6inc, 10 hdc, inc. (14)
  7. Round 714 hdc. (14)
  8. Round 8inc, 12 hdc, inc. (16)
  9. Round 916 hdc. (16)
  10. Round 10inc, 14 hdc, inc. (18)
  11. Round 1118 hdc. (18)
  12. Round 12inc, 16 hdc, inc. (20)
  13. Rounds 13–2020 hdc (8 rows), ch. (20)

Putting it together

Step 1

Sew the cloak with the yarn that we left at the beginning, between the head and the body.

Step 2

Embroider the nose with black plush yarn in a triangle, as in the photo.

Step 3

Tie the legs in row 10 FLO- 12 sc, and hide the yarn.

Step 4

Cut out eyes from foamiran in white, and an emblem from yellow and black (drawn on paper, cut out, and cut out foamiran according to this form). Glue on hot glue.

Step 5

That's all, our Batman is ready!

Marlene's notes

Note 01

A number 4 hook with this baby yarn should give you a firm, tight fabric that won't let stuffing peek through, so keep your tension snug rather than loose.

Note 02

Color changes happen mid-round in several parts, including the Hands at round 3 and the Body at rounds 2-3 and 6, so carry or cut yarn as suits your usual method and keep track of where you are.

Note 03

Stuff the Legs and Body firmly as you crochet rather than waiting until the end, since the pattern calls for tight filling on both to hold their shape once assembled.

Before you sit down

  • Check you have enough of each yarn color for the piece you're starting, since the body alone moves through black, yellow, and gray as it grows.
  • Cut and set aside your foamiran shapes for the eyes and emblem before you finish the head, so they're ready the moment the glue comes out.
  • Read through the Legs part once before casting on, since the shaping and color changes there are more involved than in Hands or Ears.
  • Have your filler within reach as you crochet the Body and Legs, since both are stuffed as you go rather than after the fact.

How the hours go

Hands and Ears
about 45 minutes because the Hands and Ears are quick pieces at 16 and 8 rounds, with a color change to watch on the Hands
Legs and Body
about 2.5 hours because the Legs carry multiple color changes and shaping rounds, and the Body runs 16 rounds with three color shifts
Head, Cloak and assembly
about 1.5 hours because the Head needs careful shaping over 18 rounds, and the Cloak plus sewing, embroidery and foamiran details finish the figure

Looking after it

  • Hand wash in cool water if needed, since Himalaya Dollpfin baby yarn is a soft acrylic blend that can lose its bounce with hot water or a machine cycle.
  • Lay the doll flat to dry away from direct heat, and reshape the ears and cloak gently by hand once damp so they dry sitting the way you want them to.
FAQs

Asked on the glider

the ones that come up on the glider

Can I use a different yarn weight than the one listed?

You can, but expect the finished doll to change size along with your hook. If you go up or down from the number 4 hook and this baby yarn, keep your gauge dense enough that the filler won't show through the stitches.

Why does the Body change color at rounds 2-3 and again at round 6?

Those shifts build the layered look of the costume right into the crocheted fabric, moving from black to yellow to gray as the body grows. It saves you from sewing on separate color panels later.

Do I need foamiran, or can I substitute something else?

Foamiran gives the eyes and emblem a clean, slightly stiff edge that holds its cut shape well under hot glue. Felt is a reasonable substitute if that's what you have on hand, though the edges will be softer.

What is the row 10 FLO tie-off on the legs for?

Working into the front loops only at that row and tying it off creates a visible seam line, which reads as the boot or cuff detail on the finished leg. It's a quick step but worth doing before you move on to sewing everything together.

Is this a good project if I've never made an amigurumi with a cape before?

It's a fair first cape project, since the Cloak is worked as its own flat piece rather than shaped in the round like the body parts. Take your time with the Head at 18 rounds, since that's where the shaping is most involved.