Intermediate 4-6 hours Worsted yarn

Worked on the glider, counted out loud —

Cozy plush baby chick amigurumi crochet pattern

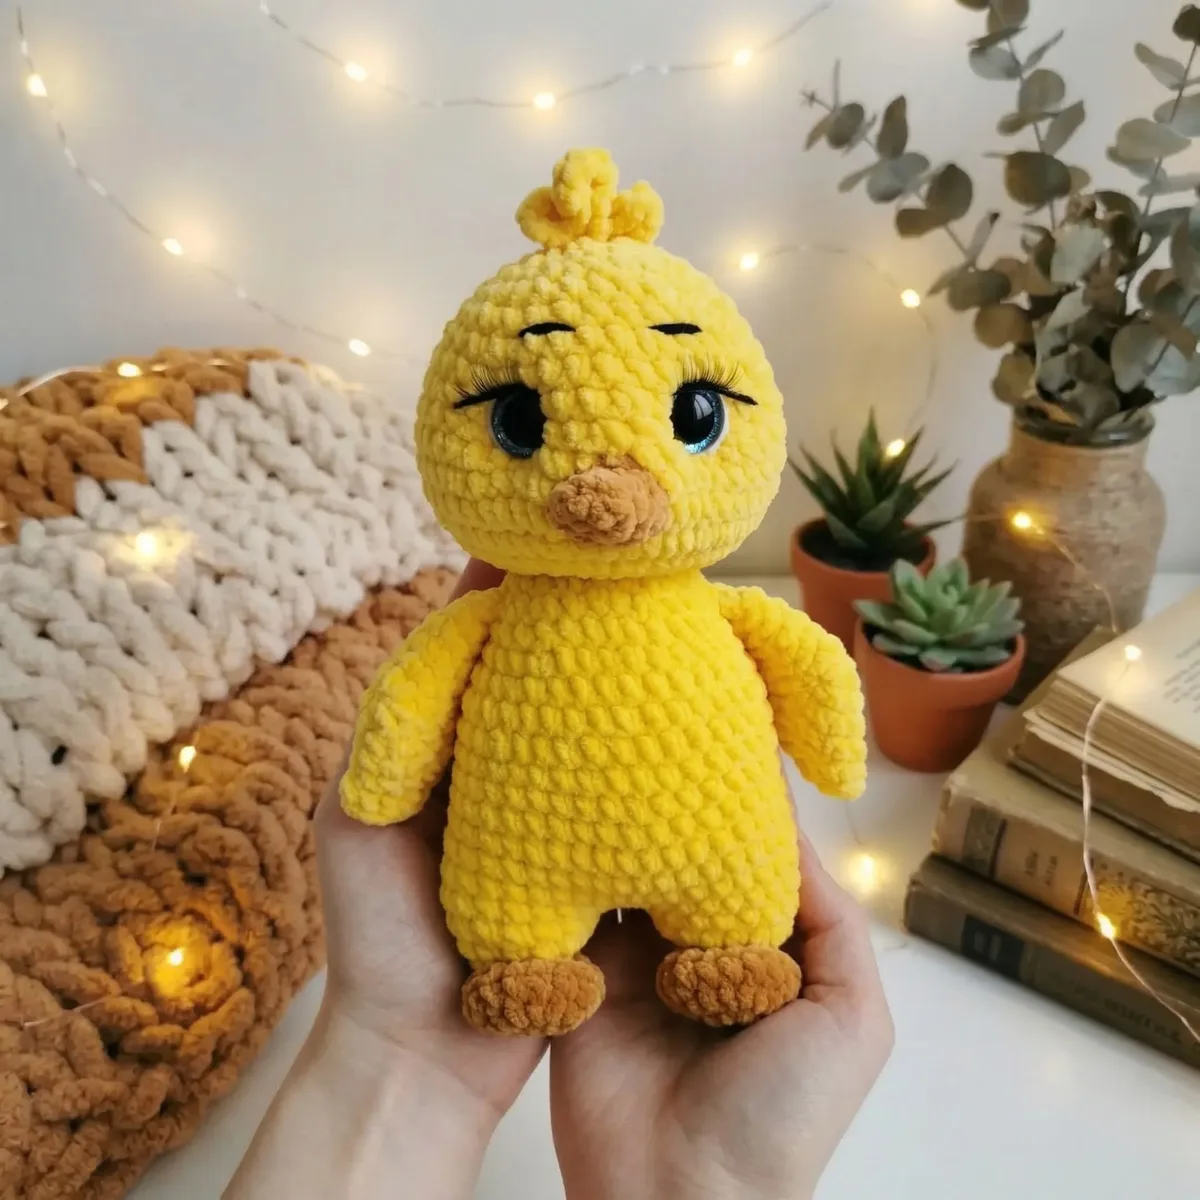
A plush yellow chick with sculpted face, for confident beginners. About 4-6 hours from mustard feet to floss-stitched eyes.

Jump to the rounds

What this one is

You know that soft, round little chick shape you see and just want to hold? This is that. I made it thinking of anyone who loves a plush toy with real personality baked into the face, not just stuck-on features. It suits you if you've made an amigurumi or two already and you're ready to try safety eyes, sculpted facial features, and a bit of shaping that goes beyond a plain ball body.

Your hands will spend most of the time on plain single crochet in the round, which is the restful part, then slow down for the shaping rounds on the head and the sculpting and embroidery stage, which is where the chick actually gets its expression. Between the legs, body, head, wings, and beak, plan on a solid few hours spread over a sitting or two, plus time for the facial work to feel unhurried.

Try it another way

Once you've made this chick, it's an easy pattern to bend to your mood. Swap the mustard for a soft gray or white on the feet and you get a completely different personality without touching a single round. If you want a smaller chick, try a lighter worsted or even a sport-weight yarn with a smaller hook. Since the body starts from joining two 16-stitch legs into a 40-stitch round, a finer yarn shrinks every part proportionally without you needing to recount stitches. You can also play with the wing and beak colors: a contrasting white for the wings against yellow gives a fluffier, more storybook look, while a darker beak color makes the face pop more. The false eyelashes are optional charm, so leave them off for a more classic amigurumi look or add them for something a little more whimsical. If you're making a set, consider varying the main yellow shade slightly across a few chicks so they read as a little flock rather than duplicates. And since the wings and beak are quick pieces, they're a good place to test a scrap of leftover yarn from another project before you commit it elsewhere.
The rounds, in full

Written out, round by round

Intermediate4-6 hours20 mmWorsted

Bring to the porch

Everything this one takes, in the order you will reach for it.

  • Plush yarn (e.g., YarnArt Dolce):
  • Yellow (main color)
  • Mustard (for feet)
  • Cotton/acrylic blend yarn (e.g., YarnArt Jeans):
  • Black (for facial details)
  • White (for facial details)
  • Safety eyes (20 mm)
  • Polyester fiberfill stuffing
  • Crochet hook (4.0 mm)
  • Scissors
  • Long tapestry needle
  • Stitch marker
  • Strong thread for facial sculpting (e.g., dental floss or embroidery thread)

Optional

  • False eyelashes for added charm

Legs (Make 2)

Start with mustard yarn.

  1. Round 18 sc in mr (8)
  2. Round 2Inc in each stitch around (16)
  3. Rounds 3–4Sc in each stitch around (2 rounds) (16)Step by step: Fasten off, leaving a long tail for sewing.
  4. Round 5(sc3tog) x 3, dec, sc 3, dec (8)
  5. Round 6Change to yellow yarn. Sc in each stitch around (8)
  6. Round 7Inc in each stitch around (16)
  7. Round 8Sc in each stitch around (16)Stuff the mustard-colored part of the leg very lightly or not at all. Stuff the yellow part firmly.Fasten off the first leg and cut the yarn. For the second leg, do not cut the yarn; continue to the Body section.

Body

Continue with yellow yarn from the second leg.

  1. Round 1In this round, we will join the legs. Ensure they are positioned correctly. Ch 2 from the second leg, sc 16 around the first leg, work 2 sc in each of the 2 chs (4 sc total in the chain space), sc 16 around the second leg, work 2 sc in each of the 2 chs (4 sc total in the chain space). (40)Move stitch marker to this point.
  2. Rounds 2–3Sc in each stitch around (2 rounds) (40)In Rnds 4, 5, 6, and 11, the decreases should be positioned on the sides of the body. Adjust placement as needed for your specific project.
  3. Round 4Sc 7, dec, sc 18, dec, sc 11 (38)
  4. Round 5Sc 8, dec, sc 16, dec, sc 10 (36)
  5. Round 6Sc 7, dec, sc 16, dec, sc 9 (34)
  6. Rounds 7–10Sc in each stitch around (4 rounds) (34)
  7. Round 11Sc 6, dec, sc 1, dec, sc 12, dec, sc 1, dec, sc 6 (30)
  8. Rounds 12–13Sc in each stitch around (2 rounds) (30)
  9. Round 14(Sc 3, dec) x 6 (24)
  10. Round 15(Sc 2, dec) x 6 (18)
  11. Round 16(Sc 1, dec) x 6 (12)Stuff the body firmly. Do not cut the yarn; continue to the Head section.

Head

Continue with yellow yarn from the body.

  1. Round 1Inc in each stitch around (12) (24)
  2. Round 2(Sc 1, inc) x 12 (36)
  3. Round 3(Sc 2, inc) x 12 (48)
  4. Rounds 4–8Sc in each stitch around (5 rounds) (48)
  5. Round 9(Sc 6, dec) x 6 (42)
  6. Round 10(Sc 5, dec) x 6 (36)Insert safety eyes between Rnds 8–9, approximately 8-9 stitches apart.
  7. Round 11Sc in each stitch around (36)
  8. Round 12(Sc 4, dec) x 6 (30)
  9. Round 13Sc in each stitch around (30)
  10. Round 14(Sc 3, dec) x 6 (24)
  11. Round 15(Sc 2, dec) x 6 (18)Stuff the head firmly.
  12. Round 16(Sc 1, dec) x 6 (12)
  13. Round 17Dec x 6 (6)Fasten off, leaving a long tail. Use the tail to sew the opening closed, weaving the needle through the front loop of each remaining stitch and pulling tight. Weave in the end.

Wings (Make 2)

Use yellow yarn.

  1. Round 16 sc in mr (6)
  2. Round 2Inc in each stitch around (12)
  3. Round 3(Sc 1, inc) x 6 (18)
  4. Round 4(Sc 2, inc) x 6 (24)
  5. Round 5(Sc 3, inc) x 6 (30)Do not cut the yarn. Fold the piece in half and single crochet through both layers, working the following sequence across the 15 folded stitches: sc, hdc, dc, hdc, sl st, hdc, dc, hdc, sl st, hdc, dc, hdc, sl st, hdc, dc.Fasten off, leaving a long tail for sewing.

Beak

Use mustard yarn.

  1. Round 14 sc in mr (4)
  2. Round 2(Inc, sc 1) x 2 (6)
  3. Round 3(Sc 2, inc) x 2 (8)
  4. Round 4Sl st 3, sc 5 (8)Fasten off, leaving a long tail for sewing.

Tail

Use yellow yarn.

  1. Round 16 sc in mr (6)
  2. Round 2Inc in each stitch around (12)
  3. Round 3(Sc 1, inc) x 6 (18)Fasten off, leaving a long tail for sewing.

Facial Sculpting and Embroidery

Sculpting:

For sculpting, you will need a long piece of strong thread (like dental floss or embroidery thread).

Insert your needle into point 1 (Rnd 16 of the body), bring it out at point 2 (Rnd 8 of the head, near the inner corner of an eye). Insert the needle at point 3 (Rnd 8 of the head, near the outer corner of the same eye), bring it out at point 4 (Rnd 8 of the head, near the inner corner of the other eye). Insert the needle at point 5 (Rnd 8 of the head, near the outer corner of the second eye), and bring it out at point 6 (Rnd 16 of the body, near point 1). Gently pull both ends of the thread to create indentation around the eyes, then tie several knots to secure. Hide the ends inside the head.

Embroidery:

Using white cotton/acrylic yarn, embroider small white highlights on the safety eyes to give them a sparkle. With black yarn, embroider eyelids and eyebrows to add expression. If desired, glue on false eyelashes for a more whimsical look.

Crest

Use yellow yarn.

Join yarn in the last round (Rnd 17) of the head.

Ch 6-10 (adjust length as desired), sl st into the next stitch. Repeat this process for 2 more "loops" (total of 3 loops).

Fasten off and weave in ends.

Putting it together

Step 1

Now that all your individual components are crocheted, it's time to bring your adorable chick to life! Careful assembly is key to a polished final product.

Step 2

Attach the Tail: Position the tail at the back of the body, centered, between Rnds 5-7. Using the long tail left on the tail piece and your tapestry needle, sew it securely to the body. Weave in any remaining ends.

Step 3

Attach the Wings: Place the wings on either side of the body, slightly towards the back, around Rnds 13-14. Ensure they are symmetrical. Use the long tails and your tapestry needle to sew them firmly to the body, stitching through both layers of the wing and into the body.

Step 4

Attach the Beak: Position the beak on the front of the head, centered, between Rnds 4-7 of the head, just below the safety eyes. Pin it in place to check alignment. Sew around the edges of the beak, ensuring it's firmly attached and the opening is closed.

Step 5

Final Touches: Double-check all sewn parts for security. Weave in any remaining loose ends inside the body or head. Give your chick a gentle squeeze and reshape to ensure the stuffing is evenly distributed and the form is appealing.

Marlene's notes

Note 01

This whole chick is worked in continuous spirals, so keep a stitch marker on your working loop at all times or you'll lose track of where each round starts.

Note 02

Stuff each part firmly as you go rather than waiting until the end, especially the legs and head, so the finished chick holds its round shape.

Note 03

The color change from mustard to yellow happens right at the start of the legs, so weave in that first yarn tail early instead of leaving it for the final cleanup.

Note 04

This pattern uses US crochet terminology.

Note 05

Gauge is not critical for this project, but maintaining consistent tension will ensure your finished chick is well-proportioned and firm enough to hold its shape.

Note 06

decreases, it is recommended to use the invisible decrease method for a neater finish, especially in amigurumi projects. To do an invisible decrease, insert your hook into the front loop of the first stitch, then into the front loop of the next stitch, yarn over, and pull through both loops (2 loops on hook), yarn over and pull through both loops on hook.

Note 07

When changing yarn colors, complete the last yarn over of the last stitch of the old color with the new color to ensure a smooth transition.

Before you sit down

  • Lay out your yellow, mustard, black, and white yarn together so you can see how the color changes will read before you commit a single stitch.
  • Have your safety eyes (20 mm) and stuffing within reach before you start the head, since you'll need to place the eyes partway through, not after.
  • Thread up your strong thread or dental floss ahead of the facial sculpting stage, so you're not stopping mid-project to hunt for it.
  • Read through the Head section once before you begin it, since the increase rounds happen quickly and it helps to know where they land.

How the hours go

Legs and Body
about 1.5 hours because the legs are quick at 7 rounds each but the body join round takes a careful moment to line up
Head
about 1.5 to 2 hours because 13 rounds with three increase rounds in a row means the shaping needs your full attention
Wings, Beak, and Facial Sculpting
about 1 to 1.5 hours because the pieces are small and fast, but the sculpting and embroidery step is slow, careful work with the tapestry needle

Looking after it

  • Since this pattern uses a plush yarn blend and a cotton/acrylic blend for the details, hand wash gently in cool water if needed, and avoid wringing so the stuffing doesn't shift or clump.
  • Lay the chick flat to air dry away from direct heat, then gently reshape the head and body by hand while damp so it dries back into its round, firm shape.
FAQs

Asked on the glider

the ones that come up on the glider

What size hook does this pattern use?

You'll work the whole chick with a 4.0 mm hook. That size pairs well with the plush yarn used for the main body and the cotton/acrylic blend used for the facial details.

Do I need safety eyes, or can I embroider the eyes instead?

The pattern calls for 20 mm safety eyes, which give the chick a bright, dimensional look. You could substitute embroidered eyes if you prefer, but you'd want to plan their placement during the same head round the pattern specifies for the safety eyes.

How firmly should I stuff the pieces?

Stuff firmly and continuously as you crochet each part, rather than stuffing all at once at the end. This keeps the legs, body, and head holding their round shape instead of going soft or lopsided.

What is the facial sculpting and embroidery step for?

This is where you use strong thread, like dental floss or embroidery thread, and a tapestry needle to define the face further, beyond just the safety eyes and beak. It's what gives the finished chick its expressive, sculpted look rather than a flat one.