Beginner-Friendly 8-12 Hours Light (#3) yarn

Worked on the glider, counted out loud —

Oversized Boxy Crochet Cardigan: Easy Panel Pattern

Make a cozy oversized crochet cardigan from simple rectangle panels. Beginner-friendly hdc stitches, custom sizing, and a relaxed, worn-in look.

Jump to the rounds

Before you sit down

Work two smaller side panels the same way, matching the ribbed stitch pattern used on the back panel.

Crochet two narrower sleeve panels using the same hdc and back-loop hdc combination until they reach your desired length.

Sew each side panel to the back panel with right sides together to form the cardigan's body.

Attach each sleeve panel to its side panel, right sides together, to complete the shoulder seams.

Fold each sleeve in half and decrease one stitch at both edges every row to taper toward the cuff.

Crochet a double crochet ribbed band for each cuff and seam it onto the tapered sleeve opening.

Optionally add a ribbed trim band around the front edges and neckline to finish the cardigan's raw edges.

What this one is

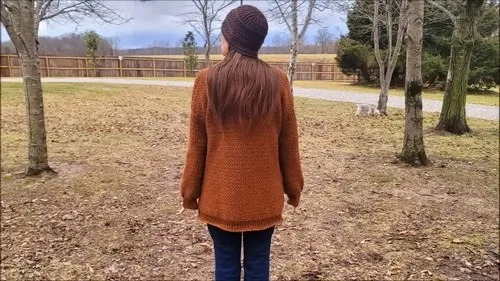
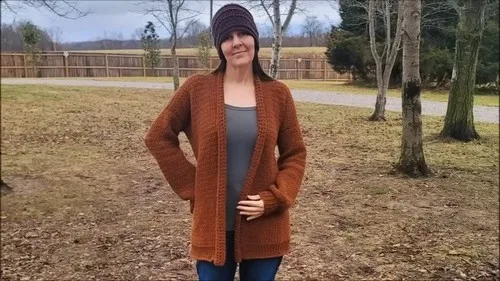
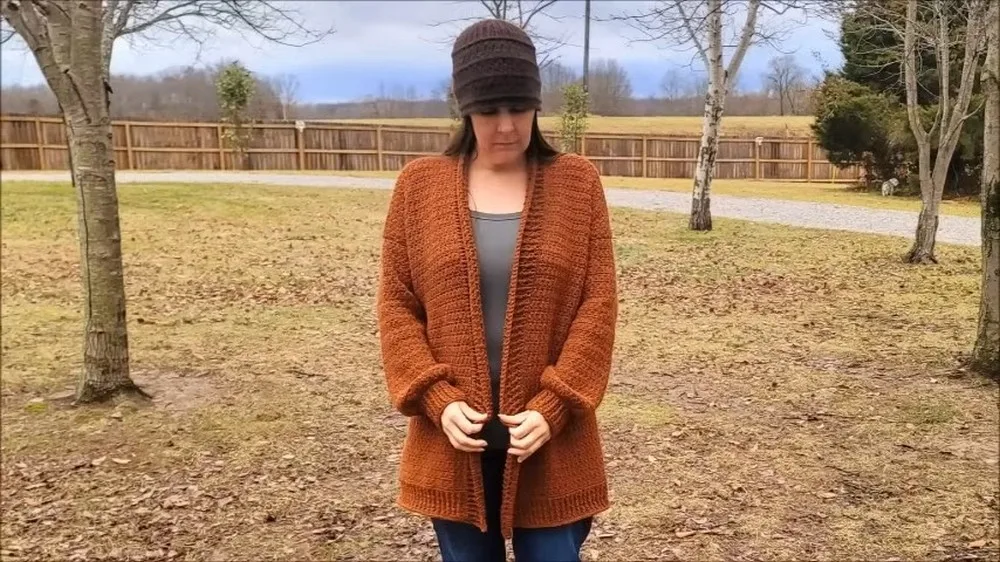
This cardigan is built from simple rectangular panels — a back panel, two side panels, and two sleeve panels — that stitch together into a wonderfully oversized, lived-in layer. It's the kind of piece that feels like it's always been your favorite, with a relaxed drape and a slightly boxy silhouette that flatters just about every body. If you've been wanting a cardigan that feels borrowed from someone cool rather than fitted and fussy, this is it. It's perfect for crocheters who want maximum coziness with minimal shaping.

The whole cardigan relies on just two stitches: half double crochet and back-loop-only half double crochet, which creates that lovely ribbed texture running through every panel. Because there's no counting stitches around in the round or working amigurumi-style shaping, this is genuinely approachable for confident beginners, though the assembly and seaming take some patience. Expect to spend several relaxed evenings on it — the flat panel construction means you can crochet while watching TV without losing your place.

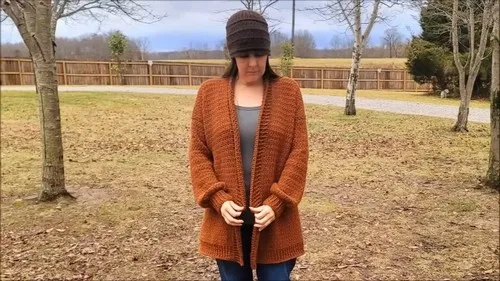
When it's all sewn together, you get a generously sized, open-front cardigan with dropped shoulders, tapered sleeves, and optional ribbed cuffs and trim for a polished finish. The back-loop ribbing gives it a chunky, textured look that reads more expensive than it is, and the customizable dimensions mean it can be sized for anyone on your gift list. It's a fantastic handmade gift for a parent, partner, or best friend who lives in oversized sweaters.

Variations

This pattern is basically a blank canvas for customization, starting with yarn choice. Swap the lightweight Drops Sky for a chunky bulky-weight yarn and a larger hook for a super plush, fast-working version, or drop down to a fingering weight for a lighter three-season cardigan. Color-wise, a heathered oatmeal or camel reads classic 'grandpa closet,' while a deep forest green or rust orange gives it a cozy autumn feel — try color-blocking the sleeves in a contrasting shade from the body for a modern twist. For pattern lovers, alternate two colors every few rows on the back panel to create subtle stripes that carry through the whole garment. Sizing is endlessly flexible since every panel starts with a chain based on your desired width — make the back panel extra wide and the side panels narrow for a cropped, boxy fit, or lengthen everything for a duster-style long cardigan. If you want a more fitted result, decrease more aggressively on the sleeve tapering step, or skip the side panels altogether and seam the sleeves directly to a wider back panel for a simplified batwing shape. For finishing touches, swap the double crochet ribbing on the cuffs and edges for a simple sc border if you want a cleaner, less bulky edge, or add wooden toggle buttons and buttonholes instead of leaving it open-front. You could even work the optional ribbing trim in a contrasting color to frame the whole cardigan like a design detail rather than an afterthought. Little kids' or petite sizes are easy too — just chain shorter starting widths for every panel and shorten your sleeve length to match.

I love this cardigan because it strips garment-making down to its simplest form — rectangles! There's no in-the-round shaping to fuss over, no complicated increase math, just straightforward rows of hdc and hdc back-loop-only that build up a gorgeous ribbed texture as you go. That back-loop detail is honestly the star of the show; it gives the fabric a soft, corduroy-like ridge that makes this look far more advanced than it actually is. I also love how customizable it is — you're chaining to your own desired width, so this pattern quietly adapts to whatever size or gauge you're working with. The front post double crochet detail adds a nice textured accent without adding real difficulty. And there's something so satisfying about laying out five simple panels and watching them transform into an actual wearable cardigan once you start seaming. It's a great portable, low-stress project, and the payoff — a cozy, oversized layer that looks like it came from a boutique — makes every row worth it.
Common mistakes

  • Chaining the wrong number of stitchesAlways add exactly 2 extra chains to your target width count, and measure your foundation chain against a ruler before starting Row 1.
  • Working into both loopsSlow down on Row 2 and onward and consciously pick up only the back loop of each stitch — this is what creates the signature ribbed texture, so it's worth double-checking your first few stitches each row.
  • Losing track of which sideLay all panels out flat before seaming and keep the ribbed texture facing the same direction on every piece so the finished cardigan looks consistent from the outside.
  • Decreasing sleeve tapering too quickly or unevenly.Decrease just one stitch at the beginning and end of each row as directed, and try on the sleeve periodically (or measure against your arm) to avoid a lopsided or overly tight cuff.
  • Making the side panels too narrowMeasure from underarm to underarm plus a bit of ease before chaining the side panel width, rather than guessing — this panel controls how roomy the body of the cardigan feels.
  • Skipping gauge/tension checksSince the whole pattern is based on measurements rather than fixed stitch counts, work a small swatch first to see how your yarn and hook combo behaves before committing to your chain lengths.

The rounds, in full

Written out, round by round

Beginner-Friendly8-12 Hours5 mmLight (#3)

Materials

Everything this one takes, in the order you will reach for it.

  • Drops Sky yarn (or similar, lightweight #3 yarn)
  • 2600 yards of yarn for size pictured (adjust based on desired size)
  • 5 mm crochet hook (adjust based on yarn)
  • Stitch markers
  • Tapestry needle

keep this to hand

Abbreviations

US crochet terms, as used in this pattern.

  1. chchain
  2. scsingle crochet
  3. hdchalf double crochet
  4. dcdouble crochet
  5. hdc blhalf double crochet back loop
  6. dc bldouble crochet back loop
  7. fpdcfront post double crochet
  8. sl stslip stitch

Back Panel

Chain: Chain a number of stitches equal to the desired width of your back panel, plus 2. For example, if you want your back panel to be 24 inches wide, you would chain 26 stitches.

  1. Row 11 hdc in the second ch from the hook, 1 hdc in each ch across, turn.
  2. Row 2ch 1, 1 hdc bl in the first hdc, 1 hdc bl in each hdc across, turn.Repeat rows 2 and 3: until your back panel is the desired length.

Side Panels

Make 2

Chain a number of stitches equal to the desired width of your side panel, plus 2. For example, if you want your side panel to be 10 inches wide, you would chain 12 stitches.

  1. Row 11 hdc in the second ch from the hook, 1 hdc in each ch across, turn.
  2. Row 2ch 1, 1 hdc bl in the first hdc, 1 hdc bl in each hdc across, turn.Repeat rows 1-3: for the side panels.

Sleeve Panels

Make 2

Chain 14-15 stitches (or measure your arm and adjust accordingly).

  1. Row 11 hdc in the second ch from the hook, 1 hdc in each ch across, turn.
  2. Row 2ch 1, 1 hdc bl in the first hdc, 1 hdc bl in each hdc across, turn.Repeat rows 2 and 3: until your sleeve panels are the desired length.

Assembly

Step 1

Sew the side panels to the back panel, right sides together.

Step 2

Sew the sleeve panels to the side panels, right sides together.

Step 3

Decreasing Sleeves: Fold the sleeve panels in half and decrease one stitch at the beginning and end of each row until the sleeves are tapered to the desired width at the cuff.

Step 4

Adding Cuffs: Crochet a band of double crochet ribbing for the cuffs. Attach the cuffs to the sleeves, right sides together.

Step 5

Adding Ribbing (Optional): Crochet a band of double crochet ribbing around the neck, front, and bottom of the cardigan.

Step 6

Finishing: Weave in any loose ends and enjoy your new cardigan!

Important notes

Note 01

This is a measurement-based pattern rather than a fixed-stitch-count one, so take your own body measurements (back width, side depth, sleeve length) before you start chaining any panel.

Note 02

The back-loop-only hdc rows are what create the ribbed texture running throughout the cardigan, so keep your tension consistent across all five panels for a uniform look.

Note 03

Block your panels lightly before seaming if your yarn allows — it helps flatten curling edges and makes matching up panel edges during assembly much easier.

Note 04

Use stitch markers generously when pinning panels together for seaming; they'll keep edges aligned so your seams stay straight and your ribbing lines up visually across panels.

Note 05

The sleeve tapering step is worked by folding the sleeve panel and decreasing symmetrically, so double-check both edges are decreasing at the same rate to avoid a twisted or off-center seam.

Note 06

If you're adding the optional ribbing trim around the front and neckline, work it as the very last step after all panels are fully assembled so you can adjust the border length to fit the finished opening.

More photos

FAQs

Asked on the glider

the ones that come up on the glider

What size cardigan does this pattern make?

This pattern is fully customizable since every panel starts by chaining to your own desired width and length. Simply take your measurements and adjust the chain counts and row repeats for the back, side, and sleeve panels accordingly.

Do I need to know how to crochet in the round for this cardigan?

No — every panel is worked flat in straight rows using hdc and hdc back-loop-only stitches. The only shaping happens later when you taper the sleeves and assemble the panels with seaming.

How much yarn do I actually need?

The pattern is written for about 2600 yards for the size pictured using a lightweight #3 yarn, but this will vary depending on the size you make. It's smart to buy an extra skein or two if you're sizing up.

What does the front post double crochet detail get used for?

The fpdc stitch shows up as a textured accent, most commonly worked into ribbing bands like the cuffs or optional trim, giving those edges a raised, corduroy-like ridge that contrasts nicely with the smoother back-loop panels.

Can I make this cardigan without the optional ribbing trim?

Absolutely — the ribbing trim around the front edges is listed as optional, so you can leave the cardigan with clean seamed edges for a more casual, unfinished look, or add a simple sc border instead.