Intermediate 6-8 hours Worsted yarn

Worked on the glider, counted out loud —

Oatmeal chunky crochet backpack for everyday carrying

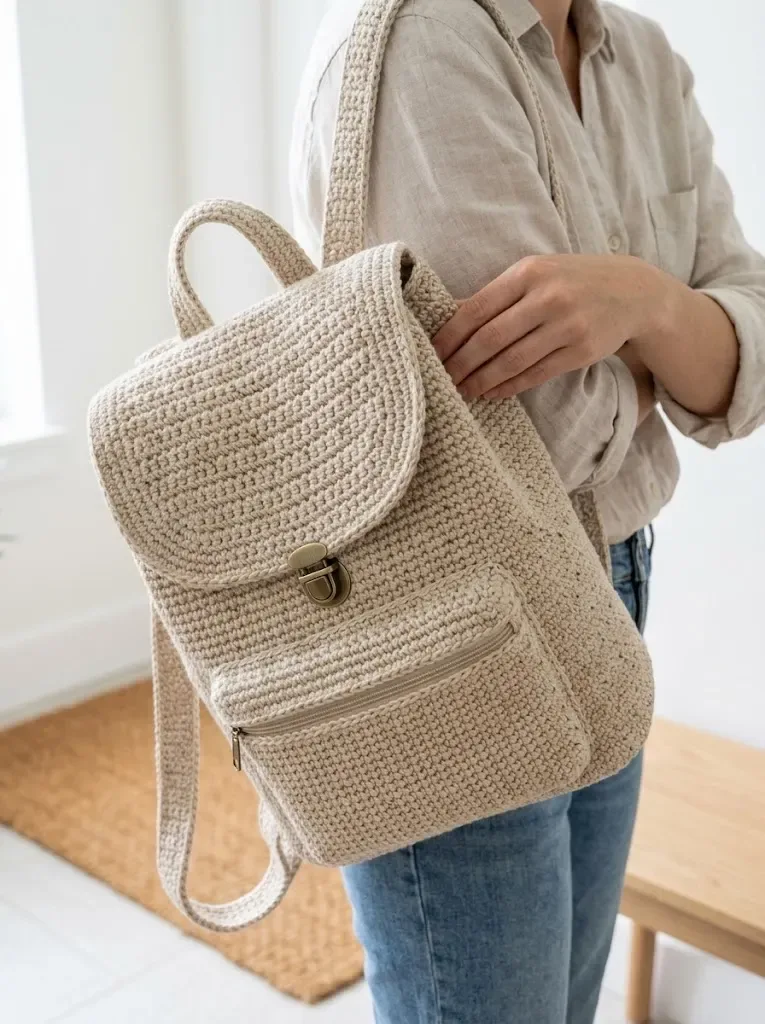
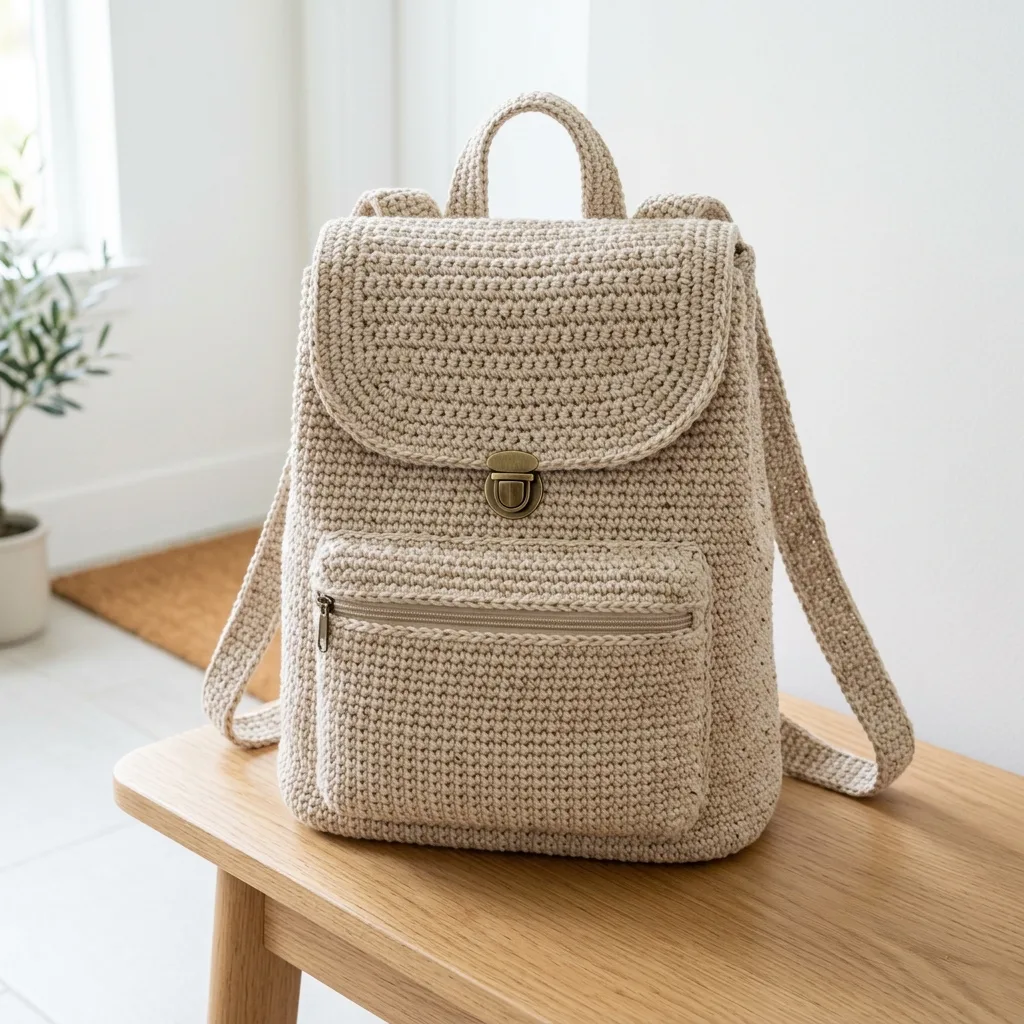
A sturdy oatmeal cotton crochet backpack worked in panels and a long strip, ready to line and zip in a solid weekend.

Jump to the rounds

What this one is

I made this backpack for the kind of evening when you want something sturdy waiting by the door before you head out the next morning — not fussy, not precious, just ready. It's for you if you like a bag with real structure, one that holds its shape whether you're packing a laptop or a change of clothes. Oatmeal keeps it neutral enough to pair with anything, so it becomes the bag you reach for without thinking twice.

Your hands spend most of this project in straight rows of single crochet — two identical panels worked forty stitches wide for fifty-four rows each, then a long narrow strip that wraps the bottom and both sides for a full hundred and forty rows before you shape the flap's gentle curve with paired decreases. Expect to work through the panels and strip over several sittings, then finish with the zipper and lining. All told, plan for a solid handful of hours spread across a few days rather than one long stretch.

Try it another way

You can play with this bag in a few honest ways. Swap the oatmeal for a heathered gray or a deep rust and you've got a completely different mood without touching a single instruction. If you want a smaller bag, work the panels a few rows short of fifty-four and shorten the strip proportionally — just keep your forty stitches across the panels and sixteen stitches on the strip so the pieces still fit together. Going up to 450 grams of yarn gives you a little cushion if you decide to add an exterior pocket from leftover single crochet fabric. For color placement, you could work the two 10-by-12-inch panels in your main color and the 31-inch strip in a contrast, so the seam lines double as design lines. A different zipper color than the coordinating one suggested can also read as a deliberate accent rather than an afterthought. If you'd rather skip the flap's curve, you could work it straight through row 20 and stop there for a simpler, squared-off closure, though you'll lose that shaped curve at the top.

What's satisfying here is watching flat rectangles turn into something structural. The two panels — forty stitches across, fifty-four rows tall — build up in plain single crochet, so you get into a rhythm fast, but that same density is what gives the finished bag its backbone at sixteen stitches and eighteen rows to four inches. The long strip, sixteen stitches wide and a hundred forty rows long, is where the shape really clicks: it wraps around the bottom and both sides in one continuous piece, so there's no side seam to fuss over later. Then the flap's decrease rows — dropping two stitches every other row after row twenty — give you an actual curve to shape, a nice change of pace after so much straight single crochet.
The rounds, in full

Written out, round by round

Intermediate6-8 hours5.0 mmWorsted

Bring to the porch

Everything this one takes, in the order you will reach for it.

  • for Your Crochet Backpack

Yarn

  • Approximately 400-450 grams of worsted weight cotton yarn (size 4) in oatmeal or your preferred neutral
  • Cotton or cotton-blend yarn works best for structure and durability

Hook

  • 5.0mm (H/8) crochet hook for a tight, sturdy fabric
  • You want minimal stretch in a bag, so going down a hook size from yarn recommendations is intentional

Notions

  • One 6-inch zipper in coordinating color
  • Tapestry needle for weaving ends and seaming
  • Stitch markers
  • Sewing needle and matching thread for zipper installation

Optional

  • fabric lining material (approximately half yard)

Height

  • approximately 12 inches (not including flap)

Width

  • approximately 10 inches

Depth

  • approximately 4 inches
  • Gauge Information
  • Getting your gauge right matters for bags. Too loose and your items fall through the stitches. Too tight and you’ll fight your hook the entire project.

Gauge

  • 16 stitches and 18 rows = 4 inches in single crochet
  • Take time to make a gauge swatch. If your swatch is too big, go down a hook size. Too small? Go up a hook size. Trust me, this step saves frustration later.

Foundation

  1. Round 1Sc in 2nd ch from hook and in each ch across, turn. (40 sts)36 Ch 1, sc in each st across, turn. (8 sts) Fasten off , leaving a long tail. Your handle should measure approximately 2 inches wide and 8 inches long.
  2. Round 254 Ch 1, sc in each st across, turn. (40 sts) Fasten off after Row 54, leaving a long tail on one panel for seaming.

You should have two identical rectangles measuring approximately 10 inches wide by 12 inches tall.

Foundation

  1. Round 1Sc in 2nd ch from hook and in each ch across, turn. (16 sts)
  2. Round 2140 Ch 1, sc in each st across, turn. (16 sts) Fasten off , leaving a very long tail for seaming.

This strip should measure approximately 4 inches wide and 31 inches long. It will wrap around the bottom and both sides of your backpack.

Foundation

  1. Round 1Sc in 2nd ch from hook and in each ch across, turn. (40 sts)
  2. Rounds 2–20Ch 1, sc in each st across, turn. (40 sts) Now we shape the curve:
  3. Round 21Ch 1, dec, sc in each st to last 2 sts, dec, turn. (38 sts)
  4. Round 22Ch 1, sc in each st across, turn. (38 sts)
  5. Round 23Ch 1, dec, sc in each st to last 2 sts, dec, turn. (36 sts)
  6. Round 24Ch 1, sc in each st across, turn. (36 sts)
  7. Round 25Ch 1, dec, sc in each st to last 2 sts, dec, turn. (34 sts)
  8. Round 26Ch 1, dec, sc in each st to last 2 sts, dec, turn. (32 sts)
  9. Round 27Ch 1, dec, sc in each st to last 2 sts, dec, turn. (30 sts)
  10. Round 28Ch 1, dec, sc in each st to last 2 sts, dec, turn. (28 sts) Fasten off , leaving a tail for weaving in.

Foundation

  1. Round 1Sc in 2nd ch from hook and in each ch across, turn. (36 sts)
  2. Rounds 2–24Ch 1, sc in each st across, turn. (36 sts) Fasten off , leaving a long tail for seaming.

Your pocket should measure approximately 9 inches wide by 5.5 inches tall.

Foundation

  1. Round 1Sc in 2nd ch from hook and in each ch across, turn. (8 sts)
  2. Round 2160 Ch 1, sc in each st across, turn. (8 sts) Fasten off , leaving a long tail for attaching.

Each strap should measure approximately 2 inches wide and 35 inches long. Don’t worry if yours are slightly different. You can adjust length during assembly.

Foundation

  1. Round 1Sc in 2nd ch from hook and in each ch across, turn. (4 sts)
  2. Rounds 2–8Ch 1, sc in each st across, turn. (4 sts) Fasten off , leaving a tail for seaming.

Hook

5.0mm (H/8) crochet hook for a tight, sturdy fabric

You want minimal stretch in a bag, so going down a hook size from yarn recommendations is intentional

Notions

One push lock clasp (also called a thumb lock or tuck lock), approximately 25mm One 6-inch zipper in coordinating color Tapestry needle for weaving ends and seaming

Stitch markers Sewing needle and matching thread for zipper installation Optional: fabric lining material (approximately half yard)

Finished Dimensions

Height: approximately 12 inches (not including flap)

Width: approximately 10 inches Depth: approximately 4 inches

Gauge

Take time to make a gauge swatch. If your swatch is too big, go down a hook size. Too small? Go up a hook size. Trust me, this step saves frustration later.

Marlene's notes

Note 01

The 5.0mm hook is a deliberate step down from what you'd normally pair with worsted cotton — it's what keeps the fabric tight enough that nothing sags through the stitches once the bag is loaded.

Note 02

Keep your tension even across both long stretches — the panels at fifty-four rows and the strip at a hundred forty rows — since any drift in gauge will show up as a lopsided seam later.

Porch photos

Before you sit down

  • Weigh out your cotton before you start — you'll want the full 400-450 grams on hand so you're not caught short mid-strip.
  • Work a gauge swatch with your 5.0mm hook and check it against 16 stitches and 18 rows to 4 inches before you cast on the first panel.
  • Set aside stitch markers now — you'll want them to flag row 20, where the flap shifts from straight rows into the decrease shaping.
  • Read through the flap's decrease rows starting at row 21 once before you begin it, so the pattern feels familiar rather than surprising mid-row.

How the hours go

Two body panels
about 3 hours, because you're working two identical forty-stitch panels for fifty-four rows each and want them to match
Bottom and side strip
about 3-4 hours, because a hundred forty rows adds up even though the strip is only sixteen stitches wide
Flap with curved shaping
about 1-1.5 hours, because the paired decreases after row 20 need a bit more attention than straight rows

Looking after it

  • Since this is worked in cotton, hand wash in cool water and resist wringing — press the water out in a towel instead so the stitches don't stretch out of shape.
  • Lay it flat to dry and reshape the panels and flap while still damp; once dry, store it stuffed lightly with tissue so the 12-inch panels hold their form on the shelf.
FAQs

Asked on the glider

the ones that come up on the glider

Why go down to a 5.0mm hook instead of the size usually paired with worsted cotton?

A bag needs minimal stretch so your belongings don't fall through the stitches, and the smaller hook is what tightens the fabric enough for that. It's intentional, not a typo.

How long is that side-and-bottom strip supposed to be?

It comes out to about 4 inches wide and 31 inches long once you've worked all 140 rows. That single strip wraps the bottom and both sides of the bag, which is why it's one long continuous piece rather than several seamed sections.

Do I really need the fabric lining?

Given the open structure of single crochet, the half yard of lining fabric keeps small items from working through the stitches and gives the zipper something sturdy to sit in. You could skip it, but the bag will hold its shape and contents better with it.

When should I install the zipper — before or after assembly?

It's easiest to sew the 6-inch zipper in once the panels and strip are seamed together but before the lining goes in, so you can check the fit against the fabric first. Working it in too early or too late tends to mean unpicking stitches.

Is this a good pattern for a first bag?

If you're comfortable with straight rows of single crochet and simple decreases, you'll manage this fine, though the long strip at 140 rows takes patience. It's a reasonable stepping stone into structured crochet bags rather than a true beginner project.