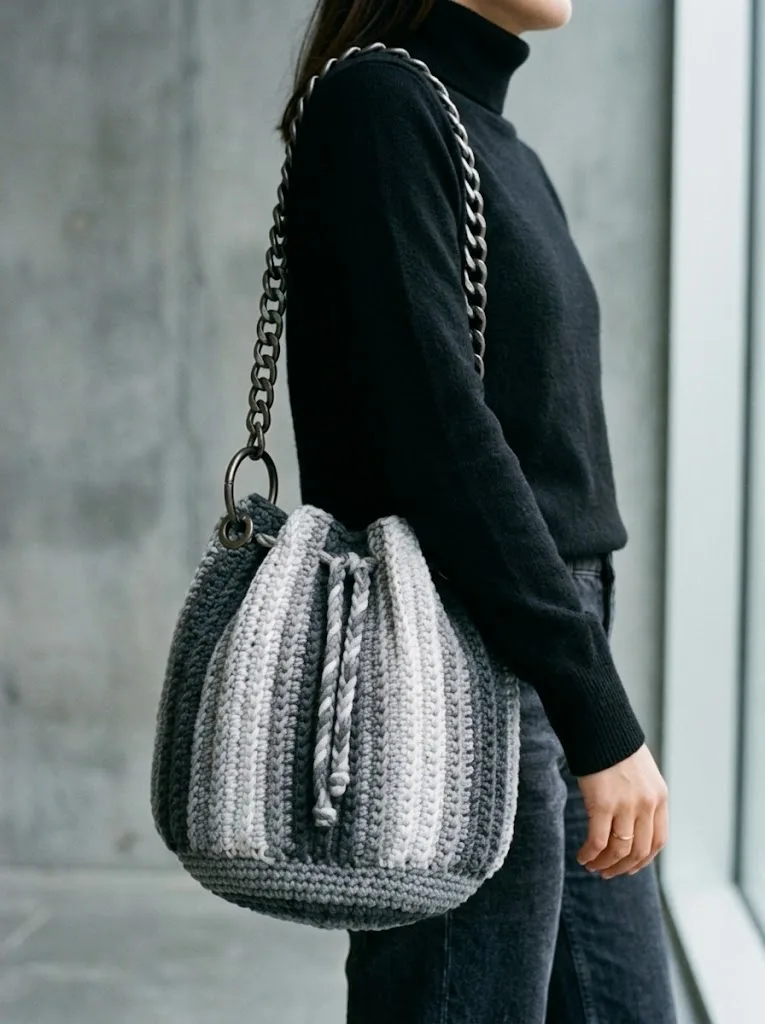
Intermediate 4-6 Hours Bulky yarn

Worked on the glider, counted out loud —

Monochrome Gray Drawstring Bucket Bag Crochet Pattern

Crochet a chic monochrome gray drawstring bucket bag with bulky yarn. Beginner-friendly stitches, vertical stripes, and a modern silhouette you'll wear dai

Jump to the rounds

Before you sit down

Start with a magic ring and crochet the base flat in continuous spiral rounds until it reaches its full width.

Transition from the flat base into upright sides by working single crochet through the back loop only for structure.

Introduce the second color and work the vertical stripe section using simple color changes for the graphic panel.

Shape the top of the bag gradually using evenly spaced simple decreases to taper the opening inward.

Work the drawstring channel rounds to create an opening the cord can pass through smoothly.

Crochet a simple drawstring cord long enough to cinch the bag closed comfortably.

Attach the metal O-rings and thread the drawstring through the channel before securing the ends.

Finish by connecting the chunky chain strap with lobster clasps to the O-rings for carrying.

What this one is

This pattern creates a structured, modern bucket bag built entirely from bulky yarn worked in continuous spiral rounds—no seams, no fuss. What makes it special is the vertical stripe panel that breaks up the classic monochrome palette, giving the bag a graphic, contemporary edge you won't find in typical granny-square totes. It's perfect for crocheters who want a fast, functional finished object that still feels fashion-forward, whether you're making it for yourself or as a standout handmade gift.

You'll use just five core techniques here: magic ring, working in continuous spiral rounds, single crochet in the back loop only, basic color changes, and simple decreases. If you've ever made a hat or anything worked in the round, you already have every skill this bag requires. Between the base, the sides, the stripe section, the top shaping, and the drawstring channel, expect to spend somewhere around 4 to 6 cozy hours from first stitch to finished strap.

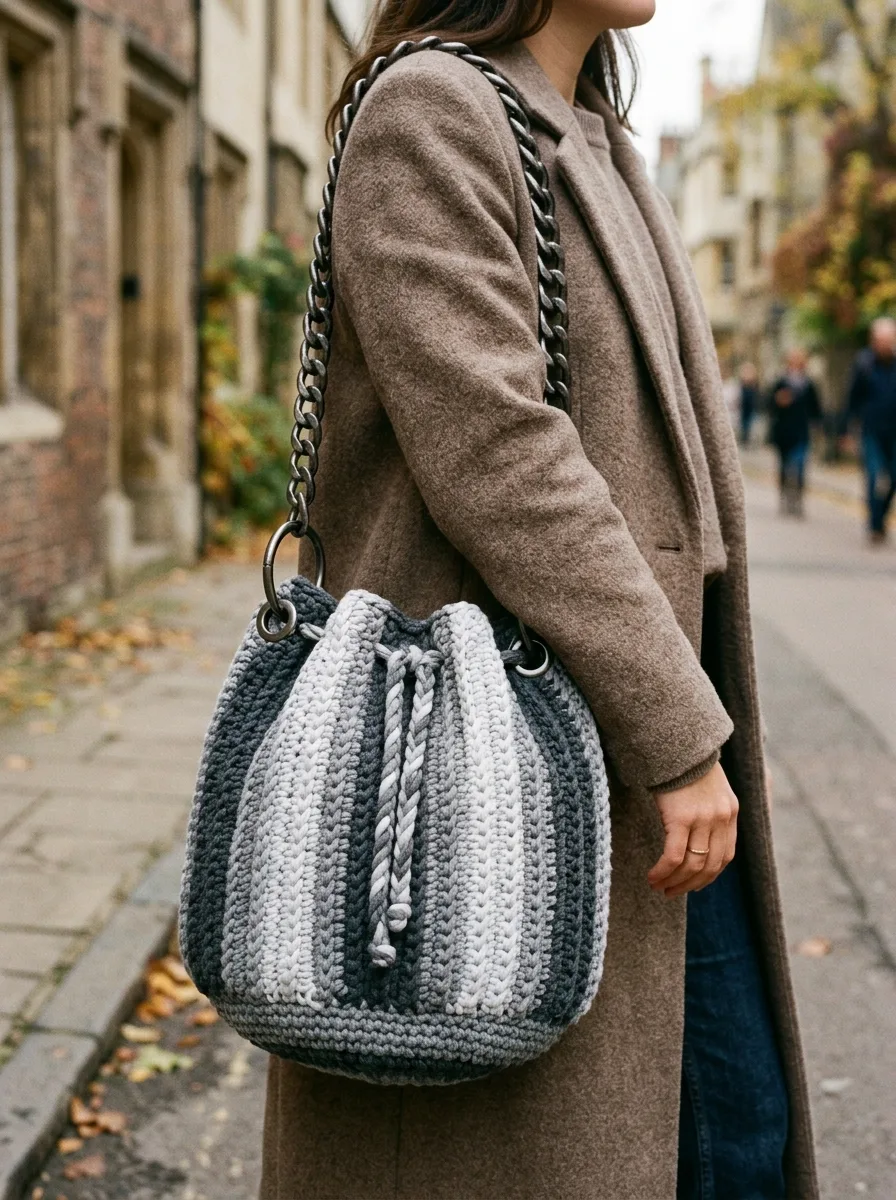
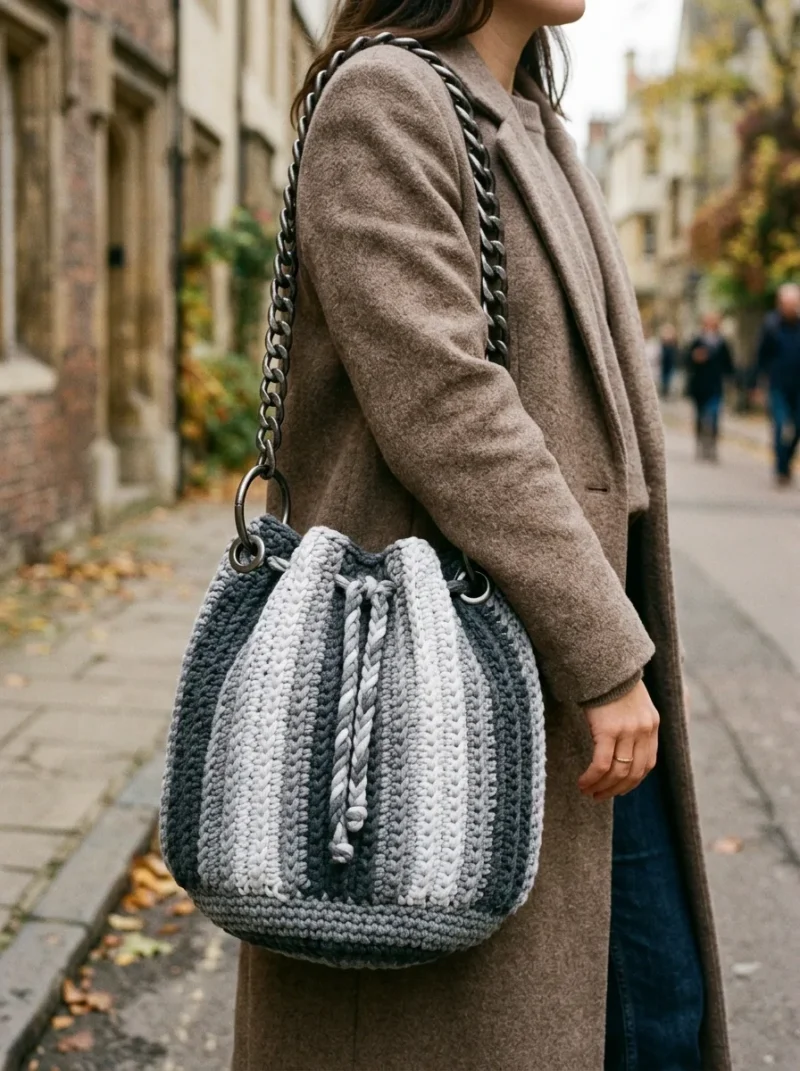
The finished bag is a sturdy, rounded bucket silhouette with a defined base, straight sides, a tapered top, and a working drawstring closure threaded through metal O-rings. It has real structure and holds more than it looks like it should. Dressed in dark charcoal and light silver gray, it reads polished and neutral enough to pair with nearly any outfit—making it an easy, impressive gift for the bag lover in your life.

Variations

The monochrome gray palette is gorgeous, but this pattern is a fantastic canvas for color experiments. Try navy and cream for a nautical, preppy vibe, or mustard and rust for a warm autumn statement piece. Feeling bold? Black and white creates striking contrast in the vertical stripe section, while sage green and oatmeal gives off an earthy, cottagecore feel. For a metallic touch, work the stripe panel in a silver or gold tinsel-blend yarn against a solid charcoal base. If you want a smaller everyday version, work Part 1 (The Base) with one or two fewer rounds before moving to Part 2, and shorten Part 4's shaping rounds slightly to create a cropped mini bucket bag perfect for phone-and-keys outings. For an oversized weekend tote, add extra rounds to Part 2 (Building the Sides) before starting the stripe section, keeping the same stitch pattern throughout. Yarn-wise, Wool-Ease Thick & Quick or Bernat Blanket work well if you want a plusher, cozier finish instead of the crisp cotton look; for that smooth, professional tube-yarn finish, look at Hoooked Zpagetti or Wool and the Gang Tina Tape Yarn. Swap the metal O-rings and chain strap for wooden rings and a braided cotton rope handle for a boho spin, or use a leather crossbody strap for a more elevated, structured look. You could also make the drawstring itself in a contrasting color—like a bright red cord against gray—for a fun pop of detail that ties the whole design together.

I designed this bag because I wanted something that felt current, not craft-fair. Working the base and sides in single crochet through the back loop only gives you that ribbed, structured texture that makes the bag stand up on its own—no wire, no stiffener, just smart stitching. The vertical stripe section is genuinely satisfying to work; it's a simple color change technique but the visual payoff is huge against the charcoal and silver gray. Shaping the top with simple decreases feels like watching the bag transform right in your hands, and threading the drawstring channel through those metal O-rings is the moment it suddenly looks store-bought. I also love that the whole thing is worked in continuous spiral rounds, so there's no seaming, no turning, no counting chains to join—just steady, meditative progress round after round. By the time you attach the chain strap, you'll have a bag with real presence, and honestly, that first moment you sling it over your shoulder never gets old.
Common mistakes

  • Pulling the magic ring closed too loosely at the start of Part 1, leaving a visible hole in the center of the base.Tug each of the first round's stitches individually before pulling the tail tight, and give the tail one final firm pull once the first round is complete to fully close the ring.
  • Losing track of where each spiral round begins, resulting in miscounted increases or decreases across the base and top shaping.Place a stitch marker in the first stitch of every round and move it up as you go—this is essential since there's no joining slip stitch to mark your place.
  • Working single crochet into both loops instead of the back loop only, which flattens the ribbed texture that gives the bag its structure.Before starting Part 2, check that you can see a visible front loop 'lip' after each stitch; if the fabric looks smooth rather than ridged, you're likely working into both loops.
  • Decreasing unevenly during Part 4 (Shaping the Top), causing the opening to pucker or lean to one side.Space decreases as evenly as possible around each round and use your stitch marker to confirm you're decreasing the same number of stitches every round as instructed.
  • Skipping a firm foundation for the Drawstring Channel, resulting in a floppy top edge that won't hold the bucket shape.Keep your tension consistent through Part 5 and don't hesitate to size down to the 6.0mm hook here if your channel rounds are coming out loose or stretched.

The rounds, in full

Written out, round by round

Intermediate4-6 Hours8.0 mmBulky

Materials

Everything this one takes, in the order you will reach for it.

  • Bulky weight yarn (Category 5) in two colors

Color A

  • Dark charcoal gray, approximately 150 yards

Color B

  • Light silver gray, approximately 150 yards
  • 8.0mm (L/11) crochet hook for the main bag
  • 6.0mm (J/10) hook if your tension runs loose
  • 2 large metal O-rings (approximately 1.5 inches diameter)
  • 1 chunky chain strap with lobster clasps (or make your own crochet strap)
  • Yarn needle for weaving ends
  • Stitch marker
  • Scissors

keep this to hand

Abbreviations

US crochet terms, as used in this pattern.

  1. Chain (ch)The foundation stitch. Yarn over, pull through the loop on your hook. Creates a chain link.
  2. Slip Stitch (sl st)Insert hook, yarn over, pull through both loops at once. Used for joining and finishing.
  3. Single Crochet (sc)Insert hook into stitch, yarn over and pull up a loop (2 loops on hook), yarn over and pull through both loops. This is your main stitch for the entire bag.
  4. Single Crochet Back Loop Only (sc BLO)Work a regular single crochet, but insert your hook under only the back loop of the stitch below instead of both loops. This creates those beautiful horizontal ridges you see in the bag.
  5. Increase (inc)Work 2 single crochet stitches into the same stitch. This adds one stitch to your count.
  6. Decrease (dec)Insert hook into first stitch, pull up a loop, insert hook into next stitch, pull up a loop (3 loops on hook), yarn over and pull through all 3 loops. This removes one stitch from your count.
  7. Magic Ring (MR)A way to start working in the round that creates a tight, closed center. If this intimidates you, chain 4 and slip stitch to join instead. It works just fine.

Part 1: The Base

We start from the center and work outward in continuous spiral rounds. Place a stitch marker at the beginning of each round and move it up as you go.

Using Color A (dark charcoal):

  1. Round 1Make a magic ring, work 6 sc into the ring, pull tight. (6 sts)
  2. Round 2Inc in each stitch around. (12 sts)
  3. Round 3*Sc 1, inc* repeat around. (18 sts)
  4. Round 4*Sc 2, inc* repeat around. (24 sts)
  5. Round 5*Sc 3, inc* repeat around. (30 sts)
  6. Round 6*Sc 4, inc* repeat around. (36 sts)
  7. Round 7*Sc 5, inc* repeat around. (42 sts)
  8. Round 8*Sc 6, inc* repeat around. (48 sts)
  9. Round 9*Sc 7, inc* repeat around. (54 sts)
  10. Round 10*Sc 8, inc* repeat around. (60 sts) Your base should measure approximately 6 inches across. If it seems too small, add another increase round. If too large, remove one.

Tip: Keep your stitches consistent and flat. The base should lie completely flat on a table without curling.

Part 2: Building the Sides

Here is where the magic happens. We will switch to working in the back loop only, which naturally turns the corner from base to sides and creates those gorgeous texture ridges.

  1. Round 11Working in BLO only, sc in each stitch around. Do not increase. (60 sts) This round creates the defined edge between your base and walls.
  2. Round 12to 14: Continue working sc in BLO around. (60 sts each round) Now we introduce the vertical stripes.

Part 3: Vertical Stripe Section

The vertical stripes are created by changing colors within each round. You will work 6 dark stripes and 6 light stripes, alternating around the bag.

Color Pattern per Round: Work 5 sc in Color A (dark gray)

Change to Color B (light gray), work 5 sc Repeat this pattern around (6 sections of each color)

Tip for Clean Color Changes: When changing colors, complete your last stitch with the new color. Insert hook, pull up a loop with old color, then yarn over with new color to complete the stitch. This keeps your color transitions crisp.

  1. Round 15to 35: Following the color pattern above, sc in BLO for each round. (60 sts) Continue carrying your unused color loosely along the inside of the work. Do not cut the yarn between color changes.After 21 rounds of stripe pattern, your bag body should measure approximately 7 to 8 inches tall.

Part 4: Shaping the Top

Now we gently decrease to create that beautiful bucket curve.

  1. Round 36Following stripe pattern, *sc 8, dec* repeat around. (54 sts)
  2. Round 37Sc around in pattern. (54 sts)
  3. Round 38*Sc 7, dec* repeat around. (48 sts)
  4. Round 39Sc around in pattern. (48 sts)
  5. Round 40*Sc 6, dec* repeat around. (42 sts)
  6. Round 41to 43: Sc around in Color A only. (42 sts) This solid band creates the drawstring channel area.

Part 5: Drawstring Channel

  1. Round 44*Ch 2, skip 2 sts, sc 5* repeat around. (6 holes created) These chain spaces are where your drawstring will thread through.
  2. Round 45Sc in each stitch and chain space around. (42 sts)
  3. Round 46Sc around. (42 sts) Slip stitch to join. Fasten off. Weave in ends.

Part 6: Making the Drawstring

Create a simple twisted cord or crochet a chain.

Chain Method:

Chain approximately 80 to 90 stitches using both colors held together. Slip stitch in second chain from hook and in each chain across. Fasten off.

This creates a sturdy, beautiful two-toned drawstring.

Twisted Cord Method:

Cut 4 strands of yarn, each about 60 inches long. Twist tightly in one direction until the cord wants to kink. Fold in half, let it twist back on itself. Knot the ends.

Thread your drawstring through the channel holes using a yarn needle or safety pin.

Assembly

Step 1

Weave in all your ends securely. For extra durability, weave each tail through several stitches in different directions.

Step 2

Optional: Add a fabric lining to prevent small items from poking through stitches. A simple drawstring pouch sewn inside works perfectly.

Step 3

Care Instructions:

Step 4

Hand wash in cool water with mild detergent. Reshape while damp and lay flat to dry. Cotton and tube yarns hold their shape well but may need occasional reshaping.

Important notes

Note 01

💡 Choose a cotton blend or tube yarn rather than a fuzzy acrylic; the structure of this bag depends on yarn with body, and cotton or tube yarn prevents sagging and stretching over time.

Note 02

💡 Weave in your color-change tails as you go rather than saving them all for the end—working in a bulky bag with two colors means loose ends can get tangled and hard to track later.

Note 03

💡 Move your stitch marker up every single round without exception since this pattern uses continuous spiral rounds with no joining slip stitch to reference your round's starting point.

Note 04

💡 When attaching the O-rings and chain strap, test the placement and clasp direction before securing permanently so the strap hangs evenly and the lobster clasps face outward.

Note 05

💡 Make the drawstring in Part 6 slightly longer than you think you need—it's easier to trim excess cord than to discover it's too short to comfortably cinch the bag closed.

More photos

FAQs

Asked on the glider

the ones that come up on the glider

Why does the pattern recommend cotton or tube yarn instead of acrylic?

Cotton and tube yarn have more body and less stretch than standard acrylic, which helps the bag hold its bucket shape instead of sagging. They also create that smooth, polished surface texture that makes the monochrome design pop.

Do I need to know how to join in the round for this pattern?

No—this entire bag is worked in continuous spiral rounds, meaning you never join or chain up between rounds. A stitch marker is essential here to keep track of where each round begins.

What if I don't have metal O-rings or a chain strap on hand?

You can substitute wooden or plastic rings of a similar 1.5-inch diameter, and swap the chain strap for a braided cord, leather strap, or even a simple crochet chain strap made from leftover yarn. The pattern notes this as an easy customizable option.

How much yarn do I actually need if I want to change the colorway?

Plan for approximately 150 yards of each of your two colors, matching the original charcoal and silver gray amounts. If you're sizing the bag up per the suggested modifications, buy an extra skein of each color to be safe.