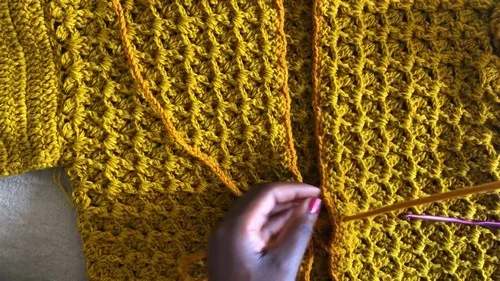
Intermediate 10-14 Hours Worsted yarn

Worked on the glider, counted out loud —

Modern Crochet Pullover: Climbing Shells Sweater Pattern

Crochet a modern shell-stitch pullover with raglan-style construction, front post shells, and a drawstring neckline. Sizes small to medium included.

Jump to the rounds

Before you sit down

Chain a foundation of 61 plus 3 stitches and begin the Climbing Shells Stitch Pattern for the back piece.

Repeat the shell rows until you reach the row count for your chosen size on the back panel.

Work two matching front pieces the same way, stopping at the shorter front-piece row count for your size.

Work two sleeves and their cuffs separately, following the same shell pattern for a matching texture throughout.

Mark 8 shell clusters in from the outer edge of the back panel to set up the armhole placement.

Lay the front panel over the back panel and sew from the outer edge inward until you reach that marker.

Join the shoulder and neckline for 8 rows on each side, leaving the marked armhole space open.

Finish with single crochet along the front edges, then chain a drawstring and weave it through the neck ribbing.

What this one is

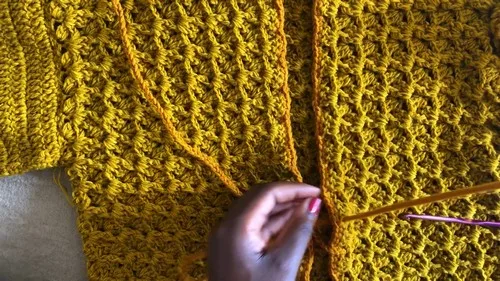
This pullover is built around one gorgeous textured motif — the Climbing Shells Stitch Pattern — repeated across a back panel and two front panels to create a sweater with real dimension and movement. The front post shells stack visually as you work, giving the fabric a rope-like climbing effect that looks far more advanced than the stitches actually are. It's perfect for the crocheter who wants a statement wearable that doesn't rely on shaping charts or complicated construction, just steady, satisfying repetition.

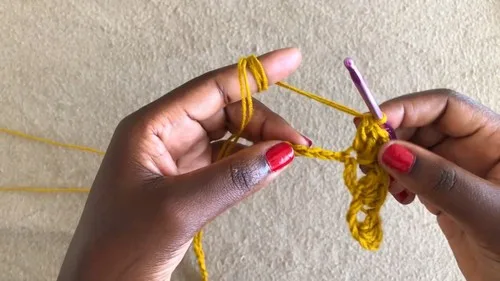
You'll be working double crochet, single crochet, chain spaces, and front post double crochet, all combined into one repeating shell sequence that carries through the back, front pieces, sleeves, and cuffs. Because the pattern piece is worked flat in rows and then assembled, this sits comfortably at an intermediate level — you should be confident with post stitches and reading a repeat, but no short rows or increases are needed. Expect roughly ten to fourteen hours total, spread across the panels, sleeves, and finishing.

The finished pullover is a boxy, relaxed-fit sweater in sizes small to medium, with a scooped drawstring neckline threaded through the neck ribbing for an adjustable finish. The dense shell texture gives it real structure and warmth without feeling stiff, and the drawstring detail adds a modern, almost athleisure edge. It's a wonderful handmade gift for a fellow maker or a rewarding project to keep entirely for yourself once autumn layering season arrives.
Variations

I adore this pattern because the Climbing Shells Stitch Pattern does so much visual work for so little mental effort — once you've worked the first two rows, your hands just know the rhythm of skip three, shell in the single crochet space, front post around the previous post. There's something deeply satisfying about watching those shells stack into a climbing column as each row builds on the last. I also love that this sweater doesn't hide its construction; the back piece, two front pieces, sleeves, and cuffs are all worked flat in the same stitch pattern, so everything feels cohesive and intentional rather than pieced together. The drawstring neckline is my favorite little surprise — it's such a simple addition, just a long chain woven through the neck ribbing, but it completely changes the personality of the sweater, letting you dial the neckline from relaxed to fitted depending on your mood that day. This is the kind of make where the process is genuinely as enjoyable as the result.

Common mistakes

  • Losing track of the front post stitchAlways work the front post stitch around the previous row's front post stitch, not into the top of the stitch — this is what creates the climbing column effect, so double check before continuing the row.
  • Miscounting the skip-3 sequence inUse a stitch marker in the chain-1 space or single crochet space of every few repeats so you can quickly verify your shell count matches across the row.
  • Forgetting to leave the armhole openingMark your 8 shell clusters from the outer edge before you start sewing, and stop sewing exactly at that marker so the armhole gap is left open as instructed.
  • Sewing the shoulder seamsSew from the outer edge inward to the armhole marker first, then join the shoulder and neckline afterward for 8 rows on each side.
  • Making the front pieces and back pieceAll three main panels start with the same foundation chain of 61 plus 3, so recount your starting chain carefully before beginning the Climbing Shells rows.
  • Pulling the drawstring too tightlyWeave the drawstring through loosely at first and adjust gradually once both front panels are joined, so the neckline gathers evenly rather than puckering to one side.

The rounds, in full

Written out, round by round

Intermediate10-14 HoursWorsted

Materials

Everything this one takes, in the order you will reach for it.

  • Yarn of your choice
  • Matching hook
  • Tapestry needle
  • Scissors
  • Stitch markers

keep this to hand

Abbreviations

US crochet terms, as used in this pattern.

  1. chchain
  2. ststitch
  3. sl stslip stitch
  4. scsingle crochet
  5. hdchalf double crochet
  6. dcdouble crochet
  7. incincrease
  8. decdecrease
  9. mrmagic ring
  10. fofinish off

Back Piece

  1. Round 1Chain 61 plus 3.Work Climbing Shells Stitch pattern.Continue for 34 rows for size small.For medium work about 38 to 40 rows.For large work about 45 rows.

Front Pieces

Make 2

Make 2 pieces.

  1. Round 1Chain 61 plus 3.Work Climbing Shells Stitch pattern.Continue for 16 rows for size small.For medium work about 18 to 20 rows.For large work about 25 rows.

Climbing Shells Stitch Pattern

  1. Round 1Chain foundation. Work 3 double crochet into third loop from hook. Skip 3 stitches. Work single crochet and 3 double crochet in same stitch. Repeat across. End with double crochet into last stitch.
  2. Round 2Chain 2, turn. Work 2 double crochet. Skip 2 double crochet. Work front post stitch around third double crochet. Chain 1. Work 3 double crochet in single crochet space. Continue repeating sequence. End with double crochet into last stitch.
  3. Round 3+Chain 2, turn. Work 2 double crochet. Skip 2 double crochet. Work front post stitch around previous front post. Chain 1. Work 3 double crochet in chain 1 space. Repeat pattern. End with double crochet into last stitch. Continue repeating until required length is achieved.

Sleeves

Make 2

Make second sleeve matching first.

  1. Round 1Chain 70 and join to form ring.
  2. Round 2-9Work 8 rows double crochet.
  3. Round 10-12Work 3 rows chain space sequence by chaining 4, skipping 1 stitch, and double crochet.
  4. Round 13-15Work 3 rows double crochet.

Cuffs

Make 2
  1. Round 1Chain 35 for small.
  2. Round 2Chain 2 and work double crochet along chain. Slip stitch to join.
  3. Round 3+Work front post double crochet then back post double crochet around. Continue ribbing for 4 to 5 rows.Sew cuff to sleeve end.

Hem

  1. Round 1Attach yarn at bottom edge. Chain 2 and work double crochet around.
  2. Round 2+Work front post double crochet then back post double crochet. Continue ribbing for 5 rows.

Neck Ribbing

  1. Round 1Attach yarn at neck edge. Chain 2 and work double crochet around.
  2. Round 2+Work front post double crochet then back post double crochet. Continue ribbing for 10 rows.

Assembly

Step 1

Mark 8 shell clusters from outer edge of back panel.

Step 2

Place front panel over back panel.

Step 3

Sew from outer edge inward to marker.

Step 4

Leave unsewn space for armhole.

Step 5

Join top of pieces for 8 rows to form shoulder and neckline.

Step 6

Repeat on other side.

Step 7

Work single crochet along front edges.

Step 8

Make long chain for drawstring.

Step 9

Weave through neck ribbing.

Important notes

Note 01

Work a swatch of the Climbing Shells Stitch Pattern first to confirm your gauge, since the finished chest measurement depends entirely on your row and stitch tension.

Note 02

Keep a stitch marker in the last stitch of each row while working the shell repeat, since the pattern always ends with a double crochet into the last stitch and it's easy to lose track of the edge.

Note 03

The back piece needs more rows than the front pieces at every size, so don't assume all three panels are worked to the same length — check the row counts for your chosen size before you stop.

Note 04

When marking the 8 shell clusters for the armhole opening, count from the outer edge of the back panel inward and keep the same count on the front panel so the armholes end up symmetrical.

Note 05

Block your finished panels lightly before assembly if your yarn allows it, since the front post stitches can make the fabric slightly cupped until it's had a chance to relax flat.

Note 06

Save enough yarn for the neck ribbing, drawstring chain, and the single crochet edging along the front edges — these finishing elements use more length than you might expect.

More photos

FAQs

Asked on the glider

the ones that come up on the glider

What size does this pullover pattern make?

The pattern includes row counts for small and medium, based on 34 rows for small and 38-40 rows for medium on the back piece. You can adjust the row count proportionally on all panels for a different fit.

Do I need to know front post stitches before starting?

Yes, front post double crochet is essential to the Climbing Shells Stitch Pattern from row 2 onward. If you've never worked a front post stitch, practice a small swatch first since the whole sweater relies on it.

How does the armhole opening work in this construction?

You mark 8 shell clusters in from the outer edge of the back panel, then sew the front and back panels together from the outer edge inward, stopping at that marker to leave the armhole space open.

Can I make the sleeves match the body pattern exactly?

Yes, the sleeves and cuffs are worked in the same Climbing Shells Stitch Pattern as the back and front pieces, just with fewer rows, so the whole sweater reads as one cohesive texture.

What is the drawstring for and how is it attached?

After assembly, you make a long chain and weave it through the neck ribbing to create an adjustable, gathered neckline. It's not sewn in place, so you can pull it looser or tighter anytime you wear the sweater.