Beginner 2-3 Hours DK yarn

Worked on the glider, counted out loud —

Mini Crochet Minion Keychain Pattern for Beginners

Make an adorable mini crochet Minion keychain with this easy beginner pattern using simple rounds, color changes, and safety eyes for a fun bag charm.

Jump to the rounds

Before you sit down

Start the body in blue yarn and work the rounds to build the rounded Minion torso shape.

Crochet the arms as separate small pieces using simple continuous rounds.

Work the legs quickly in brown yarn since they only need a single round to complete.

Stuff the body firmly in small amounts so it holds a smooth, rounded shape.

Attach the 10mm safety eyes to the head before sewing anything else onto the body.

Sew the arms and legs onto the body, then attach the clasp to finish it as a keychain.

What this one is

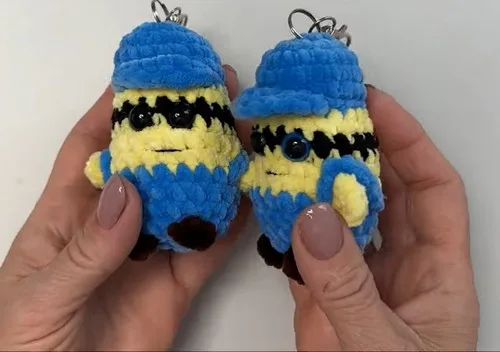
This mini crochet Minion keychain captures all the goofy charm of everyone's favorite yellow character in a palm-sized amigurumi. Worked in a cheerful blend of blue, yellow, black, and brown yarn, this little guy is built to clip onto a bag, backpack, or keyring for an instant pop of personality. It's a fantastic project for anyone who loves quick, satisfying makes that don't require a huge yarn stash or weeks of commitment, and it's just as fun to make for yourself as it is to gift.

The body starts with a simple five-round blue section before transitioning into yellow for the signature Minion coloring, then the arms and legs are added separately using basic single crochet rounds. You'll practice color changes, working in continuous rounds, and attaching small amigurumi pieces together, plus setting safety eyes for that classic Minion stare. This is a comfortable beginner project, especially if you've made even one small amigurumi before, and most crocheters can finish it in a single relaxed sitting of 2-3 hours.

The finished keychain is compact, huggable, and instantly recognizable, small enough to swing from a zipper pull yet sturdy enough to survive daily handling once stuffed and clasped. It has that soft, rounded amigurumi look that feels good in your hand and makes people grin the moment they spot it. Whether you keep it on your own keys or wrap it up for a friend, it's the kind of tiny handmade gift that gets noticed and appreciated far more than its size would suggest.
Variations

I adore how this little Minion keychain proves that big charm can come in a tiny package. Working the body in blue Himalaya Dolphin Baby yarn and then transitioning smoothly into yellow for the classic Minion coloring is such a satisfying moment in the pattern — you really see the character come to life round by round. Adding the stubby arms and simple brown legs afterward feels like assembling a little puzzle, and popping in those 10mm safety eyes is the instant where it stops being 'a blob' and starts being unmistakably a Minion. I love that this isn't an all-weekend commitment; you can start after dinner and have a finished keychain before bed. It's also endlessly giftable — I've made a handful just to keep in my bag for spontaneous gifts to friends, coworkers, and my niece's backpack collection. If you're newer to amigurumi, this pattern is forgiving enough to build your confidence with color changes and small-piece assembly without overwhelming you with complicated shaping.

Common mistakes

  • Losing track of stitch countPlace a stitch marker at the start of each round and recount your stitches immediately after any color change before continuing, so you catch mistakes while they're still easy to fix.
  • Attaching the safety eyes too earlyHold the eyes in place with removable stitch markers or pins first, try the head on at arm's length to check symmetry, and only snap the washers on once you're happy with the spacing.
  • Under-stuffing the body, resulting inStuff firmly in small pinches as you go rather than one big handful at the end, pushing stuffing into the rounded areas first so the shape stays smooth and even.
  • Sewing the arms and legs on at uneven heights or angles.Use pins to test-position both arms and legs symmetrically before stitching, checking front and side views, and only sew permanently once the placement matches on both sides.
  • Working too loosely with the 4mm hookIf your stitches look loose or stuffing shows between them, try going down half a hook size or consciously tightening your tension on every stitch of the body rounds.

The rounds, in full

Written out, round by round

Beginner2-3 Hours4 mmDK

Materials

Everything this one takes, in the order you will reach for it.

  • Blue yarn (Himalaya Dolphin Baby: 80327)
  • Black yarn (80311)
  • Yellow yarn (80302)
  • Brown yarn (80336)
  • 4mm crochet hook
  • Needle
  • 10mm safety eyes
  • Clasp
  • Stuffing material
  • Scissors

keep this to hand

Abbreviations

US crochet terms, as used in this pattern.

  1. RNDRound
  2. ST, STSStitch, Stitches
  3. CHChain Stitch
  4. SLSTSlip Stitch
  5. SCSingle Crochet Stitch
  6. HDCHalf Double Crochet Stitch
  7. DCDouble Crochet Stitch
  8. DECDecrease (2 SC together)
  9. INCIncrease (2 SC in one stitch)

The Body (Blue Yarn)

  1. Round 1Make 2 chain stitches, and in the second chain from the hook, crochet 8 SC
  2. Round 28 INC (16 SC total)(16)
  3. Round 3(3 SC, INC) repeat 4 times (20 SC total)(20)
  4. Round 4-520 SC in each round
  5. Round 6In front loops of Round 5, make 8 SLST, then (INC from HDC, 2 INC from DC, INC from HDC), then 8 SLST

Transition to Yellow Yarn

  1. Round 7In back loops only, 20 SC
  2. Round 820 SC

For Transition to Black Yarn

  1. Round 920 SC

Transition Back to Yellow Yarn

  1. Round 1020 SC

Making the Arms

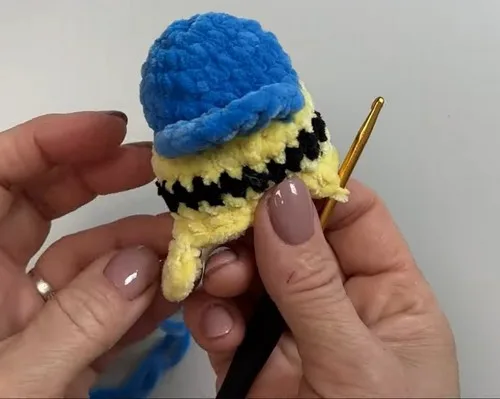
Arm: CH 3, starting in second CH from hook: 2 HDC, 1 HDC into base stitch (3 stitches at one point)

  1. Round 117 SC, attach one arm, 8 SC, attach second arm, 5 SC (20 SC total)(20)
  2. Round 1220 SC Transition to Blue Yarn
  3. Round 13-1520 SC per round

Making the Legs (Brown Yarn)

Leg: 1 SC, 2 HDC, 1 SC

  1. Round 169 SC, attach one leg, 4 SC, attach second leg, 5 SC (20 SC total)(20)

Assembly

Step 1

Stuff the toy with filling

Step 2

Round 17: 10 DEC (10 SC total)

Step 3

Stuff again if needed

Step 4

Round 18: 4–5 DEC

Step 5

Embroider the nose using black yarn

Step 6

Make straps for the pants: CH 7–8 and sew onto back

Step 7

Attach snap hook with ring

Important notes

Note 01

💡 Keep a small stitch marker on hand to mark the start of each round, especially during the color transition, so you never lose your place.

Note 02

💡 Weave in your blue and yellow yarn tails as you finish each section rather than saving them all for the end, since small amigurumi pieces get harder to maneuver once fully assembled.

Note 03

💡 When placing the 10mm safety eyes, remember they'll look closer together once the head is stuffed, so err on the side of slightly wider spacing than seems right on the flat piece.

Note 04

💡 Stuff the body firmly but in small amounts as you close each round, checking that the shape stays round rather than lumpy or lopsided.

Note 05

💡 Cut a longer starting tail on the arms and legs pieces so you have plenty of yarn left for sewing them securely onto the body later.

Note 06

💡 If your clasp hardware has a small jump ring, attach it before you fully close up the top of the head so you can weave the connection point smoothly into the stitches.

More photos

FAQs

Asked on the glider

the ones that come up on the glider

What yarn weight works best if I don't have Himalaya Dolphin Baby yarn?

Any DK or light worsted weight yarn will substitute well, since the pattern is written for a 4mm hook at that gauge. Just be sure to keep your tension firm enough that stuffing won't peek through the stitches.

Can I make this keychain without safety eyes?

Yes, you can embroider the eyes with black yarn or use small black felt circles glued on instead. Just keep in mind safety eyes give that classic bold Minion look and are more secure for frequent handling.

How long does this pattern take to finish?

Most beginners can complete the body, arms, legs, and assembly in about 2-3 hours in one sitting. If you're newer to amigurumi, it may take a bit longer as you get comfortable with the color change.

What's the finished size of the Minion keychain?

Since the body is only worked over 5 rounds plus a short yellow transition, the finished piece comes out mini-sized, perfect for a keyring or small bag charm. It's designed to be compact rather than a full-size amigurumi.

Can I turn this into a bag charm instead of a keychain?

Absolutely, simply swap the clasp for a lobster clip or lanyard-style hook when you attach the hardware in the final assembly step. The body and construction stay exactly the same either way.