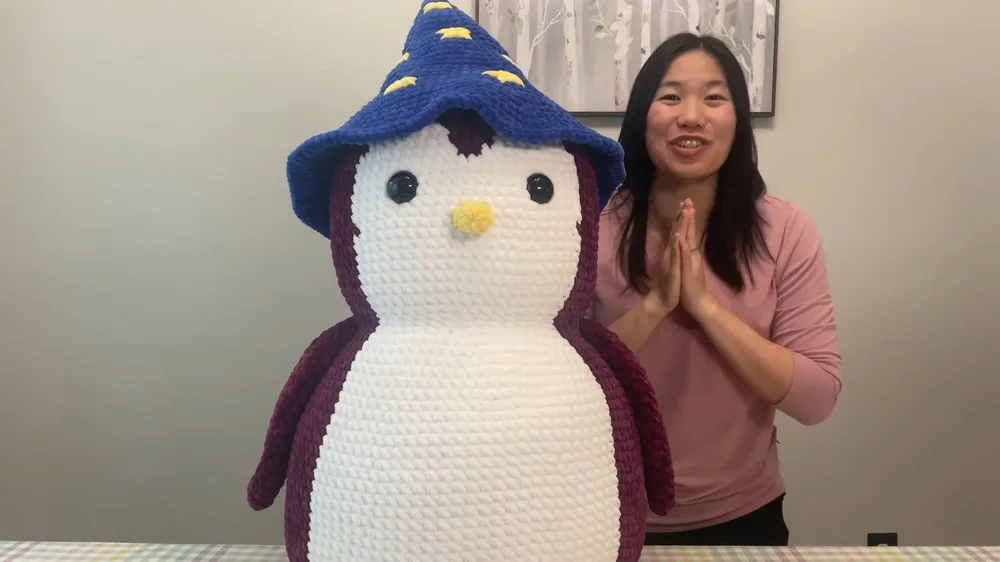
Intermediate 4-6 hours Jumbo yarn

Worked on the glider, counted out loud —

Mega pudgy penguin amigurumi crochet pattern

A giant chenille penguin for confident beginners with patience. About 4-6 hours plus a long stuffing session.

Jump to the rounds

What this one is

This is the kind of project you start when you want something big to show for your time at the hook. A mega pudgy penguin like this one is for the person who has outgrown small amigurumi and wants a floor-sitting companion, or for the maker shopping for a gift that fills an entire gift bag on its own. It's forgiving enough for someone who has made a few amigurumi already but wants to feel that satisfying weight building up in their lap.

Your hands spend most of this project on plain single crochet and increase rounds, working the body up from a tight magic ring to a wide, round shape before the white facial and belly details come in around round 13. Between the chenille's thickness and the sheer volume of stuffing involved, expect the actual crocheting to move fast while the stuffing and shaping take their own patient stretch of time.
The rounds, in full

Written out, round by round

Intermediate4-6 hours10 mmJumbo

Bring to the porch

Everything this one takes, in the order you will reach for it.

  • Size 10 mm
  • Size 7 jumbo Chenille yarn (1,400g for the body, 330g for the white parts, 80g for the yellow parts)
  • 40 mm
  • Stitch marker, needle, scissors, worsted weight yarn for sewing, and stuffing (6-10 lbs)

Body

Follow the instructions for adding white yarn to create the facial and belly details. The pattern involves precise location switching between the body color and white yarn for the desired effect.

Place safety eyes between rounds 19 and 20, approximately 11 stitches apart.

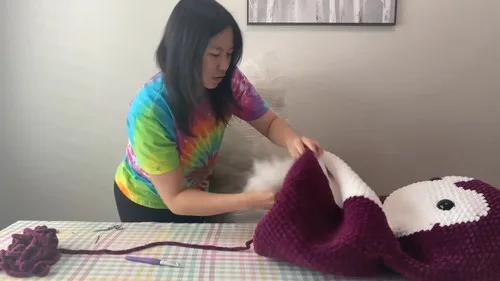
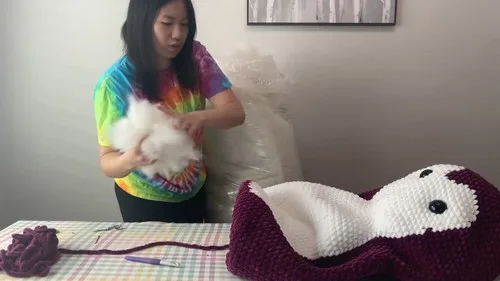
Begin stuffing as the shape forms, ensuring an even and firm fill.

  1. Round 1Begin with a magic ring; make 8 single crochets (sc) in the ring; close the loop.
  2. Round 28 increases (inc). (16 sc)
  3. Round 31 sc, 1 inc - Repeat 8 times. (24 stitches)(24)
  4. Rounds 4–7Continue increasing in each round to shape the body. Follow the video for exact stitch counts per round.
  5. Round 13Begins the addition of the white part of the face.Continue Body: Continue following the pattern for body expansion and contractions for the penguin's shape. This will involve several rounds of sc, increases, and decreases strategically placed to achieve the pudgy form.
  6. Rounds 30–35Detailed instructions are provided for shaping the neck inward and then expanding outward for the head portion, using combinations of sc, inc, and invisible decreases.Final Rounds: Continue to follow the video for closing up the head, attaching the features (including the beak and feet), and other final touches.

Putting it together

Step 1

Sew on the beak and feet, made with yellow yarn.

Step 2

Attach the safety eyes before fully closing the head.

Step 3

Wizard Hat: This is an additional accessory for your Mega Pudgy Penguin. For detailed steps, look out for the dedicated tutorial in a subsequent video.

Marlene's notes

Note 01

The 10 mm hook and jumbo chenille combination moves quickly, but it also forgives very little tension inconsistency, so try to keep your pull consistent from round to round.

Note 02

Begin stuffing as the shape forms rather than waiting until the end, packing it in evenly so the finished penguin holds a firm, rounded form instead of going lopsided.

Note 03

Have the 40 mm safety eyes placed and secured before you close up the head, since there's no easy way back in once that round is finished.

Porch photos

Before you sit down

  • Confirm you have the full yarn haul on hand: roughly 1,400g of body-color chenille, 330g of white, and 80g of yellow for the beak and feet, since running short mid-round on jumbo yarn is a real setback.
  • Set aside your stuffing early too, planning for 6-10 lbs, and have it within reach rather than mid-bag when you need it.
  • Read through round 13 and the few rounds after it before you begin, since that's where the white facial and belly sections start and the color placement needs to be clear in your head first.
  • Keep your stitch marker ready from round 1, because with jumbo yarn and a 10 mm hook it's easy to lose track of where a round starts once the body gets wide.

How the hours go

Base body, rounds 1-7
about 45-60 minutes because the increase rounds are quick but need accurate counting as the stitch total climbs
Stuffing, eyes, and assembly of beak and feet
about 2-3 hours because packing 6-10 lbs of stuffing evenly and sewing on the yellow beak and feet both take unhurried attention

Looking after it

  • Chenille yarn holds dust more than it holds odor, so spot clean with a damp cloth and mild soap rather than fully submerging a piece this heavily stuffed.
  • Let it air dry fully before storing, and store it sitting upright or on its back rather than squashed in a bin, so the stuffing keeps its even, firm shape over time.
FAQs

Asked on the glider

the ones that come up on the glider

How much yarn do I actually need to buy?

Plan on about 1,400g of your main body color, 330g of white for the face and belly, and 80g of yellow for the beak and feet. Jumbo chenille sells in varying skein sizes, so weigh what you have against these totals before you start.

Why is my penguin not standing up straight?

This usually comes down to uneven stuffing rather than a stitch count problem. Go back in through the opening if you still have access and redistribute firmly, paying particular attention to the base rounds.

Can I use regular worsted weight yarn instead of jumbo chenille?

You can, but you'll need a much smaller hook than the 10 mm called for here and the finished penguin will be dramatically smaller, since the whole mega scale comes from the jumbo fiber. The worsted weight yarn in the materials list is meant for sewing seams, not for the body itself.

When exactly do the safety eyes go in?

Place them between rounds 19 and 20, spacing them about 11 stitches apart, and attach them before you fully close the head. There's no clean way to insert them after that round is finished.

Is the wizard hat included in this pattern?

No, the hat is a separate accessory with its own dedicated set of steps, so treat the body here as complete on its own first. You can always add the hat as a follow-up project once your penguin is stuffed and sewn.