Intermediate 4-6 hours Worsted yarn

Worked on the glider, counted out loud —

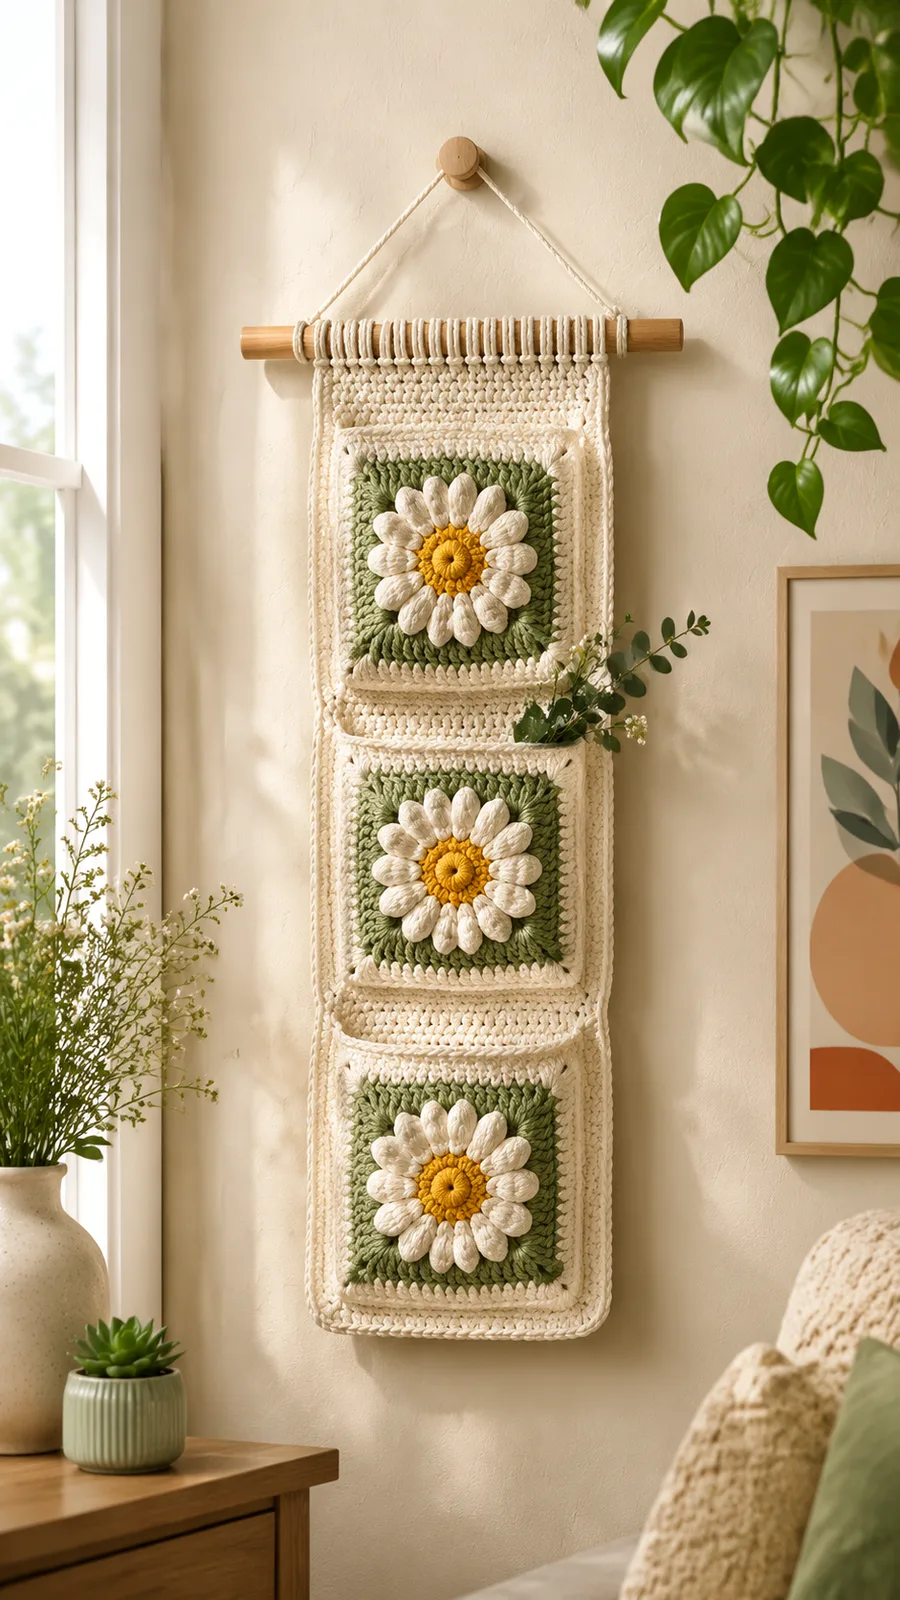
Layered floral crochet wall hanging for cozy corners

A three-square floral crochet wall hanging for confident beginners, worked in puff-stitch petals. About 4-6 hours.

Jump to the rounds

What this one is

This one's for a quiet corner that's been asking for a little warmth, maybe above a reading chair or tucked into a nursery nook that's still finding its personality. You know the spot. It's not big, it's not demanding attention, it just wants something soft and handmade to catch the light. If that's the wall you've been picturing, this narrow floral panel is built exactly for it.

Try it another way

The simplest change is scale: make just one floral square for a small, single-motif piece, or keep adding motifs vertically beyond the original three if you want a longer tapestry down a stairwell or hallway wall. Color is where this pattern really opens up. Swap the sage green background for warm autumn shades like rust, mustard, and olive if you want something that reads more like a harvest table than a nursery shelf, or go the other direction with soft pink and other pastels for a gentler, nursery-ready palette. You could also keep the golden yellow centers as your one consistent color across all three squares while changing the green background shade in each one, so the strip reads as a set rather than three identical copies. Since the petals use puff stitches in white or cream, try working one square's petals in a contrasting color against the others just to see the texture pop differently. And because the whole piece hangs from a simple 12 inch wooden dowel, you can rehome it easily above a desk, a crib, or a reading nook without ever needing to reframe anything.

There's real satisfaction in watching a flat, stable square background hold its shape while something soft and dimensional pops up right out of its center. The puff stitches do the heavy lifting here, catching light and shadow in a way that a flat motif never could, and you get to repeat that small thrill three times across matching squares. The construction itself teaches you something useful too: how a magic ring center, a ring of puffs, and a traditional double crochet square can all stack into one motif without fighting each other. By the time you're joining three squares into a single hanging strip, you've practiced centering, texture work, and clean seaming all in one project, and the cream border ties the whole thing together like a quiet frame around each flower.
The rounds, in full

Written out, round by round

Intermediate4-6 hours4.0 mmWorsted

Bring to the porch

Everything this one takes, in the order you will reach for it.

  • 450 yards (411 meters) medium weight cotton yarn
  • Golden yellow yarn for flower centers
  • White or cream yarn for petals and borders
  • Sage green yarn for square backgrounds
  • Wooden dowel approximately 12 inches (30 cm)
  • Yarn needle
  • Scissors
  • Stitch markers
  • Crochet hook, 4.0 mm (US G/6) - recommended range is 4.0 mm to 5.0 mm depending on your tension

Flower Center

  1. Round 1With yellow yarn, make a magic ring. Ch 1, work 12 dc into ring. Join with sl st to first dc. (12 sts)

Petal Layer

Attach white yarn.

  1. Round 2Ch 1, puff stitch in first stitch, ch 1. Repeat puff stitch and ch 1 around. Join with sl st. (12 puff stitches)(12)

Square Background

Attach green yarn between any two petals.

  1. Round 3Ch 3, 2 dc in same space, ch 2, 3 dc in next space, ch 2. Repeat around. Join with sl st. (12 dc clusters)(12)
  2. Round 4Sl st into corner space. Ch 3, 2 dc, ch 2, 3 dc in same corner. In each side space work 3 dc. In each corner work (3 dc, ch 2, 3 dc). Join. (48 dc)
  3. Round 5Attach cream yarn. Ch 1, sc in each stitch around. Work 3 sc in each corner space. Join. (64 sc)Fasten off and weave in ends.

Project Name

Floral Meadow Crochet Wall Hanging

This original crochet pattern creates a vertical floral tapestry made from three textured flower squares. The design is inspired by cozy handmade home decor and can be customized with any color palette.

Skill Level Confident Beginner Finished Size Approx. 10 inches x 28 inches (25 cm x 71 cm), excluding hanging cord Yarn Medium weight cotton yarn, approximately 450 yards (411 meters) total

Hook 4.0 mm US G/6 crochet hook Gauge Approx. 16 dc x 8 rows = 4 inches (10 cm)

Terminology US crochet terms

Special Stitch

Puff stitch: Yo, insert hook into indicated stitch, yo and pull up a loop. Repeat this step 3 more times in the same stitch. Yo and pull through all loops on hook. Ch 1 to secure.

Putting it together

Step 1

Crooked seams usually happen because the squares were joined while stretched. Lay all squares flat before stitching them together, since joining while the pieces are stretched can create uneven seams.

Step 1

Block all three squares until they measure approximately 8 inches x 8 inches (20 cm x 20 cm).

Step 2

Place squares vertically with matching edges aligned.

Step 3

Use cream yarn and a whip stitch seam to connect the squares.

Step 4

Single crochet around the entire outside edge for a clean finished border.

Step 5

Create a hanging loop by attaching cream yarn to the top corners and making a chain cord long enough to fit your dowel.

Step 6

Wrap the cord around the wooden dowel and secure firmly.

Step 7

Secure all loose yarn tails with a yarn needle. Lightly steam block or wet block the finished piece depending on the yarn fiber. Allow it to dry completely before hanging.

Marlene's notes

Note 01

The turning chain does not count as a stitch anywhere in this pattern, so count your stitches against the round totals given, not against the chain you just made.

Note 02

Join each round with a slip stitch into the first stitch as instructed, and keep that join snug but not tight, or the corner spaces in the Square Background rounds will pull out of square.

Note 03

Pro Tip: Block each floral square before joining. Blocking helps straighten edges, define the flower shape, and create a more polished finished wall hanging.

Note 04

Important: Always check your gauge if you want the finished dimensions to closely match the suggested size. Different yarn fibers and crochet tension can change the final measurements.

Note 05

Uneven Squares: if your motifs curl or appear uneven, your tension may be too tight. Blocking can help relax the stitches and improve the shape.

Before you sit down

  • Check that you have close to the full 450 yards of cotton yarn on hand before you start the first magic ring, since running short mid-square means hunting for a dye-matched skein later.
  • Set aside your yellow, white or cream, and sage green yarn separately so you're not pausing mid-round to dig through a bag for the right color.
  • Read through Round 1 of the Flower Center and Round 2 of the Petal Layer together before you begin, since the puff stitches build directly into the spaces left by the first round of double crochet.
  • Place a stitch marker in the first stitch of each new round while you work the Square Background, since the joining slip stitch is easy to lose track of once the corners start filling in with cream.

How the hours go

Flower Center and Petal Layer (both squares' worth)
about 45-60 minutes because each is only one round, but the puff stitches want a slower, deliberate pace
Square Background, all three squares
about 2-3 hours because each square has three rounds and the corners in Rounds 3 and 4 take a bit of care to keep square
Joining squares and attaching the dowel
about 30-45 minutes because the pattern calls for laying pieces flat first, which is worth the extra patience

Looking after it

  • Hand wash the finished piece in cool water with a gentle detergent, since cotton yarn holds its shape best without the agitation of a machine cycle.
  • Lay it flat on a towel to dry and gently reshape the squares and petals with your fingers while damp, then store it rolled rather than folded so the puff stitches don't flatten into a crease.
FAQs

Asked on the glider

the ones that come up on the glider

Can I make this with just one floral square instead of three?

Yes, the pattern notes that a smaller decoration is easy to create by making only one floral square. You'll skip the joining step entirely and can hang it from a short dowel or small ring.

What yarn weight works best for this wall hanging?

A medium weight cotton or cotton blend yarn is recommended, and the pattern calls for about 450 yards total across all three squares. Cotton keeps the stitches crisp, which matters for both the puff stitch petals and the flat square background.

How do I keep the puff stitches even across all 12 of them?

Work at a steady pace and pull up each loop to a similar height before completing the puff, since Round 2 asks for 12 puff stitches evenly spaced with chain-1 between them. A stitch marker in the first puff can help you confirm you've landed on 12 before joining.

Why do the corners matter so much in the Square Background rounds?

Rounds 3 and 4 build the square's shape entirely through those corner spaces, where you work 3 dc, chain 2, 3 dc again. If a corner space gets skipped or worked unevenly, the square won't lie flat, which matters a lot once you're joining three of them.

Do I need stitch markers for this pattern?

They're listed in the materials and genuinely help, especially for tracking the first stitch of each joined round in the Square Background. Losing track of the join point is the easiest way to end up with a lopsided square.

What's the best way to join the three squares without puckering?

The pattern's assembly notes are the key: block all three squares first, lay them flat before stitching them together, and use cream yarn with a whip stitch seam. Joining while the pieces are stretched creates uneven seams, so take your time working the edges with the squares resting on a flat surface rather than held in your lap.