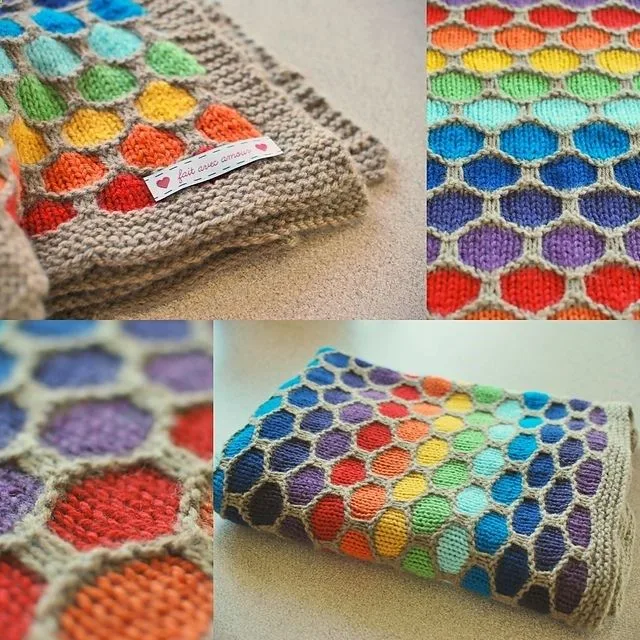
Intermediate 3-4 Hours per Swatch Chunky yarn

Worked on the glider, counted out loud —

How To Crochet Honeycomb Stitch: A Textured Stitch Guide

Learn the crochet honeycomb stitch step by step! Master this beautiful textured pattern perfect for blankets, scarves, and cozy statement projects.

Jump to the rounds

What this one is

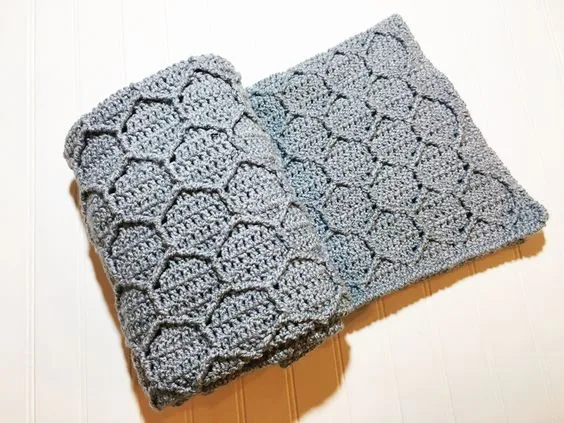
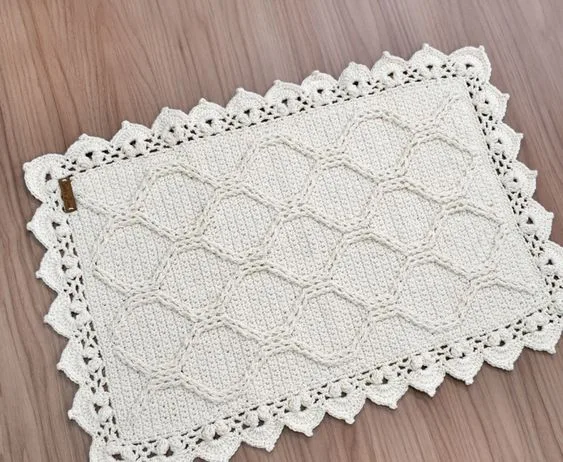
The Crochet Honeycomb Stitch is one of those patterns that instantly upgrades any project from simple to stunning. Working up in chunky yarn, this stitch creates a raised, hexagonal texture that genuinely mimics the look of a honeycomb, giving your fabric incredible depth and visual interest. It's ideal for crocheters who love textured work and want a stitch pattern that photographs beautifully and feels luxurious under the hands. Whether you're making a blanket, scarf, or pillow cover, this stitch turns a basic project into a real showstopper.

This pattern is built around a 3-round repeat that combines foundational stitches with strategic placement to build up the honeycomb's signature raised bumps. While the stitch count itself isn't complicated, understanding how each round interacts with the last takes a bit of practice, which is why I'd call this an intermediate-friendly technique. Once you get the rhythm down, though, it becomes almost meditative to work. Expect to spend a few hours getting comfortable with the pattern before diving into a full-sized project.

The finished fabric has a wonderfully dense, cushiony feel thanks to the chunky yarn and the layered stitch structure, making it perfect for cold-weather accessories and cozy throws. The hexagonal texture holds its shape beautifully and adds visual dimension that flat stitches simply can't match. This stitch pattern makes an excellent gift base too — a honeycomb scarf or lapghan feels thoughtful, handmade, and undeniably special to anyone who receives it.

Variations

This stitch is a fantastic canvas for experimentation! For a bold, graphic look, try alternating two contrasting colors every few rounds — think deep mustard and warm terracotta, or classic navy and cream for a nautical vibe. Using a variegated chunky yarn like Mandala or Bernat Blanket in an ombré colorway creates a gorgeous gradient effect within the honeycomb texture itself, since the raised stitches catch the color shifts beautifully. If you want a lighter, drapier fabric, swap the chunky yarn for a worsted weight and drop down to a 5.0mm or 5.5mm hook — just note you'll need to work more rounds to reach the same finished size, so plan for roughly 25-30% more repeats. Going the opposite direction, a super bulky yarn with an 8mm-9mm hook creates an incredibly plush, oversized texture that's perfect for a chunky statement pillow or a quick-finish blanket. For seasonal fun, work the honeycomb stitch in cream and add metallic gold thread held together with your main yarn for a festive holiday table runner or stocking. Autumn lovers can layer burnt orange, deep red, and golden yellow in wide stripes to mimic changing leaves. If you're making a scarf, consider adding a simple single crochet border in a contrasting color to frame the texture and give the edges a clean, finished look. For gift-giving, monogram-style color blocking — using one color for most of the piece and a pop color for just one or two honeycomb sections — creates a subtle, personalized touch without adding complexity to the stitch pattern itself.

There's something so satisfying about watching the honeycomb texture emerge round after round — it genuinely feels like you're building tiny hexagons right before your eyes! I love how this stitch uses chunky yarn to really let the raised pattern pop; every bump and ridge is visible and touchable, which makes the finished fabric feel so luxe. The 3-round repeat keeps things interesting without becoming tedious, and once you find your rhythm, it turns into this wonderfully relaxing, almost hypnotic process. What I really appreciate is how forgiving the stitch is with yarn choice — a solid color lets the texture shine, while a variegated skein adds a totally different, painterly effect. It's also incredibly versatile: the same technique that makes a stunning blanket square works just as well scaled down for a cowl or scaled up for a full afghan. Honestly, this is one of those stitches I keep coming back to because it never gets boring, and every single time I finish a swatch, I'm impressed all over again by how dimensional and professional it looks. It's a stitch that makes you look like a crochet expert, even if you're still building your skills!
Common mistakes

  • Losing track of which round you'reUse a stitch marker or scrap yarn to mark the start of Round 1 each time, and consider keeping a small tally or tick mark on paper as you complete each round of the repeat.
  • Working with inconsistent tensionPractice keeping your tension steady throughout, especially on the stitches that create the raised bumps — pulling too tight will flatten them, so aim for a relaxed, even hand as you work.
  • Choosing a yarn weight that's too thinStick with the recommended chunky yarn weight, or if substituting, choose something with good body and stitch definition — avoid thin, drapey yarns that won't hold the raised shape.
  • Skipping the swatch step and jumpingAlways crochet a small test swatch first to check your tension, confirm you like the visual effect, and make sure your hook size is producing the density you want before committing to a larger piece.
  • Miscounting stitches at the endCount your stitches at the end of every round before moving on, and don't hesitate to rip back a round if the count is off — it's much easier to fix immediately than several rounds later.
  • Forgetting to block the finished pieceWet block or steam block your finished project according to your yarn's care instructions — this relaxes the fibers and helps the hexagonal pattern lay flat and look its most polished.

The rounds, in full

Written out, round by round

Intermediate3-4 Hours per SwatchChunky

Materials

Everything this one takes, in the order you will reach for it.

  • Chunky yarn
  • Crochet hook

keep this to hand

Abbreviations

US crochet terms, as used in this pattern.

  1. scsingle crochet
  2. dcdouble crochet

Main Pattern

  1. Foundation ChainChain an even number of stitches. For a swatch, start with Chain 20. Turn your work.
  2. Row 1Setting the Foundation Single crochet (SC) in the second chain from the hook. Chain 1 , skip the next stitch, single crochet in the following stitch.Repeat “Chain 1, skip 1, single crochet in the next stitch” across the row.
  3. Row 2Creating the Honeycomb Chain 3 to start, which counts as your first double crochet (DC).Skip the first single crochet and double crochet into the chain space from the previous row.Chain 1 , skip the next single crochet, and double crochet into the next chain space .Repeat across, finishing with a double crochet in the last single crochet stitch.
  4. Row 3Building the Texture Chain 1 and turn your work. Single crochet in the first double crochet , chain 1, skip the next chain space, and single crochet in the following double crochet .Repeat this pattern across to create alternating spaces that form the honeycomb structure.Repeat Rows 2 and 3 until you’ve reached your desired length.Use a consistent tension: This stitch’s texture and structure depend on maintaining an even tension.Experiment with yarn colors: Try two-tone yarn for a colorful honeycomb effect or add stripes for visual impact.Practice swatching: Swatch in a smaller sample size before beginning a full project to get comfortable with the stitch.This stitch works well for pillows, creating a decorative and durable texture. Choose contrasting colors or add a border for extra flair.Perfect for adding a rustic or farmhouse touch to your dining room, the honeycomb stitch can be used to create an elegant table runner.

Tips and Tricks for a Perfect Honeycomb Stitch Here are some extra tips to ensure your Crochet Honeycomb Stitch comes out perfectly:

Block your work : Blocking helps the honeycomb pattern lay flat and enhances the overall look of the fabric.

1. Honeycomb Baby Blanket

Use a soft, lightweight yarn to create a cozy, breathable baby blanket. The honeycomb pattern adds dimension and looks beautiful with pastel colors.

2. Chunky Honeycomb Scarf

A chunky scarf is a quick project that showcases the honeycomb stitch beautifully. Choose a warm, wooly yarn to enhance the texture.

3. Textured Honeycomb Pillow

4. Honeycomb Table Runner

5. Honeycomb Tote Bag

A tote bag made with the honeycomb stitch is sturdy yet flexible. Pair with leather handles for a modern, chic look.

Important notes

Note 01

💡 Choose a hook size that matches your chunky yarn's label recommendation, but don't be afraid to size up half a millimeter if you want the honeycomb texture to look extra pronounced and airy.

Note 02

💡 Keep a stitch marker on the first stitch of every round so you never lose track of where your 3-round repeat begins — this is especially helpful once your project grows large.

Note 03

💡 Chunky yarn works up fast, but it also shows tension inconsistencies more obviously than thinner yarns, so take breaks if your hands get tired to keep your stitches even.

Note 04

💡 When swatching, make your test piece at least 6-8 inches wide so you can really see how the honeycomb pattern repeats and get an accurate feel for the finished texture.

Note 05

💡 If working with two-tone yarn for a color-block honeycomb effect, weave in ends as you go rather than saving them all for the end — it keeps chunky yarn tails from adding bulk to your seams.

Note 06

💡 Block your finished piece before seaming or adding borders; this helps the hexagon shapes settle into their true form and makes any assembly work much easier.

More photos

FAQs

Asked on the glider

the ones that come up on the glider

What size hook works best for the honeycomb stitch with chunky yarn?

A hook in the 6.5mm-9mm range typically pairs well with chunky yarn, but always check your yarn label's suggested hook size first. Swatch with your chosen hook to make sure the honeycomb texture looks raised and defined rather than flat.

Can I use the honeycomb stitch for a full-sized blanket?

Absolutely — the honeycomb stitch is a wonderful choice for blankets since the texture adds warmth and visual interest. Just multiply your foundation chain to reach your desired width, keeping in mind the stitch repeat so your pattern stays aligned across the whole row.

Why does my honeycomb texture look flat instead of raised?

This usually happens when tension is too tight or the yarn weight is too thin for the stitch to have enough loft. Try loosening your tension slightly and confirm you're using a chunky or bulky weight yarn for the best dimensional effect.

Is the honeycomb stitch beginner-friendly?

It's best suited for confident beginners or intermediate crocheters who are comfortable following a repeating multi-round pattern. If you're brand new to crochet, I'd recommend practicing basic stitches first before tackling the 3-round honeycomb repeat.

How much yarn do I need for a honeycomb stitch scarf?

a standard adult scarf, plan on roughly 3-4 skeins of chunky yarn, though this varies based on your desired length and width. It's always smart to buy an extra skein from the same dye lot in case you run short.