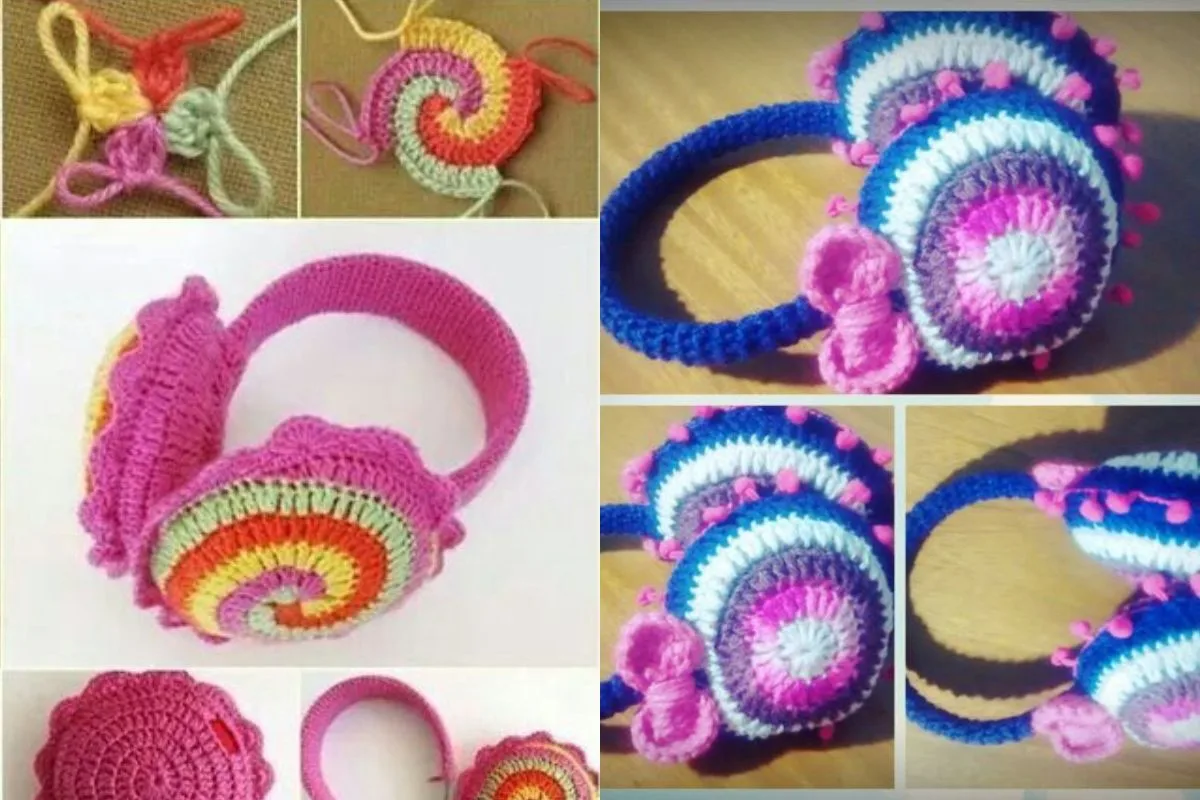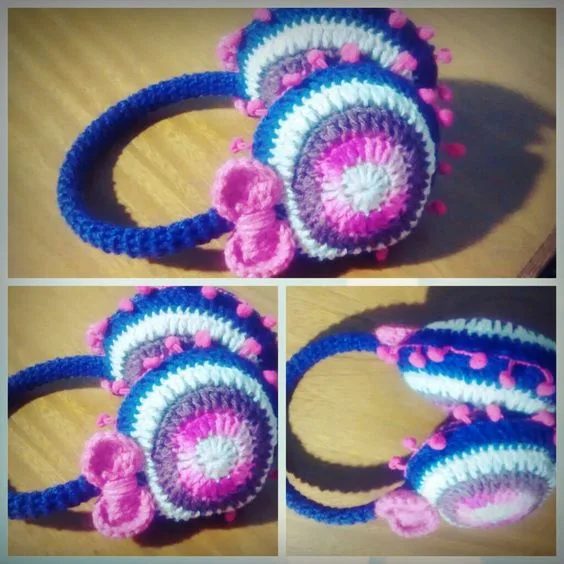
Beginner-Friendly 2-3 Hours Worsted yarn

Worked on the glider, counted out loud —

How to Crochet Cute Earmuffs: A Cozy DIY Guide

Learn how to crochet cute earmuffs with this cozy DIY guide featuring simple rounds, plush stuffing tips, and fun ways to customize your winter accessory.

Jump to the rounds

Before you sit down

Gather soft worsted weight yarn, a 5.0mm to 6.0mm hook, a sturdy headband, and fiberfill or cotton stuffing.

Start each earmuff by working a small ring of stitches to form the very center of the circle.

Build outward through the increase rounds, adding evenly spaced stitches so the circle grows flat rather than cupping.

Keep working rounds until the circle reaches the size you want for a full, huggable earmuff shape.

Fasten off and repeat the entire circle from scratch to create a matching second earmuff.

Tuck fiberfill or cotton stuffing into each circle, packing the edges first for an even, plush dome.

Position both stuffed circles evenly on either side of your headband and stitch them securely in place.

Try on your finished earmuffs and adjust placement or stuffing firmness before trimming any loose yarn tails.

What this one is

This pattern turns a handful of simple rounds into two plush, huggable earmuff circles that snap onto a sturdy headband for an instantly cozy winter accessory. What makes it special is how customizable it is — pick any yarn color, any embellishment, and you've got a one-of-a-kind pair that looks nothing like the mass-produced ones from the mall. It's perfect for crocheters who want a fast, satisfying project, gift-givers hunting for something personal, and anyone who loves how good handmade accessories feel against cold ears.

You'll work each earmuff as a flat crocheted circle, building it up round by round with strategic increases to keep it lying flat and growing evenly. This is a wonderfully approachable project for beginners who've mastered the basics of single crochet and want to practice controlled increasing, while more experienced stitchers will appreciate how quickly it comes together. Expect to spend somewhere in the neighborhood of an hour or two per earmuff, plus a little extra time for stuffing and attaching them to your headband base.

The finished earmuffs are soft, dome-shaped, and generously plush thanks to a hearty helping of fiberfill or cotton stuffing tucked inside each circle. They sit snugly over the ears, adding both warmth and a playful pop of color to any winter coat or hat combo. Because they're so quick to whip up and endlessly customizable, they make a fantastic last-minute handmade gift for a friend, a teacher, or a kiddo who loves anything soft and huggable.
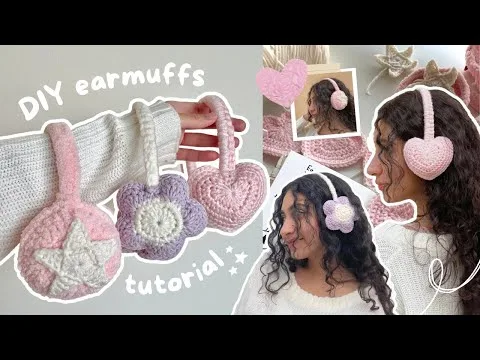
Variations

There's something so satisfying about watching a flat little ring of stitches transform into a plump, huggable circle right in your hands — that's exactly what happens as you work the increase rounds on these earmuffs. I love that this pattern doesn't ask for anything fancy: just a hook, some cozy yarn, and a headband you probably already have lying around. The stuffing step is my favorite part — pressing soft fiberfill into each circle and feeling it puff up into that perfect, squeezable dome is deeply satisfying, almost like making a tiny crochet cushion. Because the circles are worked in straightforward rounds, this is a project you can pick up during a movie night and have finished before the credits roll. And the payoff is huge for the effort — a genuinely adorable, wearable accessory that people will assume you bought from a boutique. Whether you keep it classic or run wild with the heart-shaped or animal-ear variations, this pattern gives you a blank canvas to make something that's completely, unmistakably yours. It's the kind of quick win that reminds me why I fell in love with crochet in the first place.

Common mistakes

  • Starting the first round too looselyPull your starting tail snug before working your first round of stitches, and give it one more firm tug once the round is complete to close any gap.
  • Losing track of stitch countsCount your stitches at the end of every round and place a stitch marker at the start of each round so you always know exactly where you began.
  • Working increases in the wrong spotSpace your increases as evenly as possible around the round — if the pattern calls for a set number of increases, divide the total stitch count by that number to find your spacing.
  • Under-stuffing the earmuff circlesStuff generously and firmly, pushing fiberfill into the edges of the circle first before filling the center, so the shape holds its rounded form.
  • Attaching the finished circlesMeasure and mark matching points on both sides of the headband before sewing, and try the headband on partway through attaching to check the placement.
  • Using a hook that's too smallStick to the recommended 5.0mm to 6.0mm hook range for a soft, workable fabric that stuffs and shapes easily.

The rounds, in full

Written out, round by round

Beginner-Friendly2-3 Hours5.0 mmWorsted

Materials

Everything this one takes, in the order you will reach for it.

  • Yarn: Opt for a soft, warm yarn, such as wool or acrylic. Thick yarn works best for extra coziness.
  • Crochet Hook: A size 5.0mm to 6.0mm hook is ideal for this project.
  • Headband: Use a sturdy plastic or metal headband as the base.
  • Stuffing: Polyester fiberfill or cotton stuffing to make the earmuffs plush.
  • Yarn Needle: For sewing pieces together and weaving in ends.
  • Scissors: To cut the yarn as needed.

keep this to hand

Abbreviations

US crochet terms, as used in this pattern.

  1. scsingle crochet

1. Creating the Earmuff Circles

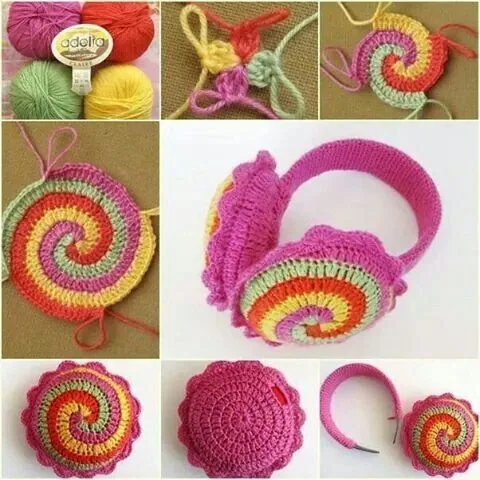
The earmuffs are essentially two crocheted circles that will be attached to a headband. Here’s how to crochet each circle:

Start with a Magic Ring : Create a magic ring and crochet 6 single crochets (SC) into the ring.

  1. Round 1Pull the ring tight and join with a slip stitch. Chain 1.
  2. Round 2Crochet 2 SC in each stitch around (12 stitches). Join with a slip stitch, chain 1.
  3. Round 31 SC in the first stitch, 2 SC in the next stitch ; repeat around (18 stitches). Join with a slip stitch.
  4. Round 41 SC in the first 2 stitches, 2 SC in the next stitch ; repeat around (24 stitches).(24)

"Continue increasing the size of the circle until it’s large enough to cover your ear comfortably."

Pro Tip : If you want a thicker earmuff, crochet more rounds without increasing the number of stitches.

2. Adding Padding to the Earmuffs

Once you have two crocheted circles, it's time to add stuffing:

Place a small amount of stuffing in the center of one circle.

Lay the second circle on top and crochet around the edges to join them, creating a puffy, plush earmuff.

Tip : Use enough stuffing to make the earmuffs cozy, but not so much that they become bulky and heavy.

3. Attaching Earmuffs to the Headband

Now that you have your two earmuffs, it's time to attach them to the headband:

Position the earmuffs on each side of the headband, aligning them with where they will cover your ears.

Use your yarn needle and leftover yarn to sew the earmuffs onto the headband securely.

Alternative Method : For a removable option, crochet small loops on the earmuffs that can slide onto the headband.

4. Personalizing Your Earmuffs

Now for the fun part— customizing your earmuffs! Here are some ideas:

Add a Pop of Color : Use different yarn colors for each layer of the earmuff circles for a striped effect.

Embellishments : Attach crochet flowers, bows, or pom-poms to the earmuffs for an extra cute look.

Fuzzy Yarn : Use a fluffy yarn, like faux fur or chenille, for a cozy, soft texture.

Important notes

Note 01

💡 Stick within the 5.0mm to 6.0mm hook range recommended for this pattern — a smaller hook makes the increases tight and hard to work, while a much larger one leaves gaps that stuffing can peek through.

Note 02

💡 Place a stitch marker in the first stitch of every round so you never lose track of where a new round begins, especially once your increase counts start climbing.

Note 03

💡 Choose a thick, soft yarn like wool or acrylic worsted weight for the coziest, most huggable finished earmuffs — thin yarn will leave the circles looking flat even after stuffing.

Note 04

💡 Stuff firmly but don't overstuff — pack the fiberfill evenly around the edges first, then the center, so the circle holds a smooth dome shape without stretching the stitches.

Note 05

💡 Check that your headband is sturdy plastic or metal before attaching your circles, since a flimsy or bendable band won't support the weight of the plush earmuffs long-term.

Note 06

💡 If you're trying a themed variation like animal ears or a lace overlay, complete and stuff the base circle first, then add embellishments last so you can adjust placement before sewing everything down permanently.

More photos

FAQs

Asked on the glider

the ones that come up on the glider

What yarn weight works best for these crochet earmuffs?

A soft, thick yarn like worsted weight wool or acrylic gives the coziest, plushest result. Thinner yarns can work for a lacy variation but will need a smaller hook and extra rounds for coverage.

Can I make these earmuffs without a plastic or metal headband?

The pattern is designed around a sturdy headband base to hold its shape and stay comfortable on the head. A flimsy or fabric-covered band may bend under the weight of the stuffed circles, so a firm plastic or metal one is recommended.

How much stuffing do I need for each earmuff?

It varies by yarn thickness, but plan on stuffing generously until each circle feels plush and holds a rounded dome shape. Push fiberfill into the edges first, then fill the center, checking firmness as you go.

Can I turn this pattern into heart-shaped earmuffs?

Yes — work two half-circles and join them at a center point to form a heart shape before increasing outward as usual. Stuff and attach to the headband exactly as you would the classic circles.

How do I keep my circles from ruffling as they get bigger?

Ruffling usually means too many increases relative to the round's stitch count. Count carefully at the end of each round and space increases evenly to keep the circle lying flat.