Intermediate 4-6 hours Worsted yarn

Worked on the glider, counted out loud —

Granny square tote bag pattern for beginners

A beginner-friendly granny square tote with handles, worked in worsted yarn. About 4-6 hours from square to finished bag.

Jump to the rounds

What this one is

This one's for you if you've got a basket of yarn scraps and a hankering to carry something you made with your own two hands. A granny square tote sits at that sweet spot between simple and striking, and once you've got the base down, the rest practically builds itself. It's a good project for sitting on the porch with the radio on, or for taking along somewhere you'll be waiting a while.

Your hands start with a magic ring and a handful of double crochets, then settle into the easy rhythm of single crochet as the sides grow tall. After that, a long chain and a row of single crochet give you sturdy handles. All told, you're looking at something in the four to six hour range, though that stretches out nicely if you work it in pieces over a few evenings.

Try it another way

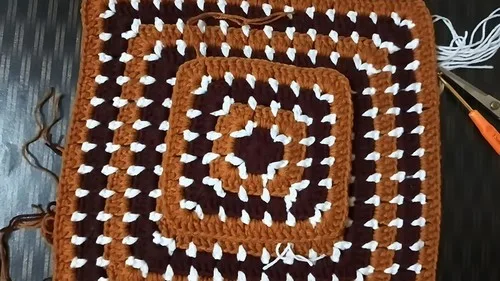
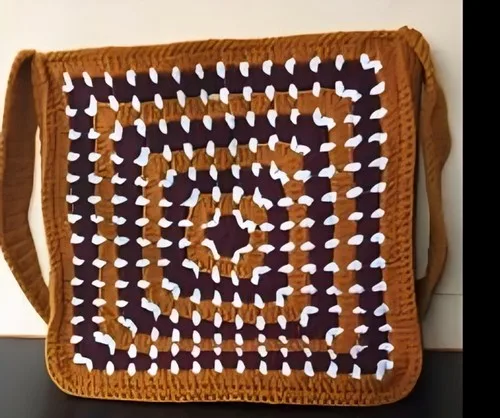
The granny square base is where you've got the most room to play. The pattern already tells you to keep adding rounds and changing colors until the square reaches your preferred size, so a bigger square gives you a roomier tote, while a smaller one makes a neat little project bag. Try working the corners in one color and the side repeats in another for a striped effect, or keep every round a different shade for a scrappy, use-up-your-stash look. For the Bag Sides, you can stop the rows early for a shorter, slouchier tote, or keep going for something tall enough to hold a few library books. The Handles section just asks for a long chain to your preferred length, so make them short for a wrist loop or long enough to sling over a shoulder. If you want a sturdier bag overall, work the sides a little tighter by going down toward the 4.0 mm end of the hook range; for something slouchier, stay closer to 5.0 mm. A solid-color square with a contrasting handle color also reads as more modern if that's the look you're after.
The rounds, in full

Written out, round by round

Intermediate4-6 hours4.0 mmWorsted

Bring to the porch

Everything this one takes, in the order you will reach for it.

  • Yarn in multiple colors (worsted weight recommended)
  • Crochet hook (4.0 mm to 5.0 mm)
  • Yarn needle
  • Scissors

Granny Square Base

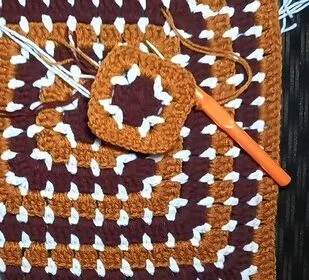
  1. Round 1Make a magic ring; chain 3, work 2 double crochets into the ring; chain 2, then make 3 double crochets into the ring; repeat this (3 dc, ch 2) two more times; chain 2 and slip stitch to the top of the starting chain-3 to close the round; cut yarn and tie off.
  2. Round 2Attach a new color to any chain-2 corner space; chain 3, work 2 double crochets into the same corner space; chain 2, make 3 double crochets into the same space (this creates a corner); make 3 double crochets into each side space, and repeat corners; slip stitch to join the round.Continue adding rounds, changing colors as desired, until the granny square reaches your preferred size.

Bag Sides

  1. Round 1Attach yarn to one side of the granny square base; crochet single crochet stitches evenly around the perimeter.
  2. Rounds 2+Continue crocheting in rows to build the height of the bag; work until the sides are your desired height.

Handles

  1. Round 1Make a long chain to your preferred handle length; work single crochet stitches across the chain to strengthen it.

Putting it together

Step 1

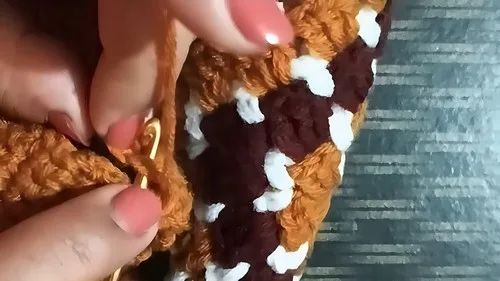
Attach each end of the handle to the top corners of the bag securely.

Step 2

Weave in all loose ends with a yarn needle for a neat, polished look.

Marlene's notes

Note 01

When you attach a new color at the start of Round 2, pull that first stitch snug so the join doesn't leave a loose gap at the corner.

Note 02

Weave in ends as you go rather than saving them all for the finish, since the granny square base alone can involve several color changes.

Porch photos

Before you sit down

  • Lay out your yarn colors ahead of time so you know your color-change order before you start Round 2 of the granny square base.
  • Check your hook size against your yarn label; the pattern calls for 4.0 mm to 5.0 mm, so pick the end of that range that matches your worsted weight.
  • Work a quick magic ring and a few double crochets as a test swatch to make sure your tension feels comfortable before committing to the full square.
  • Read through the Bag Sides section first so you understand that you'll be working in rows to build height once the square is finished.

How the hours go

Granny Square Base
about 45-60 minutes because you're working two rounds with color changes and four corners to keep even
Bag Sides
about 2-3 hours because building the height in rows takes the most stitches of the whole project
Handles and assembly
about 1 hour because the long chain works up fast, but attaching both ends securely takes a little care

Looking after it

  • Hand wash in cool water with a gentle soap, then lay the tote flat on a towel to dry since worsted weight yarn can stretch out of shape if hung while wet.
  • Reshape the square and sides gently with your hands while damp, and store the finished tote flat or loosely stuffed with a towel rather than folded, to keep the granny square corners crisp.
FAQs

Asked on the glider

the ones that come up on the glider

Can I use leftover yarn from other projects for this tote?

Yes, this is a great scrap-busting pattern since the granny square base is built with color changes between rounds. Just keep your yarn to worsted weight so your tension stays consistent across colors.

How big should I make the granny square base?

The pattern lets you keep adding rounds until the square reaches your preferred size, so it really depends on how roomy you want the finished tote. A few extra rounds will noticeably increase both the width and depth of the bag.

What hook size should I actually pick within the 4.0 to 5.0 mm range?

A smaller hook around 4.0 mm gives you a firmer, sturdier fabric that holds its shape better for a bag. A larger hook closer to 5.0 mm works up faster but will feel a bit looser.

How do I know when the Bag Sides are tall enough?

The pattern has you continue working rows until the sides reach your desired height, so hold the piece up against yourself or a reference bag as you go. Stopping a row or two earlier than planned is an easy way to avoid an overly deep tote.

Why reinforce the handle with single crochet instead of leaving it as a chain?

A plain chain has a lot of stretch and will sag under the weight of a loaded tote. Working single crochet across it firms it up considerably so the handles hold their shape over time.

Do I need to use a different color for every round of the granny square?

Not at all, that's entirely up to you. You can keep the whole square one color for a cleaner look, or change colors every round for something scrappier.