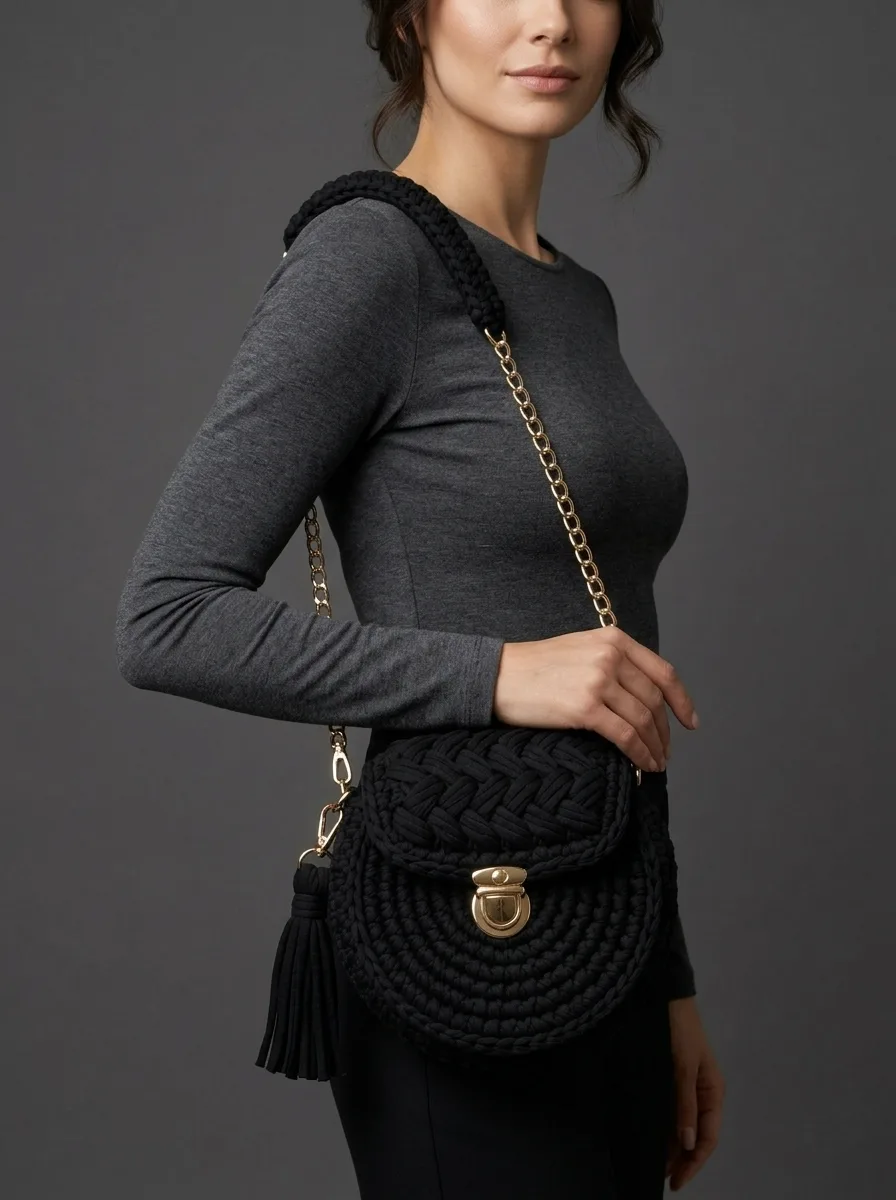
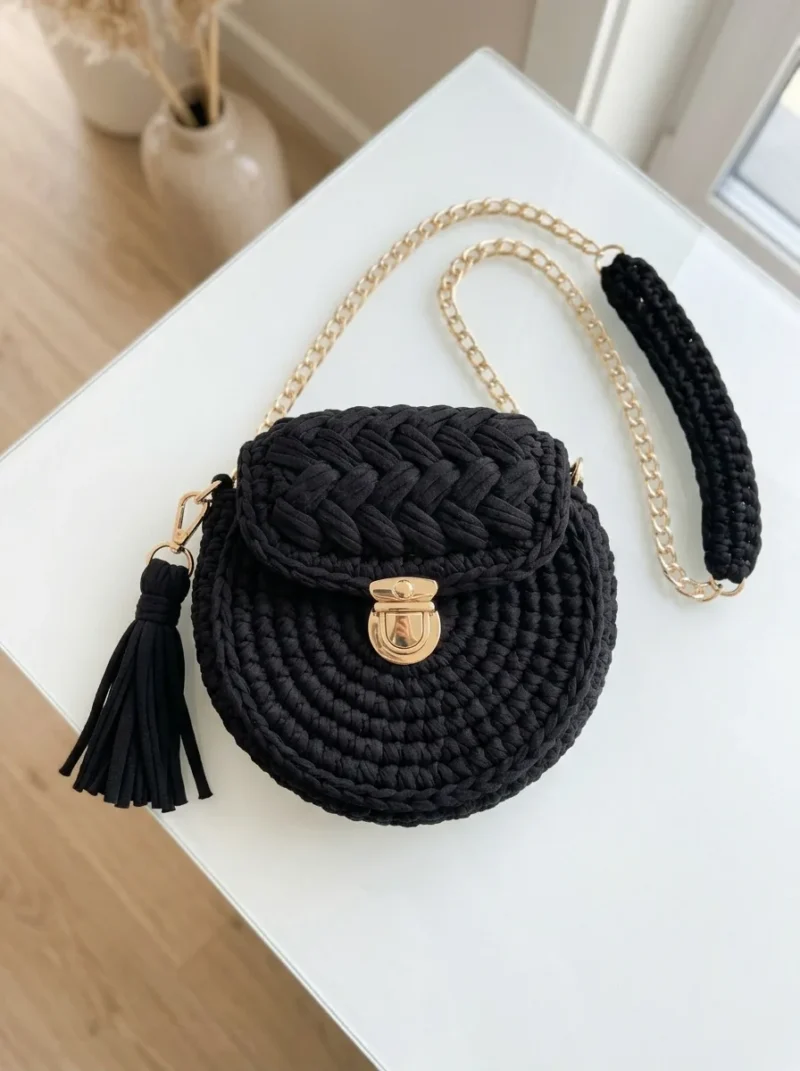
Part 1: The Circular Base
We start with a magic ring. If magic rings intimidate you, feel free to chain 4 and join with a slip stitch to form a ring instead.
- Round 1Make a magic ring. Ch 1 (does not count as a stitch throughout). Work 6 sc into the ring. Pull ring closed. Join with sl st to first sc. (6 sts)
- Round 2Ch 1. Work 2 sc in each st around. Join with sl st. (12 sts)
- Round 3Ch 1. *1 sc in first st, 2 sc in next st.* Repeat from * around. Join with sl st. (18 sts)
- Round 4Ch 1. *1 sc in next 2 sts, 2 sc in next st.* Repeat from * around. Join with sl st. (24 sts)
- Round 5Ch 1. *1 sc in next 3 sts, 2 sc in next st.* Repeat from * around. Join with sl st. (30 sts)
- Round 6Ch 1. *1 sc in next 4 sts, 2 sc in next st.* Repeat from * around. Join with sl st. (36 sts)
- Round 7Ch 1. *1 sc in next 5 sts, 2 sc in next st.* Repeat from * around. Join with sl st. (42 sts)At this point, your circle should lay flat and measure approximately 14-16cm across. If it is cupping or ruffling, adjust your tension or hook size.
Part 6: The Chain Strap Tab (Make 2)
These small tabs connect the chain strap to your bag using D-rings.
- Row 1Ch 8. Sc in 2nd ch from hook and each ch across. Ch 1, turn. (7 sts)
- Rows 2–4Sc in each st across. Ch 1, turn. (7 sts) After Row 4, fold the tab in half over a D-ring. Using your tapestry needle, sew the ends together to secure the D-ring inside.Attach one tab to each side of the bag at the point where the sides meet the flap. Sew securely using matching yarn.
Part 2: Building the Sides
Now we stop increasing and begin working in continuous rounds to build the bag walls. This is where we switch to the waistcoat stitch for that beautiful textured look.
- Round 8Working in the back loop only (this creates a defined edge at the base), work 1 sc in each st around. Do not join. Place stitch marker in first st and move it up each round. (42 sts)
- Rounds 9–14Switch to waistcoat stitch. Insert hook into the center V of each stitch below (between the two legs, not under the top loops). Work 1 ws in each st around. Continue moving your stitch marker. (42 sts each round)(42)
After Round 14, your bag sides should measure approximately 6cm tall. Work additional rounds if you prefer a deeper bag.
Tip: The waistcoat stitch can feel awkward at first. Take your time finding that center V. After a few stitches, it becomes second nature.
Part 3: Creating the Flap Opening
We need to create the opening and begin shaping the flap. This section requires some counting, so use stitch markers liberally.
- Round 15Work 21 ws (halfway around the bag). Ch 1, turn your work.(21)
- Row 16Skip first st. Work 1 ws in each of the next 20 sts. Ch 1, turn. (20 sts)
This creates the back portion of the bag. The front half remains open for the flap to cover.
Part 4: The Herringbone Flap
Now we work rows back and forth to create the decorative flap. The herringbone stitch gives this section its distinctive braided appearance.
- Row 17Work 1 hhdc in each st across. Ch 1, turn. (20 sts)
- Row 18Skip first st. Work 1 hhdc in each st to last st. Skip last st. Ch 1, turn. (18 sts)
- Row 19Work 1 hhdc in each st across. Ch 1, turn. (18 sts)
- Row 20Skip first st. Work 1 hhdc in each st to last st. Skip last st. Ch 1, turn. (16 sts)
- Row 21Work 1 hhdc in each st across. Ch 1, turn. (16 sts)
- Row 22Skip first st. Work 1 hhdc in each st to last st. Skip last st. Ch 1, turn. (14 sts)
- Row 23Work 1 hhdc in each st across. Ch 1, turn. (14 sts)
- Row 24Skip first st. Work 1 hhdc in each st to last st. Skip last st. (12 sts) Fasten off and weave in ends.(12)
Part 5: Flap Edging
To create a polished edge around the flap:
Join yarn at the corner where the flap meets the bag body. Work sl st evenly along the side of the flap, across the bottom curved edge, and up the other side. This creates a neat border and prevents stretching.
Fasten off and weave in ends.
Part 7: The Tassel
Cut 15-20 strips of t-shirt yarn, each approximately 25cm long. Fold them in half. Take a small piece of yarn and wrap it tightly around the folded bundle, about 2cm from the top, creating the tassel head. Secure with a knot.
Attach a lobster claw clasp to the top loop of the tassel. This allows you to clip it onto one of the D-rings.
Part 8: Hardware Installation
Push Lock Clasp:
Position the push lock on the front center of the bag body, approximately 2cm below where the flap will rest. Use a small screwdriver to attach the back plate through the crochet fabric. Most push locks come with washers and screws.
Attach the corresponding latch portion to the flap, ensuring it aligns perfectly with the lock below. Test the closure several times before fully tightening.
Chain Strap:
Clip the chain strap to both D-rings using the attached lobster claws (most pre-made chain straps include these). If your chain does not have clips, use additional jump rings and lobster claws.
Part 9: Optional Lining
For a truly professional finish, consider adding a fabric lining. Cut a circle of fabric slightly smaller than your bag base. Cut a rectangle to line the sides. Hand sew these pieces together, then whip stitch the lining to the inside of your bag along the top edge.
A lining protects the inside of your bag, hides any visible stitching, and prevents small items from poking through the crochet fabric.