Intermediate 4-6 hours 4-ply / Worsted yarn

Worked on the glider, counted out loud —

Granny Shell Cotton Tote Bag You Can Carry Anywhere

A quick cotton granny-shell tote for confident beginners, worked in 4 rounds in an easy evening or two.

Jump to the rounds

What this one is

This is the bag you reach for when you want your hands busy but your mind free, the kind of project that fits into a quiet afternoon between errands. It suits anyone who likes their crochet practical, someone who wants a tote sturdy enough for the farmers market but pretty enough to carry to a friend's porch for coffee. If you've made a granny square before, this will feel familiar and satisfying in equal measure.

Your hands spend most of the time building shells of three double crochets, separated by two chains, growing the ring outward round by round. There's a nice rhythm to it once you get past the first round, and because the pattern only has four rounds in the main piece, you can realistically finish the bulk of it in one sitting, then come back for finishing touches when you have a spare hour.

Try it another way

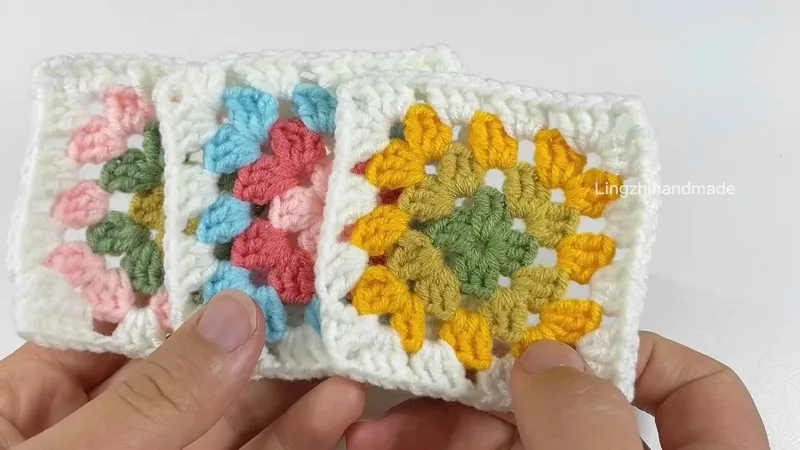
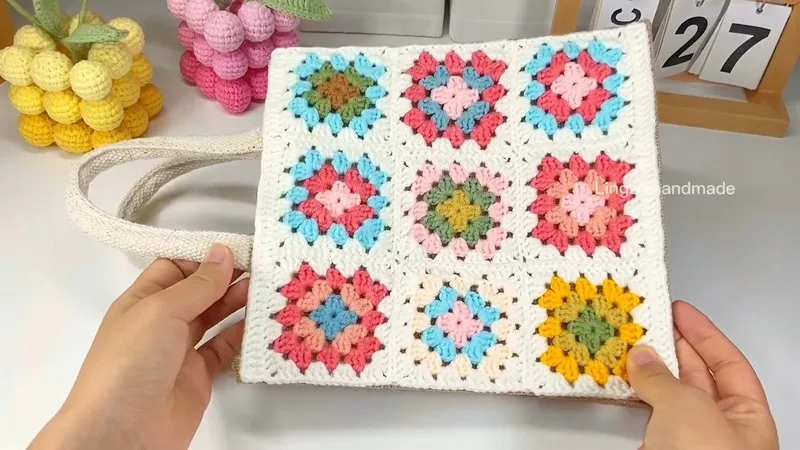
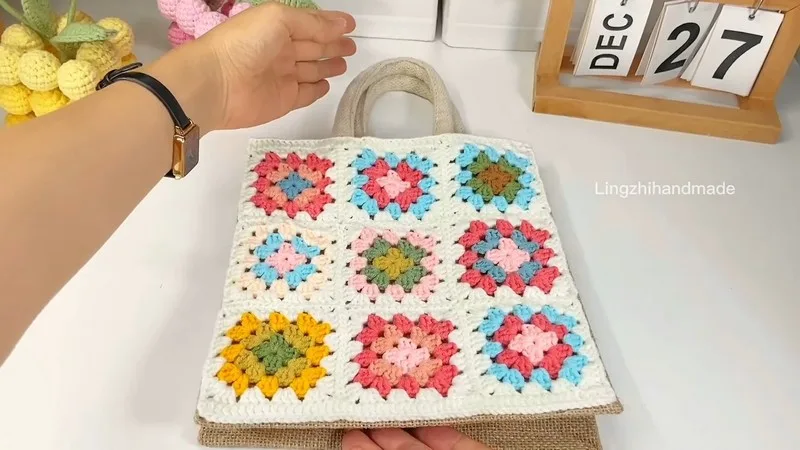
Once you've got the four-shell foundation down, there's plenty of room to make this bag your own. Try alternating colors every round instead of sticking to one, so each of the four rounds reads as its own stripe of shells. If you want a bigger tote, you can keep building past the fourth round, adding more shells and chain-2 spaces in the same pattern, since the structure repeats predictably. For a smaller market bag, stop after round three instead of four, and you'll have a neater, more compact base. Swapping in a different cotton weight changes the drape too; a finer 4-ply gives you a softer, more pliable bag, while doubling the strands makes for something stiffer and more structured. You could also work the whole thing in a single bold color for a clean, graphic look, letting the shell texture do the visual work instead of color changes. And if you want it for something other than groceries or market trips, this shape works nicely as a beach bag or a project bag for other crochet, especially once you add handles and a simple lining.

There's something quietly addictive about watching four shells turn into a solid, useful shape round after round. The double crochet shells build up fast, so you get visible progress almost immediately, and the two-chain spaces between shells give the fabric a nice open texture that's still sturdy enough to hold its shape as a bag. Working in the round from a simple chain-4 ring means no turning, no counting rows twice, just steady building. Cotton yarn holds crisp stitch definition, so every shell reads clearly, which makes this a satisfying piece to photograph and to use. It's the kind of project where the structure does the work for you.
The rounds, in full

Written out, round by round

Intermediate4-6 hours4-ply / Worsted

Bring to the porch

Everything this one takes, in the order you will reach for it.

  • Save
  • 4-ply cotton yarn in various colors
  • Crochet hook (size not specified, but typically a hook that matches the yarn weight is used)

Main Pattern

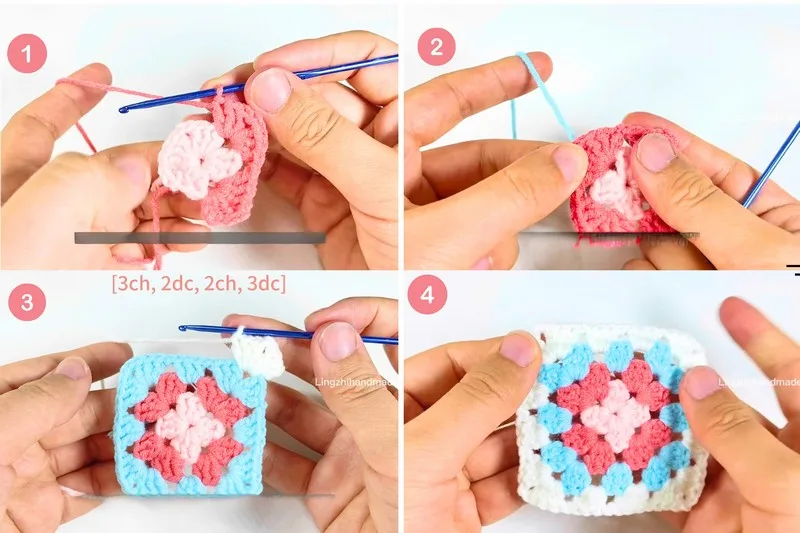
  1. Round 1Start with a slip knot. Chain (ch) 4 to form a ring. Slip stitch (sl st) to the first chain to connect into a ring.Chain 3 (counts as the first double crochet [dc]).Inside the ring, do 2 more double crochets. This forms your first “shell.” Chain 2.Still working in the ring, create 3 double crochets. The tail can be woven in as you work.Repeat step 6.Continue this pattern until you have four groups of 3 double crochets separated by 2 chains.Join with a slip stitch to the first stitch to close the round.Cut off the yarn and tidy any loose ends.
  2. Round 2Join a new color yarn at any corner. Chain 3 (this counts as the first double crochet).In the same space, make 2 more double crochets, chain 2, and then 3 more double crochets to form the corner.Chain 1.Repeat this pattern (3 double crochets, 2 chains, 3 double crochets in the same corner space, then 1 chain) for each corner around the square.Join with a slip stitch to the first stitch to close the round.Cut off the yarn and tidy any loose ends, moving tails to the corners for easier weaving.
  3. Round 3As before, join a new color yarn at any corner. Start with 3 chains (counts as 1 dc), then make 2 more dcs in the corner.Chain 2, and then make 3 more dcs in the same corner.Chain 1.Now , in the space between the corner “shells” from the previous round, make 3 dcs (not in a corner), then chain 1.In the next corner, follow the pattern: 3dcs, 2ch, 3dcs, then ch 1 after completing each corner.Repeat around the square.
  4. Round 4Repeat the pattern established in Round 3, adapting for the increase in the size of the square. Each side between corners will now have more spaces where you will do 3 double crochets and then chain 1, continuing the established pattern around.

Marlene's notes

Note 01

Cotton yarn has little give, so keep your tension even but not tight, especially on the chain-4 ring at the start, or the center of your bag base may pucker.

Note 02

A stitch marker on the first chain-3 of each round saves you from miscounting shells later, since all four rounds build on that same starting point.

Note 03

If you're using multiple colors, plan your color changes to land at the start of a round, right after the slip stitch join, for the cleanest transition.

Porch photos

Before you sit down

  • Check you have enough 4-ply cotton yarn on hand in your chosen colors before you begin, since cotton doesn't stretch to fill gaps the way wool does.
  • Pick a hook size that matches your cotton yarn weight; the pattern doesn't specify one, so swatch first to see what gives you a firm, bag-worthy fabric.
  • Read through Round 1 fully before you start, since the ring, first shell, and chain-2 spacing set the rhythm for every round after it.
  • Have a stitch marker ready to mark your first chain of each round, which makes it much easier to track where each round starts and ends.

How the hours go

Starting ring and Round 1
about 20-30 minutes because you're setting up the chain-4 ring and working the first four shells
Rounds 2 through 4
about 2-3 hours because each round adds more shells and stitches to work around
Weaving in ends and finishing
about 30-45 minutes because cotton ends need a firm weave-in to stay put through wash and wear

Looking after it

  • Hand wash your finished tote in cool water with a mild detergent, since cotton holds up well to washing but can lose shape if agitated too roughly in a machine.
  • Lay it flat to dry and reshape the shells gently with your fingers while damp, then store it flat or loosely folded rather than hung, so the straps don't stretch out of shape.
FAQs

Asked on the glider

the ones that come up on the glider

What hook size should I use for this tote?

The pattern doesn't specify a hook size, so match it to your 4-ply cotton yarn and swatch first. You want a fabric firm enough to hold a bag's shape without being so tight it's hard to work.

How much yarn do I need for the whole bag?

The pattern lists 4-ply cotton yarn in various colors but doesn't give exact yardage. It's worth having a couple of extra skeins on hand, especially if you're planning color changes across the four rounds.

Can I make this bag bigger or smaller?

Yes, the shell pattern repeats predictably, so you can add more rounds past the fourth for a larger tote or stop earlier for a smaller one. Just keep the same rhythm of three double crochets and two chains between shells.

Why does my ring look loose after Round 1?

This usually comes from a slightly loose chain-4 ring or an uneven slip stitch join. Give the ring a gentle tug before starting your first shell round, and keep your tension consistent as you work into it.

Do I need to use a stitch marker for this pattern?

It's not required but it does help. Marking the first chain-3 of each round makes it much easier to see where you started, especially once you have four rounds of shells built up.

Is cotton the best yarn choice for this tote?

Cotton is a great fit here because it holds its shape and shows off the shell stitch pattern clearly. It also washes well, which matters for a bag that's likely to see regular use.