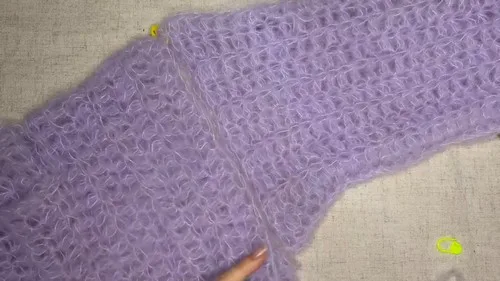
Intermediate 8-10 hours Super Bulky yarn

Worked on the glider, counted out loud —

Fluffy half double crochet sweater pattern for cozy nights

A beginner-friendly fluffy 10 mm HDC sweater with ribbed cuffs - plan on a few relaxed sittings to finish.

Jump to the rounds

What this one is

This is the sweater I'd pull out for a slow evening when you want to work with your hands instead of scrolling. It's for the crocheter who likes big, bold stitches and doesn't want to fuss over tiny gauge swatches - someone who wants a finished piece that actually gets worn, not just admired. The hook is big, the yarn is soft, and the shape comes together with almost no fuss, which makes it a good project if you're newer to garment making but still want something that looks intentional.

Try it another way

There's something deeply satisfying about working every single row into the back loop only - it leaves that little ridge of front loops stacked up the whole piece, so your fabric grows its own built-in texture without a single fancy stitch. Shaping the front panel's neckline is the clever bit: you simply stop five stitches short on row 8, work the shoulder straight for nine rows, then bridge the gap with five new chains on row 18 to rejoin the two sides into one piece again. The sleeve cuffs are their own small reward too - dropping down to the 4 mm hook after thirty chains gives you a snug ribbed edge that contrasts beautifully against the loose, fluffy drape of the 10 mm body. It's a sweater that teaches real garment construction through repetition, not complexity.
The rounds, in full

Written out, round by round

Intermediate8-10 hours10 mmSuper Bulky

Bring to the porch

Everything this one takes, in the order you will reach for it.

Yarn

  • Fluffy yarn
  • Main Hook: 10 mm

Ribbing Hook

  • 4 mm (used for sleeve cuff ribbing)

Notions

  • Stitch markers, yarn needle, scissors

Back Panel (10 mm Hook)

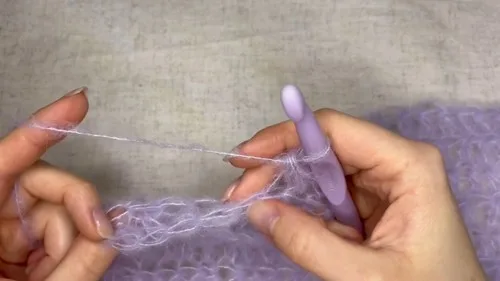
Make a slip knot and create a foundation chain of 30 chains.

  1. Row 1(30 HDC) Add one extra chain for turning. Work Half Double Crochet (HDC) into the second chain from the hook and into each chain across.
  2. Row 2(30 HDC) Chain one and turn your work. Work HDC into the Back Loop Only (BLO) across the row.
  3. Rows 3–25(30 HDC) Repeat Steps 3 and 4 until you reach the desired length. Total of 25 rows. Finish by chaining one, cutting the yarn, and securing the last loop.

Front Panel (10 mm Hook)

Work the same as the back panel for the first 7 rows (30 HDC BLO per row).

  1. Rounds 1–7(30 HDC) Start Neckline: Chain one, turn. Work 25 HDC BLO , skipping the last 5 stitches of the row.
  2. Round 8(25 HDC) First Shoulder: Chain one, turn. Work 25 HDC BLO across the row.
  3. Rounds 9–17(25 HDC) Rejoin Neckline: Work 25 HDC BLO. Then, chain 5 extra chains and one more chain for turning .
  4. Round 18(25 HDC + 6 chains) Turn your work. Starting in the second chain from the hook, work HDC BLO into the new chains and the existing stitches to rejoin the panel.
  5. Round 19(30 HDC) Complete the panel.
  6. Rounds 20–25(30 HDC) Finish by securing the yarn.

Sleeves (Make 2)

Create a foundation chain.

30 chains (10 mm hook)

Switch to the smaller hook (4 mm) and add 5 more chains.

5 more chains (4 mm hook)

Add one extra chain for turning.

  1. Row 1Starting in the second chain from the hook, work 5 HDC BLO with the 4 mm hook. Place a stitch marker in the last of the five stitches. Switch to the 10 mm hook and work 30 HDC BLO across the remaining chain.5 HDC (4 mm)30 HDC (10 mm)
  2. Row 2Chain one, turn. Work HDC BLO with the 10 mm hook until you reach the stitch marker. Switch to the 4 mm hook and work 5 HDC BLO to the end of the row.30 HDC (10 mm)5 HDC (4 mm)
  3. Rows 3–20Repeat steps 4, 5, and 6 for the remainder of the sleeve. Total of 20 rows.Seaming: Fold the sleeve in half.Chain one on the last row and join the edges together with slip stitches.Join the first 5 stitches with the smaller hook, then switch to the bigger hook for the rest of the seam.

Putting it together

Step 1

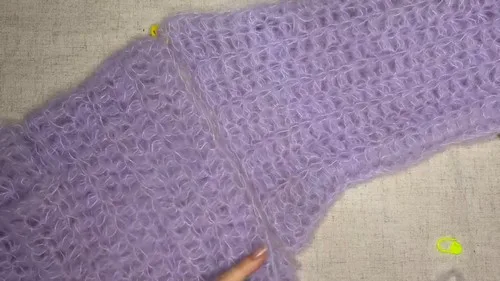
Sew Shoulders: Sew the front and back panels together at the shoulder seams using a yarn needle and the tails left for sewing.

Step 2

Stretch the fabric slightly while sewing to avoid tightness.

Step 3

Neckline Finish: With the 10 mm hook , attach the yarn in a corner and work slip stitches all the way around the neckline opening.

Step 4

Slip stitch to the first stitch to join.

Step 5

Pin Sleeves: Pin the sleeves onto the armholes using stitch markers, stretching the fabric out slightly to ensure they fit evenly.

Step 6

Sew Sides and Sleeves: Starting at the bottom edge, sew the side seam up toward the armpit, around the sleeve, and finish under the armpit.

Step 7

Repeat on the other side.

Step 8

Weave in ends and your sweater is complete!

Marlene's notes

Note 01

The 10 mm hook and fluffy yarn make individual stitches hard to see clearly, so count carefully at the end of each row rather than trusting your eye alone.

Note 02

All of the body texture comes from working into the Back Loop Only throughout - skipping even one row of BLO will show as a visible break in the pattern.

Porch photos

Before you sit down

  • Wind off plenty of your fluffy yarn before you start the back panel - with a 10 mm hook and thick fiber, you'll burn through yardage faster than a standard worsted sweater.
  • Set a stitch marker at the fifth-from-last stitch on row 7 of the front panel, so you know exactly where to stop when the neckline shaping begins on row 8.
  • Keep your 4 mm hook on hand before you start the sleeves - you'll need it right after the first 30 chains, for the extra 5 chains of ribbing.
  • Read through the front panel's neckline rejoin at row 18 before you begin that panel, since chaining 5 new stitches to bridge the shoulder gap is the one step that benefits from knowing what's coming.

How the hours go

Back and Front Panels (10 mm hook)
about 2-3 hours each because twenty-five rows of thirty HDC stitches build up slowly on a large hook, and the front panel adds the neckline shaping and rejoin at row 18
Assembly (shoulders, neckline, sleeves)
about 1 hour because sewing seams and working slip stitches around the neckline takes patience even though the stitch count is small

Looking after it

  • Hand wash your fluffy sweater in cool water and lay it flat to dry - the plush texture can mat or shed if it's wrung out or tumbled in a machine.
  • Store it folded rather than hung, since the weight of a fluffy 10 mm fabric can stretch out of shape on a hanger over time.
FAQs

Asked on the glider

the ones that come up on the glider

Can I make this sweater without stitch markers?

You can get by with safety pins or scrap yarn tied in loops, but you'll want some kind of marker to track where the front panel's neckline shaping starts at row 8. Markers also help when pinning the sleeves onto the armholes during assembly.

What if I lose count partway through a row of 30 HDC?

Stop and count your stitches against the row below before continuing, since fluffy yarn hides individual stitches easily. It's much faster to fix a miscount at the end of a row than several rows later.

How do I know when my panel is long enough?

The pattern gives you a full count to follow - twenty-five rows for the back panel - so you don't need to measure against a gauge swatch at all. Just count your rows as you go.

Can I work on the front and back panels at the same time?

There's no reason not to, since both start the same way for the first seven rows of 30 HDC before the front panel branches off into neckline shaping. Many people keep separate stitch markers on each piece so they don't mix up which row they're on.

What's the trickiest part of this pattern?

Most people find row 18, where you chain 5 new stitches and work back into them to rejoin the shoulder, the one spot that needs full attention. Everything else is the same HDC BLO stitch repeated, so once you're past that rejoin you're on familiar ground.