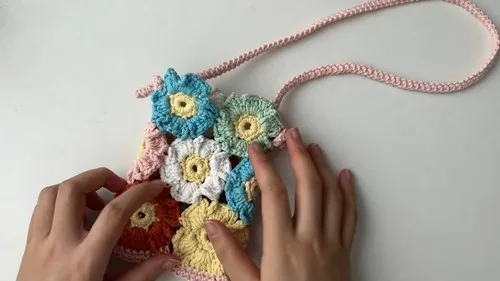
Intermediate 4-6 hours Worsted yarn

Worked on the glider, counted out loud —

Floral Crochet Bag Pattern With Pretty Petal Rounds

A floral crochet bag built round by round from a ring - good for confident beginners, roughly 4-6 hours start to finish.

Jump to the rounds

What this one is

This is the bag you make for the afternoon you finally clear the table and just want your hands busy with something pretty. It suits you if you like watching a flat little ring turn into something with real shape and character, round by round, without a pattern piece in sight. It is not a fussy project, but it rewards someone who likes to see structure build in front of them.

Your hands start small here: a slip knot, a ring of five chains, and twelve single crochets settled into that ring like the first petals opening. From there you keep working outward, round after round, watching the base widen and the shaping for petals take over. Plan on a few sittings rather than one long stretch - this is a project that likes to be picked up and put down.
Try it another way

There is something genuinely satisfying about starting from nothing but a slip knot and a chain of five, and ending with a bag that has real dimension. The center ring and that first round of twelve single crochets give you an anchor you can feel with your fingers before you even see the shape emerge. Once you move into the chain-2, skip-a-stitch rhythm of the petal rounds, the piece stops looking like a flat circle and starts reading as floral - which is the whole appeal of this design. You are not just stacking rounds, you are sculpting texture, and that shift from plain single crochet into shaped petals is where the project earns its name.

The rounds, in full

Written out, round by round

Intermediate4-6 hoursWorsted

Bring to the porch

Everything this one takes, in the order you will reach for it.

  • Worsted weight yarn
  • Crochet hook (size to suit your yarn)

Main Pattern

  1. Round 1Creating the Center Start with a slip knot. Chain 5 (ch 5). Join with a slip stitch (sl st) to form a ring.

Round 1 is now finished.

  1. Round 2Building the Base Chain 1 (ch 1) to start Round 2. Make 12 single crochet (sc) stitches into the ring.Join with a slip stitch (sl st).
  2. Round 2is now finished. For Round 3: Preparing for Petals Chain 2 (ch 2). Skip 1 stitch.Make 1 single crochet (sc).Repeat the sequence of 2 chain (ch 2) and 1 single crochet (sc) around the circle.Join with 2 chain (ch 2) and 1 single crochet (sc) to complete Round 3.Switch colors for the petals.
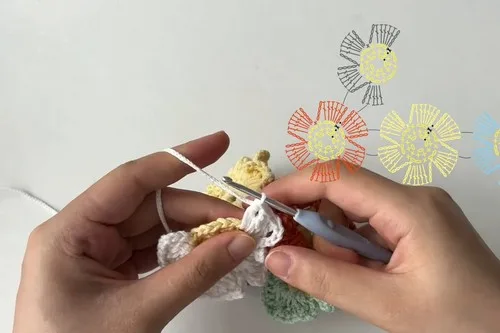
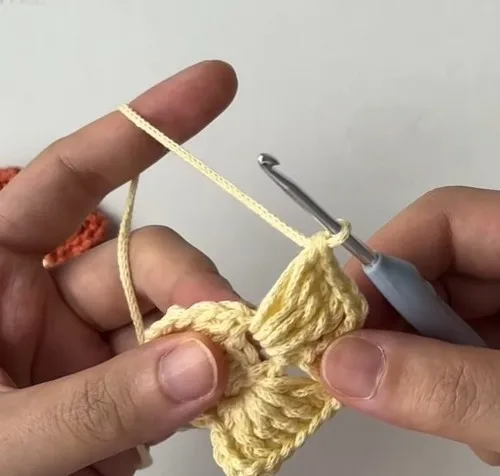
  3. Round 4Crocheting the Petals Chain 4 (ch 4). Make 5 double crochet (dc) stitches in the chain space.Chain 4 (ch 4).Make 1 single crochet (sc) in the next chain space to join.Repeat this process for a total of 6 identical petals.For the last petal, use a slip stitch (sl st) to join it to the first petal.Chain 1 (ch 1) before snipping the yarn.When making the second flower, connect it to the first flower at the 5th double crochet (dc) of the second petal.Continue crocheting the second flower's petals, connecting the 1st double crochet (dc) of the third petal to the corresponding position on the first flower.Repeat this process for as many flowers as needed to achieve the desired width for your project.Connect the last flower in the row with the first one to form a continuous loop.Finishing the Bag Body Sealing the Bottom Make 1 chain (ch 1).Make 1 half double crochet (hdc) in the top of the 4 chain (ch 4) space.Make 1 single crochet (sc) in each double crochet (dc) stitch.Make 1 half double crochet (hdc) in the 4 chain (ch 4) space.For a tidy bottom line, make only 2 double crochet (dc) stitches.Skip 4 chain (ch 4) stitches.Make 2 double crochet (dc) stitches accordingly.Make 1 half double crochet (hdc), 1 single crochet (sc) 5 times, and then 1 half double crochet (hdc).Slip stitch (sl st) to join the round.Make 1 chain (ch 1).Make 1 single crochet (sc) in each stitch.Slip stitch (sl st) to join this round.Sew to close up the bottom.Sew the end into the cloth.Creating the Strap Start with a slip knot.Chain 2 (ch 2).Make 1 single crochet (sc).Turn slightly.Make 1 single crochet (sc).Chain 1 (ch 1) to finish.Sew the end into the cloth.Attach the strap to the bag.

This completes one petal.

Fix the end into the cloth.

Connecting the Flowers to Make a Bag Horizontal Connection

There are 2 joints between each two horizontally connected flowers. The connection points are the last double crochet (dc) of the second petal and the first double crochet (dc) of the third petal.

Vertical Connection For vertical connections, you will need to connect 3 flowers when making a new one.

Connect the new flower to the neighboring pieces at their corresponding points.

Every flower needs to connect with all neighboring pieces.

Keep going like this to get a proper length.

Snip the yarn.

To Get Pattern

Marlene's notes

Note 01

Choose a hook that lets your ch-5 ring close firmly - too loose and the center of the bag will show a gap once the base rounds are worked.

Note 02

Mark the join point at the end of every round; with twelve stitches from Round 2 onward it is easy to lose track once the petal shaping starts in Round 3.

Note 03

Keep your tension even through the single crochet base rounds so the twelve stitches sit flat - uneven tension here will show later in how the petals lie.

Porch photos

Before you sit down

  • Check how much yarn you have on hand - this bag grows steadily round by round, so you want enough of one dye lot to avoid a visible break partway through.
  • Read through Round 3 before you begin, since that is where the pattern shifts from plain single crochet into the chain-2, skip-1 petal shaping - it helps to know the change is coming.
  • Keep a stitch marker handy for the join at the end of each round, especially once you are past the simple 12-stitch base and counting gets trickier.
  • Work a small test ring first if you have not joined with a slip stitch in a while, just to get the join snug before you commit to the full piece.

How the hours go

Center ring and Round 2 base
about 20-30 minutes because it is just the ring, the join, and 12 single crochet stitches to establish
Petal shaping rounds
about 2-3 hours because the chain-2, skip-1 pattern needs careful counting to keep the petals even
Remaining rounds to complete the bag
about 2-3 hours because the piece is worked entirely in the round with no assembly steps, so every round adds to the total

Looking after it

  • Hand wash the finished bag in cool water with a mild soap, then lay it flat on a towel to dry so the petal rounds keep their shape instead of stretching.
  • Store it stuffed loosely with tissue paper or a soft cloth when not in use, which helps the rounded base and petal texture hold their form between uses.
FAQs

Asked on the glider

the ones that come up on the glider

Do I need to be an experienced crocheter to make this bag?

You should be comfortable with basic single crochet and joining rounds with a slip stitch before starting. The petal shaping in Round 3 introduces a chain-2, skip-1 pattern that is easy once you have read it through, so it suits someone past the absolute beginner stage.

What happens after Round 2 in this pattern?

Round 2 finishes the base with 12 single crochet stitches joined into a ring. Round 3 begins the petal shaping with a chain-2 and a skipped stitch, which is where the floral look starts to take shape.

How many rounds does the main pattern have?

The main pattern is worked as a single continuous piece across several rounds, starting from the ch-5 ring through the petal shaping rounds. Each round builds directly on the last, so there is no separate assembly at the end.

Why does my center ring look loose after Round 1?

This usually comes down to how snugly you pulled the slip knot and the chain-5 before joining. Try tightening the join stitch by stitch as you work Round 2, and it should firm up once the 12 single crochets are in place.

Is there any sewing or assembly once the rounds are finished?

No, this pattern is worked entirely in the round with no separate assembly steps listed. Everything from the center ring to the petal shaping is built up as one continuous piece.